

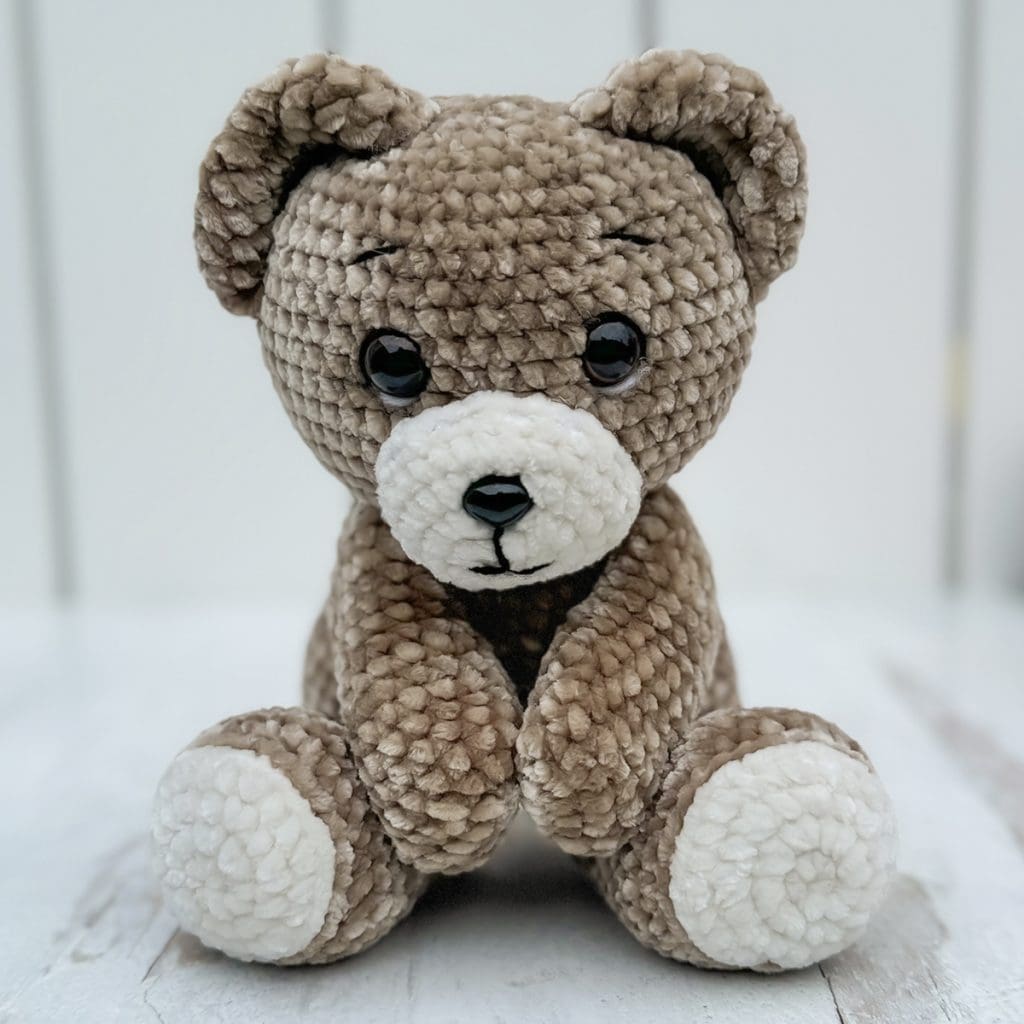
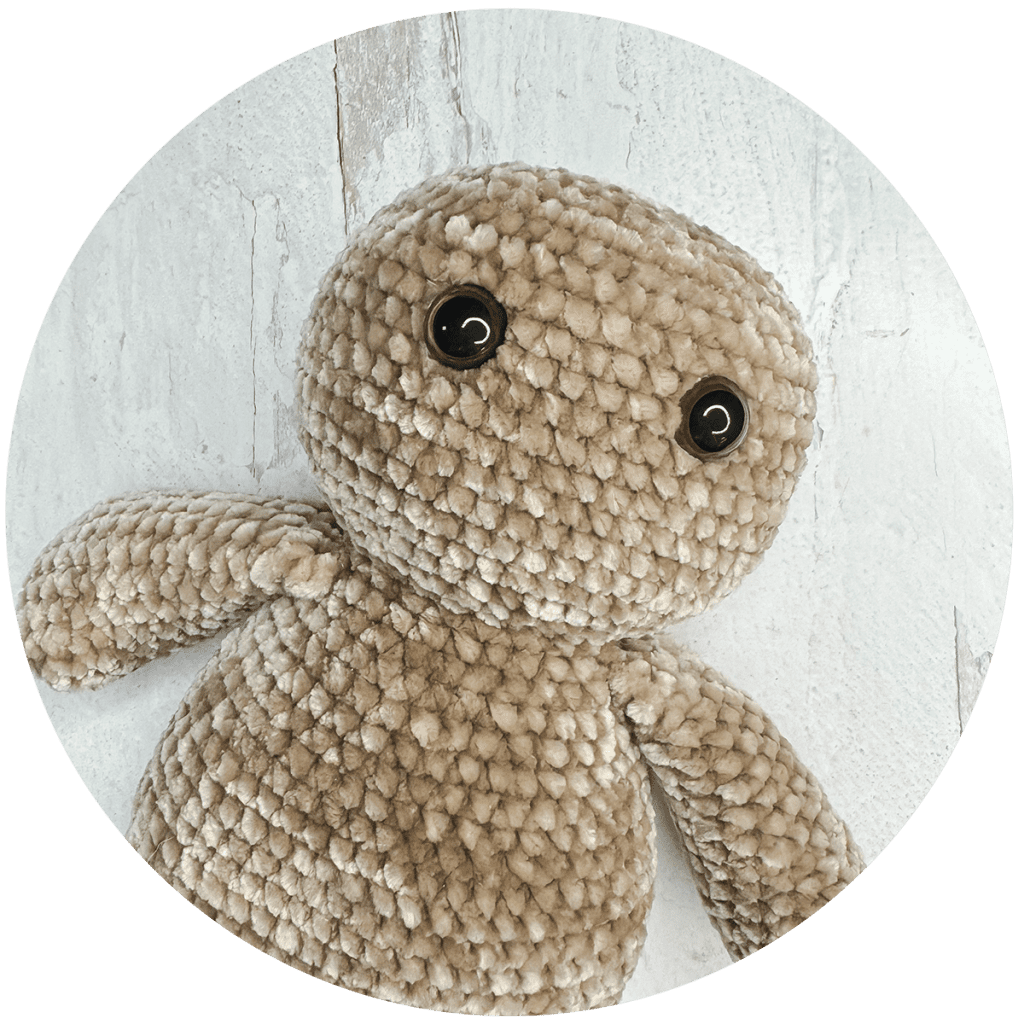
After what had been quite a long hiatus for the blog, the Yarn + Chai community joined me this summer for a fun crochet-along! The much loved pattern for this Amigurumi Teddy Bear is now available to all, and I hope you enjoy it as much as we did. You can join the Facebook group to see lots of finished bears, and jump in with those who are still working on theirs.
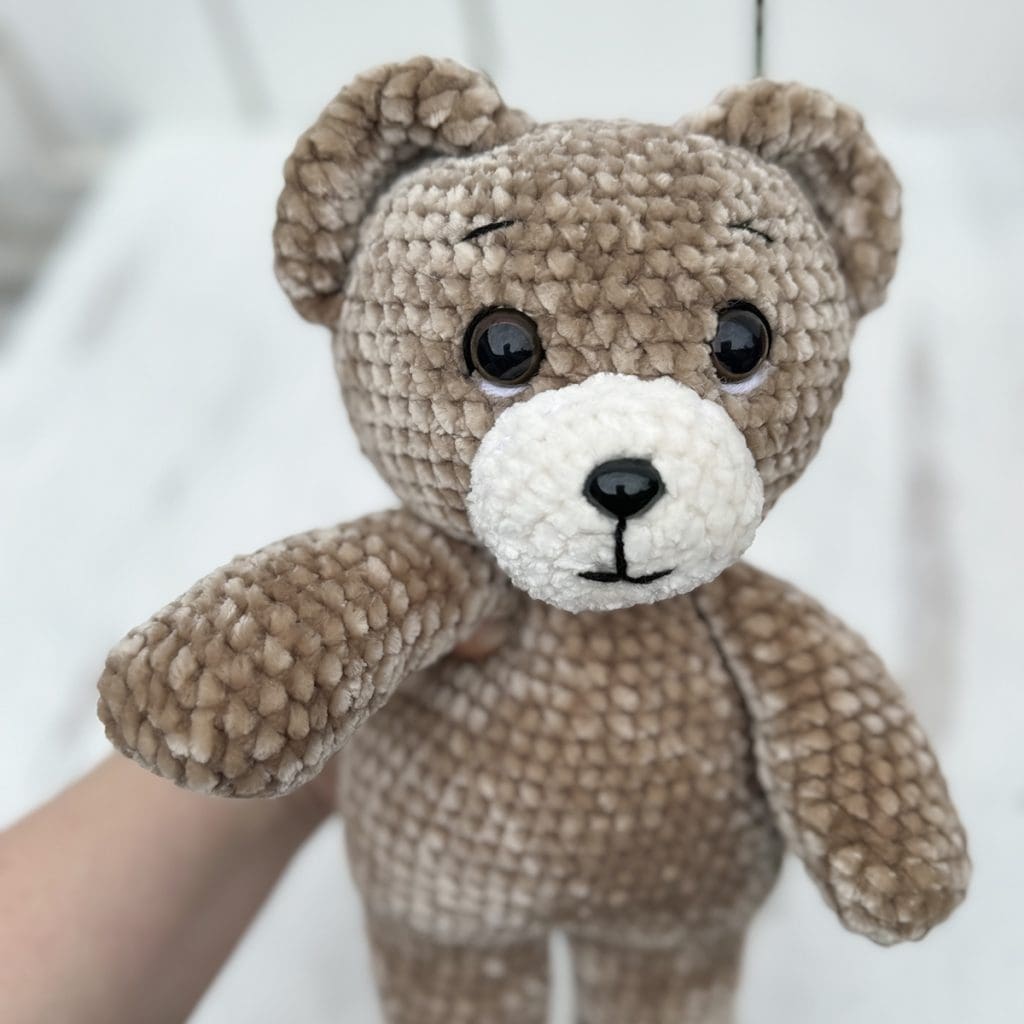
If you’ve never done amigurumi before, I would suggest working up the pattern with non-furry yarn first. But if you’re comfortable with amigurumi or have played around with chenille or velvet yarns before, I highly recommend making this teddy bear as plush as can be! The finished bear will be so soft and sweet.

All-Access Pass
If you prefer working from the convenience of an ad-free PDF pattern, consider becoming a Yarn + Chai All-Access Passholder. It’s a sweet deal that gives you access to all of my PDF patterns, including this one!
And now, on to the pattern…
AMIGURUMI TEDDY BEAR
Difficulty: Easyish
Crochet Language: American Standard
Finished Size: 12″ tall
Yarn: #5 (bulky) velvet or chenille yarn recommended. (Sample is made with Luxe Velour by Juicy Couture.) The approximate amounts needed are:
- COLOR A (I used “Frothy Fawn”): 185yds
- COLOR B( I used “Angel”): 12yds
You’ll also need a very small amount of thinner black yarn and white yarn for facial features.
Hook: 4.0mm (G) hook
Gauge: 18 CSC x 20 rows = 4″ square
You’ll also need:
Yarn needle (long)
Polyester Fiber-Fill
(2) 15mm animal eyes
(1) 15mm animal nose
Terms and Abbreviations:
ST/STS (stitch/stitches)
CH/CHS (chain/chains)
SL ST (slip stitch)
CSC (crossed single crochet: Insert your hook, yarn UNDER, draw yarn through stitch (2 loops on hook), yarn over, draw through both loops.)
BLO (back loop only)
FLO (front loop only)
INC (2 CSC in same ST)
DEC (Insert hook into FLO of ST, then immediately insert it into the FLO of the next ST as well; yarn UNDER, draw yarn through stitch (2 loops on hook), yarn over, draw through both loops.)
Notes:
(1) CHANGING COLORS: In the stitch before a color change, complete the final step of the stitch with the new color; so you’ll work the stitch right before the change, and when it’s time to pull through the final loops, you’ll drop the first color and pull through with the new color.
(2) When pattern instructs with a number followed by a stitch
(ex: “5 CSC”), it means to work one CSC in each of the next 5 stitches (not to work 5 CSC in one stitch).
(3) Repeats are represented in (parentheses). Make sure you complete everything in the parentheses before repeating it. For example:
“(CSC, INC, CSC) 3 times”
means
CSC, INC, CSC | CSC, INC, CSC | CSC, INC, CSC
(4) Yarn, hook size and gauge are only meant as a guide, and this pattern will work with any yarn you choose; just use a hook that is smaller than the yarn’s recommended size for a nice tight fabric, and keep in mind your yarn amounts and finished dimensions will be affected by any changes.
INSTRUCTIONS
ARMS (make 2)
To begin: With COLOR A, CH6.
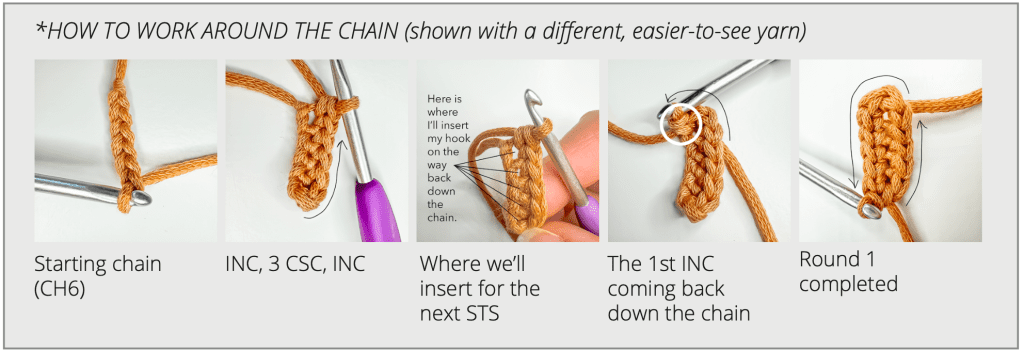
Round 1: Starting in 2nd CH from hook, and working into only the back loop of each chain stitch, INC, 3 CSC, INC. Working around the chain* to the other side: INC, 3 CSC, INC. (14)
Round 2: INC, 5 CSC, INC, INC, 5CSC, INC. (18)
Rounds 3-8: CSC in each ST around. (18)
Round 9: DEC, 16 CSC. (17)
Round 10: DEC, 15 CSC. (16)
Round 11: DEC, 14 CSC. (15)
Round 12: DEC, 13 CSC. (14)
Round 13: DEC, 12 CSC. (13)
Round 14: DEC, 11 CSC. (12)
Round 15: DEC, 10 CSC. (11)
Round 16: DEC, 9 CSC. (10)
To finish: Stuff lightly, then CSC closed by holding sides of opening together and working through both sets of corresponding loops across. (4 or 5 CSC, depending on the number you decide fits best; just be consistent with both arms.)
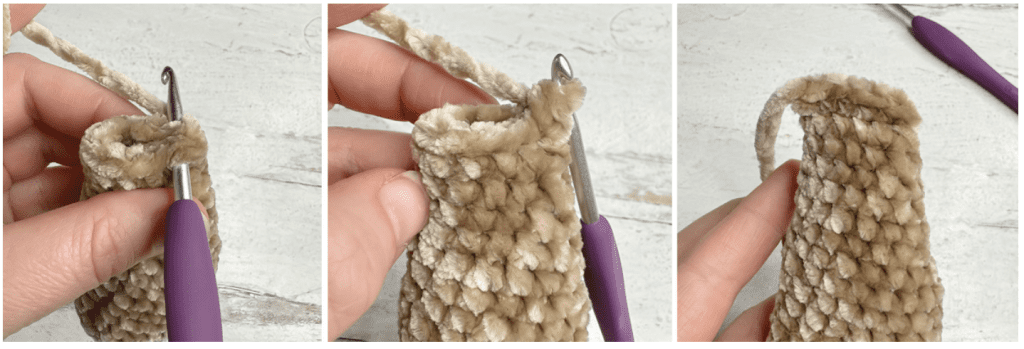
Fasten off and hide ends inside. Set arms aside for later.
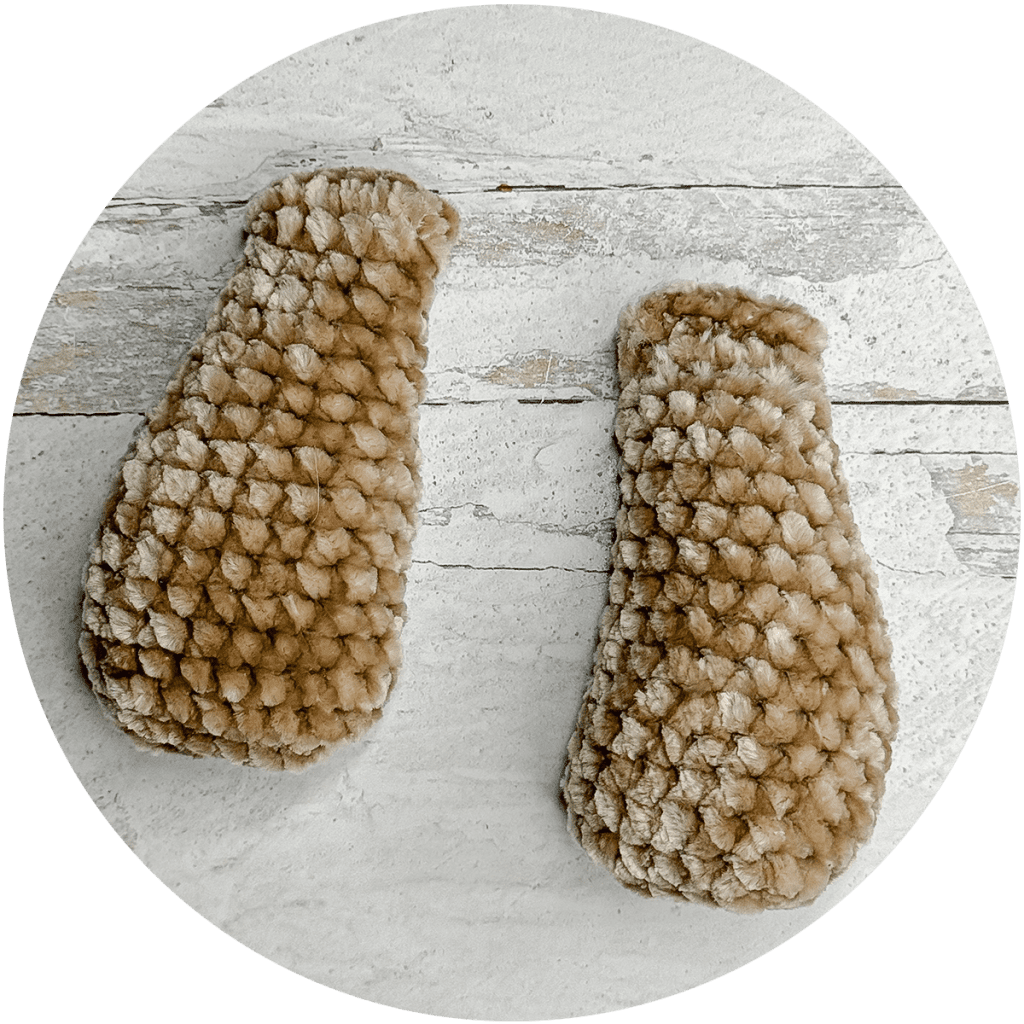
LEGS (make 2)
To begin: With COLOR B, make a Magic Circle; CH1.
Round 1: 7 CSC in MC. (7)
Round 2: INC in each ST around. (14)
Round 3: (INC, CSC) around. (21)
Round 4: (CSC, INC, CSC) around. (28)
Switch to COLOR A. Fasten off COLOR B.
Round 5: With a loose tension, SL ST in BLO of each ST around. (28)
Round 6: In BLO, (3 CSC, INC, 3 CSC) around. (32)
Rounds 7-8: CSC in each ST around. (32)
Round 9: (3 CSC, DEC, 3 CSC) around. (28)
Round 10: 10 CSC, 4 DEC, 10 CSC. (24)
Round 11: 8 CSC, 4 DEC, 8 CSC. (20)
Rounds 12-22: CSC in each ST around. (20)
Fasten off. Add stuffing. (I stuff the bottom part of the leg quite densely, then lightly stuff the skinni- er part and leave about 1/2” at the top competely unstuffed. This helps the legs stay flexible.)

Continue on to BODY.
BODY
To Begin: Place legs side by side, fronts facing away from you. On the inner sides that sit closest together, locate the centermost stitch on each leg. With COLOR A, join legs together by joining yarn through top loops of BOTH opposing stitches; CH1.
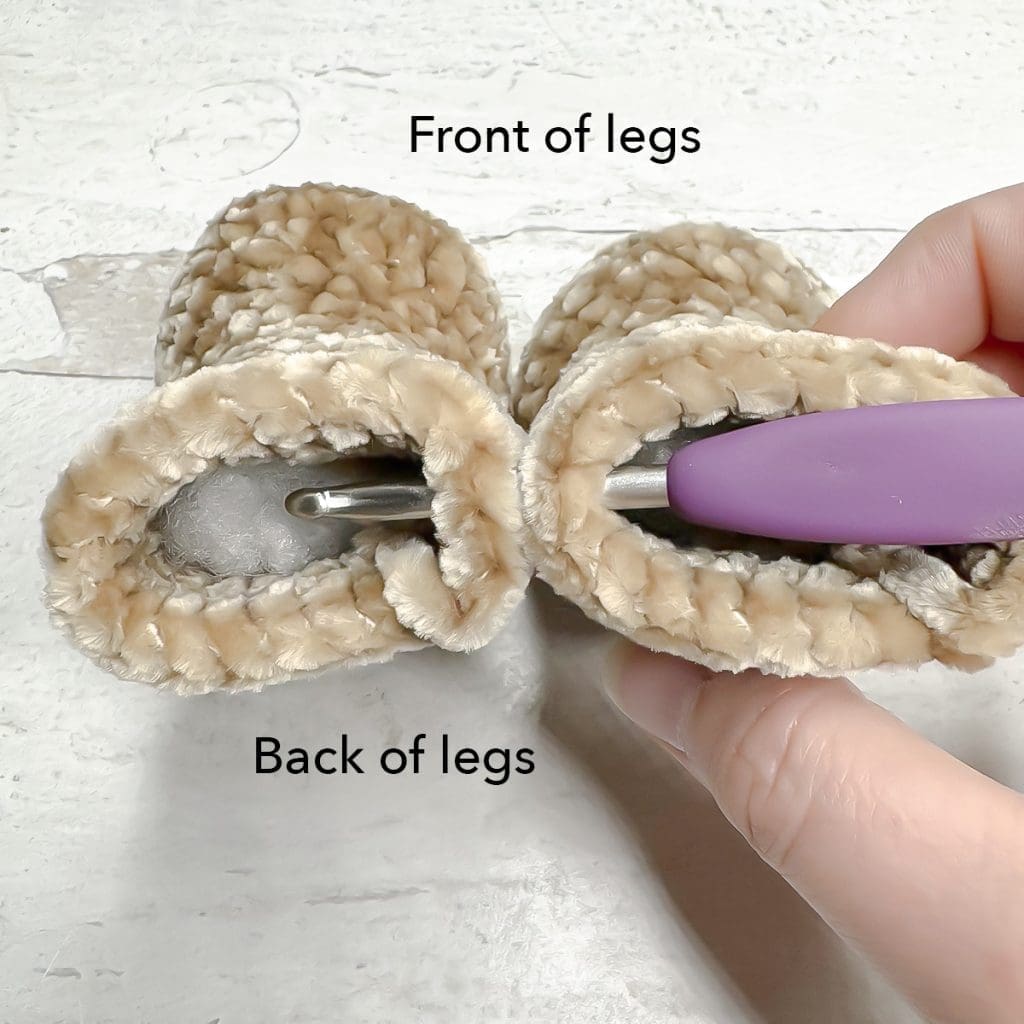
Round 1: CSC in same ST as your CH1 on the left leg, and moving clockwise, CSC in each remain- ing ST around left leg (20 CSC). Continue to the right leg, and CSC again in the same ST as your initial CH1; continue to CSC in each ST around the right leg (20 CSC). (40)
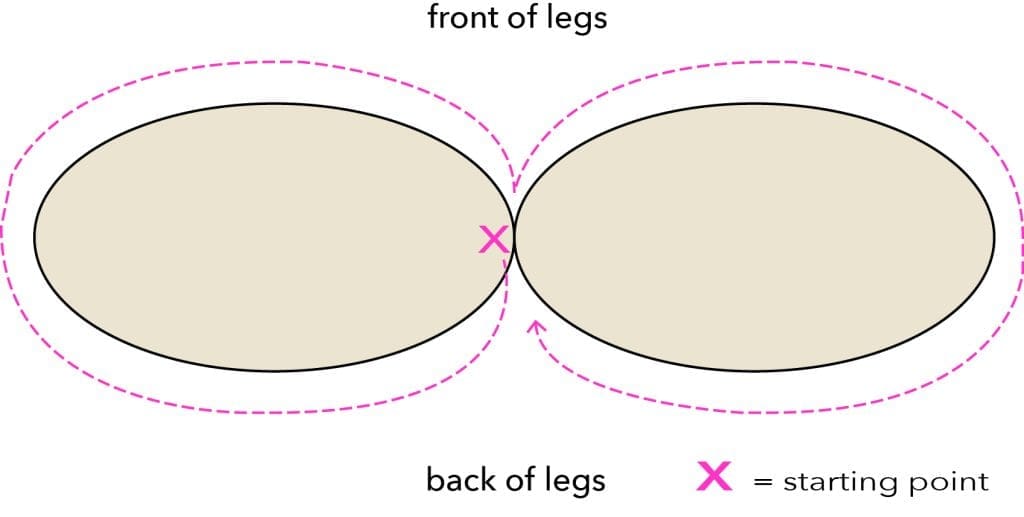
NOTE: When you come to the part on each leg that has the “dropoff” created by the end of the final round, simply CSC until the dropoff and continue immediately to the next unworked stitch after it. (Pretend the dropoff isn’t even there.
Round 2: In FLO for this round only, (INC, 3 CSC) around. (50)
Rounds 3-11: CSC in each ST around. (50)
Round 12: (4 CSC, DEC, 4 CSC) around. (45)
Round 13: CSC in each ST around. (45)
Round 14: (DEC, 7 CSC) around. (40)
Round 15: CSC in each ST around. (40)
Round 16: (3 CSC, DEC, 3 CSC) around. (35)
Round 17: CSC in each ST around. (35)
Round 18: (DEC, 5 CSC) around. (30)
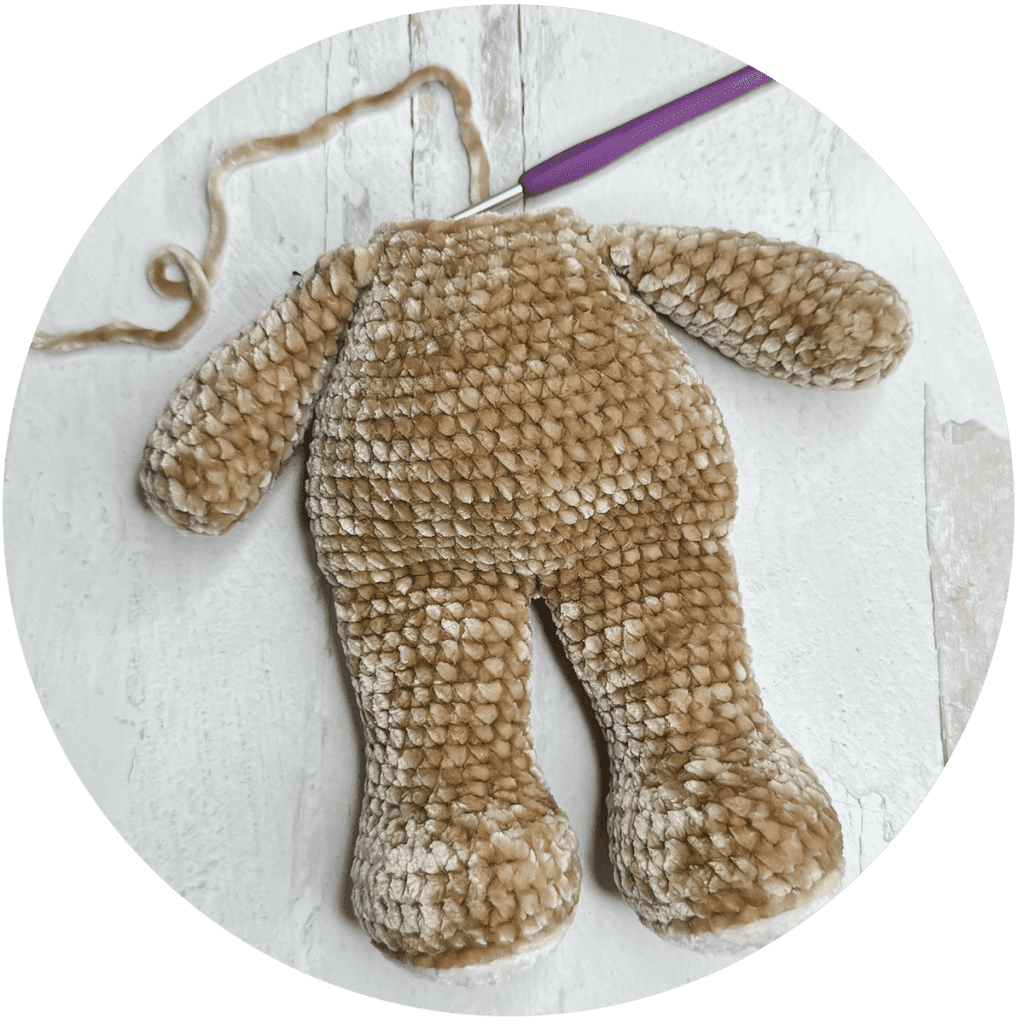
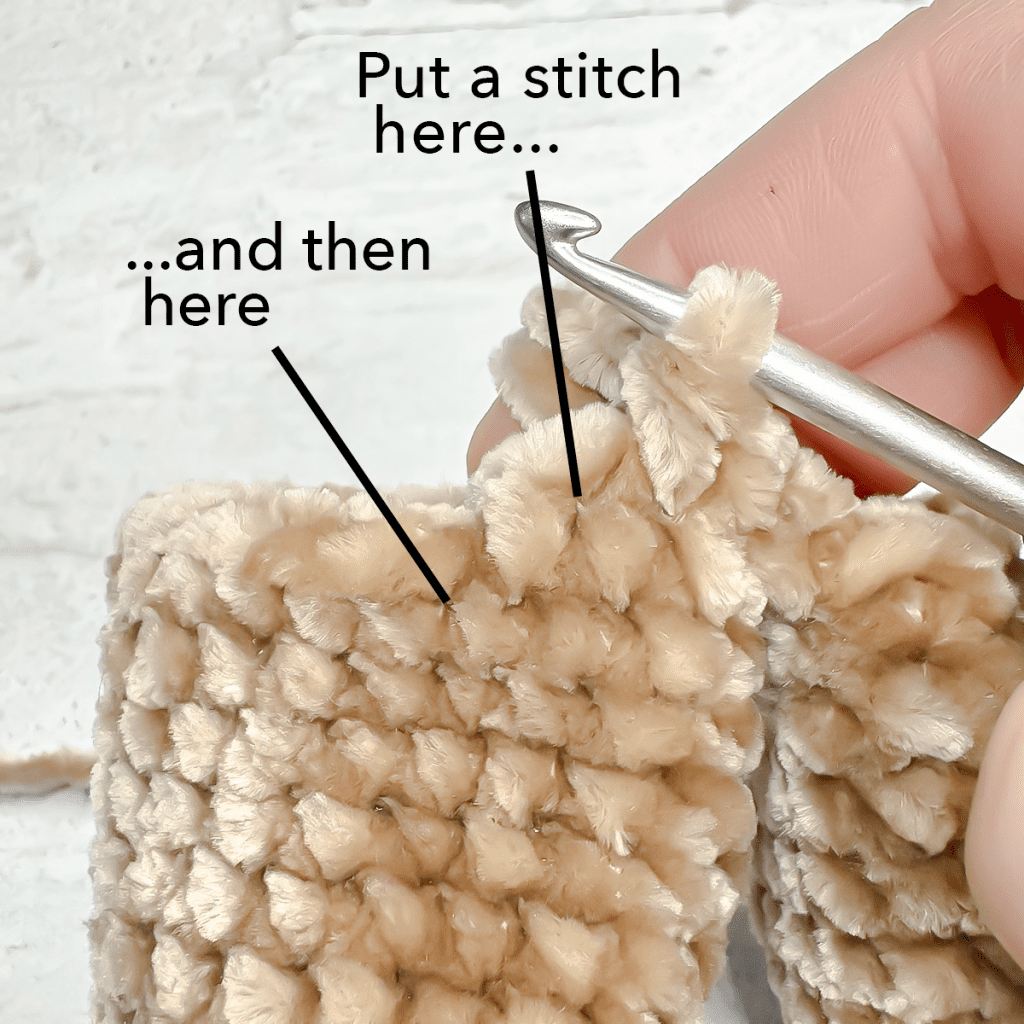
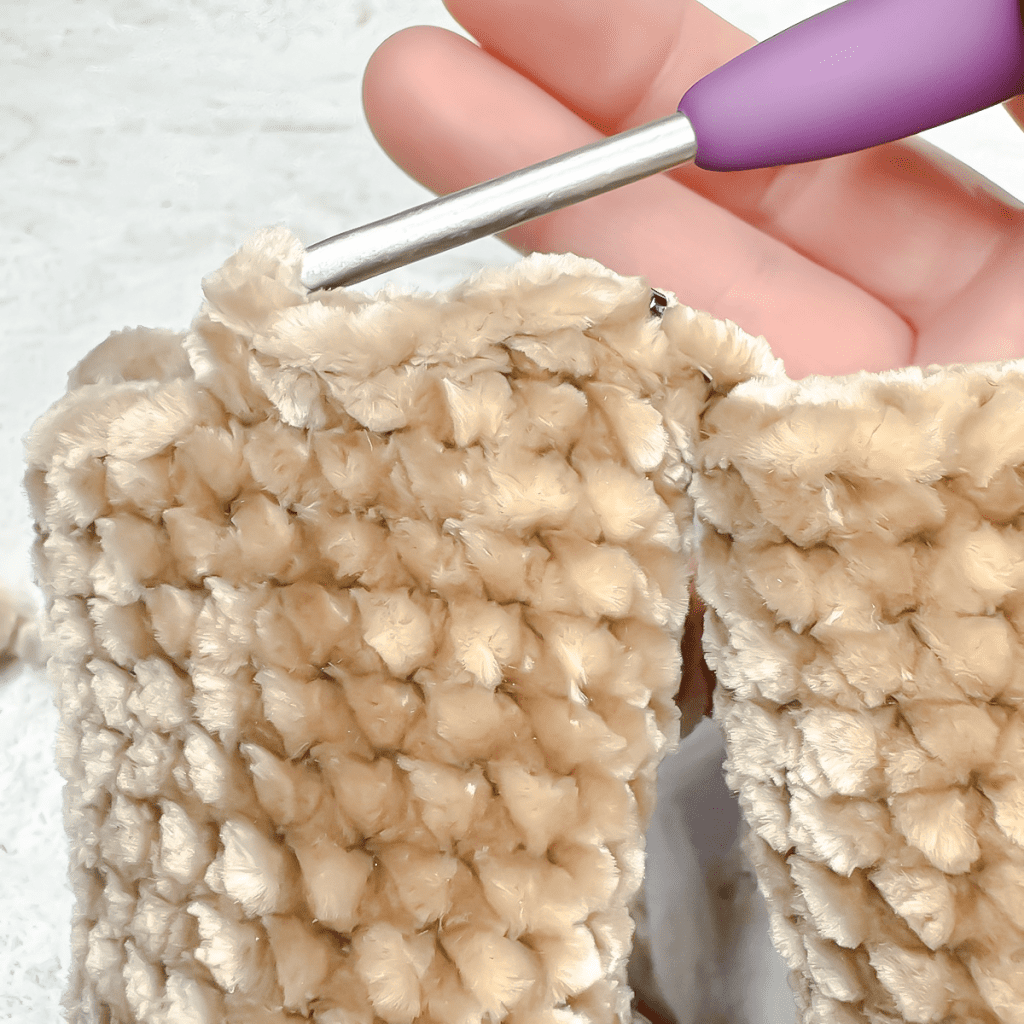
Stuff. Then, along Round 18, use stitch markers to mark 4 or 5 STS for each arm (depending on how many STS you used to seam the arms).
Round 19: CSC in each ST around, attaching arms as you go by inserting hook into corresponding ST on arm AND body. (30)
Round 20: (DEC, 3 CSC) around. (24)
HEAD
Round 21: In FLO for this round only, (CSC, INC, CSC) around. (32)
Round 22: (INC, 3 CSC) around. (40)
Round 23: (2 CSC, INC, 2 CSC) around. (48)
Round 24: (INC, 11 CSC) around. (52)
Round 25-35: CSC in each ST around. (52)
Pause and add the eyes between Rounds 31 and 32. I placed mine 8 stitches apart.
Round 36: (DEC, 11 CSC) around. (48)
Round 37: (2 CSC, DEC, 2 CSC) around. (40)
Round 38: (DEC, 3 CSC) around. (32)
Round 39: (CSC, DEC, CSC) around. (24)
Stuff here, and continue to add stuffing as desired until you close it up
Round 40: (DEC, CSC) around. (16)
Round 41: DEC around. (8)
To finish: Fasten off with a long tail. Thread tail through a yarn needle and weave the needle in and out of the outer loops of the previous round, all the way around. Slowly pull circle closed. (Be careful if you’re using single-ply yarn, it breaks easily!)
Tie a knot, then hide knot and tail inside head.
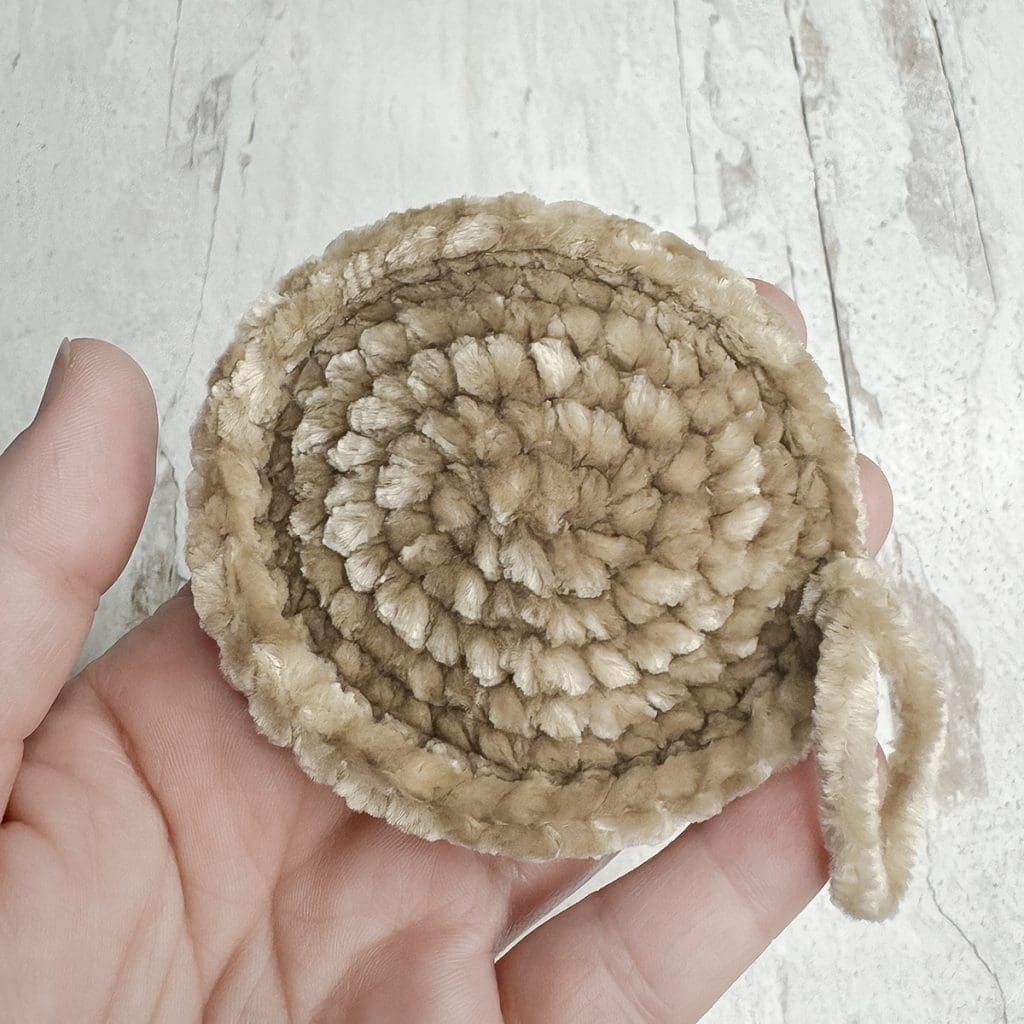
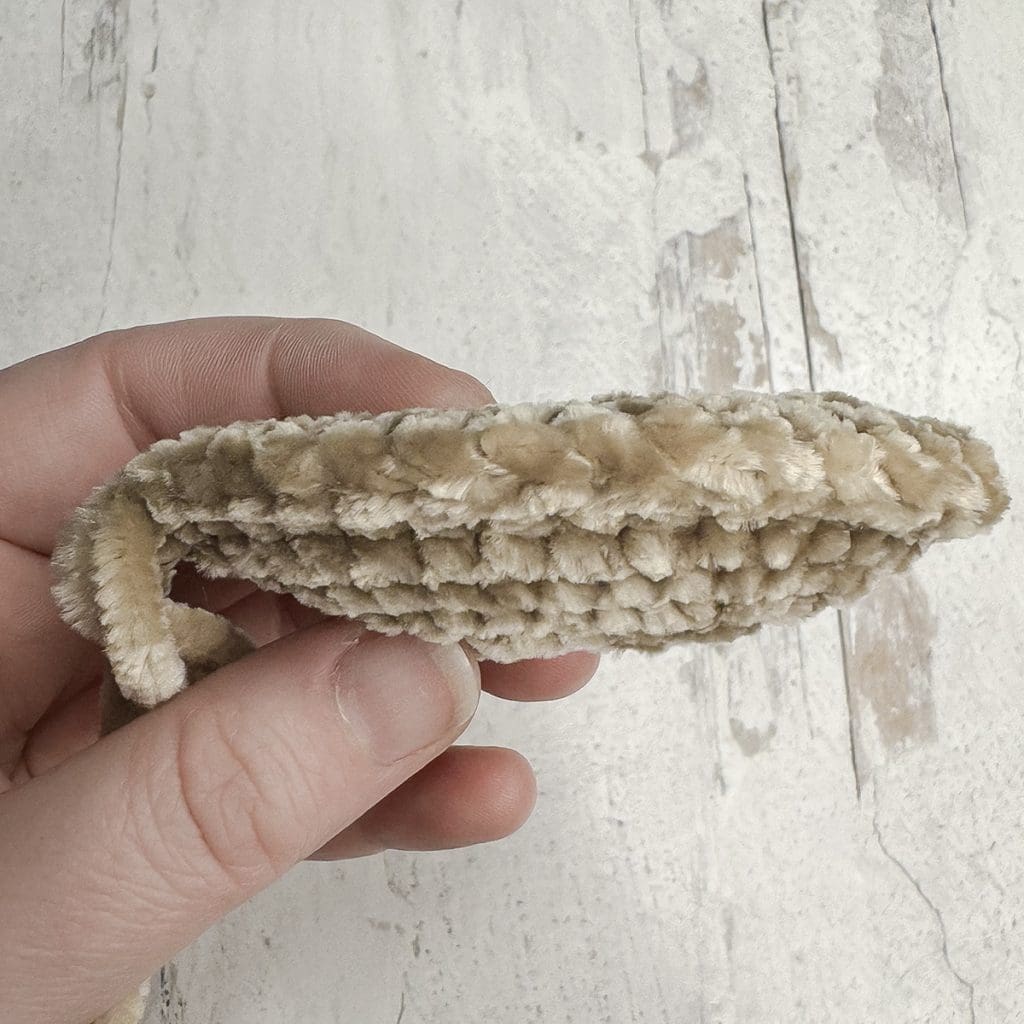
SNOUT
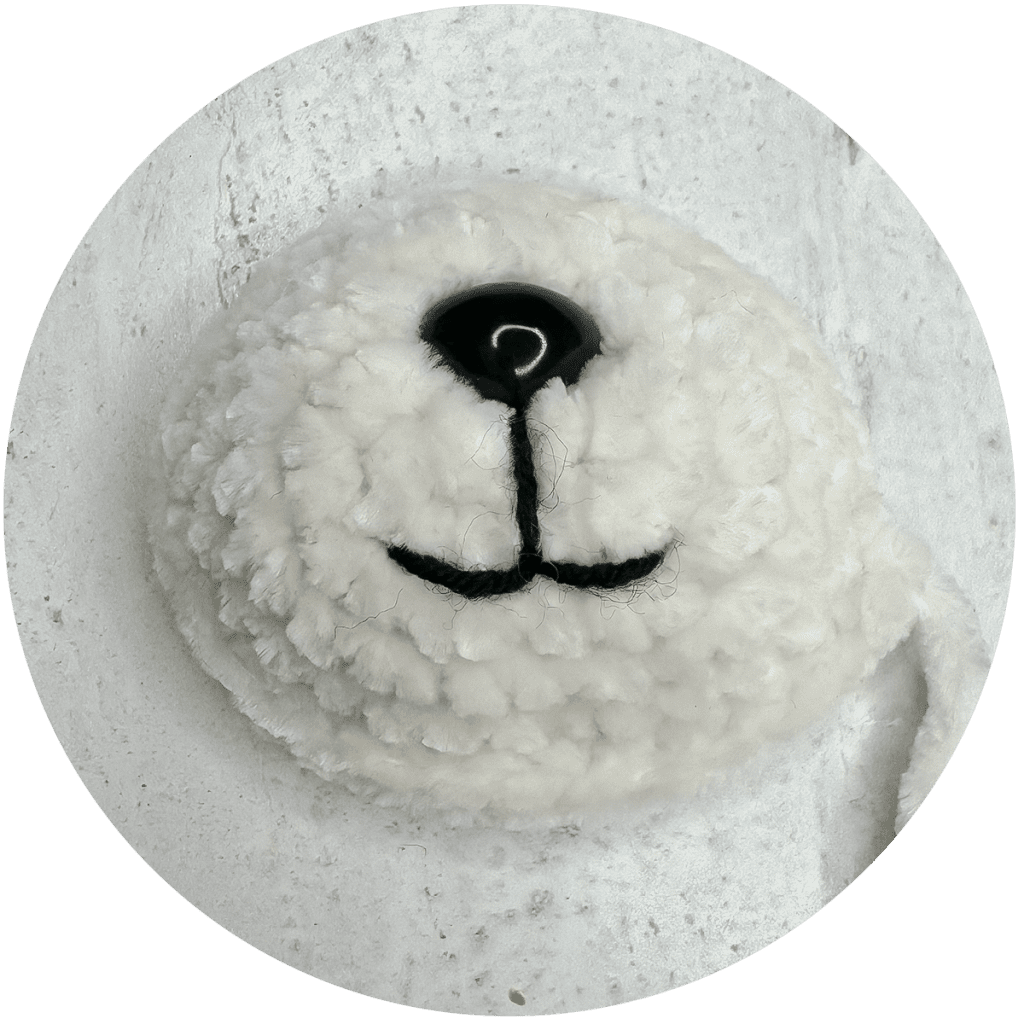
To Begin: With COLOR B, CH4.
Round 1: Starting in 2nd CH from hook, and working into only the back loop of each chain stitch, INC, CSC, INC. Working around to the other side of the CH, and working in the unworked loops of each chain stitch, INC, CSC, INC. (10)
Round 2: 2 INC, CSC, 4 INC, CSC, 2 INC. (18)
Round 3: INC, CSC, INC, 2 CSC, (INC, CSC) 4 times, CSC, INC, CSC, INC, CSC. (26)
Rounds 4-5: CSC in each ST around. (26)
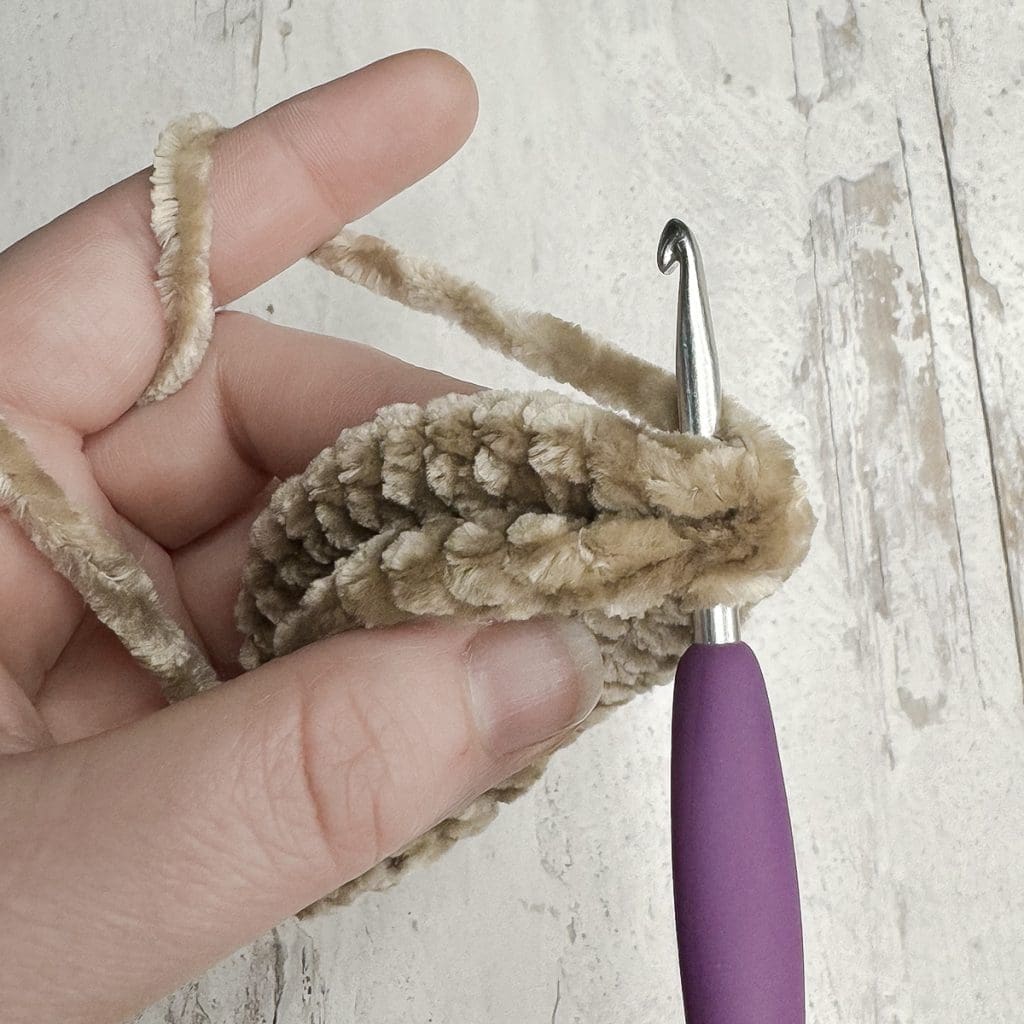
To finish: SL ST in next ST. Fasten off, leaving a long tail for sewing. Weave in starting tail.
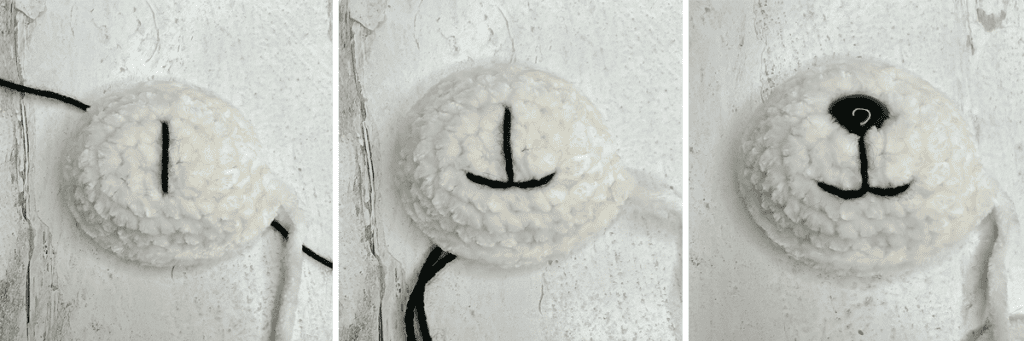
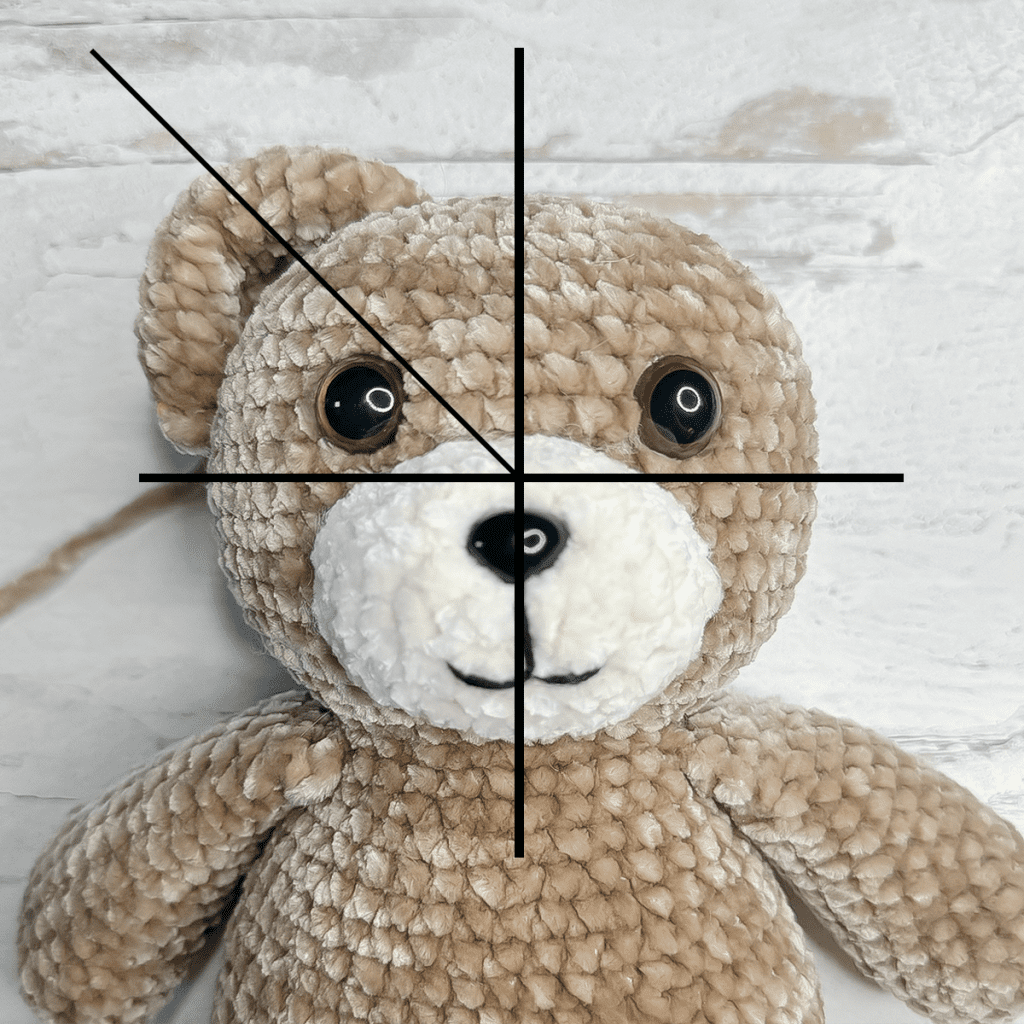
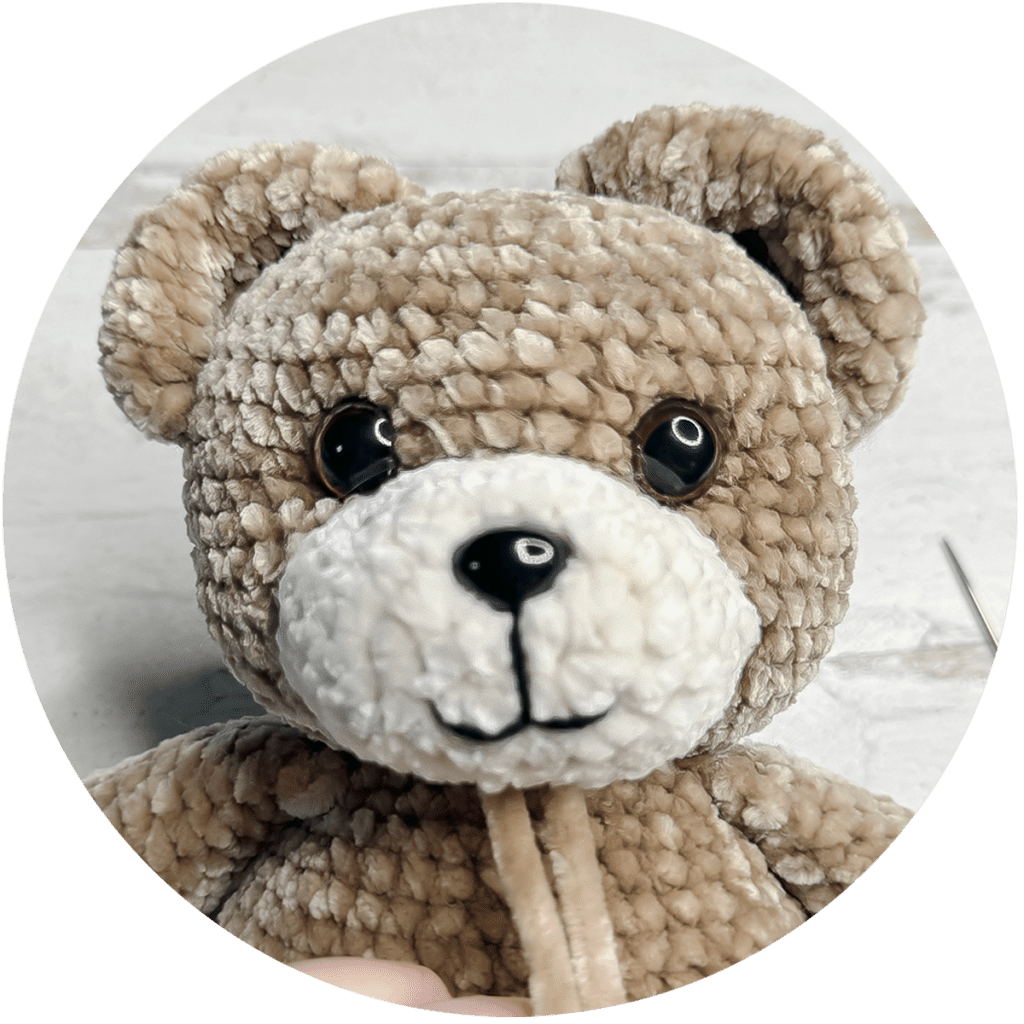
MOUTH and NOSE
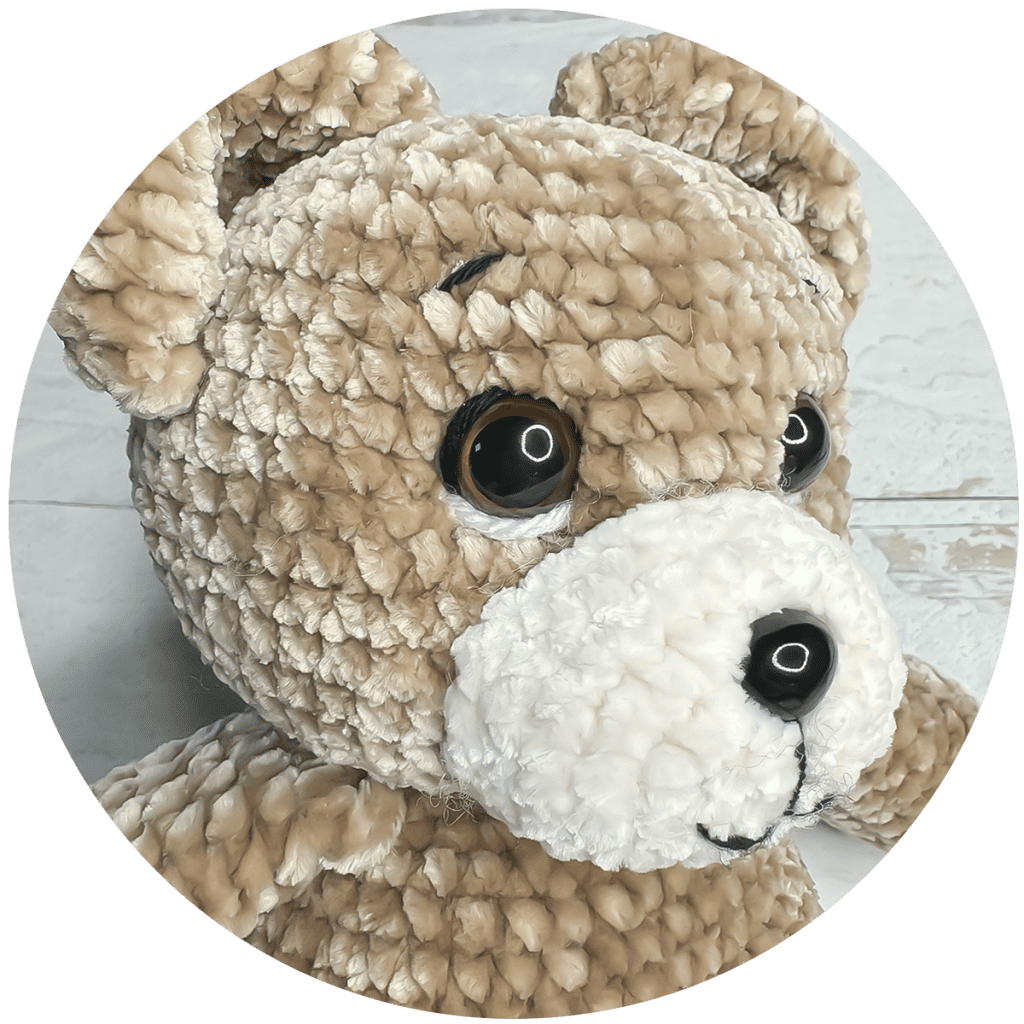
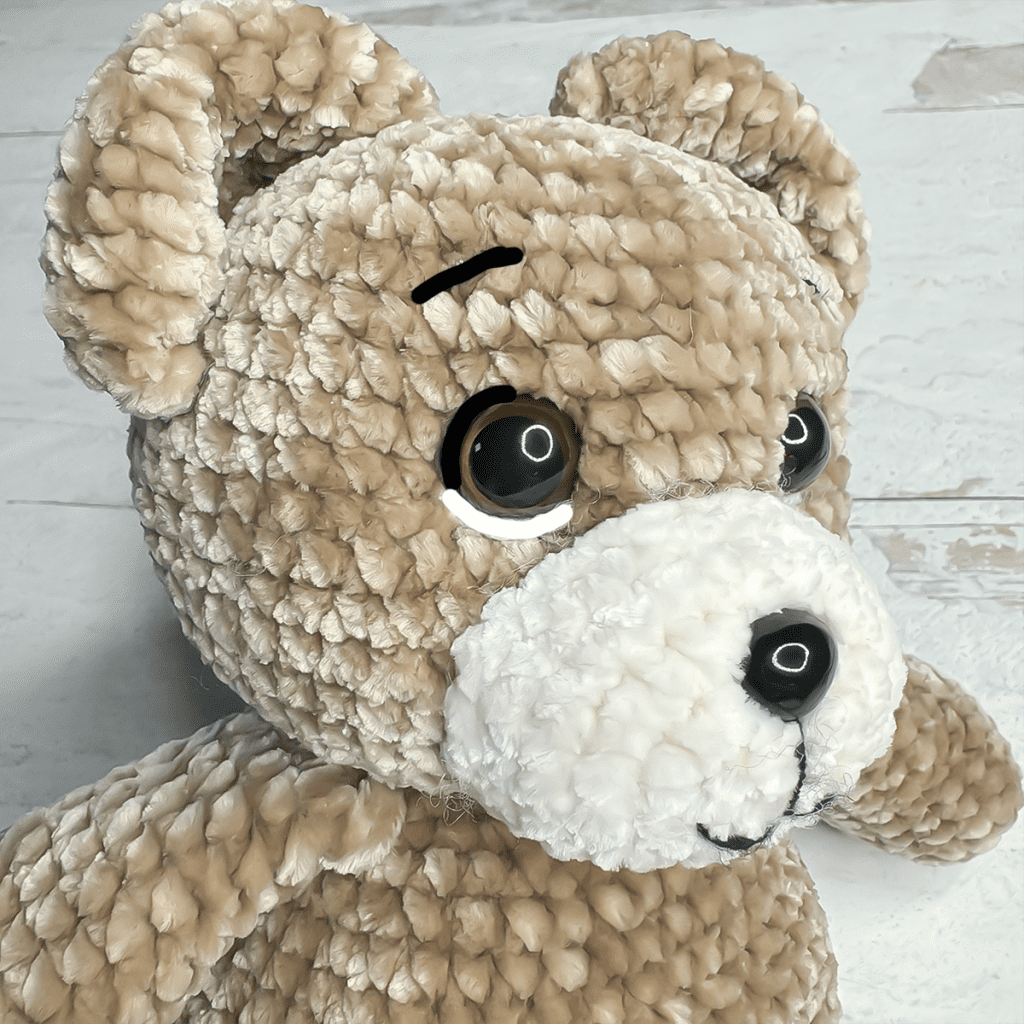
Use thin black yarn to “draw” the mouth, using photos for reference.
- Vertical line starts between Rounds 2 and 3 above the middle of the snout, and ends between Rounds 1 and 2 below the middle of the snout.
- Horizontal line is actually two lines beginning from 2 stitches to the right and left of the bottom of the vertical line, and meeting at the bottom of the vertical line.
- Safety nose is inserted at the top of the vertical line.
Secure tails and trim so they’ll be able to be hidden inside the snout.
ATTACHING THE SNOUT
Use pins to hold snout in place, if desired.
- Top of snout should be just slightly above the bottom of the eyes
- Sides of snout should be just about lined up with the outer edges of the eyes
- Bottom of snout should be just a round or two above the crease of the neck
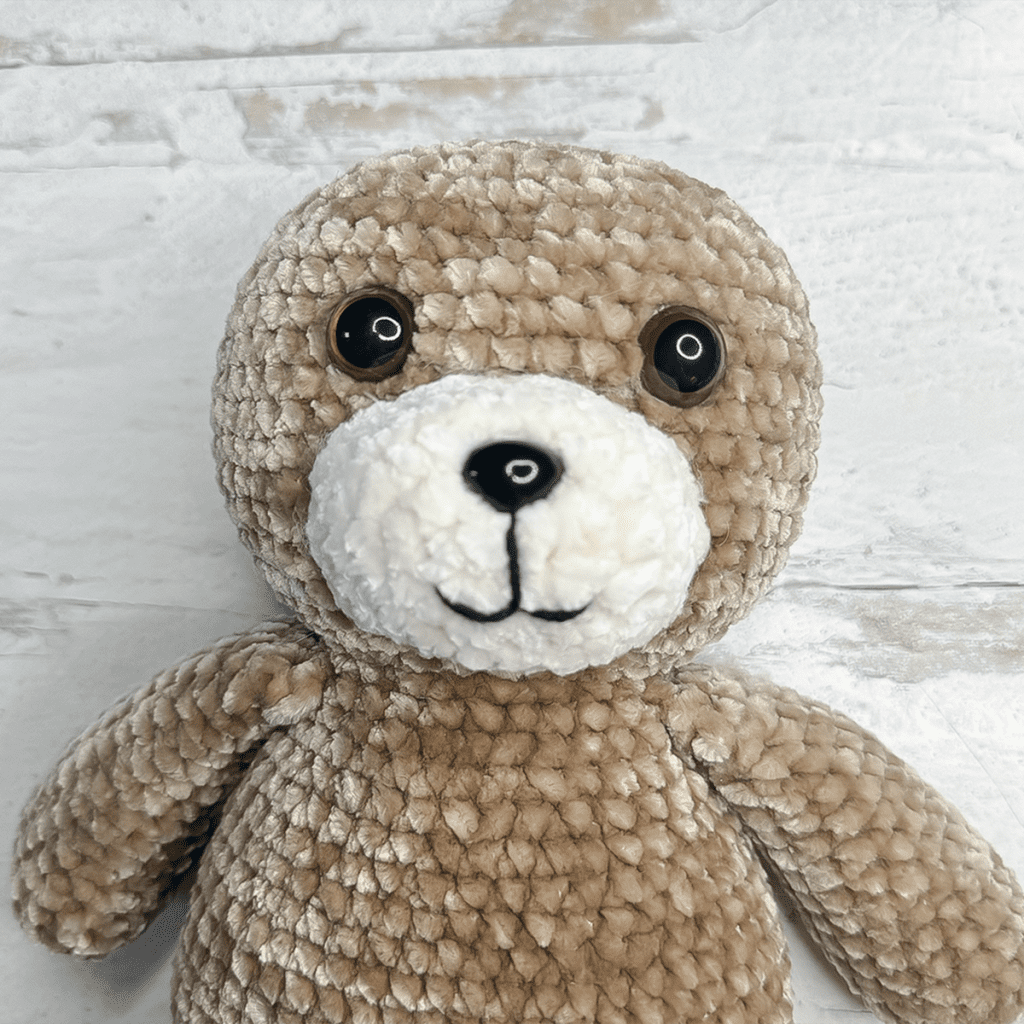
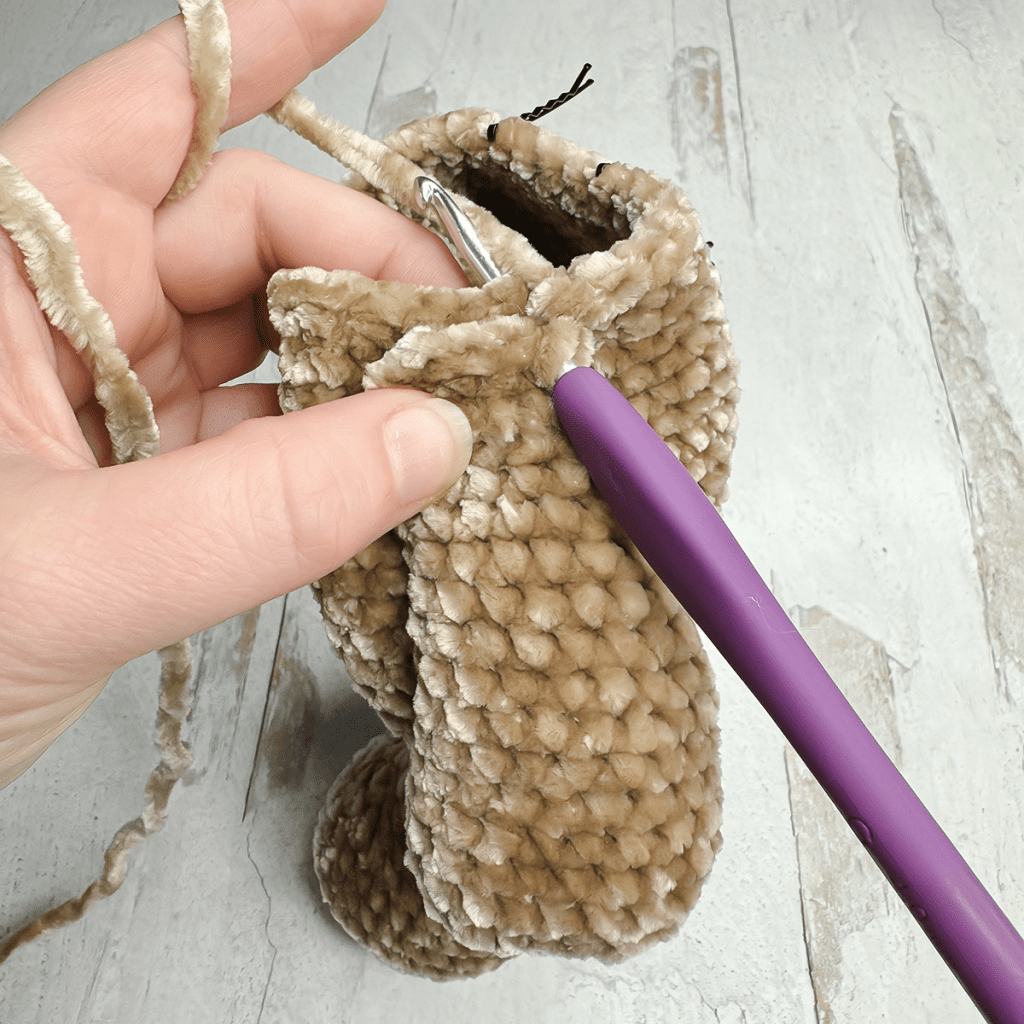
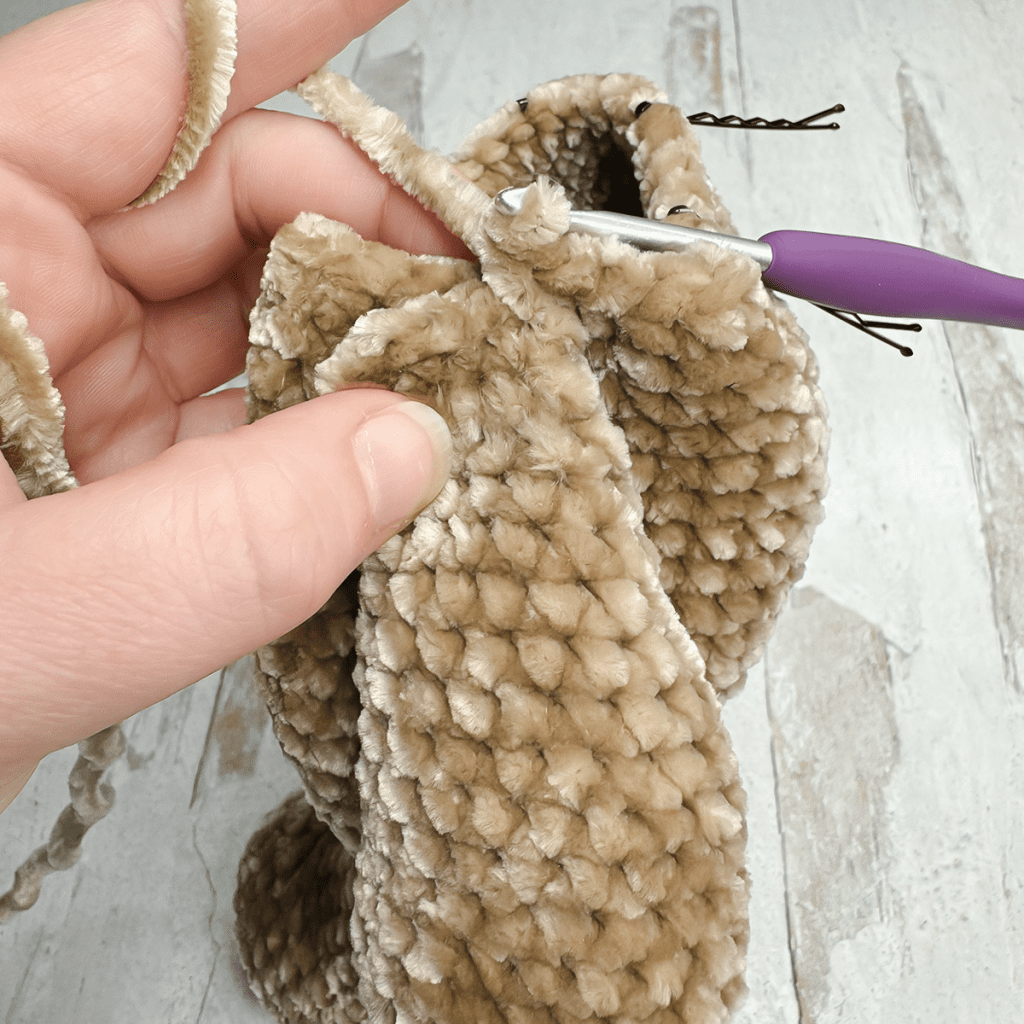
Use finishing tail to sew snout to face. Add stuffing when halfway around, and continue to add stuffing as desired until finished. Knot and hide finishing tail inside head.
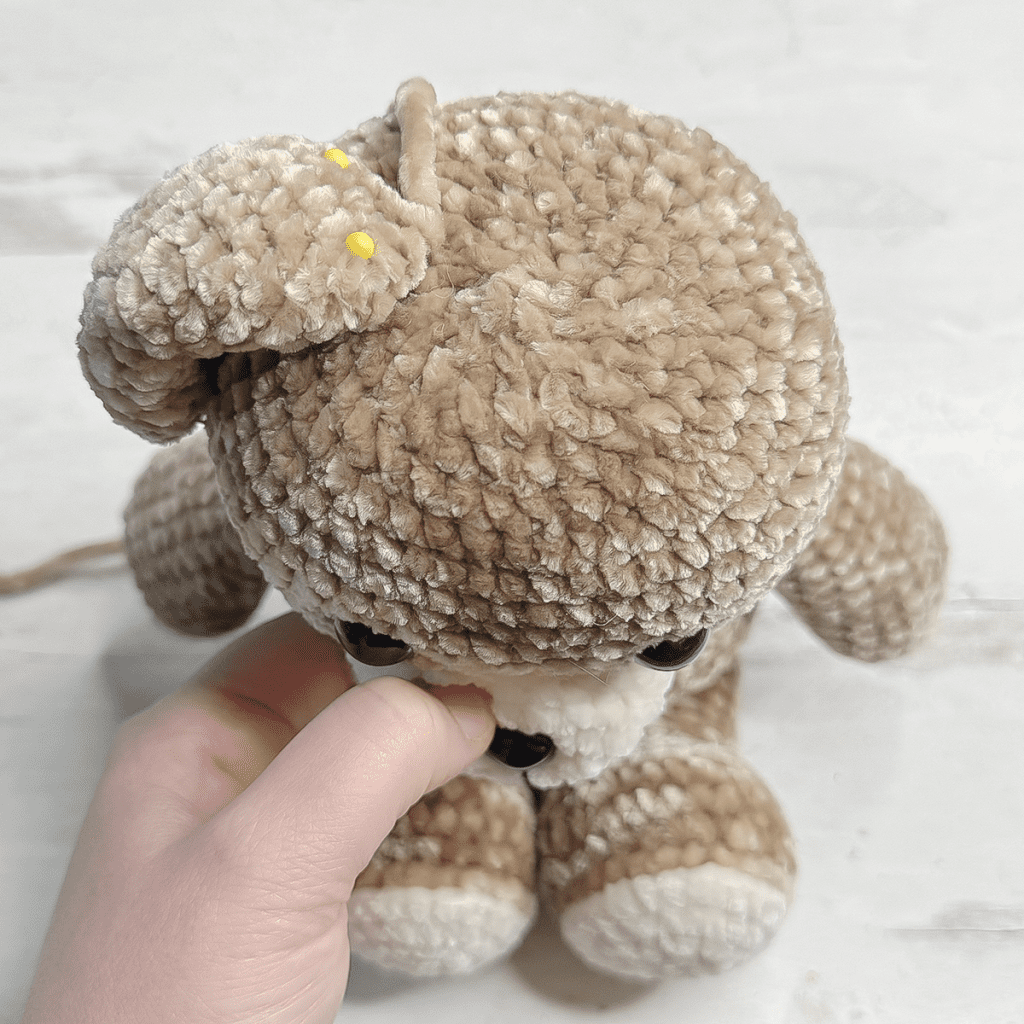
EARS
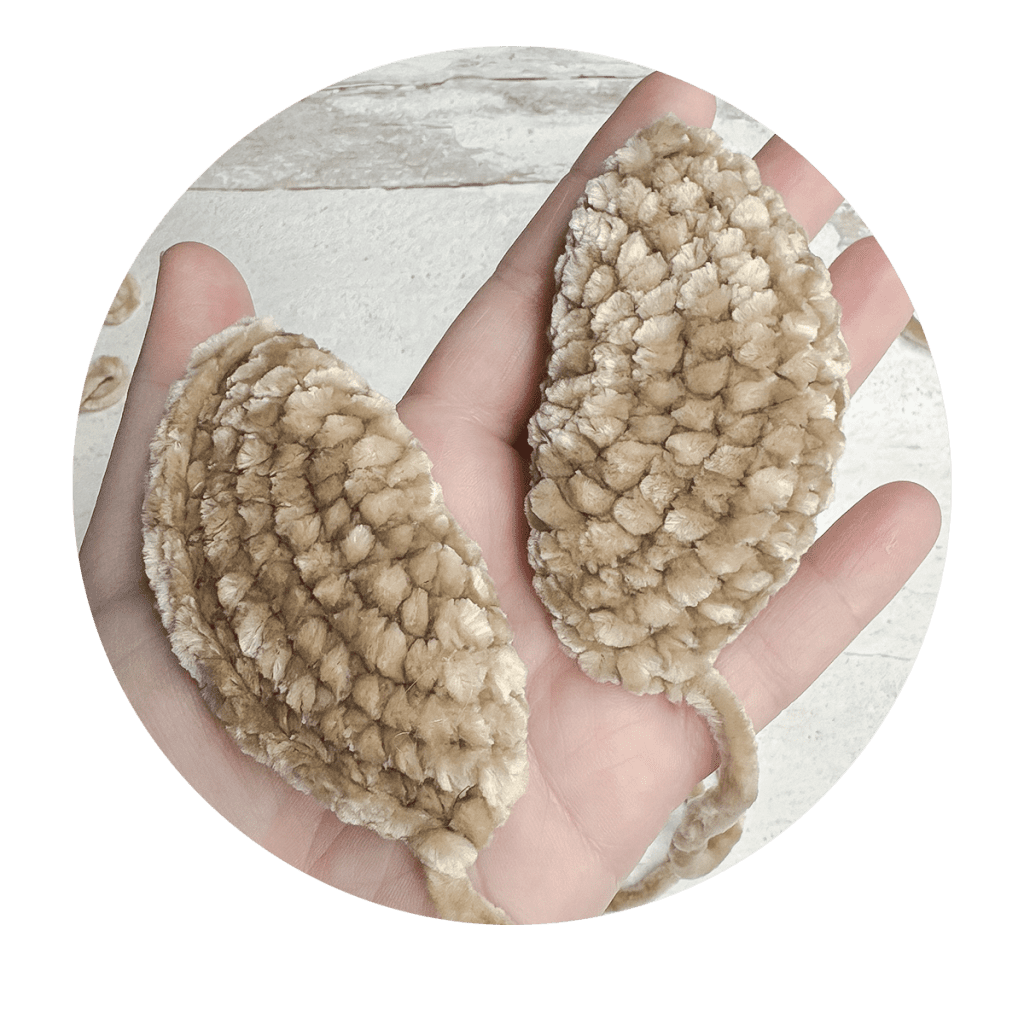
To Begin: With COLOR A, CH4.
Rounds 1-3: Follow instructions (Rounds 1-3) from SNOUT.
Round 4: (2 CSC, INC) 2 times. CSC. (2 CSC, INC) 4 times. CSC. (2 CSC, INC) 2 times. (34)
Rounds 5-6: CSC in each ST around. (34)
To finish: SL ST in each of the next 2 STS; remove hook. Secure and trim starting tail, then CSC ear closed by folding in half along the starting chain, and working through both sets of corresponding loops across. Fasten off, leaving a long tail for sewing.
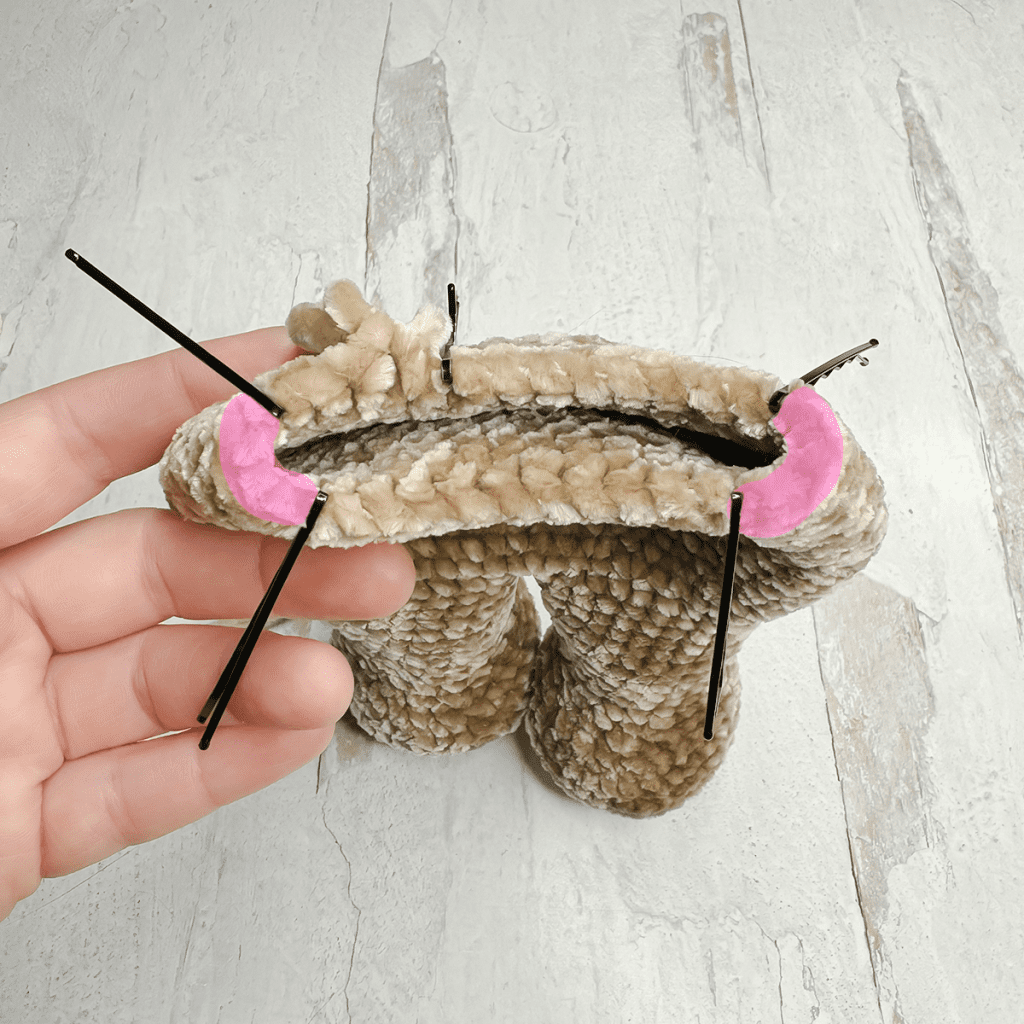
ATTACHING THE EARS
Use pins to hold ears in place, if desired. Sew the seamed side of the ears to the head in desired placement. When finished, knot and hide tail inside head.
- The ears should be toward the lower part of the top left and top right quadrants (see photo).
- Ears should be placed about halfway back on the head, in line with the middle of the arm below them.
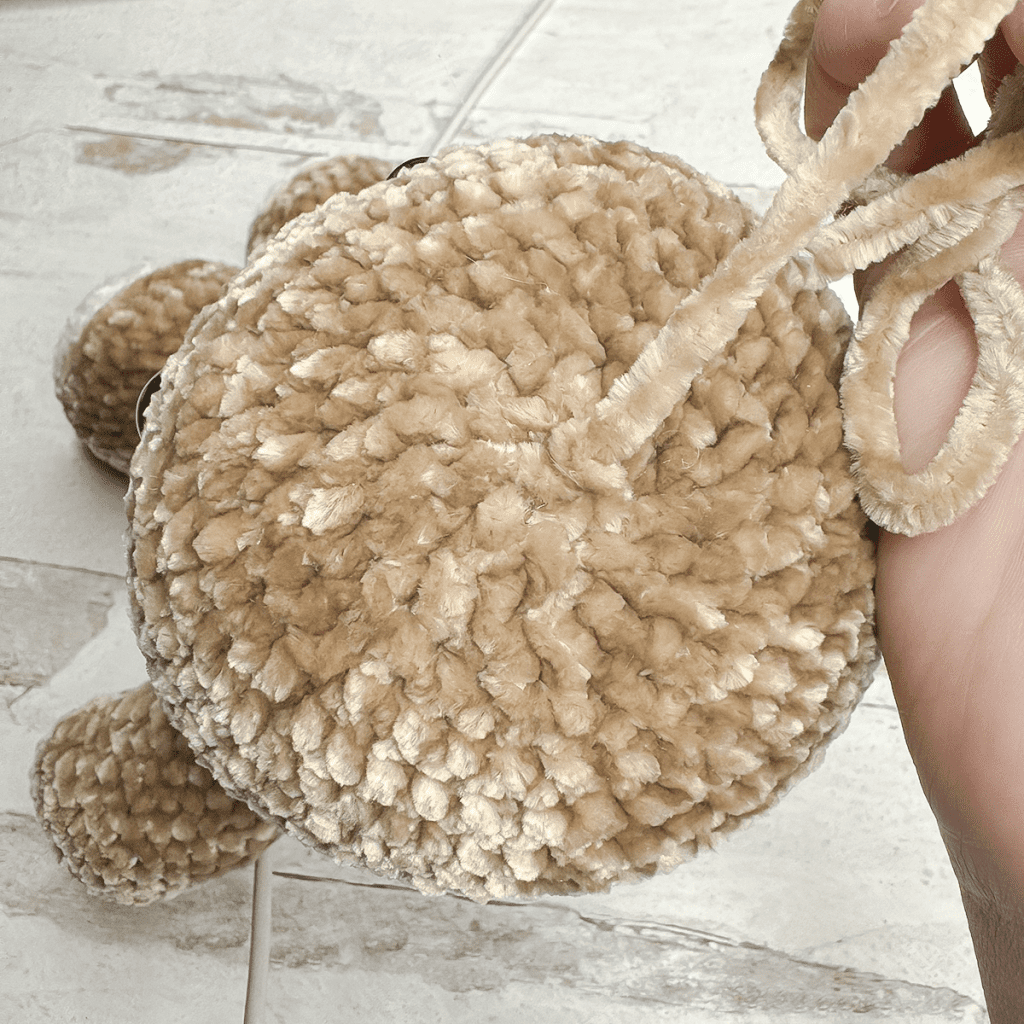
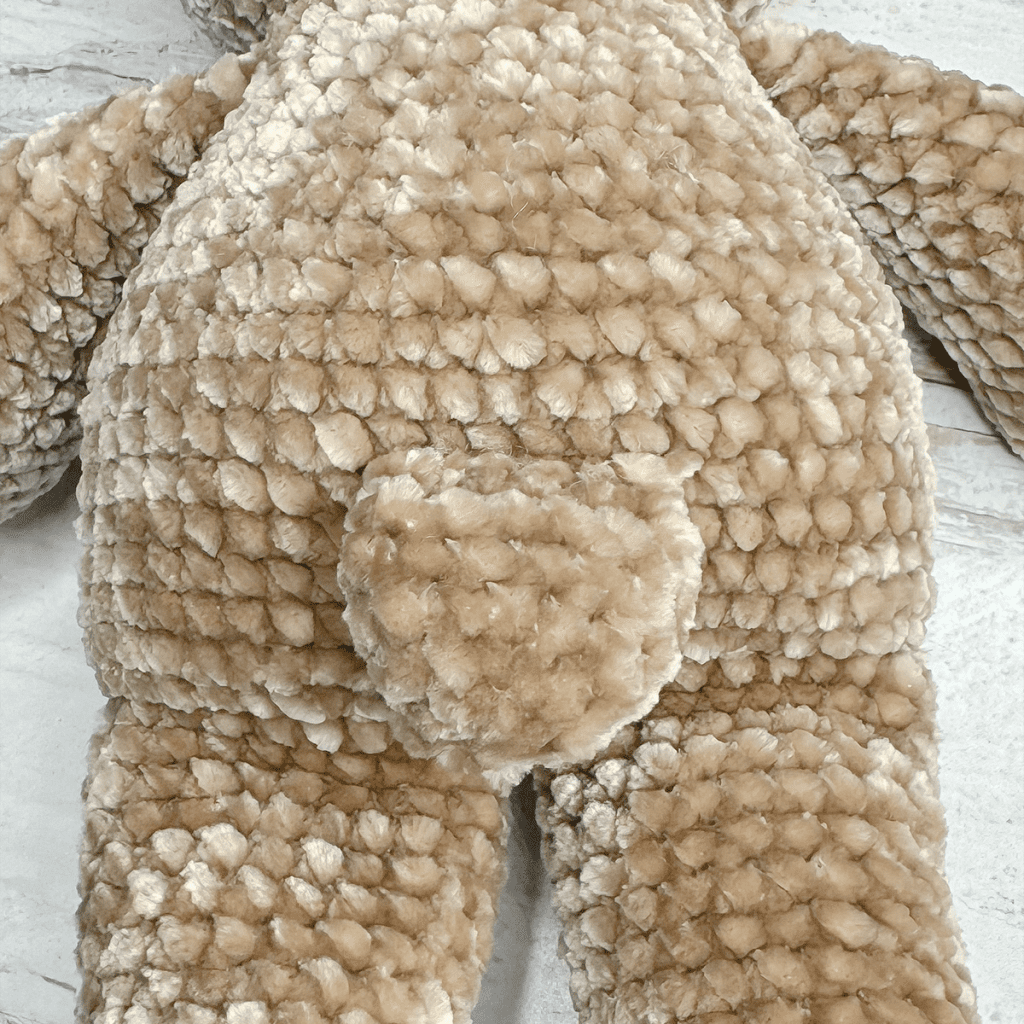
TAIL
To Begin: With COLOR A, make a Magic Circle; CH1.
Round 1: 6 CSC in MC. (6)
Round 2: INC in each ST around. (12)
Rounds 3-5: CSC in each ST around. (12)
To Finish: SL ST in next ST. Remove hook; secure and trim starting tail. Reinsert hook and CSC tail closed by holding sides of opening to- gether, and working through both sets of corresponding loops across. (This is the same technique you used to seam the arms.) Fasten off, leaving a long tail for sewing.
ATTACHING THE TAIL
Use pins to hold tail in place, if desired. Sew tail to back of body.
- I sewed my tail so that the top was in line with Rounds 6-7 of the body. When finished, knot and hide finishing tail inside body.
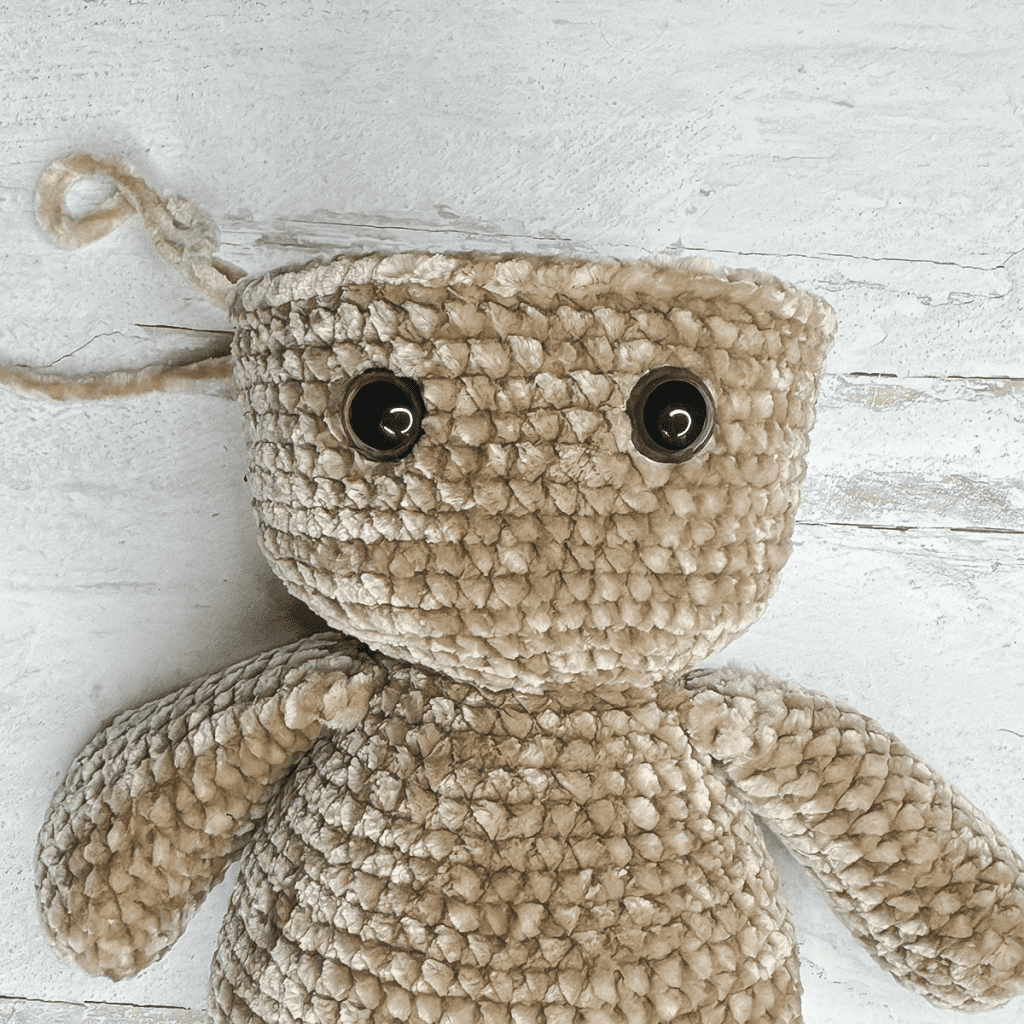
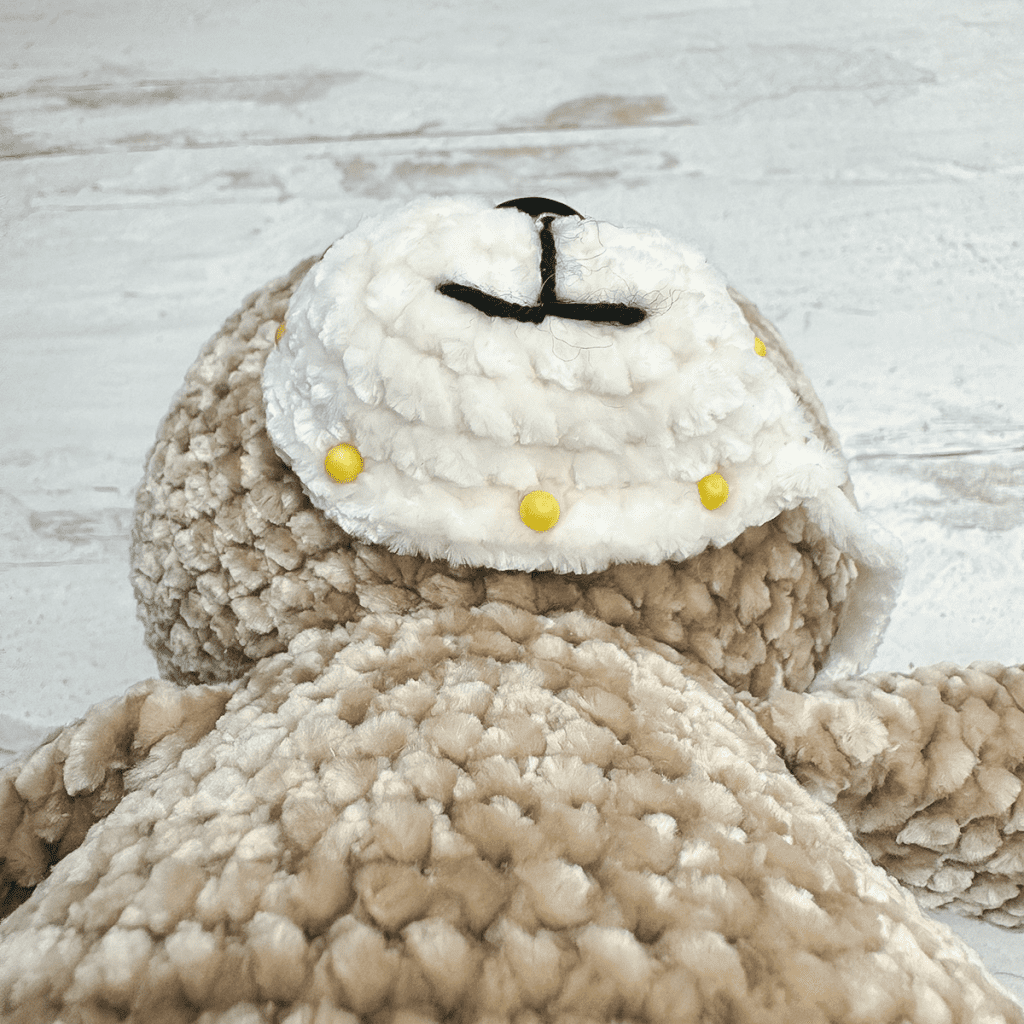
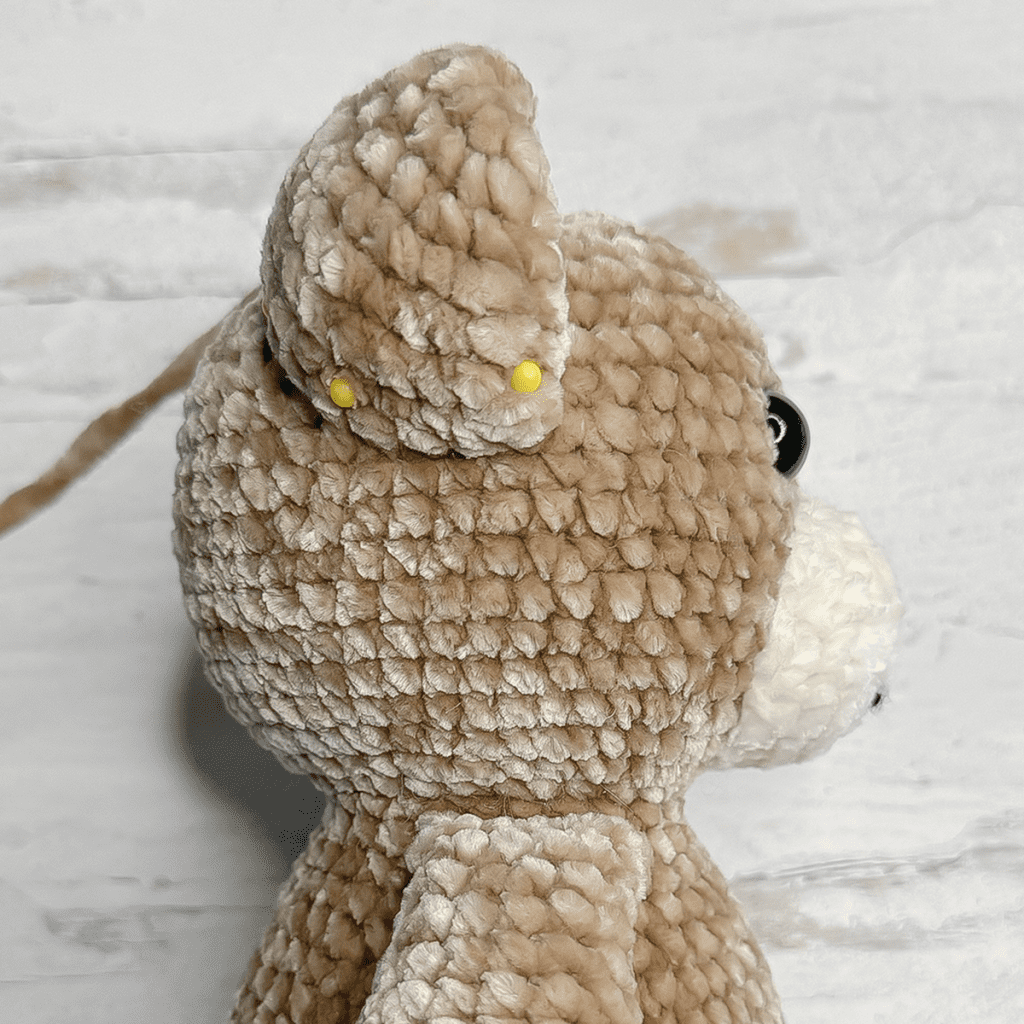
SHAPING THE HEAD
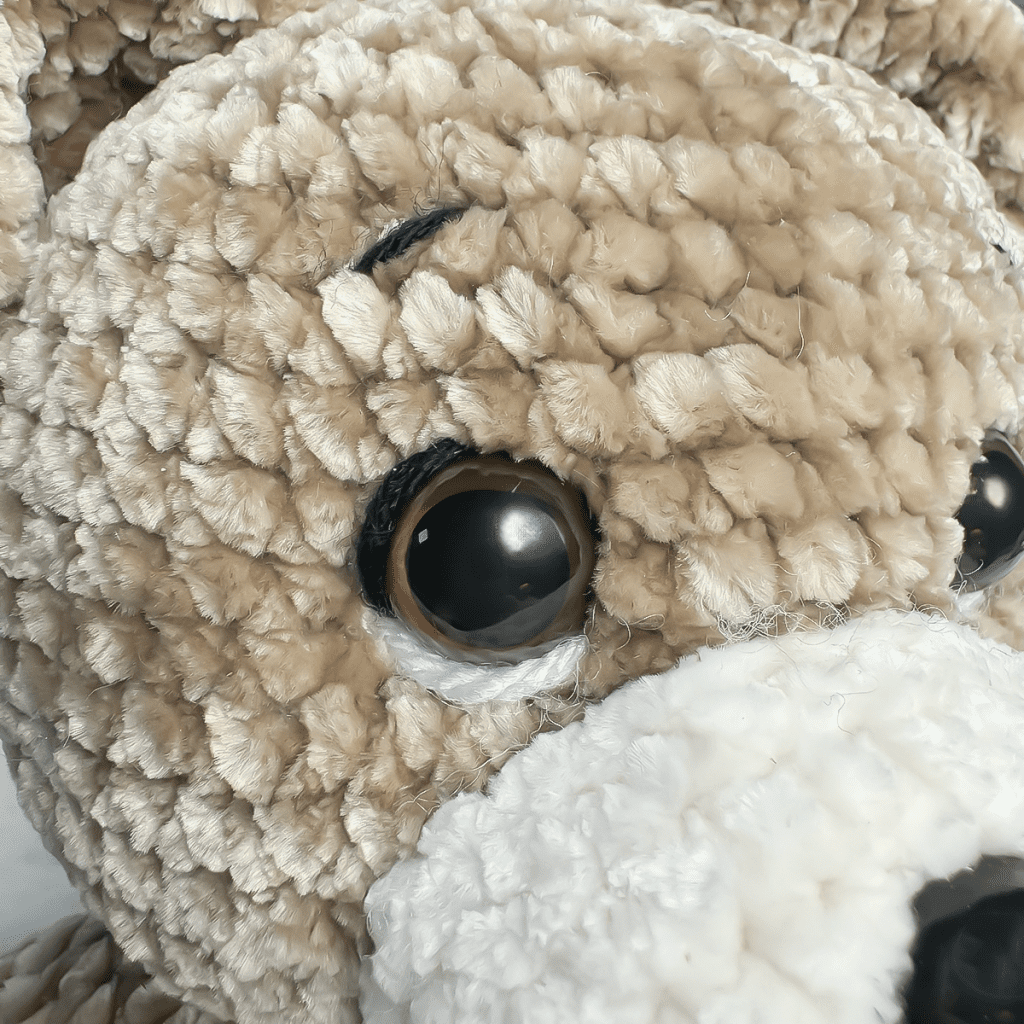
Cut a long length of yarn (COLOR A) and thread it through a long yarn needle, then follow these steps carefully, using the picture as a guide. (My yarn has been highlighted in yellow.)
- Insert needle at the base of the neck (1), and pull it out at the lower right part of the first eye (2). (When working near the eyes, try to get your needle as close to the eye as you can.)
- Insert it into the lower left part of the same eye (3), and pull it out of the same spot at the base of the neck where you first inserted it (1).
- Move one stitch to the right (4) and insert hook, then pull it out at the lower left part of the 2nd eye (5).
- Insert it into the lower right part of the same eye (6), and pull it out of the same spot at the base of the neck where you most recently inserted it (4).You should now have two ends coming out of the base of the neck. Gently pull them (at the same time) until you are happy with the indentation of the eyes, then tie them in a knot and hide the knot inside the head.
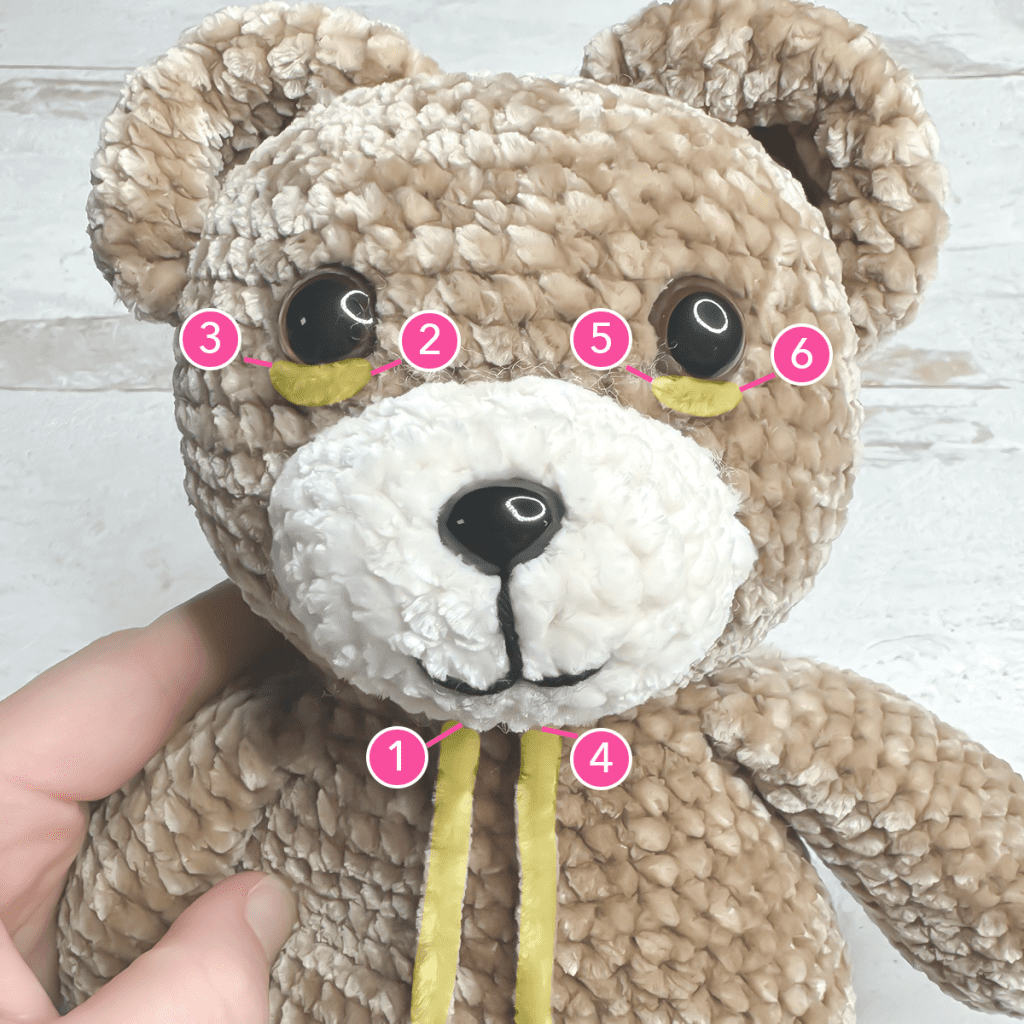
(Notice how pulling on the yarn brings the eyes closer to the snout.)
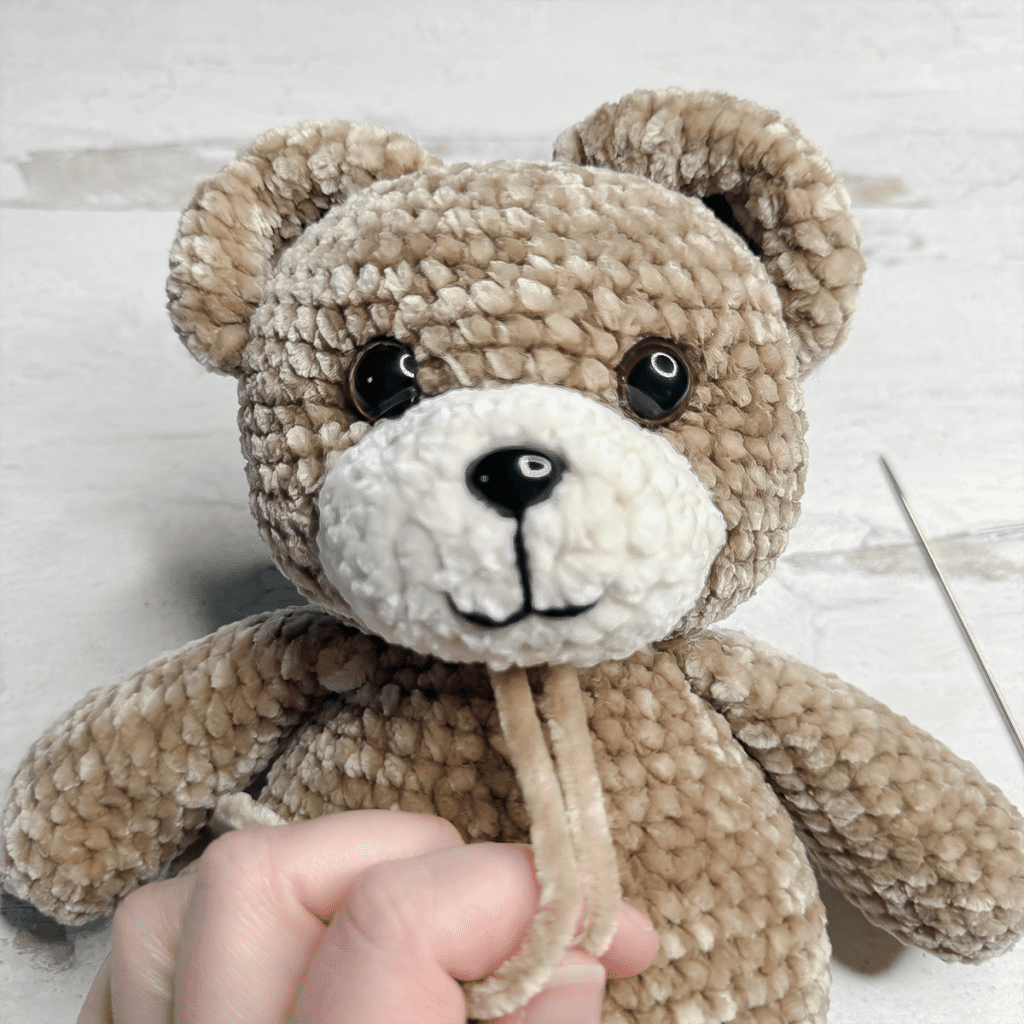
FINISHING TOUCHES
My favorite part of this pattern is adding the finishing touches at the end. With just a few well- placed bits of yarn, you can take your teddy bear to the next level of cuteness.
Adding these facial features is simply a matter of “drawing” with yarn. For each color, cut a long strand, insert somewhere on the head, draw the desired lines, and exit out the same place you entered. Tie ends in a knot and hide the knot inside the head. That’s it!
Use the photos to guide you, or make it your own by experimenting with different placements. If you don’t like what you do, just take it out and try again.

I hope you’ve enjoyed this pattern.
Thank you for your support!
