

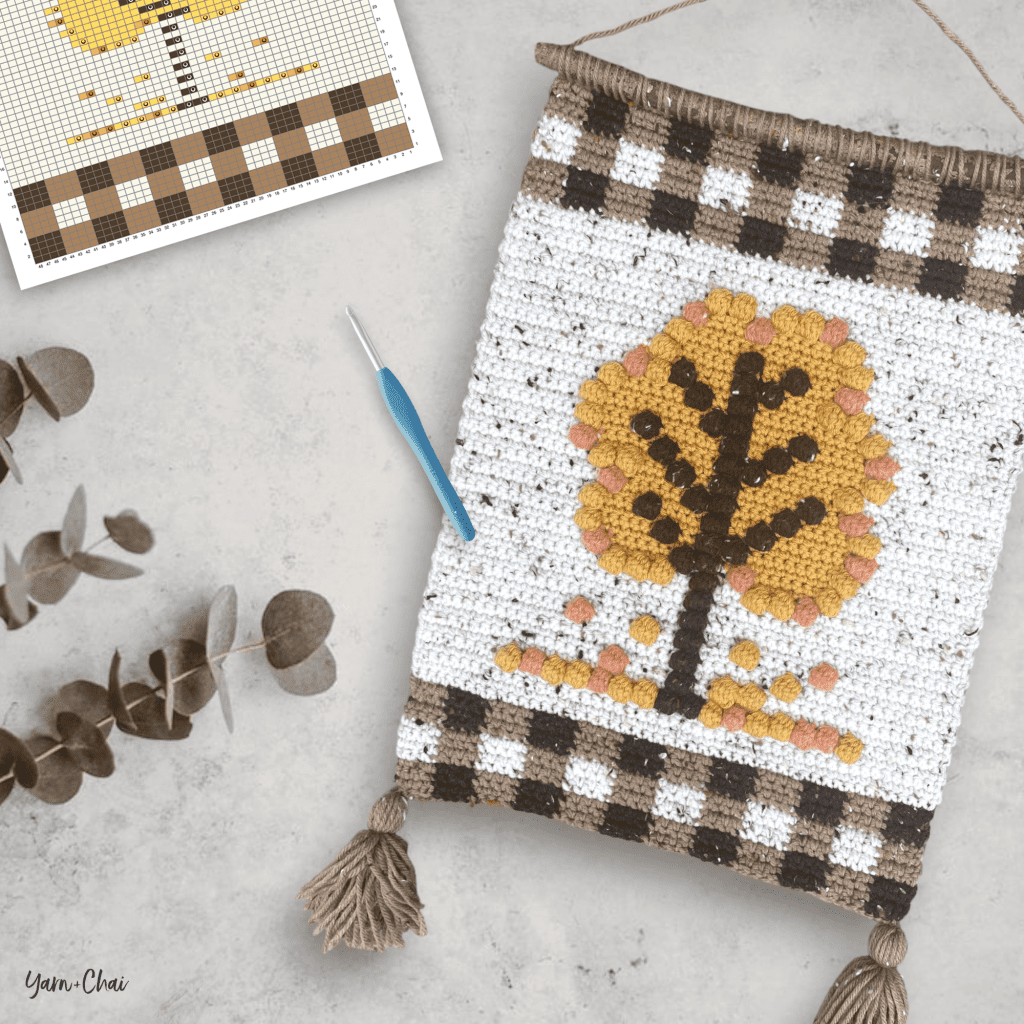
For the fall-lovers out there, here’s a new bobble stitch wall hanging design — a cozy late-autumn tree with falling leaves. Framed at the top and bottom by plaid in shades of brown and ivory, the tree in the center can be changed to represent your favorite fall hues!
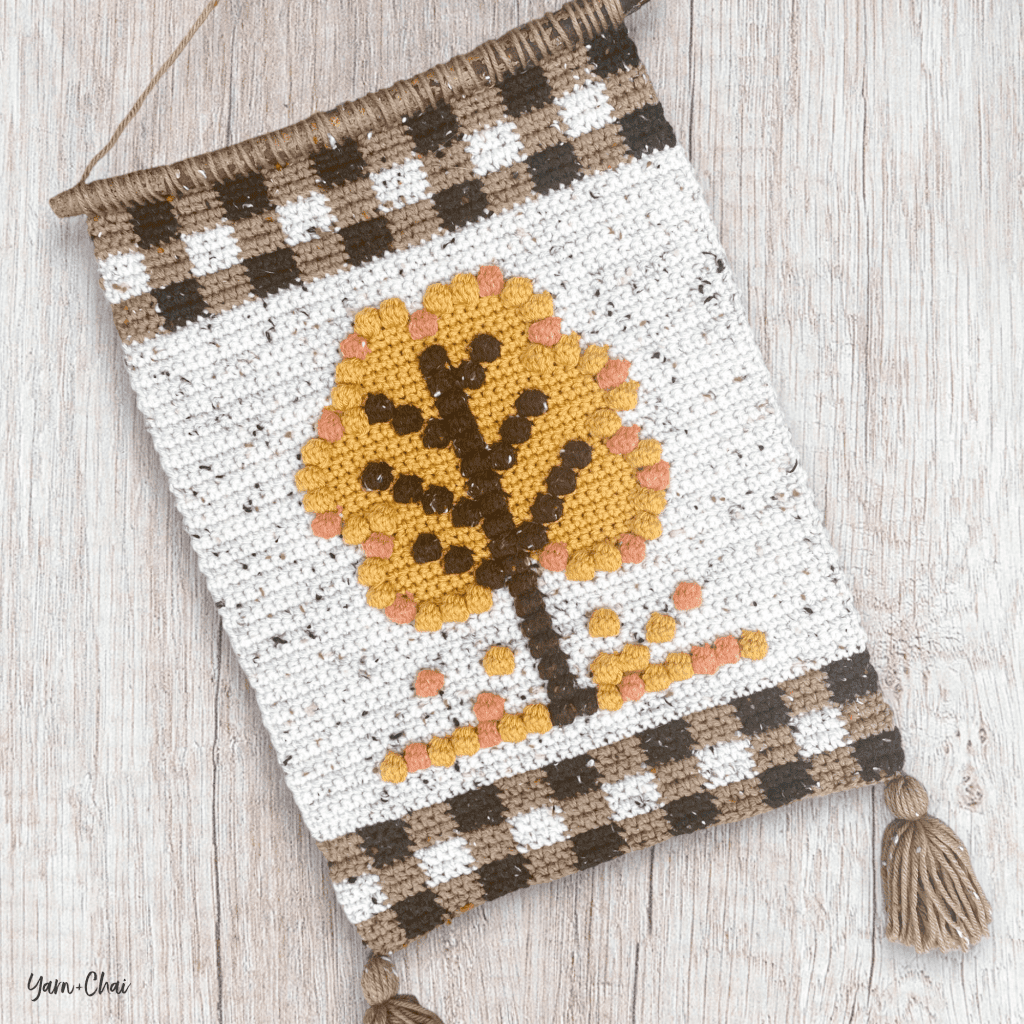
I used a strong stick from my yard for the dowel, but you could use a regular wooden dowel found at most craft stores. And while I embellished mine with tassels, you could do fringe instead. Make it your own!
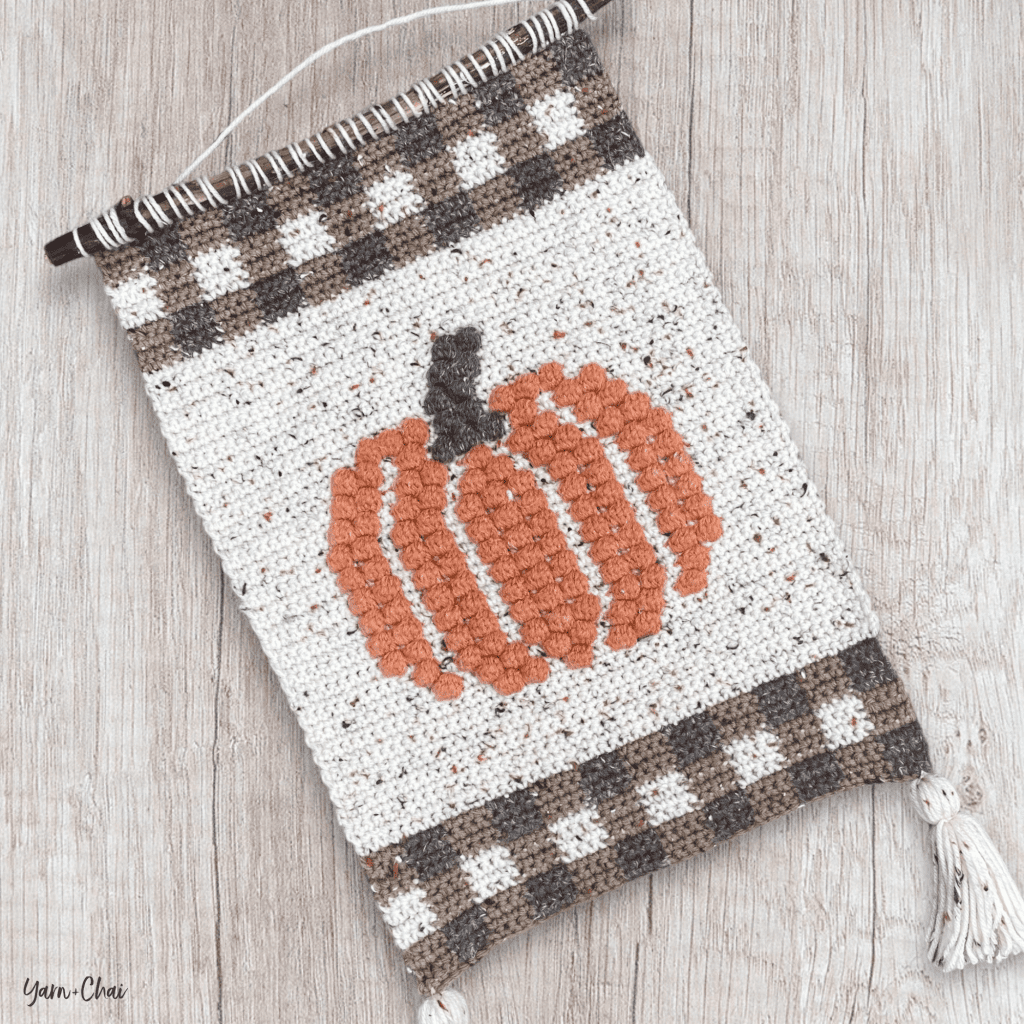
(And if you like this one, check out my previous pattern release — the Autumn Pumpkin Wall Hanging!)
Blog Version vs. PDF Version
I’ll say this up front: While I normally try to create my ad-free PDF versions of my blog patterns as similarly to the blog version itself as I can, in this case, I’ll say this up front: While I normally try to create my ad-free PDF versions of my blog patterns as similarly to the blog version itself as I can, in this case, the PDF version is packed with helpful tips and info that I just couldn’t reasonably fit into the blog post without it getting long and confusing. So with that said…
If you’ve never made a bobble stitch wall hanging before, I recommend you work from the ad-free PDF version of this pattern which is available to All-Access Passholders.
Here’s what you’ll get in the PDF:
- How to follow a color chart
- How to make tassels (photo tutorial)
- How to attach the dowel (photo tutorial)
- Enlarged printable version of the color chart
- No ads
All-Access Passholders get the ad-free version of this and all of my other blog patterns. It’s a pretty sweet deal, if I do say so myself! Learn more about it here.
You can purchase the All-Access Pass, or scroll on to view the pattern right here on the blog.
– – – – – – – – – – – – – –
Autumn Tree Wall Hanging
View on Ravelry
Difficulty: Easy
Crochet Language: American Standard
Finished Size:
17″ tall x 12″ wide
Yarn:
#4 medium weight acrylic yarn recommended. The approximate amounts and colors I used are:
COLOR A (lighter brown): 40 yds
Loops & Threads Impeccable Tweed in “Chocolate”
COLOR B (darker brown): 55 yds
Loops & Threads Impeccable Tweed in “Walnut”
COLOR C (ivory tweed): 120 yds
Loops & Threads Impeccable Tweed in “Aran“
COLOR D (yellow): 60 yds
Yarn Bee Soft & Sleek in “Mustard”
COLOR E (orange tweed): 15 yds
Yarn Bee Rustic Romantic in “Pumpkin Spice”
Hook:
5.0mm (H) hook
Gauge:
16 SC x 18 rows = 4”
You’ll also need: Stick or wooden dowel cut to 14”
Terms and Abbreviations:
ST/STS (stitch/stitches)
CH (chain)
SL ST (slip stitch)
SC (single crochet)
YO (yarn over)
BOBBLE STITCH
1: YO and insert the hook into the stitch
2: YO and pull up a loop
3: YO and pull through the first 2 loops on the hook
4: Repeat 1-3 four more times until you have 6 loops on the hook
5: YO and pull through all 6 loops
Notes about the Bobble Stitch:
(1) Bobble stitches will always be followed by a single crochet (SC) of the same color.
(2) Bobble stitches are worked on the “wrong side” of the pattern, but the bobble will show up on the correct side.
Pattern Notes:
(1) CH1s at the beginning of rows/rounds do not count as stitches.
(2) CHANGING COLORS: In the stitch before a color change, complete the final step of the stitch with the new color. In this pattern, the stitch before a color change will always be a single crochet; so you’ll work the stitch, and when it’s time to pull through the final loops, you’ll drop the first color and pull through with the new color.
(3) READING THE CHART: Odd-numbered rows are worked right-to-left, and even-numbered rows are worked left-to-right. You’ll begin in the bottom-right corner of the chart.
(4) CARRYING YARN: For this project, I carried my yarn through the plaid sections (dropping whichever of the three colors I wasn’t using on that row, and picking it back up again when needed). For the tree area, I carried the background color (the ivory tweed) throughout, but only carried the colors of the tree if I only needed to carry them for a few stitches; otherwise I just fastened off and rejoined when needed.
– – – – – – – – – – – – – – –
INSTRUCTIONS FOR WALL HANGING
With COLOR A, CH49.
Row 1: Beginning in 2nd CH from hook, (4 SC in COLOR A, 4 SC in COLOR B) across. (48)
Rows 2-74: CH1, turn; complete corresponding row on color chart.* (You’ve already completed chart Row 1.) (48)
(Click chart to enlarge.)

Once you’ve completed the chart, fasten off.
Complete the following:
- Relocate all yarn ends to the back of the project and weave in.
- Block project (optional, recommended)
- Add tassels or fringe (optional)
- Attach project to dowel
– – – – – – – – – – – – – – –
That’s it!
I hope you enjoyed this tutorial. If you’re sharing your project on social media, be sure to tag me @yarnandchai.design!
