
As soon as Fall decor started showing up at the craft stores this year, it was clear that buffalo check was going to be a staple of the season. And I’m not complaining… because I love it.

So I was especially pumped to see that the theme is carrying on into Christmas decor, too!
Buffalo check, buffalo plaid… whatever you call it, there’s something downright cozy about this familiar fabric. It takes me back to a little cabin in the Tennessee mountains where our family vacationed a few years back, and I can almost smell the pine trees!
But as “American” as buffalo check feels to, well, Americans, we’re only responsible for the name. The original fabric has much earlier origins in Scotland. Cool, right?

There are a lot of color variations these days, too. You can go with the classic red and black, opt for a modern black and white, or get creative with a different choice altogether. Do whatever suits your personality!

About the Yarn
I used Hobby Lobby’s I Love This Cotton for all three of my potholders. It’s important to use 100% cotton yarn for potholders, and ILTC has an awesome selection of colors. Here are the three color schemes I crocheted, and their colorways:
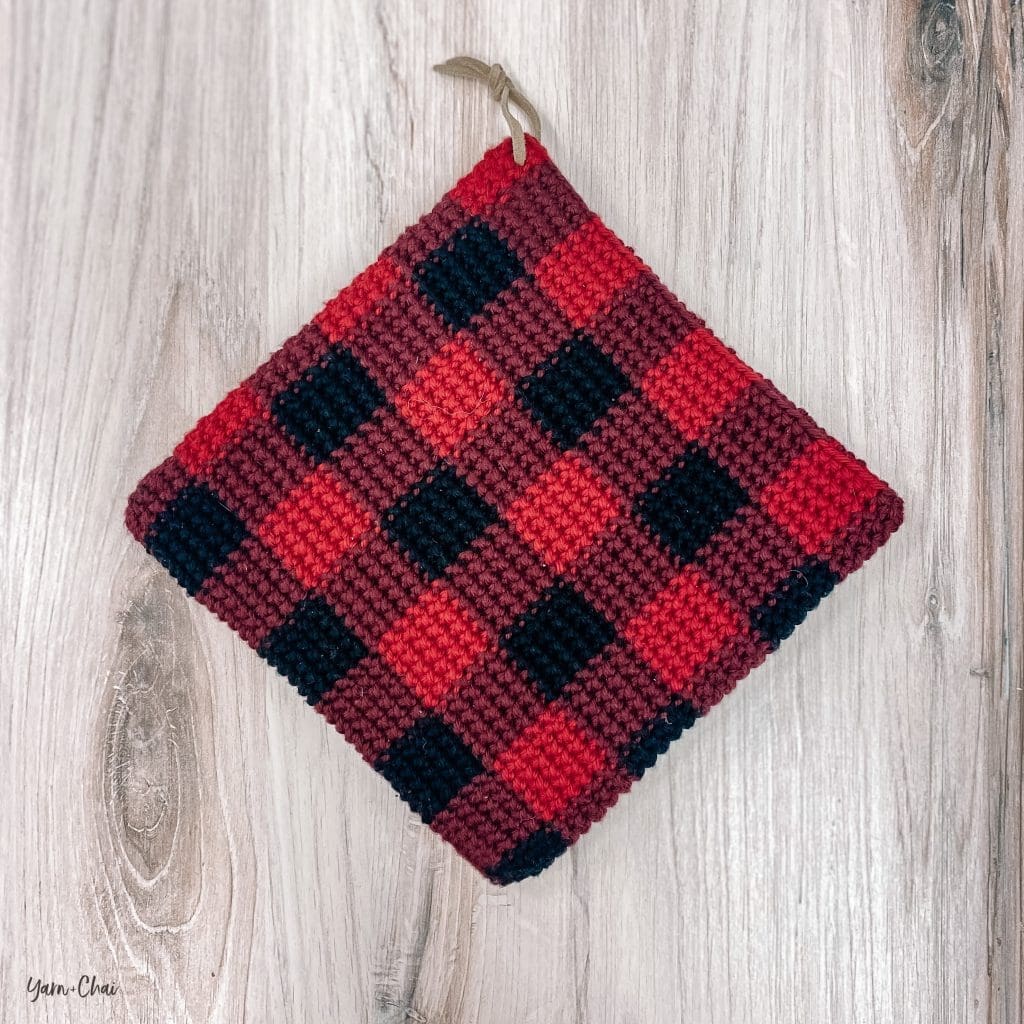
COLOR A: Aubergine
COLOR B: Black
COLOR C: Burnt Sienna
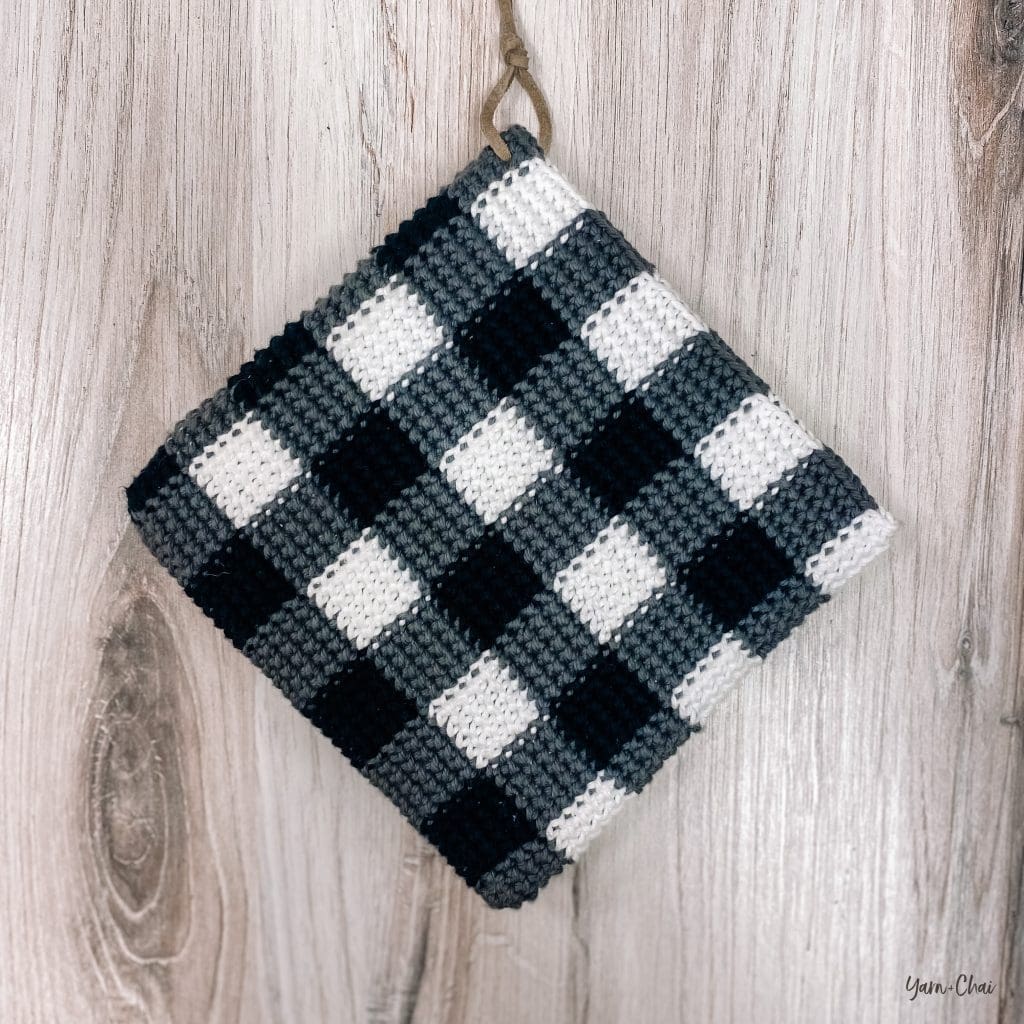
COLOR A: Pewter
COLOR B: Black
COLOR C: White
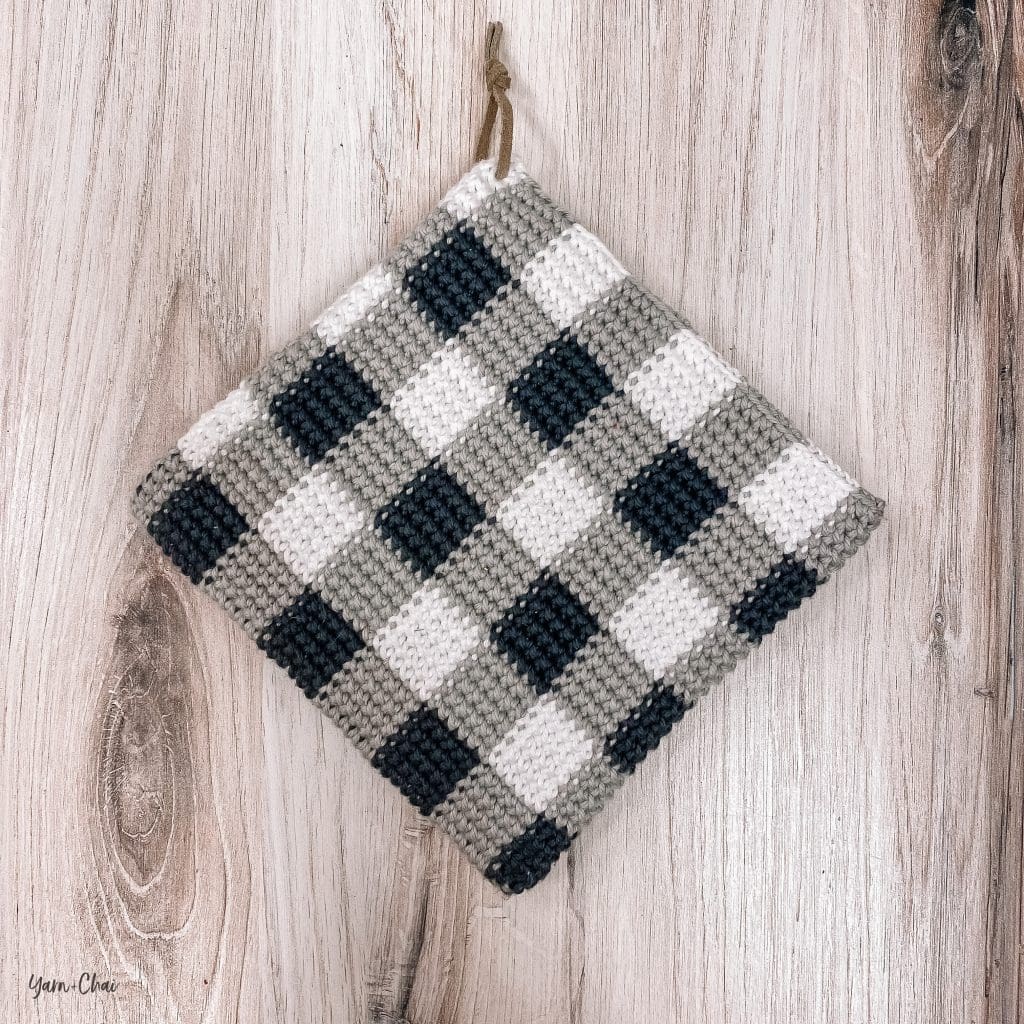
COLOR A: Dove
COLOR B: Pewter
COLOR C: White
I’ve seen some other pretty combos in the craft stores, like green and white, and red and white. If you do decide to stray from the colors I crocheted with, you’ll get best results by starting with white, adding a dark color, and finally choosing a lighter version of the dark color. (True buffalo check fabric is woven and actually only uses 2 colors; the medium color is the result of the dark and light threads crossing paths.)
Free Downloadable Label
Since Buffalo Check Potholders would make a great holiday gift, I’ve included a free downloadable PDF for a wraparound-style label! These wrappers will take your gift presentation up a notch, and would also be great for displaying your potholders as a part of your craft show inventory. Whatever your needs, just click the image to download. (I printed mine on lightly textured, cardboard-colored cardstock to achieve this rustic look.)

Prefer a PDF?
This pattern can be completed using the 100% free version right here on this page. However, many people prefer the convenience of a printable, ad-free PDF.
All-Access Passholders get the ad-free version of this and all of my other blog patterns. It’s a pretty sweet deal, if I do say so myself! Learn more about it here or continuing scrolling for the free version.
BUFFALO CHECK POTHOLDERS
View on Ravelry
Language: American Standard
Difficulty: Intermediate
Finished Size: 7.5″ x 7.5″
Hook: 4.0mm or whichever hook is needed to obtain correct gauge
Gauge: 22 CSC x 17 rows = 4″ square
Yarn: #4 medium weight cotton yarn in three colors:
- COLOR A (midtone): 80 yards
- COLOR B (darkest): 45 yards
- COLOR C (lightest): 45 yards
I used Hobby Lobby’s I Love This Cotton for all three of my Buffalo Check Potholders. Check up in the blog post for the colorways used in each one!
You’ll Also Need: Yarn needle, 10″ length of 3mm leather or suede cord for handle
Terms and Abbreviations:
ST/STS (stitch/stitches)
SL ST (slip stitch)
CH (chain)
CSC (crossed single crochet: Insert hook into stitch. Yarn UNDER, pull through; 2 loops on hook. Yarn over, pull through both loops.)
FLO (front loop only)
JOIN (join with a SL ST to the top of the first ST of the round)
Notes:
(1) CH1s at the beginning of rounds do not count as a stitch in the final stitch count.
(2) This is an intermediate level pattern because it involves a lot of color changes and carrying yarn. I go through the first round very thoroughly with lots of photos, and then basically set you free with a color chart after that. If you can crochet the first round and it’s all making sense to you, you’ll be just fine to complete the pattern!
(3) Pattern is worked in joined, unturned rounds around a base chain and seamed closed at the end, resulting in a sturdy, double-thickness potholder.
INSTRUCTIONS
To begin: With COLOR A, CH43.
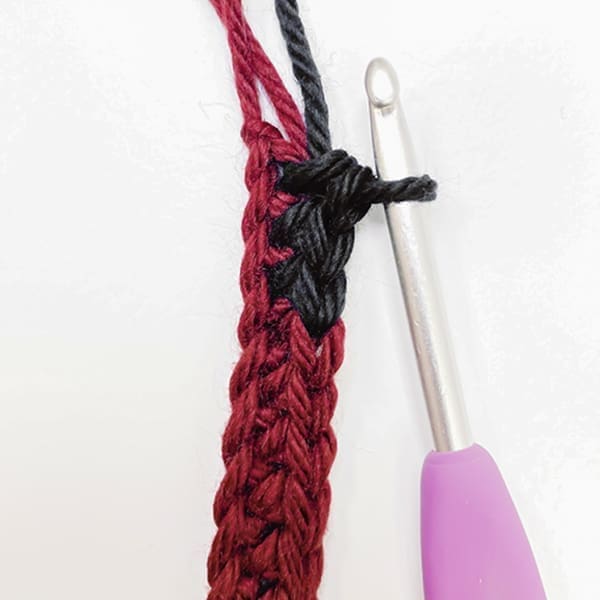
Round 1: CSC in 2nd CH from hook. CSC in next CH. CSC in next CH, but complete the ST with COLOR B (see photo).

With COLOR B, and carrying COLOR A along behind your stitches, CSC in each of the next 5 CHS. CSC in next ST, but complete the ST with COLOR A (see photo).

Carrying whichever color you are not actively using, continue across the chain, following a color pattern of 6 STS per color (excluding the very first set of 3 STS) until you have three empty chains remaining. Complete the final 3 STS with COLOR B (photo).
Next, you’re going to complete the other half of this set of six COLOR B stitches on the other side of the chain. Place your next 3 STS where indicated in the first image (shown completed in the second image), and don’t forget to complete the final ST with COLOR A to prepare for the color change:

Continue to CSC into the remaining chains, following the 6-stitches-per-color pattern, until only 3 STS remain; complete those STS in COLOR A. (Notice how the first 3 STS and the last 3 STS of the round make a full set of 6 for COLOR A.)
JOIN to the top of the very first ST of the round (indicated in the first photo and shown completed in the second photo). (42)

Rounds 2-30: CH1, do not turn. In FLO, CSC in each ST around, following the color chart below. Join. (42)

A few tips for following the color chart:
- To save space, the chart has been condensed using a repeated section, just like a written pattern would. Read it from right-to-left (or left-to-right, if you’re a leftie), and be sure to complete the repeated section the indicated number of times before finishing with your final 3 stitches (or final 9 if you’re a leftie).
- The pattern is worked from the bottom up, so start at the bottom of the chart.
- Don’t forget, you’ve already completed Round 1.
- Remember, when changing colors, always complete the last ST of the previous color by drawing the new color through the two loops on the hook.
- When you get to Round 6 and add COLOR C, you can drop COLOR B until you need it again (you don’t need to carry it along). This applies to whenever you get to a round where the blocks of color are different from the previous round.
Fasten off, leaving a long tail for seaming. Weave in all other ends.
Seaming
Hold top edges of potholder together so that the color blocks line up with each other, and seam the edges together in your preferred method. Here’s how I seamed mine:

Fasten off and weave in your final end.
Handle
Cut a 10″ length of leather or suede cord (mine was 3mm thick) and use a yarn needle to run it through the potholder near the corner. Tie a knot at the top and trim as necessary.
Done! If you’re sharing on social media, be sure to tag me @yarnandchai.design so I can see your beautiful work!
(And don’t forget to download these FREE wrapper labels!)


