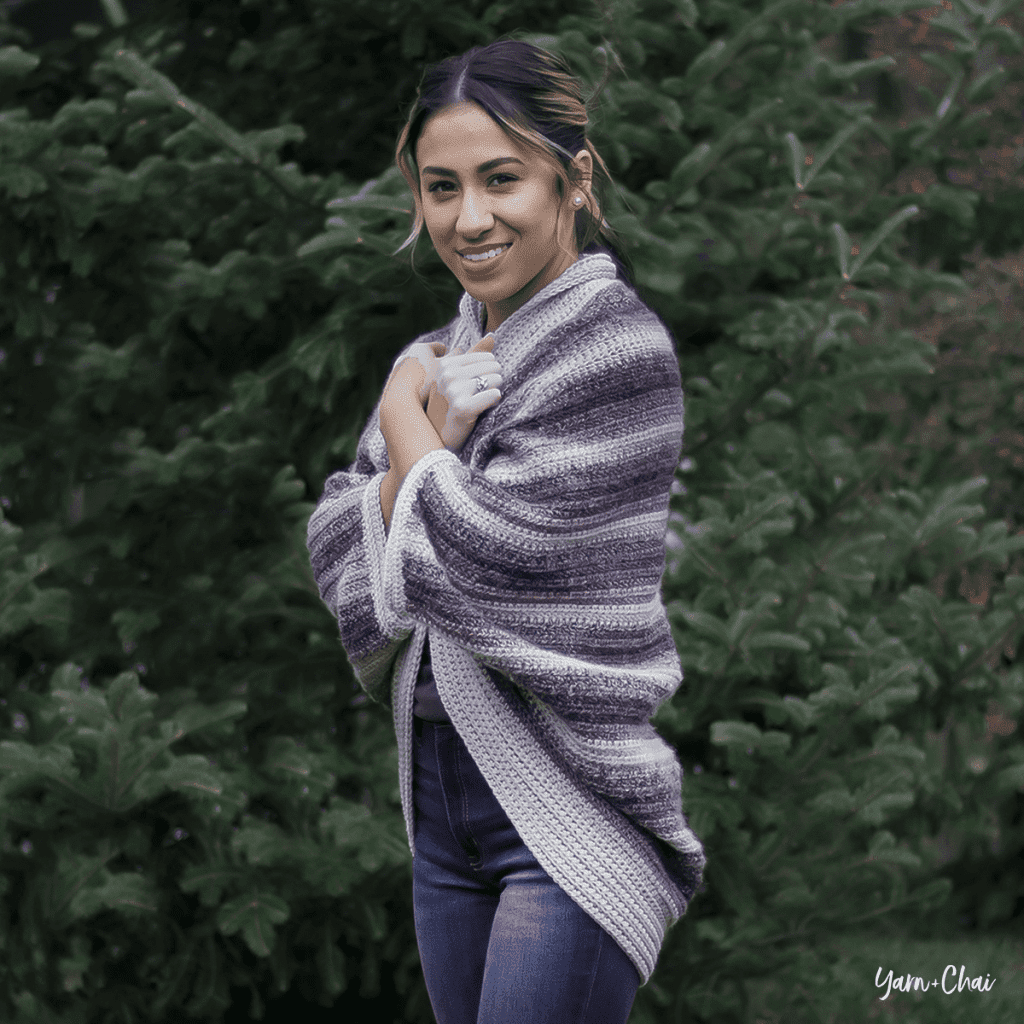
If you’re in the mood for an easy sweater pattern, you really can’t beat the simple construction of a cocoon cardigan sweater.
It’s hard to believe that a basic rectangle can produce such a cozy, relaxed shape, isn’t it? But it’s true! So whether you’re newer to crochet, or you just want a mindless project that will add something beautiful to your wardrobe, give this one a try.
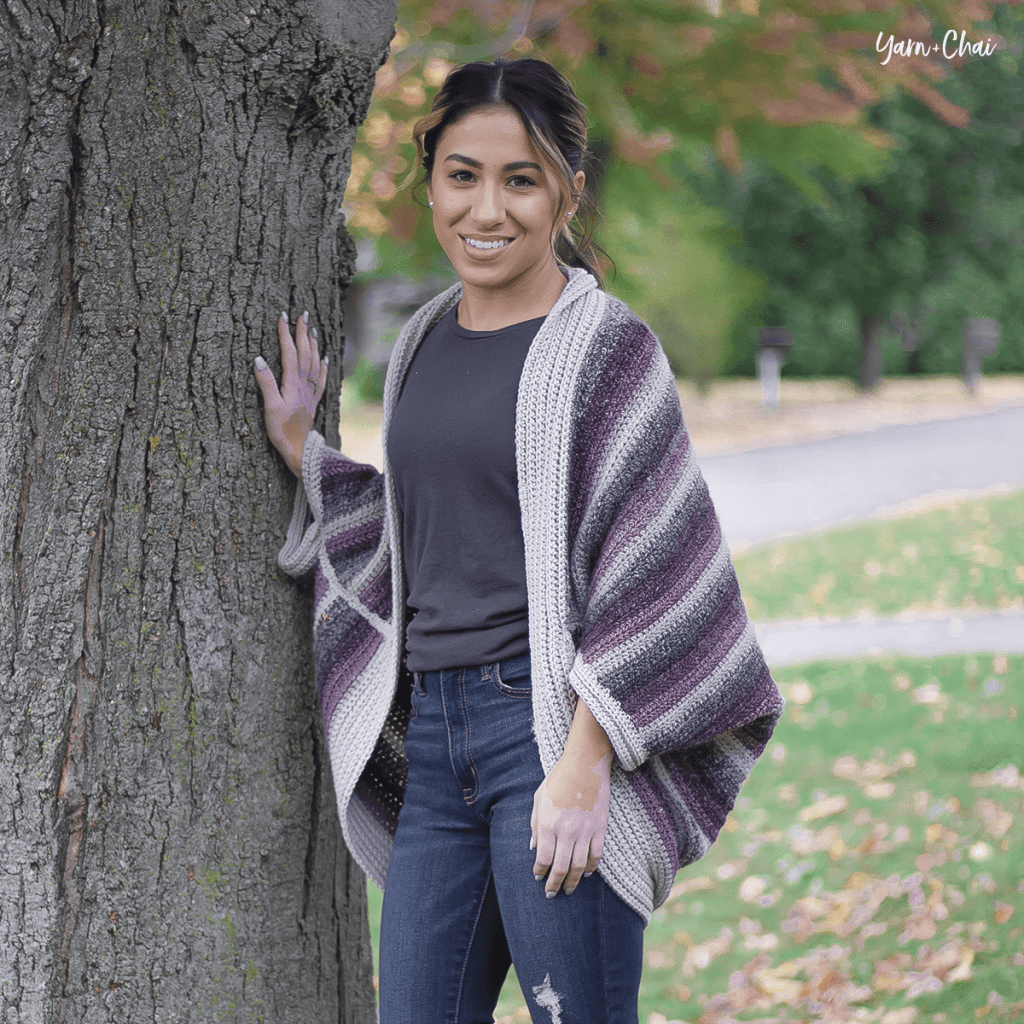
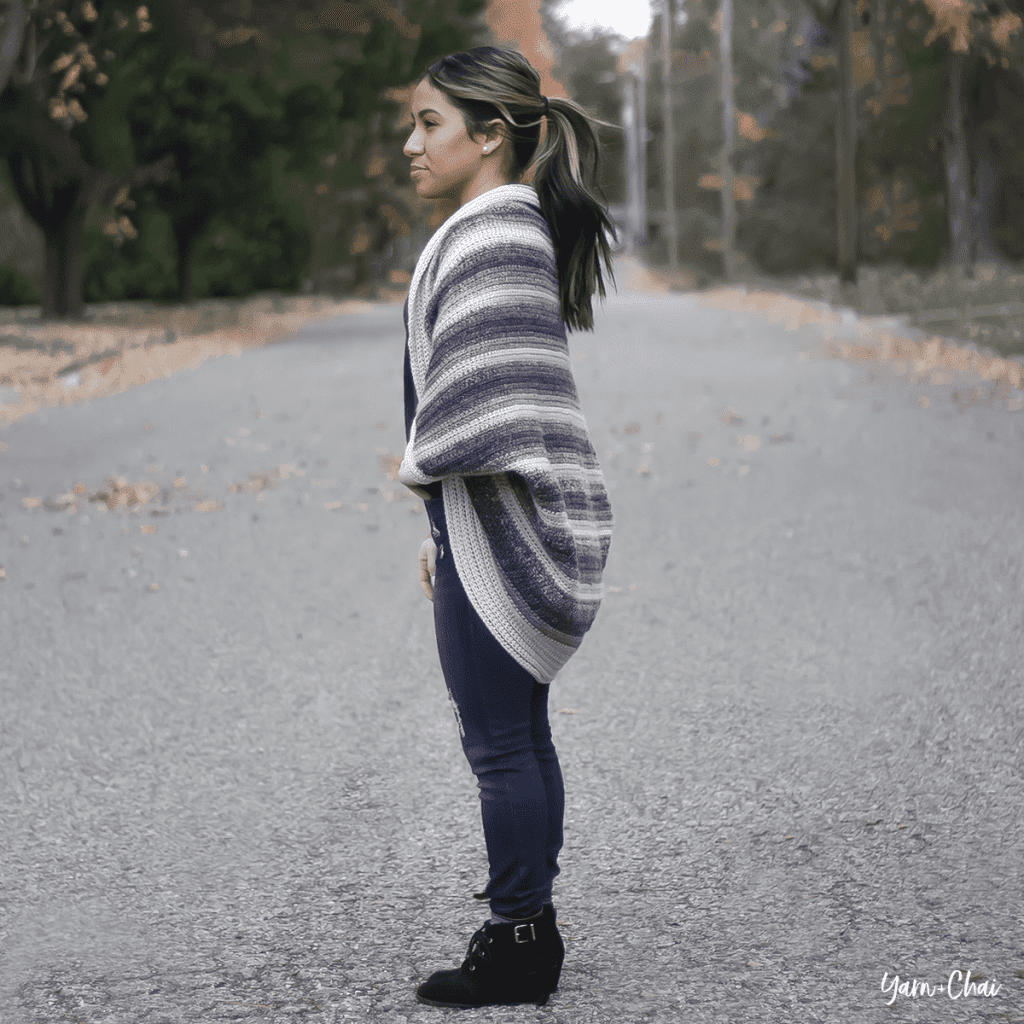
Doesn’t it look like something you’d want to snuggle in, along with a good book, in front of your fireplace?
For reference, my model is wearing the XS/S/M size with a petite modification. The petite modification, which is noted within the pattern, removes 4″ from the overall length. That’s helpful when you’re only 4’9!
About the Yarn
For the body of this pattern, I used Premier Yarns Coffee Shop in the color “Sandstone”. Coffee Shop is a #3 lightweight, acrylic/wool blend with very slow, gradual color changes.
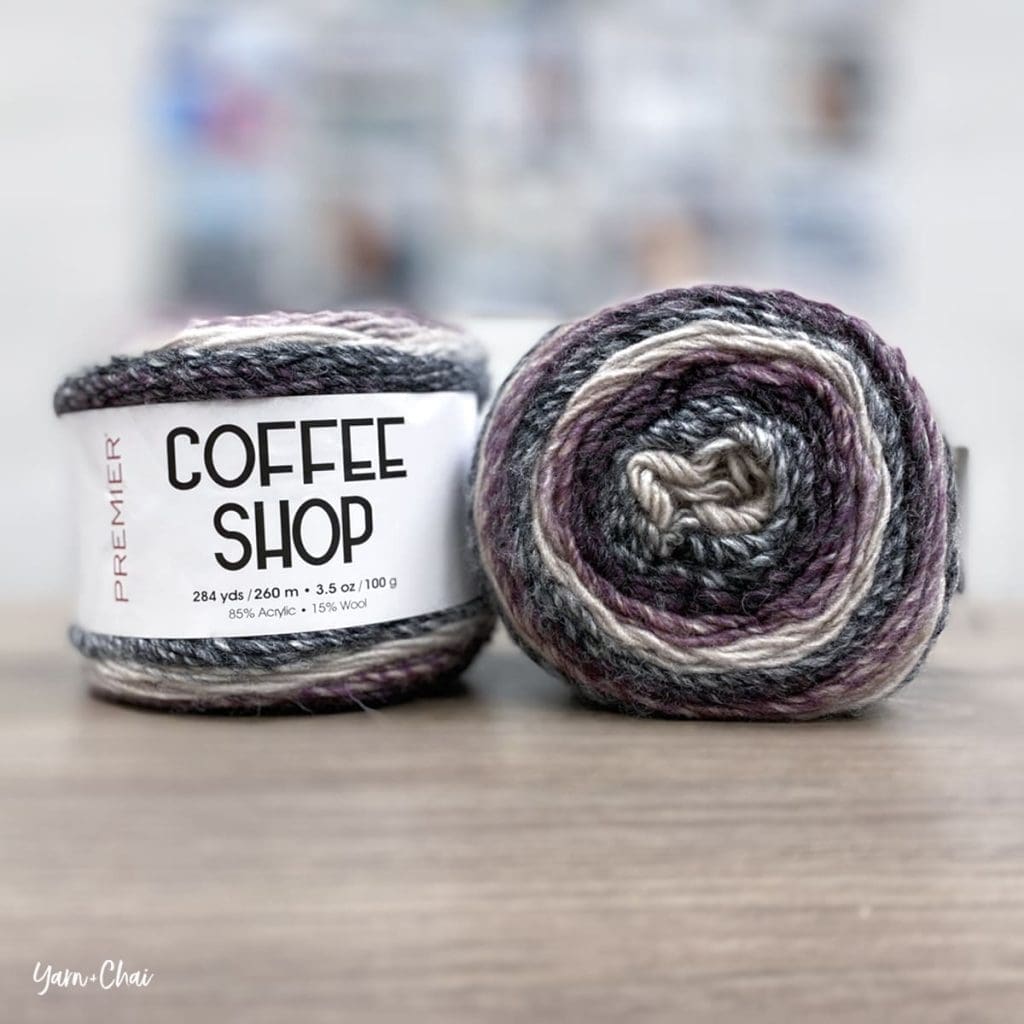
I don’t normally choose multi-colored yarns; I’m more of a solids girl. But as I was shopping the Premier site for a different yarn, this one caught my eye and I threw some into my shopping cart on a whim. I’m glad that I did! It really is gorgeous. It’s very wearable, and very, very lightweight… which is always a nice thing when crocheting a top.
Of course, you don’t have to use a multicolored yarn. This simple pattern will look sophisticated in a solid hue, too.
Yarn Substitutes
I also did a little searching online to find some possible substitutions for Premier Coffee Shop. (Sometimes yarn availability is out of our control, and I get questions about substitutions on every pattern I publish!) Please note that I haven’t tested these; but they are all multi-colored #3 weight yarns that I could see myself trying with the Fireside Cocoon Cardigan.
- Premier Bloom | Premier Yarns
- Mandala / Mandala Sparkle / Mandala Baby | Lion Brand
- Wool-Ease DK Cake | Lion Brand
- Ice Cream | Lion Brand
- Urban Chic | Yarn Bee
- Baby Bee Sweet Delight Prints | Yarn Bee
- Skinny Cakes | Caron
- Joy DK | Loops & Threads
– – – – – – – – – – – – – – –
Prefer a PDF?
This pattern can be completed using the 100% free version right here on this page. However, many people prefer the convenience of a printable, ad-free PDF.
All-Access Passholders get the ad-free version of this and all of my other blog patterns. It’s a pretty sweet deal, if I do say so myself! Learn more about it here or continuing scrolling for the free version.
– – – – – – – – – – – – – – –
Fireside Cocoon Cardigan
View on Ravelry
Language
American Standard
Difficulty
Easy
Finished Size
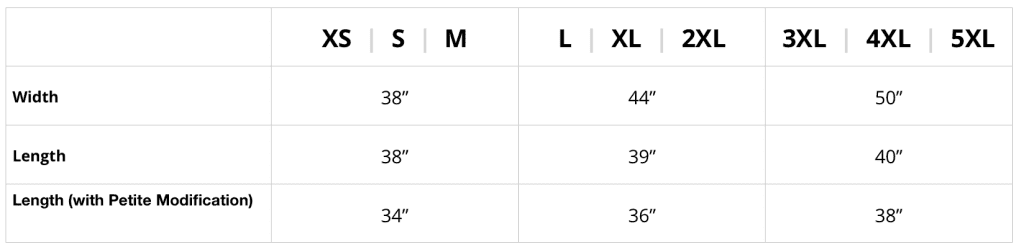
Pattern is written for sizes XS/S/M, L/XL/2XL, and 3XL/4XL/5XL (see chart for specific measurements). The cocoon design is a very oversized style with plenty of positive ease, so you should be just fine choosing your regular size. If you are petite in height, consider following the in-pattern instructions for the Petite Modification. It removes 4″ from the overall length.
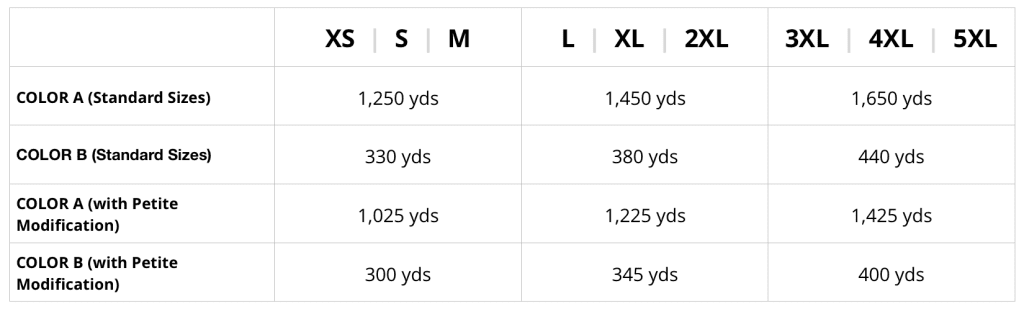
Yarn
COLOR A (body): #3 DK yarn – I used Premier Yarns Coffee Shop in “Sandstone.”
COLOR B (collar/edging): #3 DK yarn – I used Yarn Bee Sweet Delight in “Cloudy.”
Hook
5.0mm (H), or whichever hook you need to get an accurate gauge check.
Gauge
14 HDC x 11 rows = 4″
Terms and Abbreviations
ST/STS (stitch/stitches)
SL ST (slip stitch)
SK (skip)
CH (chain)
SC (single crochet)
HDC (half double crochet)
BLO (back loop only)
Notes
(1) Measurements can be easily adjusted. For width, chain any number, and for height, add or subtract any number of rows.
(2) Pattern is written for sizes XS/S/M, L/XL/2XL, and 3XL/4XL/5XL. Row numbers and stitch counts are written as follows: XS/S/M (L/XL/2XL, 3XL/4XL/5XL). If only one number is given, it applies to all sizes.
(3) CH1 at the beginning of rows does not count as a stitch.
(4) If using a self-striping yarn, be sure to begin on the same color you are leaving off with on the previous skein.
– – – – – – – – – – – – – – –
Instructions
– – – – – – – – – – – –
BODY
– – – – – – – – – – – –
To Begin: With COLOR A, CH135 (155, 175).
Row 1: HDC in 2nd CH from hook and in each remaining CH.
Stitch count: 134 (154, 174)
*Rows 2-91 (2-94, 2-96), or until rectangle is about 33″ (34″, 35″) tall: CH1, turn. HDC in each ST across.
Stitch count: 134 (154, 174)
*For Petite Modification (removes 4″ from length), follow these instructions instead:
Rows 2-77 (2-80, 2-82), or until rectangle is about 28″ (29″, 30″) tall: CH1, turn. HDC in each ST across.
Stitch count: 134 (154, 174)
Fasten off and weave in ends.
– – – – – – – – – – – –
EDGING THE RECTANGLE
– – – – – – – – – – – –
Edging: Join COLOR B somewhere on the edge of the rectangle and CH1. SC evenly* around the rectangle, putting 3SC in each corner. Join with a SL ST to the top of the first SC. (*When you SC along the row ends, which don’t have top loops, you can start by SCing once in each row end. If it starts to pull or pucker, try crocheting 3SC for every 2 rows, or try a different sized hook. Nice-laying fabric is more important than stitch count here; just be sure to do the same technique on both edges.)
Fasten off and weave in ends.
– – – – – – – – – – – –
ASSEMBLING
– – – – – – – – – – – –
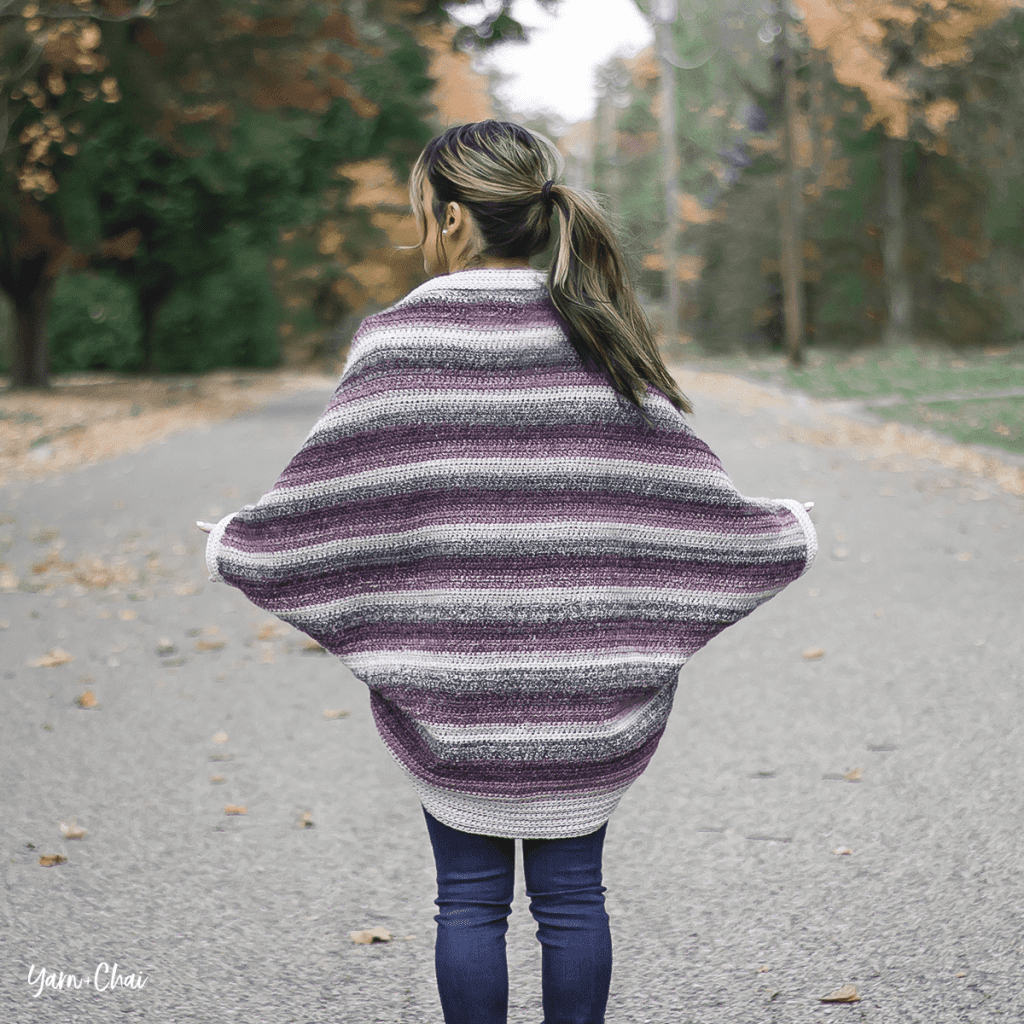
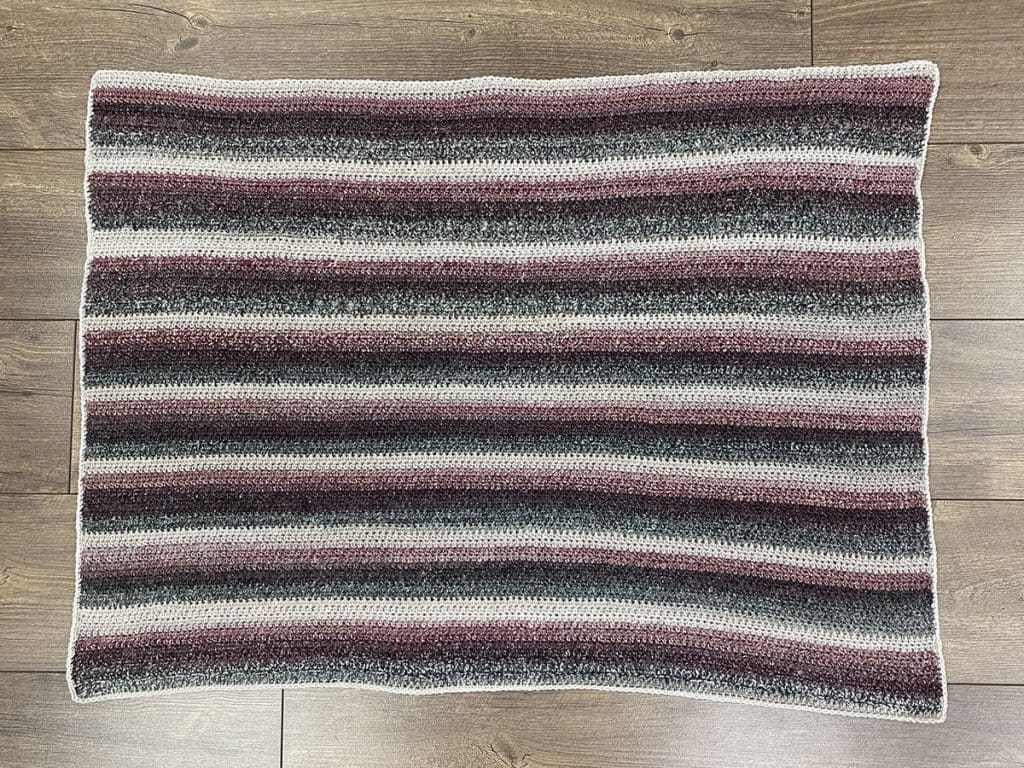
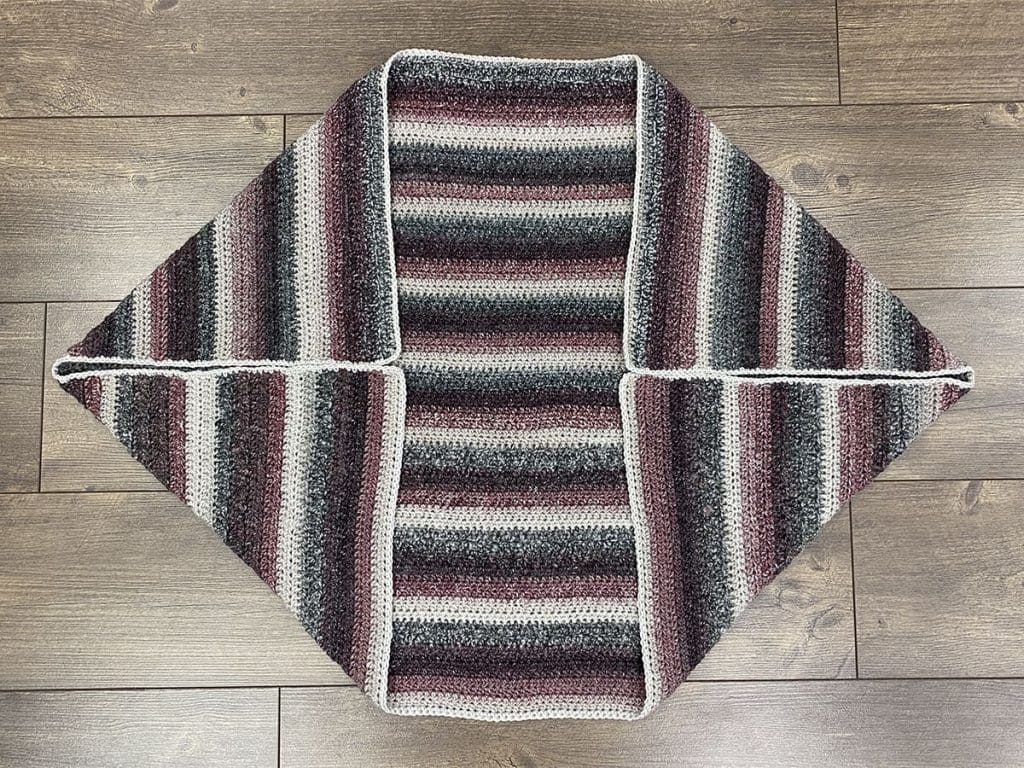
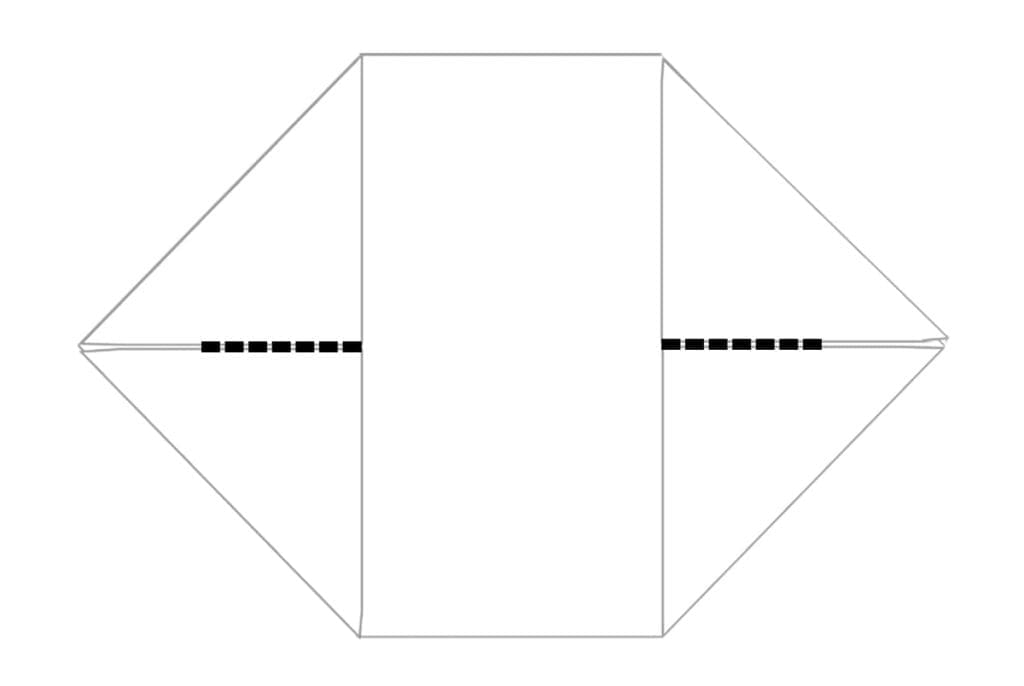
Lay rectangle out flat. (If using a self-striping yarn, lay stripes horizontally.) Bring outside corners in until the top left aligns with the bottom left, and the top right aligns with the bottom right:
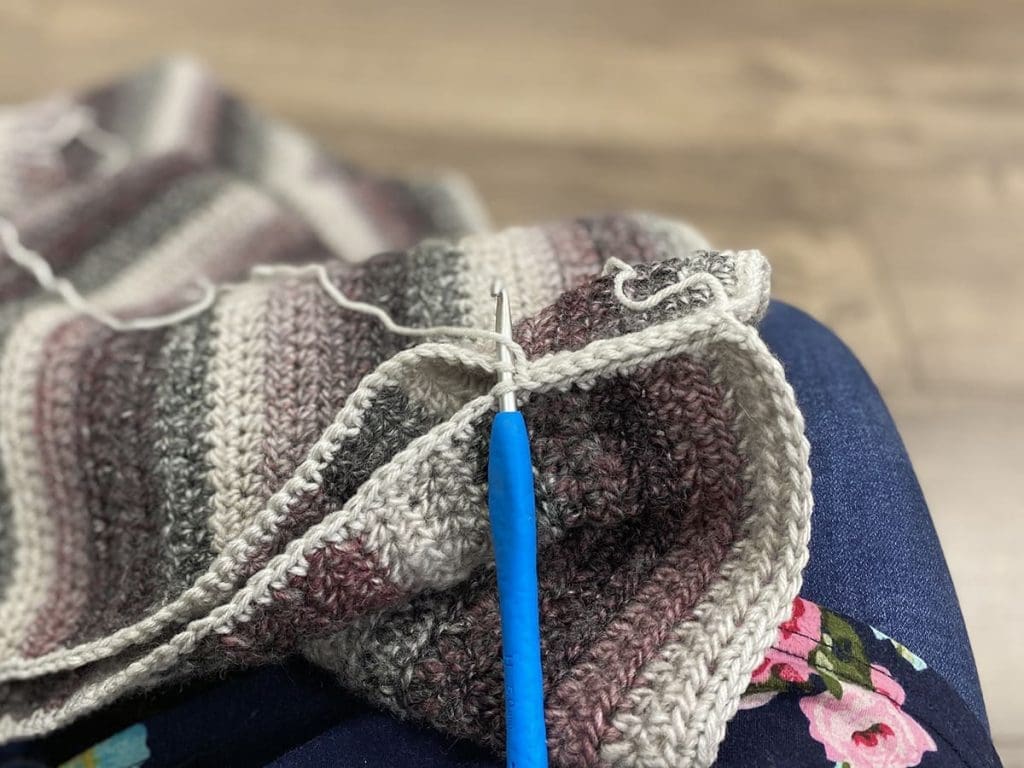
Join COLOR B to the inner edge where the two left corners meet and CH1. Hold corners with loops together (so you should have a row of 4 total top loops) and SL ST through all 4 loops, about halfway to the end. Fasten off, weave in ends, and repeat on the right side.
– – – – – – – – – – – –
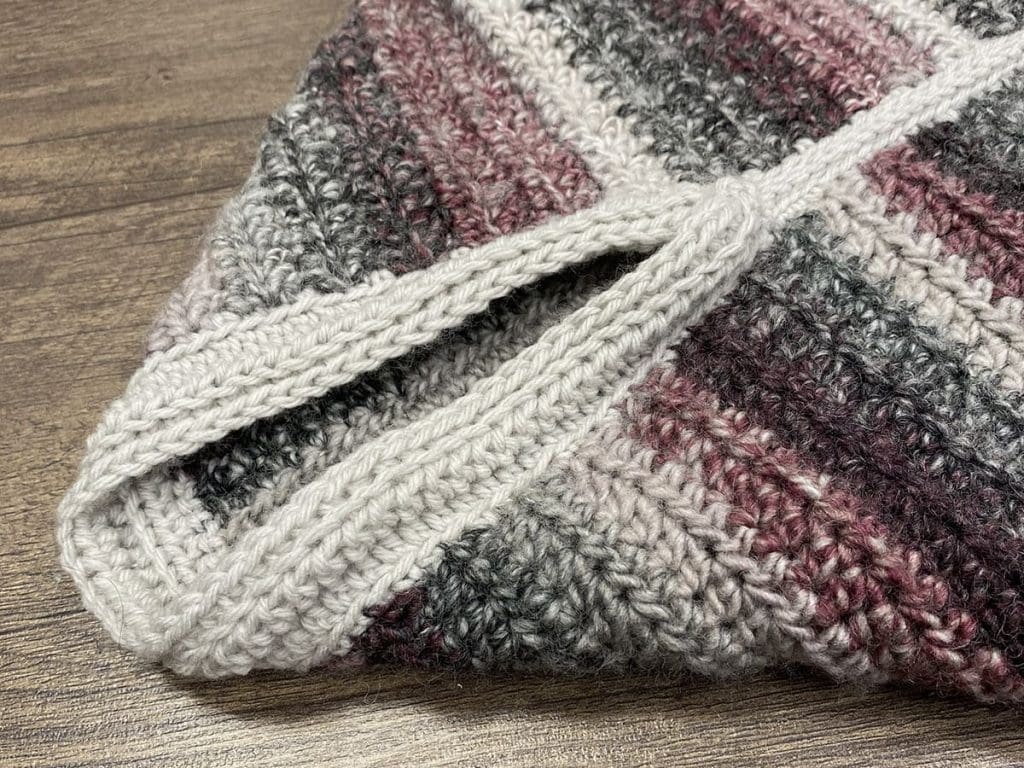
FINISHING THE ARMS
– – – – – – – – – – – –
To begin: Join COLOR B to inner corner of armhole, where seam ends; CH1.
Round 1: In BLO, HDC evenly around armhole. Join with a SL ST to the top of the first HDC (here and throughout).
Rounds 2-3 (or as many rounds as you want): CH1, turn. In BLO, HDC evenly around. Join.
Fasten off and weave in ends. Repeat for the other armhole.
– – – – – – – – – – – –
COLLAR
– – – – – – – – – – – –
To begin: Join COLOR B to top center of garment; CH1.
Round 1: HDC in BLO evenly around the entire perimeter of the collar area. Join.
Rounds 2-10 (or as many rounds as you want): CH1, turn. In BLO, HDC evenly around. Join.
Fasten off and weave in ends.
Don’t forget to share your finished project!
Share it on FB, in our FB group, in other groups, on Instagram… wherever you want to show if off! Be sure to tag me @yarnandchai.design so I can see it, too!