

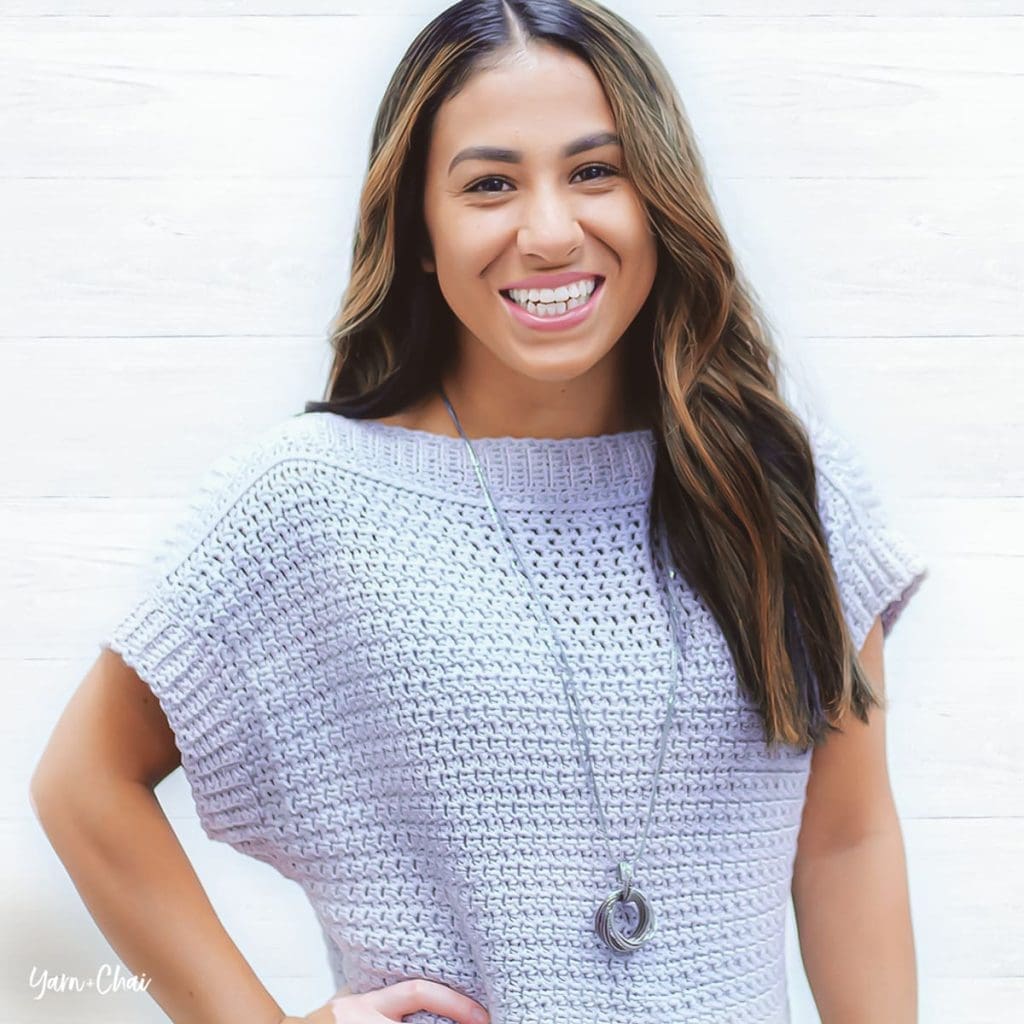
Ever since I designed my very first garment pattern last winter, I’ve been itching to get started on a new wearable. I love how Marsali turned out; she’s soft, simple, and feminine, and she’ll accompany you through at least 3 seasons:
- 🍂 In fall, pair her with jeans or leggings and tall boots
- ❄️ In winter, put a long-sleeved white tee underneath for extra coziness
- 🌷 In spring, layer her over a simple tank top
About the Yarn
I worked up the sample in Lion Brand Coboo (affiliate link), which is a #3 weight blend: 51% cotton, and 49% rayon from bamboo. When I was newer to crochet I avoided cotton because my first experience with it was the kitchen cottons that are sold at almost all craft stores, and I couldn’t fathom how anyone would make garments with it. I had no idea the huge range of cotton that was actually available in the yarn world… I’m so glad I do now!

Coboo was awesome to work with. It can be a little splitty, but that doesn’t bother me (and it actually helps the drape of the finished pattern). And it’s so soft! I am really picky about what yarn touches my skin, and I would love to wrap myself in a big soft blanket of Coboo.
Note: If you’re someone who has trouble with “splitty” yarns, I recommend switching up your hook. My Clover Amour works well with this yarn, and although I had to be a little more conscious of grabbing all of the strands, I didn’t find Coboo unmanageable in the least. And the finished fabric is worth it. Look at that drape!

About to do some yarn shopping? Click here to use my affiliate link for Lion Brand Coboo. (When you purchase from my affiliate links at no extra cost to you, I get a little commission… which helps me to continue putting out free patterns!)
– – – – – – – – – – – – – – –
Prefer a PDF?
This pattern can be completed using the 100% free version right here on this page. However, many people prefer the convenience of a printable, ad-free PDF.
All-Access Passholders get the ad-free version of this and all of my other blog patterns. It’s a pretty sweet deal, if I do say so myself! Learn more about it here or continuing scrolling for the free version.
– – – – – – – – – – – – – – –
Marsali Summer Top
View on Ravelry
Difficulty: Easy
Finished Size: Pattern is written for sizes XS – 5XL (see chart for specific measurements). Top has an oversized fit, with 10-12″ positive ease.

Yarn: I used Coboo from Lion Brand (affiliate link), a super soft #3 DK weight cotton/rayon blend, in the color “Silver”. The table below will tell you how much yarn you will need for your size. Please note that the number of skeins required assumes an accurate gauge check and is specific to Lion Brand Coboo; if you use a different yarn, you’ll need to go by yardage when deciding how much to purchase.

Hook(s): 4.5mm, or whichever hook you need to get an accurate gauge check. For the sleeves, you will also need a hook that is .5mm larger (I used a 5.0mm).
Gauge: 17 STS x 16 rows = 4″ square (done in the SC+HDC stitch).
::: How to Check Your Gauge For the Marsali Top :::
With 4.5mm hook and chosen yarn, follow this pattern:
To begin: CH23.
Row 1: HDC in 2nd CH from hook. (SK next CH, SC+HDC in next CH) 10 times. SC in final CH. (22)
Rows 2-20: CH1, turn. HDC in first ST. (SK next ST, SC+HDC in next ST) 10 times. SC in final ST. (22)
Fasten off.
Lay your gauge fabric on a flat surface and measure the width of 17 stitches, as well as the height of 16 rows. If each come to 4″, you are good to go. If less than 4″, use a larger hook and try again; if more than 4″, use a smaller hook. 
If you can get one measurement correct but not the other, go with the hook size that gets you the correct number of stitches; you can easily adjust the height of the pattern by adding or removing rows.
Terms and Abbreviations:
ST/STS (stitch/stitches)
SL ST (slip stitch)
SK (skip)
CH (chain)
SC (single crochet)
HDC (half double crochet)
SC+HDC (do a full SC and full HDC in the same stitch)
BLO (back loop only)
Notes:
(1) This pattern is written in American Standard Terms.
(2) Measurements can be easily adjusted. For width, simply keep an even-numbered stitch count in your rows, and for height, add or subtract an even number of rows of the SC+HDC stitch in the body of the pattern. Just be sure that whatever you do for the front panel, you do for the back panel as well.
(3) Pattern is written for sizes XS-5XL, with counts for sizes S-5XL written in parentheses. Example: XS (S, M, L, XL, 2XL, 3XL, 4XL, 5XL). If only one number is given, it applies to all sizes.
(4) “Right” side of fabric is the side where the braid at the top and bottom of the pattern is visible.
(5) Pattern is worked from the bottom up.
– – – – – – – – – – – – – – –
Instructions
– – – – – – – – – – – – – – – – – –
PANELS (MAKE 2)
– – – – – – – – – – – – – – – – – –
The front and back panels, which are identical, consist of 3 parts: the bottom ribbing, the body, and the top ribbing. These 3 parts are worked as one piece, so don’t fasten off until instructed.
– – –
Part 1: Bottom Ribbing
The bottom of Marsali is a classic ribbed edge.
To Begin: With 4.5mm hook, CH9.
Row 1: SC in 2nd CH from hook and in each remaining CH. (8)
Rows 2-86 (94, 102, 110, 120, 128, 136, 144, 154): CH1, turn. SC in first ST. SC in BLO of each of the next 6 STS. SC in final ST. (8)
– – –
Part 2: Body
Body, Row 1: CH1, do not turn. Working down the long edge of the ribbing, HDC in each row end (each peak and each valley). (86 [94, 102, 110, 120, 128, 136, 144, 154])
Row 2: CH1, turn. SC in first ST. SC in 3rd loop of each of the next 84 (92, 100, 108, 118, 126, 134, 142, 152) STS. SC in final ST. (86 [94, 102, 110, 120, 128, 136, 144, 154])
Rows 3-74 (74, 74, 78, 78, 78, 82, 82, 82): CH1, turn. HDC in first ST. (SK next ST, SC+HDC in next ST) across, until 1 ST remains. SC in final ST. (86 [94, 102, 110, 120, 128, 136, 144, 154])
Row 75 (75, 75, 79, 79, 79, 83, 83, 83): CH1, turn. HDC in each ST across. (86 [94, 102, 110, 120, 128, 136, 144, 154])
Row 76 (76, 76, 80, 80, 80, 84, 84, 84): CH1, turn. SC in first ST. SC in 3rd loop of each of the next 84 (92, 100, 108, 118, 126, 134, 142, 152) STS. SC in final ST. (86 [94, 102, 110, 120, 128, 136, 144, 154])
– – –
Part 3: Top Ribbing
In this section, we will be creating the top ribbing by making vertical ribs and attaching them with slip stitches to the last row of the body as we go. If you feel you need a little more in-depth help with this part, here’s a tutorial video that is specifically about this technique.
Top Ribbing, Row 1: CH9, turn. SC in 2nd chain from hook and in each of the remaining 7 chains. SL ST into the first SC from final row of Part 2, the stitch on which your CH9 was built. SL ST into the next SC from the final row of Part 2. (8, plus the two slip stitches along the final row of Part 2)
The section we just created, built on the CH9, will hereafter be referred to as the “ribbing.”
Row 2: CH1, turn. Skipping over the 2 SL STS you put in the final row of Part 2, SC in first ST of the ribbing. SC in BLO of each of the next 6 STS. SC in both loops of the last ST. (8)
Row 3: CH1, turn. SC in 1st ST. SC in BLO of each of the next 6 STS. SC in both loops of the last ST. SL ST in each of the next 2 unworked STS along the final row of Part 2. (8, plus the 2 SL STS along the final row of Part 2)
Row 4: CH1, turn. Skipping over the 2 SL STS you put in the final row of Part 2, SC in first ST of the ribbing. SC in BLO of each of the next 6 STS. SC in both loops of the last ST. (8)
Rows 5-86 (94, 102, 110, 120, 128, 136, 144, 154): Repeat Rows 3-4 all the way across the final row of Part 2. (8)
Fasten off and weave in all ends. Block both panels if desired.
– – – – – – – – – – – – – – –
SEAMING THE SIDES
– – – – – – – – – – – – – – –
Lay panels on top of each other on a flat surface, wrong sides together, right sides facing out. Using the recommendations for your size in the chart below, measure the suggested number of inches down both sides and mark with a stitch marker. Put your stitch marker through both panels and be sure to mark the same row on both sides, and both panels.

Starting at the bottom, just above where the ribbing ends and working upward, seam edges of one side using the Mattress Stitch (being careful to keep the rows lined up as you go). Seam until you reach your stitch marker, then fasten off and weave in ends on the inside of the top. Do the same for the other side.
(A note on seaming: Because we are seaming the sides of the work, there are no top loops to work into. We just have to do our best; and the more you do, the more you’ll become familiar with the pattern of the yarn along the edges, helping you to stay consistent. Just keep those rows lined up. You’ll be ok! If you need a little help on Mattress Stitch technique, here’s a tutorial video from fellow designer Edie Eckman.)

– – – – – – – – – – – – – – –
ADDING RIBBING TO THE ARM HOLES
– – – – – – – – – – – – – – –
Important: Follow all arm hole instructions with a hook that is .5mm larger than you used for the body. As you SC around the first arm hole, if your fabric starts to pucker, try going another .5mm larger still.
Decide which side is going to be the front panel and which will be the back panel (right now they are identical). Mark the front panel with a stitch marker for easy reference.
RIGHT SIDE ARM HOLE
Remove the stitch marker on the right arm hole (as if you were wearing it) and join your yarn at that spot on the front panel. SC up the front edge of the arm hole, putting one SC in each row end. (Tip: the little “squares” in the fabric are each comprised of two rows each.)

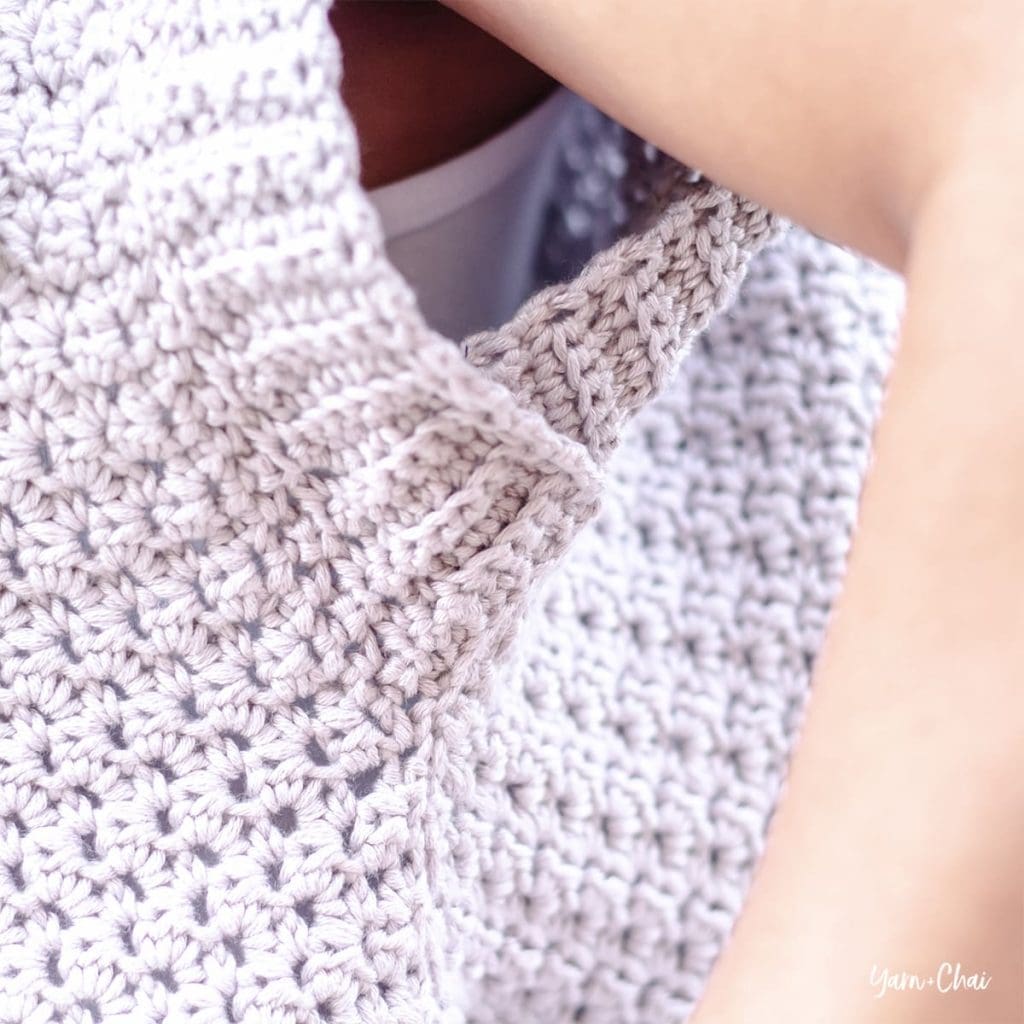
When you get to the ribbing at the top, lay the ribbing from the front panel over the ribbing from the back panel…

…and SC through both panels along the edge of the ribbing.

Continue to SC down the back edge of the arm hole until you reach the seam. Count your SCs; if you have an odd number, add or subtract one to make it even. Then, follow this pattern to add ribbing all around the armhole:
Row 1: CH9, turn. SC in 2nd chain from hook and in each of the remaining 7 chains. SL ST into the first SC from arm hole edging, the stitch on which your CH9 was built. SL ST into the next SC from the edging. (8, plus the two slip stitches along the arm hole edging)
The section we just created, built on the CH9, will hereafter be referred to as the “ribbing.”
Row 2: CH1, turn. Skipping over the 2 SL STS you put in the edging row, SC in first ST of the ribbing. SC in BLO of each of the next 6 STS. SC in both loops of the last ST. (8)
Row 3: CH1, turn. SC in 1st ST. SC in BLO of each of the next 6 STS. SC in both loops of the last ST. SL ST in each of the next 2 unworked STS along the edging. (8, plus the 2 SL STS along the arm hole edging)
Row 4: CH1, turn. Skipping over the 2 SL STS you put in the edging, SC in first ST of the ribbing. SC in BLO of each of the next 6 STS. SC in both loops of the last ST. (8)
Rows 5-?: Repeat Rows 3-4 all the way around the arm hole. (8)
Here is an in-progress illustration of adding the ribbing:

Fasten off, leaving a 12″ tail for seaming.
Overlap ribbed edges as shown (front panel over back panel) and use finishing tail to sew them in place as marked.

Weave in ends.
LEFT SIDE ARM HOLE
Remove the stitch marker on the left arm hole (as if you were wearing it) and join your yarn at that spot on the back panel. SC up the back edge of the arm hole, putting one SC in each row end. (Tip: the little “squares” in the fabric are each comprised of two rows each.)

When you get to the ribbing at the top, lay the ribbing from the front panel over the ribbing from the back panel…

… and SC through both panels along the edge of the ribbing.

Continue to SC down the front edge of the arm hole until you reach the seam. Then, follow the same ribbing pattern you did for the right arm hole to add ribbing all the way around the left arm hole.
Next, overlap ribbed edges as shown (front panel over back panel) and use finishing tail to sew them in place as marked.

Weave in ends.
– – – – – – – – – – – – – – –
SECURING THE SHOULDERS
– – – – – – – – – – – – – – –
You’ll need to add a little bit of seaming at the shoulders so that your beautiful top stays put!
Lay garment flat, front side up. Using the size chart in the illustration below, measure the instructed number of inches in from each edge (NOT counting the sleeves) and place a stitch marker on the front panel in those two locations at the top of your garment.

Beginning on either side, and holding the front panel ribbing over the back panel ribbing (lined up with the braid on the back panel, but not covering it), use yarn and a yarn needle to sew the pieces together from the edge of the garment to the stitch marker, then across the ribbing on one side (as shown by the red lines in the photo). Make sure that your final stitch goes all the way over the edge of the top layer of fabric to hold it down; this will ensure that it won’t stick up when stretched over your shoulders.

Fasten off and weave in ends on inside of garment. Repeat for the other shoulder.
Don’t forget to share your finished project!
Share it on FB, in our FB group, in other groups, on Instagram… wherever you want to show if off! Be sure to tag me @yarnandchai.design so I can see it, too!
