I love fall. It gives me all the feels.
When the heat of a Michigan summer finally breaks and the leaves start to turn shades of orange and red and yellow and I can snuggle up in a cardigan and fuzzy socks, I feel an overwhelming sense of calmness.
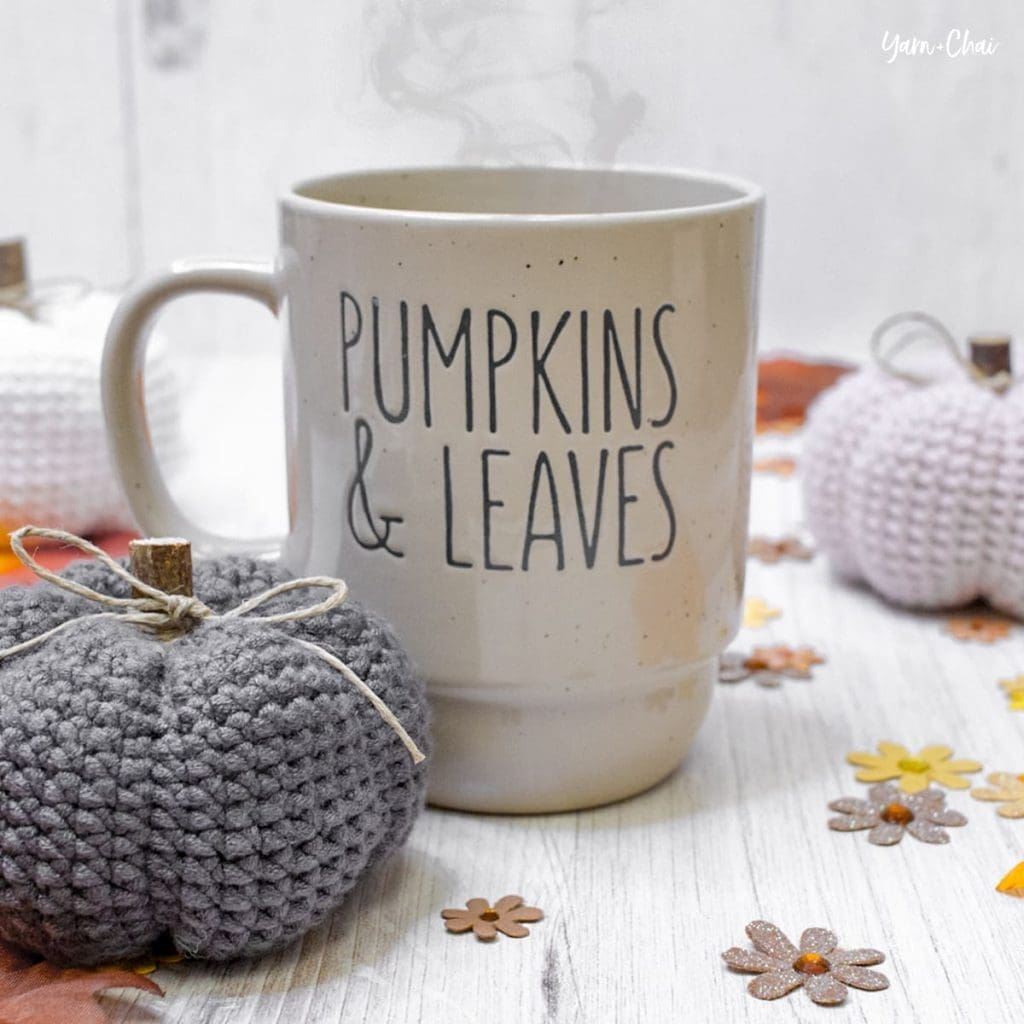
If I could bottle up the feeling that autumn gives me and access it year-round, I would be one peaceful, contented girl.
But alas, fall is fleeting. So let’s make the most of it, starting with a brand new pumpkin pattern, shall we?
Prefer a PDF?
This pattern can be completed using the 100% free version right here on this page. However, many people prefer the convenience of a printable, ad-free PDF.
All-Access Passholders get the ad-free version of this and all of my other blog patterns. It’s a pretty sweet deal, if I do say so myself! Learn more about it here or continuing scrolling for the free version.
– – – – – – – – – – – – – –
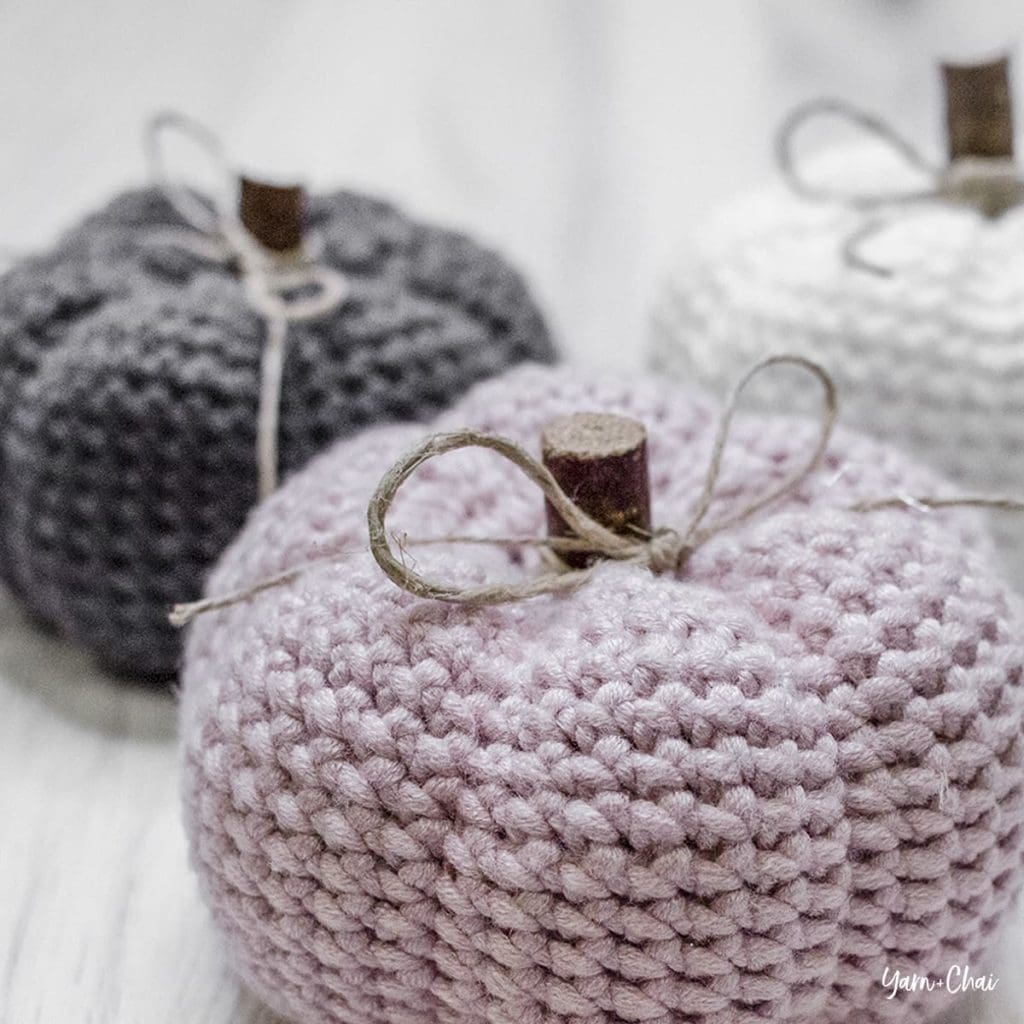
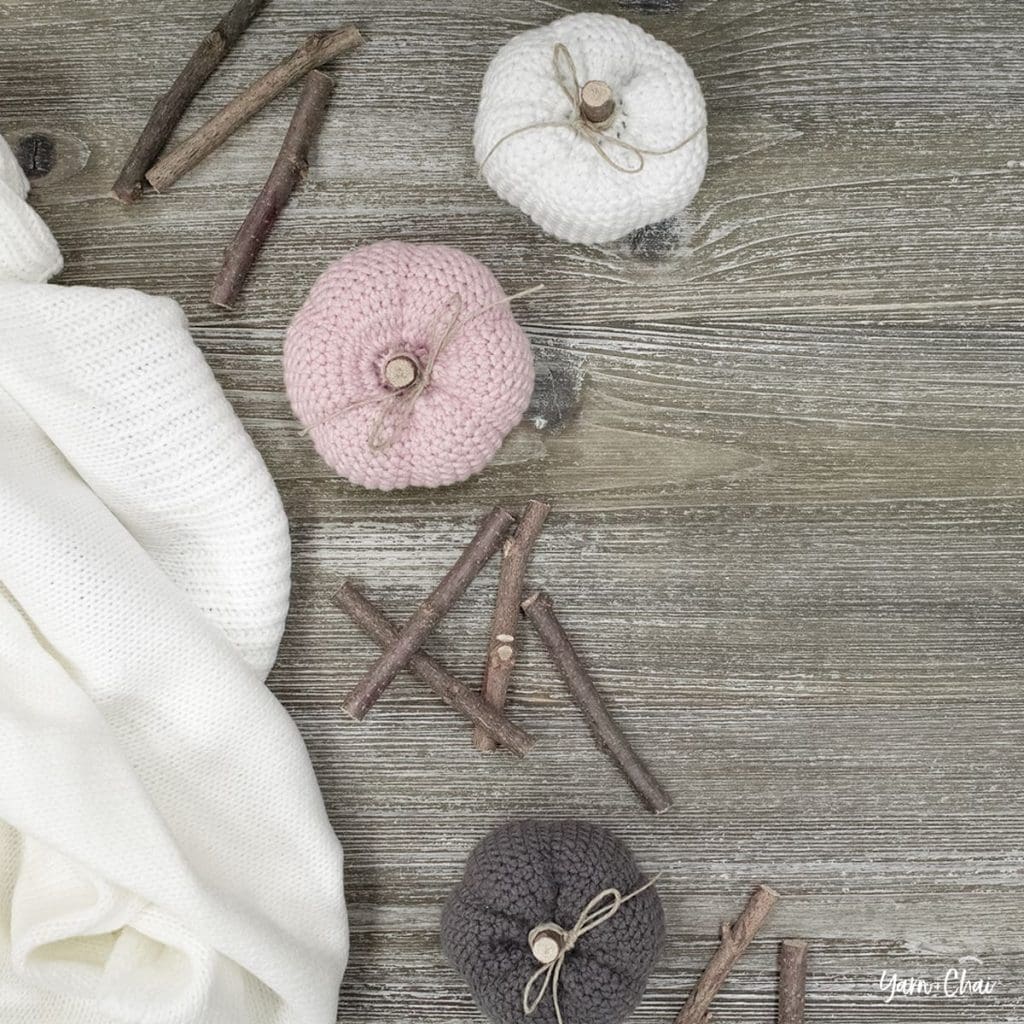
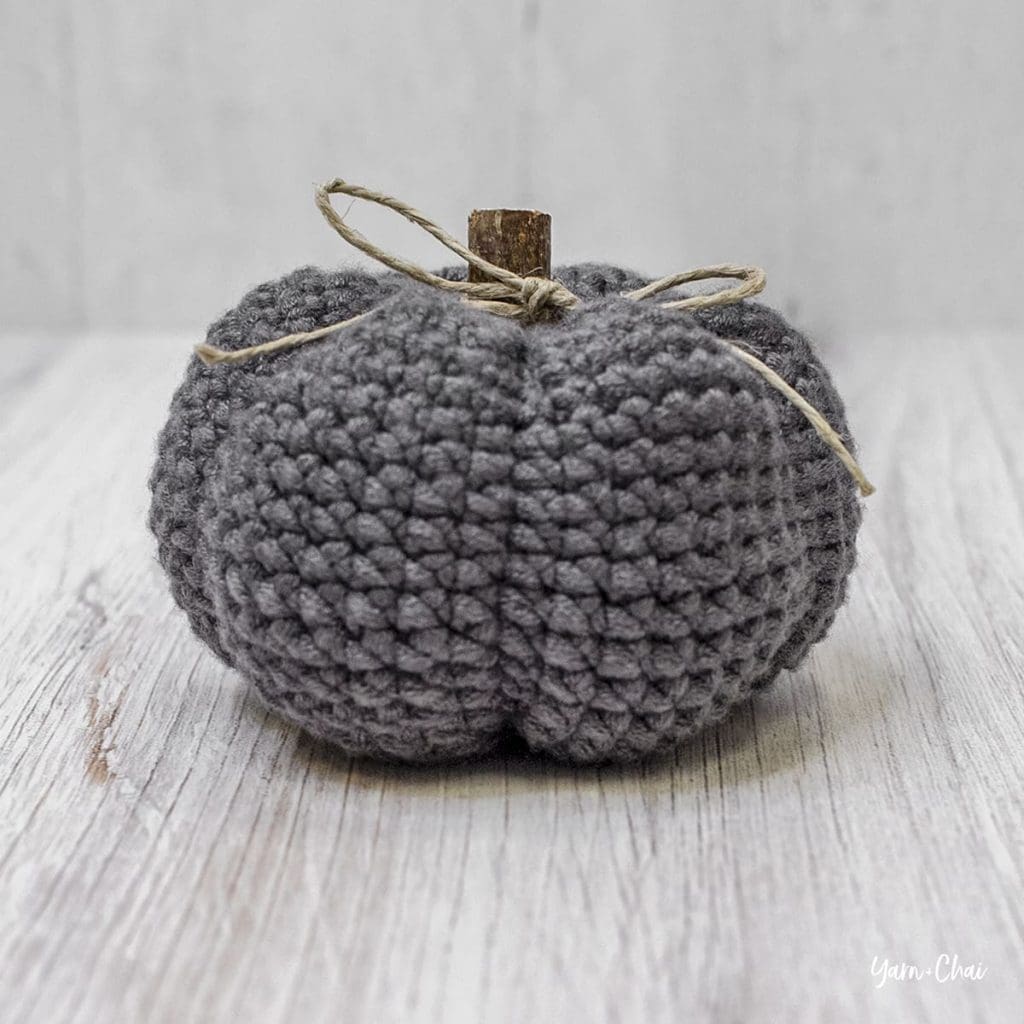
Petite Autumn Pumpkin
View on Ravelry
Difficulty: Easy
Crochet Language: American Standard
Finished Size: 4.25” wide x 4.25” tall (laid flat, before stuffing). Finished pumpkin will be approximately 3.5” wide x 2.25” tall, but these measurements may vary slightly based on how you stuff and shape it.
Yarn: Approximately 50 yards of a #4 weight yarn. I used Yarn Bee Comfy Classic (samples shown in White, Granite, and Blush). Comfy Classic is a blend of viscose, polyester and nylon. You can substitute another #4 weight yarn to achieve a similar size, or play around with different yarn weights to create pumpkins in different sizes. (Of course, yardage will vary.)
Hook: 4.5mm (G) hook
Gauge: Not super important, but 12 CSC x 11.5 rows = 2” square.
You’ll also need: Yarn needle, stitch marker, poly-fill (stuffing), small stick (or cinnamon stick) for stem, fast drying glue, twine or other pumpkin embellishments
Terms and Abbreviations:
MC (magic circle – view tutorial here)
ST/STS (stitch/stitches)
SL ST (slip stitch)
CH (chain)
FLO (front loop only)
CSC (crossed single crochet: Insert hook into stitch, yarn UNDER, pull through — 2 loops on hook; yarn over, pull through both loops.)
Notes:
(1) Pattern is worked in a seamless round. Do not join, chain and/or turn unless instructed. Use a stitch marker to mark the beginning of your rounds.
– – – – – – – – – – – – – – –
INSTRUCTIONS
To begin: Make a magic circle; CH1.
Round 1: 16 CSC in MC. (16)
Round 2: 3 CSC in each ST around. (48)
Rounds 3-22: CSC in FLO of each ST around. (48)
To finish: SL ST in FLO of each of the next 2 STS to smooth down the round, then fasten off, leaving a tail about 2 yards long.
SHAPING + FINISHING
Follow these steps to shape and finish your pumpkin. Remember, the “top” of the pumpkin is where your magic circle is.
Stem:
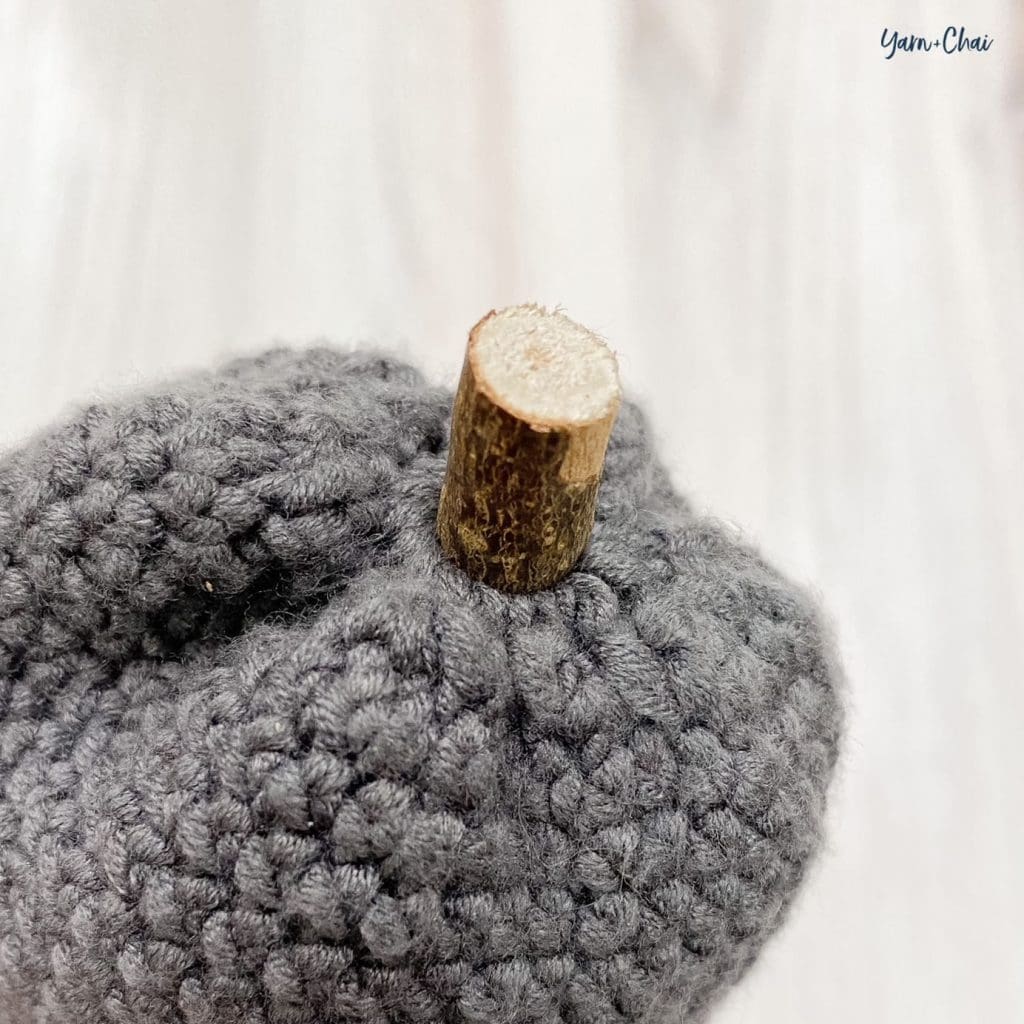
Turn pumpkin inside out. Cut a 1” length of your chosen material to serve as the pumpkin stem. Insert into the hole created by the magic circle, then pull the starting tail so that it tightens up around the stem. Weave in starting tail; remove stem. (You’ll glue it in place at the end.)
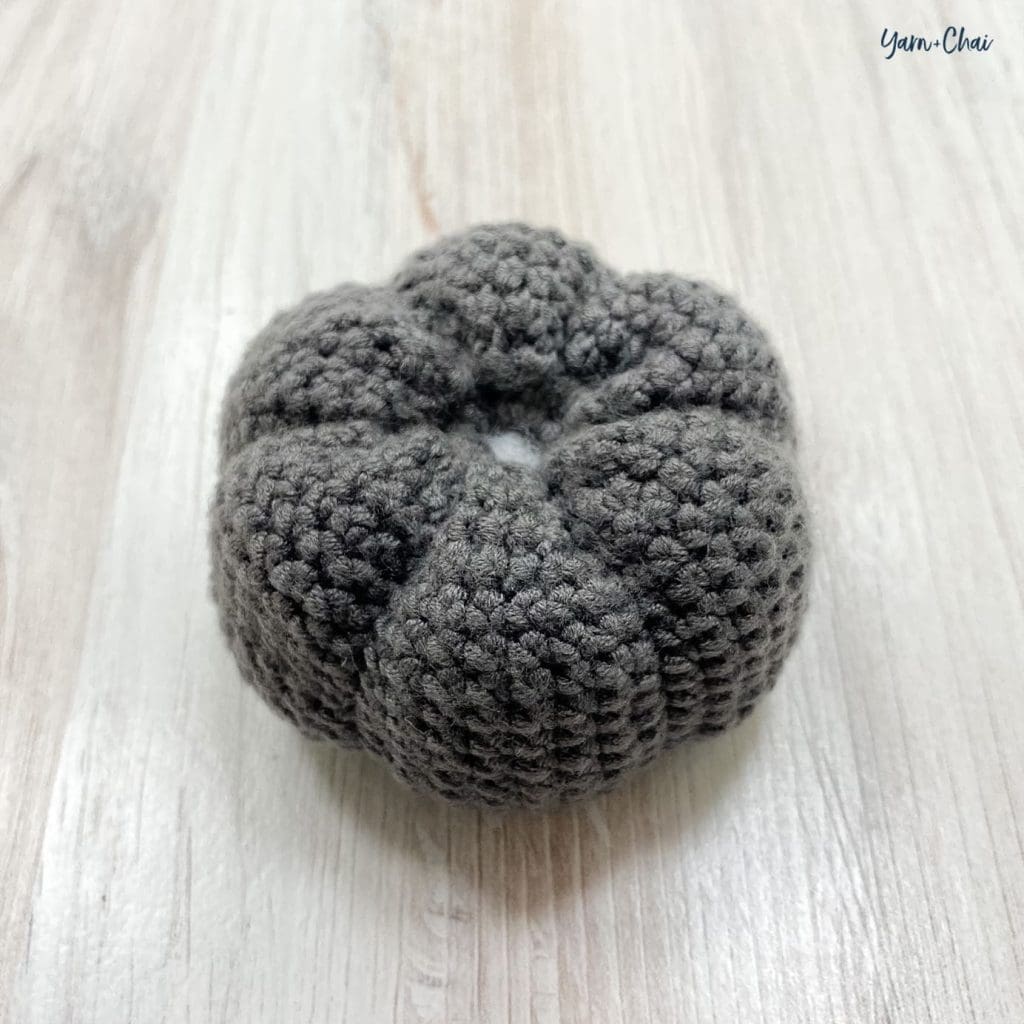
Cinching, Stuffing and Closing:
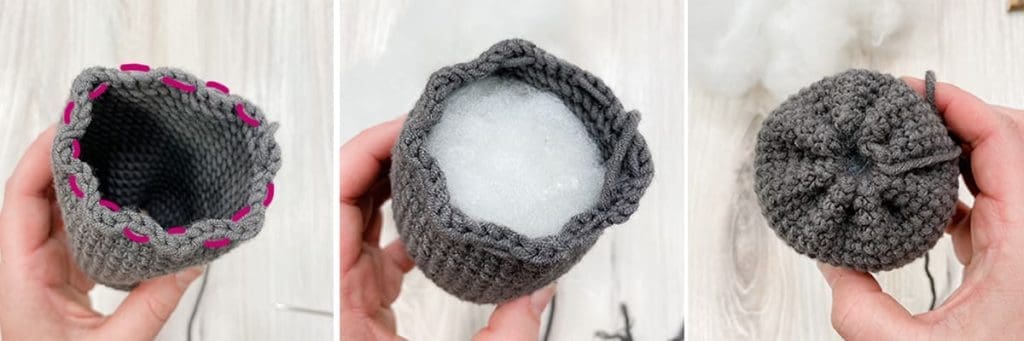
Turn pumpkin right-side out. Use yarn needle and finishing tail to weave along the bottom edge of the pumpkin, weaving every 3 stitches until you’re back where you started (1st image). Set yarn needle down and stuff pumpkin (2nd image), then pull yarn tail to cinch closed (3rd image). Weave yarn needle across the cinch in a couple different directions to reinforce closure; tie a knot, but do not fasten off.
Shaping:
Use yarn needle to run the finishing tail under the diagonal bar of each CSC in a vertical line as shown in the photo below:
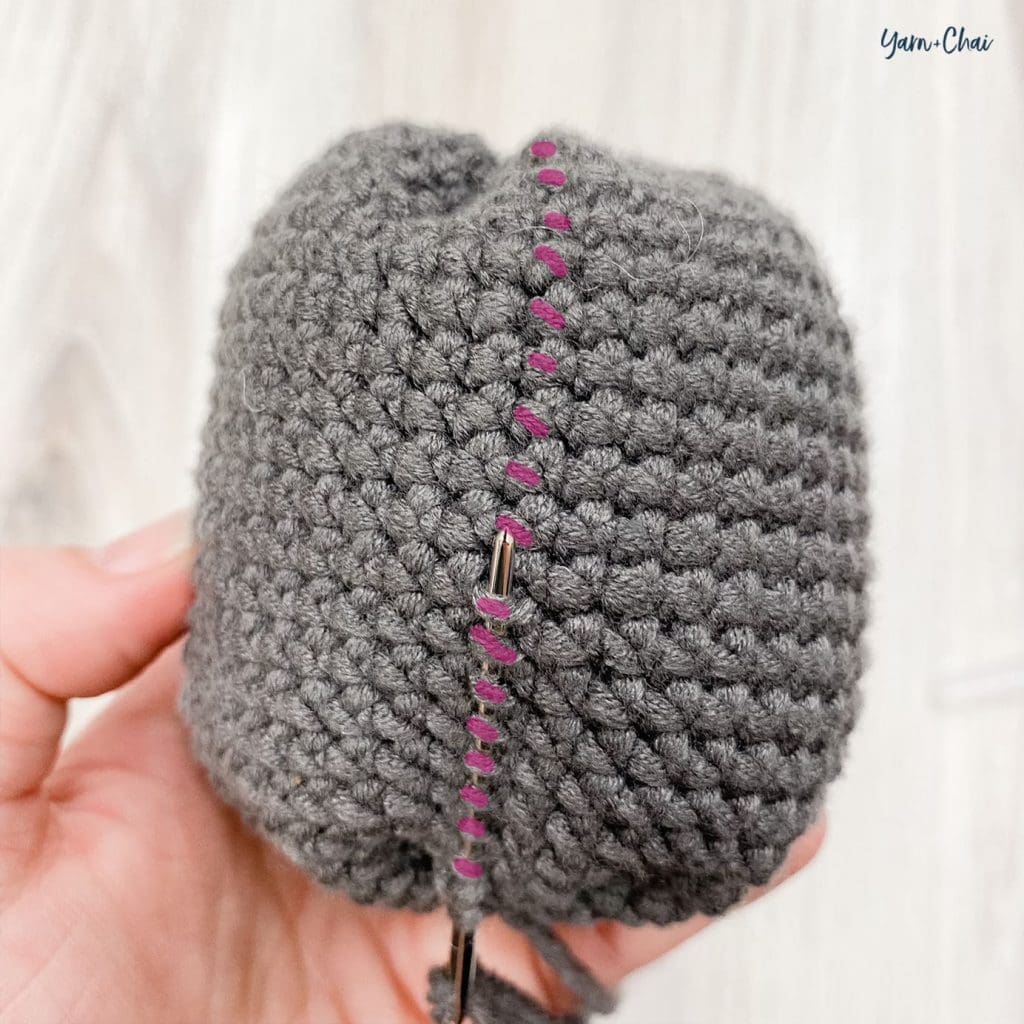
Continue all the way to the top, then insert yarn needle down between the 1st and 2nd round and push it down through the pumpkin, pulling it out through the center of the bottom of the pumpkin. Pull tight, creating an indent in the pumpkin.
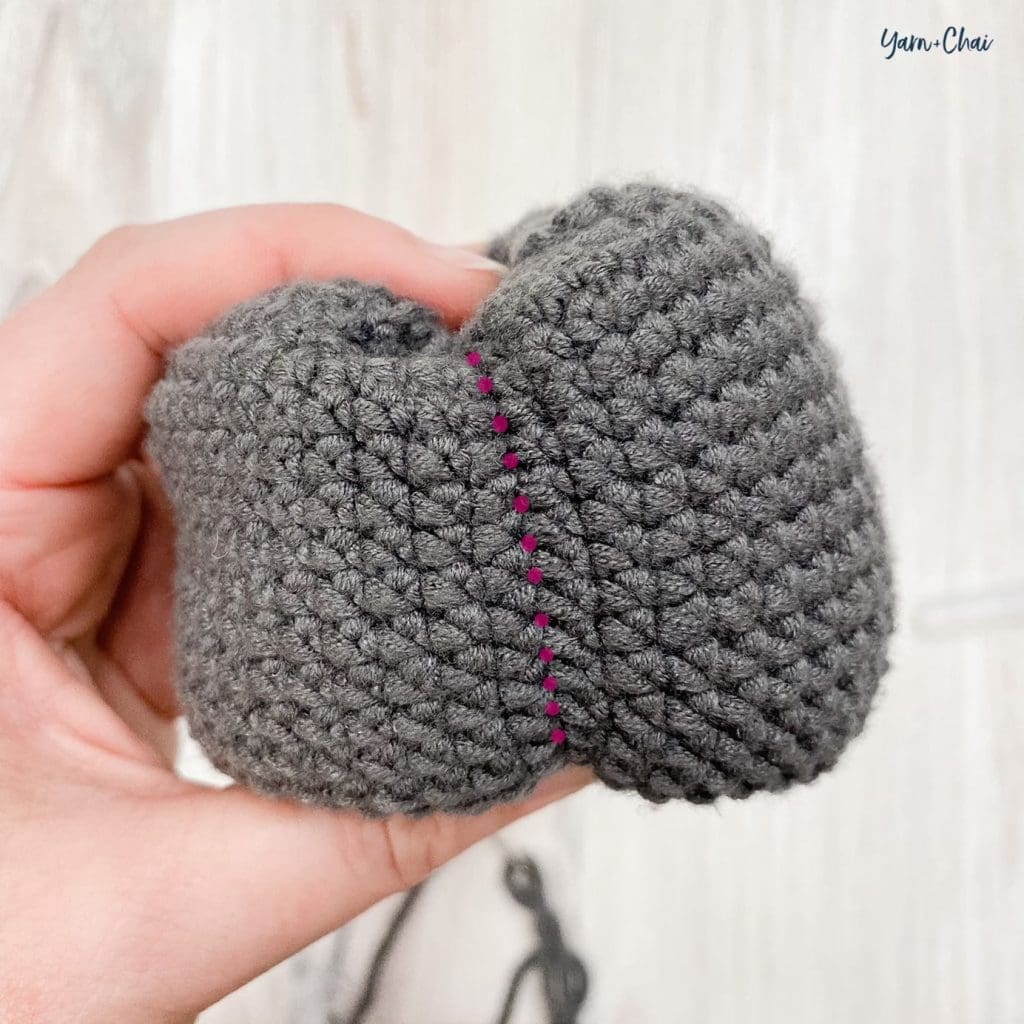
Count over 8 stitches to the right from your first indent, and repeat the process.
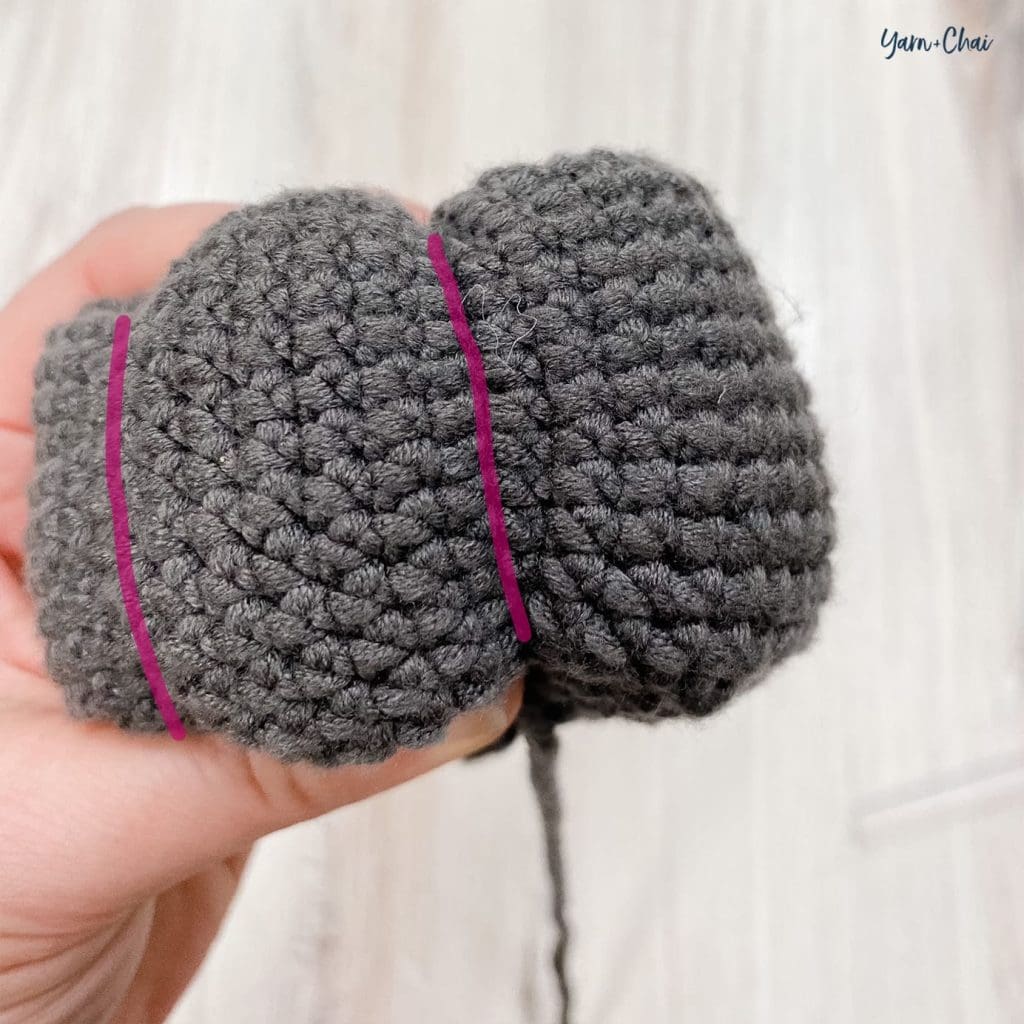
Continue the process, counting over 8 stitches each time. You should end with 6 evenly spaced indents. Tie a knot and weave in the tail.
Stem:
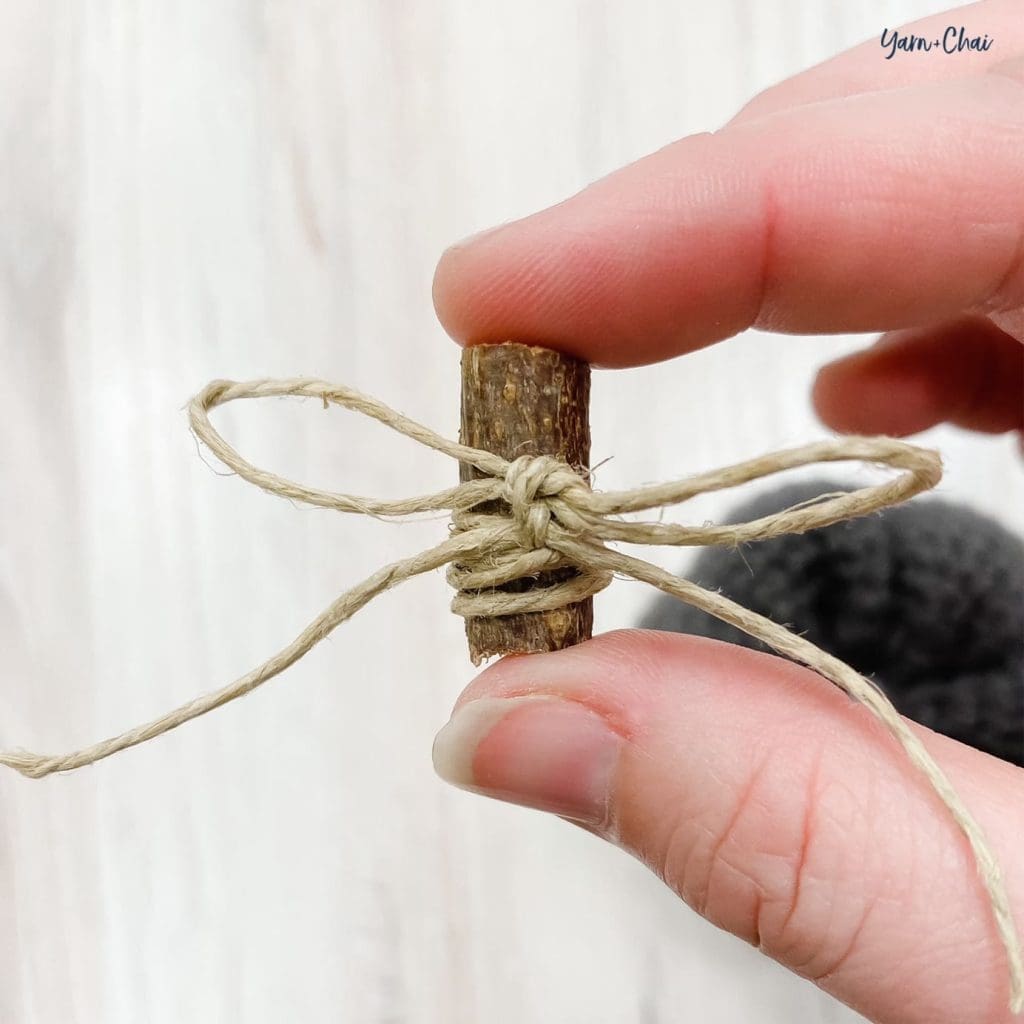
Embellish stem as desired. I wrapped twine around mine 4 or 5 times, then tied it in a small double-knotted bow:
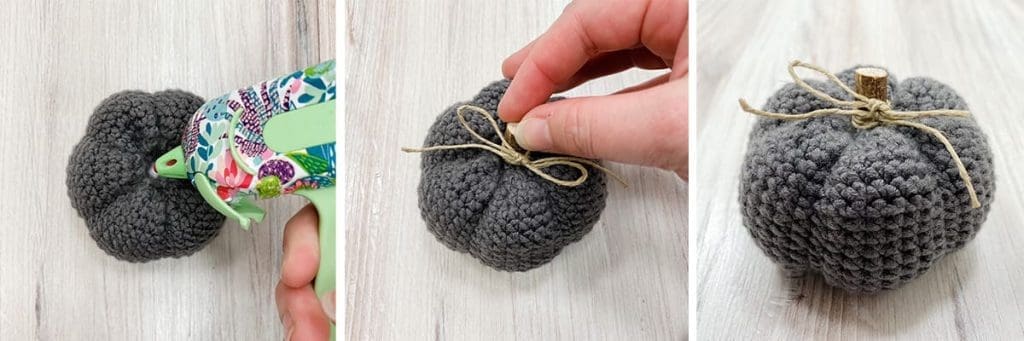
Add a few dots of fast-drying glue to the magic circle area of the pumpkin, then quickly insert cinnamon stick and push down; hold to set.
You’re done!
I hope you enjoyed this tutorial. If you’re sharing your pumpkins on social media, be sure to tag me @yarnandchai.design!