Category: Crochet Patterns

  • Malia CAL (Fall 2017 Crochet-Along)

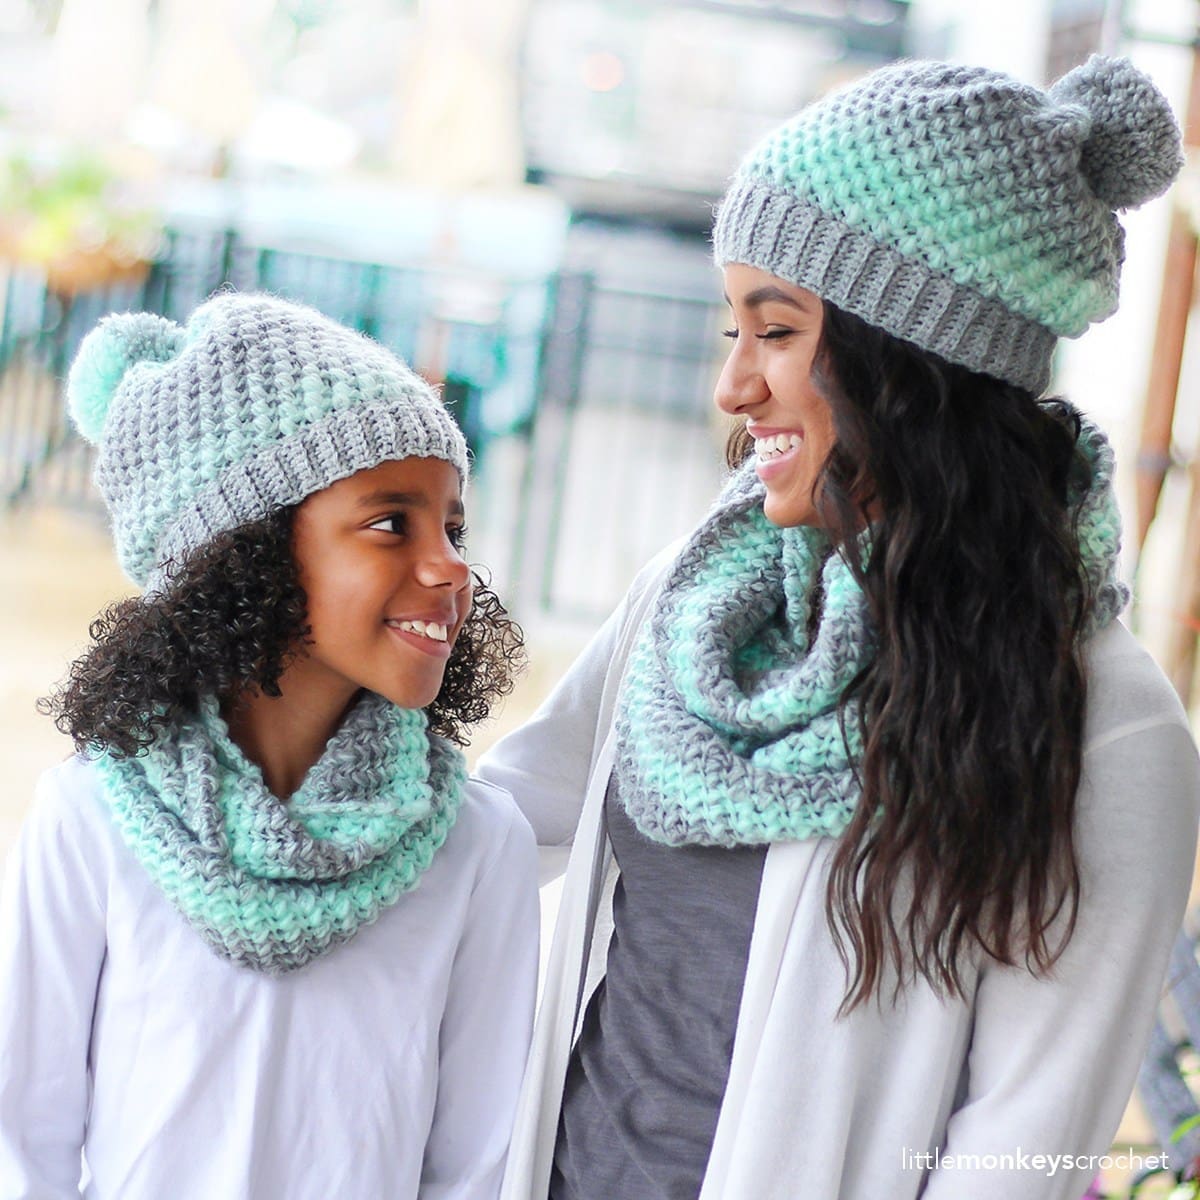
    The Malia CAL is officially over…

    …but the patterns will remain on my blog free for use! I’ve left the original CAL information below.

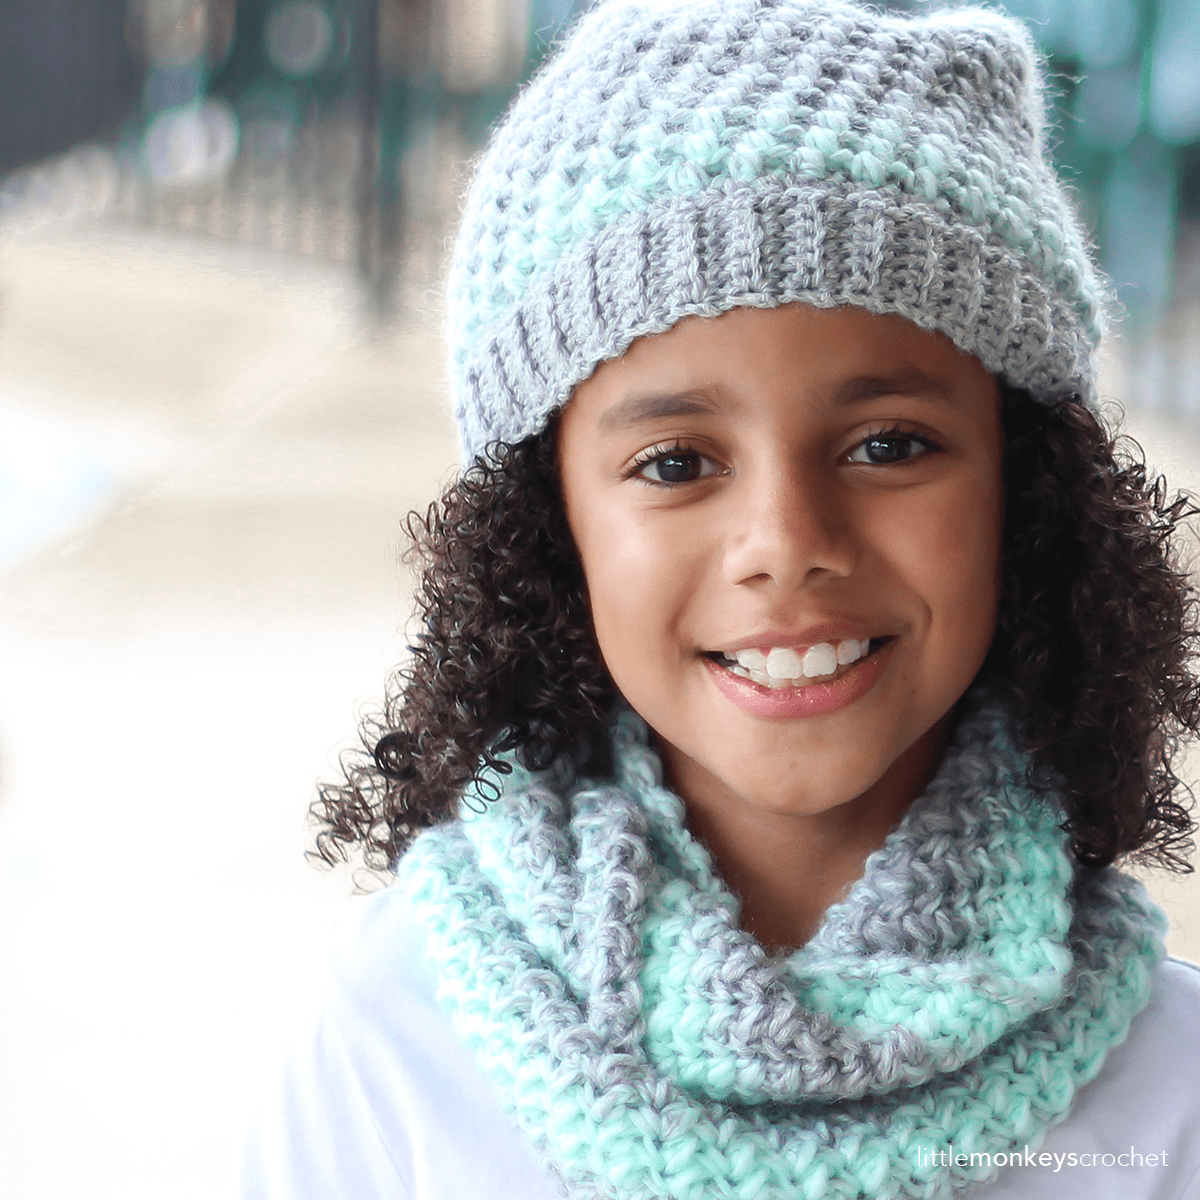
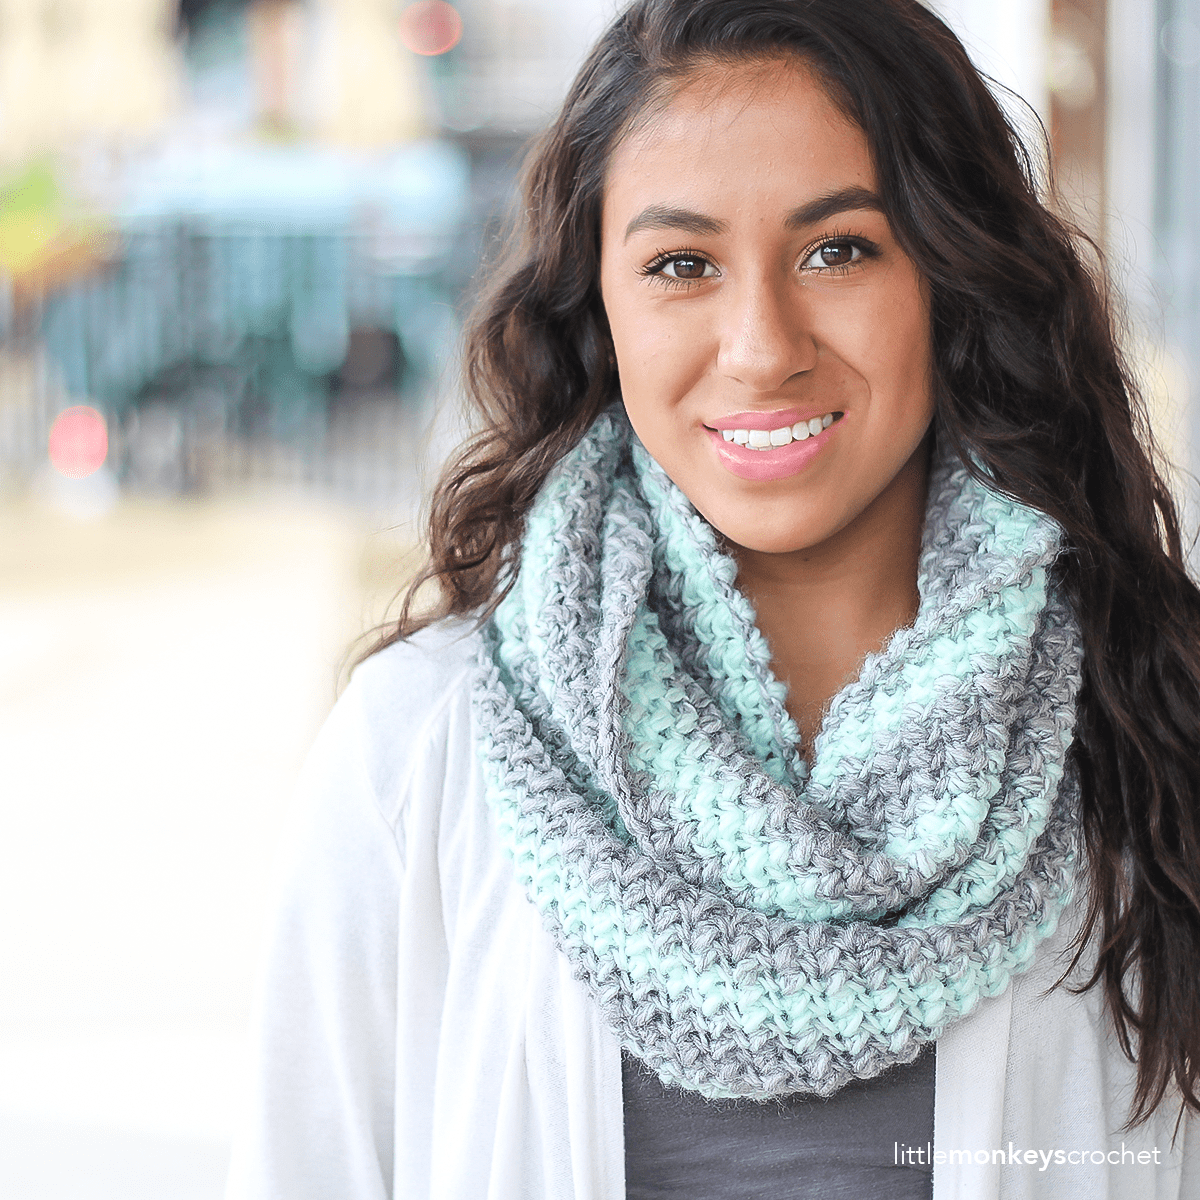
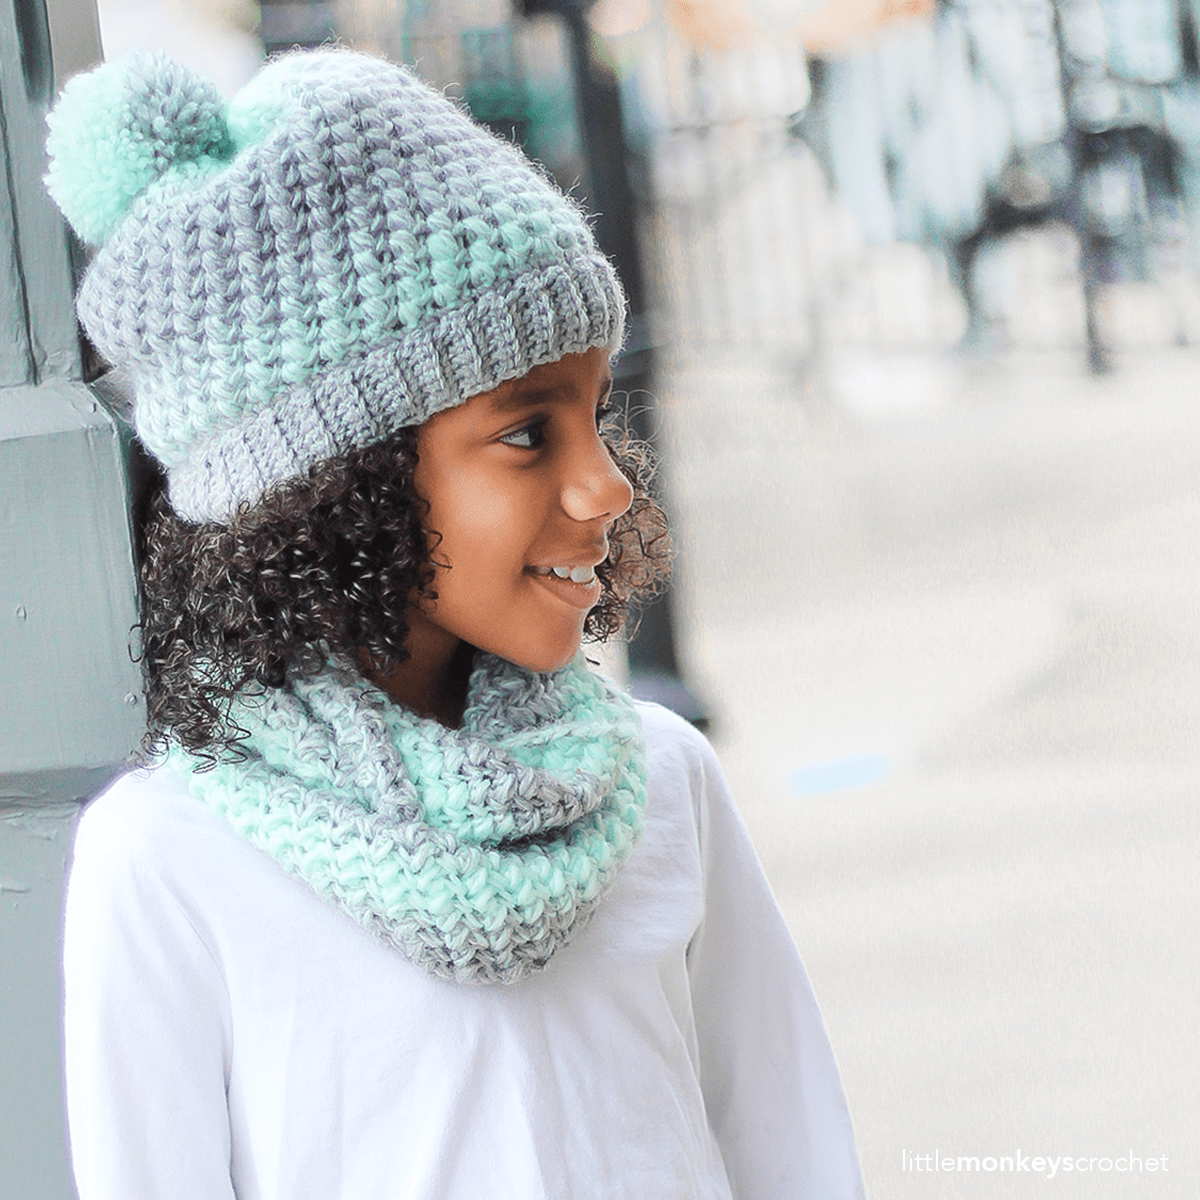
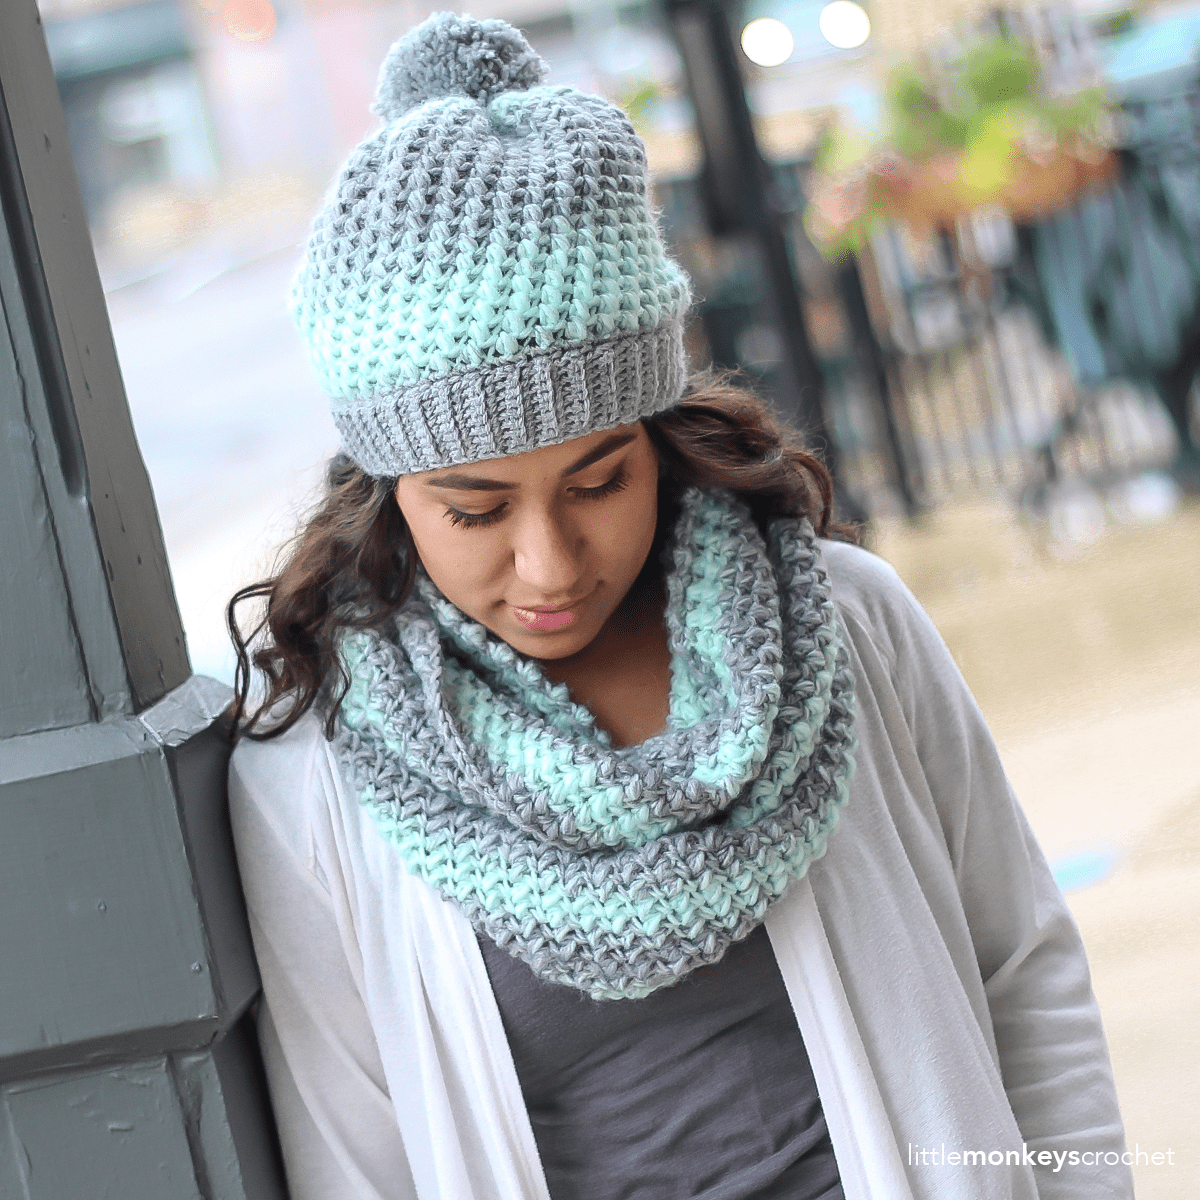
    Malia Beanie | Malia Slouchy | Malia Infinity Scarf | Malia Buttoned Cowl | Malia Newborn Beanie | Malia Earwarmer | Malia Messy Bun Beanie | Malia Boot Cuffs | Malia Wrist Warmers

    Remember, All Access Passhttps://members.yarnandchai.comholders get ALL of these patterns in ad-free format, plus ALL of my other patterns!

    – – – – – –

    First Things First… What’s a CAL?

    A CAL (Crochet-Along) is an online event where a pattern (or series of patterns) is released over the course of a number of weeks, and a community of crocheters works on it together. The Malia CAL will begin on October 25 and last for 4 weeks.

    I’ve designed this CAL so that you can pick and choose which patterns you want to create based on your own personal style! The first week is hat week, which includes a beanie and a slouchy version of the Malia Hat. The second week is scarf week, which includes an infinity scarf and a buttoned cowl. (The third week is a bonus week, which I’ll talk more about later.) So, you can choose which patterns you want to make… or, make them all! Each pattern from the first 2 weeks will include a video tutorial. All patterns are sized for a teen / adult (with the exception of one of the bonus patterns).

    Here’s the Schedule:

    You’ll find all of the links for the CAL right here as they are released.

    Week 1: Malia Beanie + Malia Slouchy
    Week 2: Malia Infinity Scarf + Malia Buttoned Cowl
    Week 3: BONUS WEEK! Malia Newborn Beanie + Malia Earwarmer + Malia Messy Bun Beanie
    Week 4: BONUS BONUS WEEK! Malia Boot Cuffs + Malia Wrist Warmers

    (What’s Bonus Week, you ask? Well… it’s a week of awesome bonuses, like more patterns for you using the beautiful Malia stitch pattern, plus even more goodies that I can’t reveal yet!)

    Join the CAL Facebook Group

    Life is better together, right? That’s the heart behind a crochet-along, too! If you’re on Facebook and want to join our private group to ask questions, post progress pics, or just meet new friends while you work through the CAL, request your invite by clicking here.

    Choose Your Yarn

    For these patterns, you’ll want to look for a soft aran weight yarn. Aran is part of the #4 family of yarn weights and is just a tad bit thicker than worsted. The three yarns listed here are my recommendations for this CAL; I’ve gauge-checked all of them and come up with the same results (see later section, “Check Your Gauge”). Of course, you can choose any yarn you want, as long as you can match gauge!

    Rustic Romantic | Yarn Bee
    The absolutely gorgeous yarn you see in my CAL photos is Rustic Romantic by Yarn Bee (a Hobby Lobby brand). As soon as I saw it I was smitten! The colors, though limited, are sophisticated and charming. If you’re into the rustic modern look and you love natural-looking hues, this is a great option. It is 85% acrylic and 15% hemp; the hemp provides those beautiful white flecks running throughout the strands that gives it a weathered look. It is surprisingly soft and warm, with great stitch definition and absolutely charming color names like “Faded Porch Swing” and “Blueberry Bushel.” It is machine washable but lay flat to dry, so if that’s an issue for you, it’s something to consider. Rustic Romantic sells for $5.49 for 228 yards.

    I Love This Yarn | Hobby Lobby
    A staple for Hobby Lobby shoppers, I Love This Yarn is a soft aran available in a huge range of colors, from bright and cheery to soft and subtle. Besides solid colors, it also offers various shades of metallic, tweed, and multis. It has good stitch definition, good drape, and you get 355 yards in a $3.99 skein, making it a great option if you’re budget-conscious. It’s 100% acrylic and machine washable and dryable.

    Vanna’s Choice | Lion Brand
    One of Lion Brand’s most popular yarns, Vanna’s Choice comes in a large selection of colors and is readily available in most large craft stores and online. It has a similar look and feel to Rustic Romantic (minus the hemp) and usually rings in at about $3.99 for 170 yards.

    How Much Yarn Do You Need?

    Because this CAL includes two different hat styles and two different scarf styles to choose from, you’ll need to determine which patterns you want to make in order to know how much yarn you need. Here is the breakdown of each pattern and how much yarn it uses:

    Beanie (Week 1): 200 yards
    Slouchy (Week 1): 260 yards
    Infinity Scarf (Week 2): 580 yards
    Buttoned Cowl (Week 2): 355 yards

    On Week 3 of the CAL (a.k.a. “Bonus Week”) I’ll be revealing a few more patterns that use the same beautiful stitch pattern, but those are a surprise (and we won’t be making them together) so I won’t have yarn totals for those until Week 3. Same for Week 4.

    Check Your Gauge

    Before you jump into these patterns, you need to check your gauge. Why is it so important? Because we all crochet differently! You and I could use the exact same yarn and the exact same hook and the exact same pattern, and mine could come out larger or smaller than yours. It’s not such a big deal for things like scarves and cowls, but for a hat, it’s important. Don’t put all the work into this project only to end up with a hat that is too large or too small!

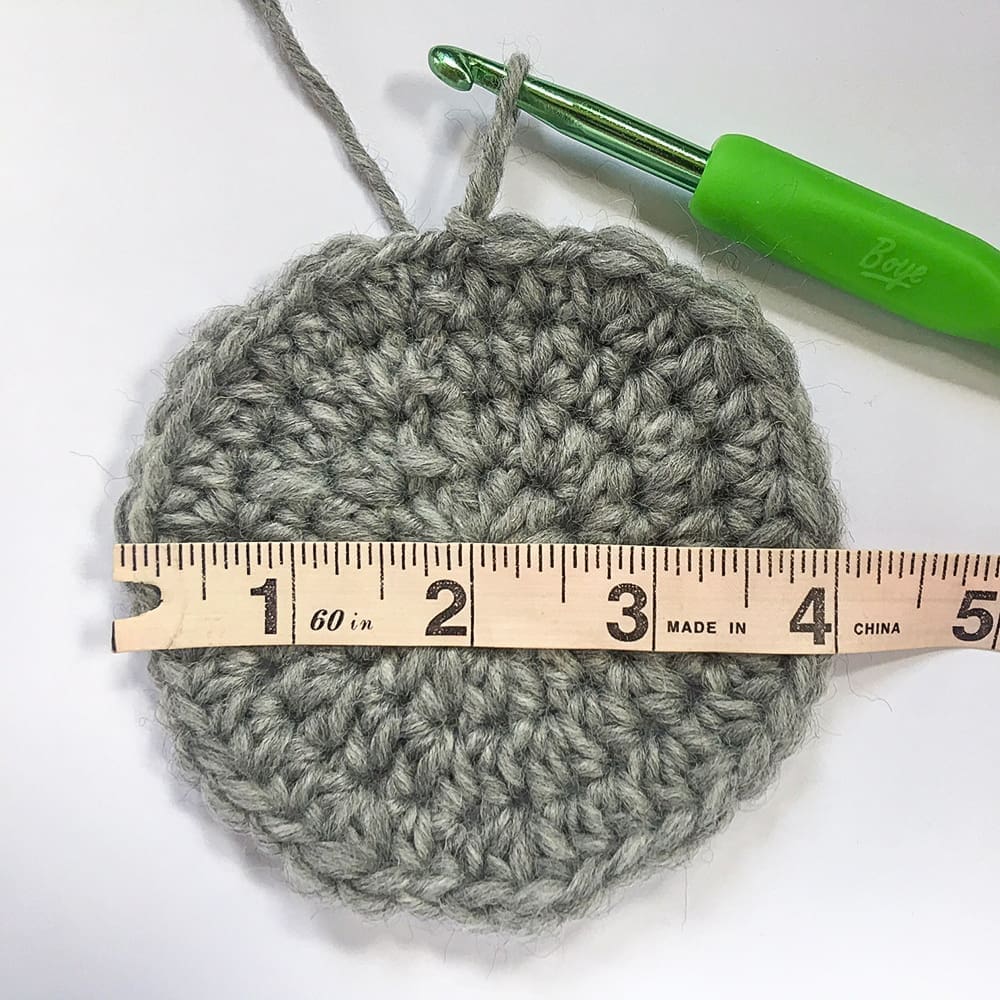
    The importance of checking your gauge for this project cannot be understated. Because of the construction of the hats, it is difficult to adjust mid-pattern if you discover yours is turning out too large. Even if you typically do not complete gauge checks, I strongly encourage you to do so this time. To ensure the best results, the gauge check is a swatch taken straight from the patterns. Upon completion, you should have a 4” square. If yours is larger, consider using a smaller hook or a thinner #4 yarn. If yours is smaller, consider using a larger hook.

    Pattern for Gauge:
    CH17.
    Row 1: SC in 2nd CH from hook and in each remaining CH. (16)
    Row 2: CH1, turn. SC in first ST. (SK next ST, LBS in next ST) 7 times. SC in final ST. (16)
    Row 3: CH1, turn. HDC in each ST across. (16)
    Row 4: CH1, turn. SC in first ST. SC in 3rd loop of each of the next 14 STS. SC in final ST. (16)
    Row 5: CH1, turn. SC in each ST across. (16)
    Row 6: CH1, turn. SC in first ST. (LBS in next ST, SK next ST) 7 times. SC in final ST. (16)
    Row 7: CH1, turn. HDC in each ST across. (16)
    Row 8: CH1, turn. SC in first ST. SC in 3rd loop of each of the next 14 STS. SC in final ST. (16)
    Row 9: CH1, turn. SC in each ST across. (16)
    Rows 10-16: Repeat Rows 2-8. (16)

    Now grab a ruler and measure the square. Is it 4″? Great! Stick with the I (5.5mm) hook. Is it smaller than 4″? You might need to go up a hook size or choose a thicker yarn. Larger than 4″? You might need to go down a hook size or choose a thinner yarn. Once you’ve determined what hook size and yarn will get you the correct gauge, remember it; you’ll use the same hook all throughout this CAL.

    Get Ready, Get Set…

    Now that you’ve chosen which patterns to make, joined the Facebook group, chosen your yarn and checked your gauge, you’re ready to jump into the Malia CAL!

  • Landon Slouch and Scarf (Adult and Child Sizes)

    Landon Slouch and Scarf (Adult and Child Sizes)

    Thank you to Lion Brand Yarn for providing the yarn for this sample.

    Have you used Lion Brand’s Scarfie yarn yet? It is sooo soft and fluffy. My first experience with it was when I designed the Macchiato Slouch and I always knew I’d come back to it again someday. Now there are even more combos to choose from then there were back then, and I am just obsessed with this Mint & Silver! I paired it with Wool-Ease Gray Heather (for the band of the hat, because I wanted to make sure the entire band was one solid color) and it was a perfect match.

    I designed this set as a part of Lion Brand’s “12 Days of Christmas” promotion, and knew you guys would be excited to have it available in both adult and child sizes. You can even grab the kit on lionbrand.com, which comes with the pattern and enough yarn to make two sets – one for you and one for your mini-me!

    The hat is made up mostly of mini bean stitches, which I love because they give basically the same look as a regular bean stitch but use less yarn.

    The finished products are so fluffy and soft! I love fluffy accessories. Besides the obvious fact that they are soft on your skin, they also tend to lay really nicely. This infinity scarf was so easy to style on my model because of its light, airy feel.

    Can I also give a shoutout to my models? Because seriously, they rocked this shoot. You’d never know they had just met, like, two and a half minutes before this photo. 🙂

    Prefer a PDF?

    This pattern can be completed using the 100% free version right here on this page. However, many people prefer the convenience of a printable, ad-free PDF.

    All-Access Passholders get the ad-free version of this and all of my other blog patterns. It’s a pretty sweet deal, if I do say so myself! Learn more about it here or continuing scrolling for the free version.

    LANDON SLOUCH AND SCARF (ADULT AND CHILD SIZES)

    Difficulty: Easy

    Hooks: K (6.5mm) and H (5.0mm)

    Yarn:
    3 skeins of Lion Brand Scarfie in “Mint/Silver” (#826-217)
    1 skein of Lion Brand Wool-Ease in “Grey Heather” (#620-151)

    Gauge: With larger hook and Scarfie yarn, 4 increase rounds of HDC = 4” diameter. (Begin first round with 10 HDC in a magic circle, then increase each round for a total of 4 rounds.) Use whatever hook size you need to obtain the correct gauge. This guage can be used for all 4 patterns.

    You’ll Also Need: Yarn needle, scissors, pom maker (optional)

    Abbreviations Used:
    MC
    (magic circle – tutorial here)
       ST/STS (stitch/stitches)
       SL ST (slip stitch)
       SK (skip)
       CH (chain)
       SC (single crochet)
       BLO (back loop only)
       MBS (mini bean stitch – see “Special Stitch”)

    Special Stitch – Mini Bean Stitch (MBS):
    Insert hook into stitch, yarn over, pull through (2 loops on hook), yarn over, insert hook into same stitch, yarn over, pull through (4 loops on hook), yarn over, pull through all 4 loops, chain 1 to close stitch. (Because this stitch creates two sets of top loops, it counts as 2 stitches in final round counts.)

    Notes:
    (1) Patterns are written in American Standard terms.
    (2) Any CH1s at the beginning of rounds do not count as stitches.
    (3) All patterns are designed in a continuous spiral for a seamless finished look. Do not join, chain up or turn unless instructed.
    (4) For the finished measurements of the hats, height is measured from the bottom of the band to the top of the body, pom not included. Width is measured across the bottom of the body of the hat, at the point where the body and the band meet. (Band of hat is smaller but will stretch to fit.)
    (5) The poms on the hats are optional. You will have more than enough yarn left over to make two poms in either Scarfie (shown on the child-size sample) or Wool-Ease (shown on the adult-size sample).
    (6) Due to the nature of the ombre yarn used, no two hats or scarves will look the same.

    – – – – – – – – – –

    LANDON SLOUCH HAT (TEEN / ADULT SMALL)

    Finished Size: 9” tall x 10” wide
    Yarn:
    Lion Brand Scarfie (130 yards) and Wool-Ease (45 yards)

    With larger hook and Scarfie yarn,
    Round 1: 10 HDC in MC. (10)

    Round 2: 2 HDC in each ST around. (20)

    Round 3: 2 HDC in each ST around. (40)

    Round 4: (2 HDC in each of the next 7 STS, HDC in next ST, 2 HDC in each of the next 7 STS, HDC in next ST, 2 HDC in each of the next 3 STS, HDC in next ST) 2 times. (74)

    Rounds 5-20: (MBS in next ST, SK next ST) around. (74)

    Round 21: (MBS in next ST, SK next ST) around. Join with a SL ST to the top of the first ST of the round. (74)

    Switch to smaller hook and Wool-Ease yarn. Fasten off Scarfie yarn.

    Round 22: CH1. SC in each ST around. Join with a SL ST to the top of the first ST of the round. (74)

    – – – – – –

    Next we’re going to make the band of the hat, and we will be working in vertical rows, attaching it to Round 22 (the final round of the hat) with SL STS as we go. If you need a little extra help, click here for a video tutorial on how to add ribbing at the end of a project.

    – – – – – –

    CH9.
    Row 1:
    SC in 2nd chain from hook and in each of the remaining 7 chains. SL ST into the first SC from Round 22, the stitch on which your CH9 was built. SL ST into the next SC from Round 22. (8, plus the two slip stitches along Round 22)

    The section we just created, built on the CH9, will hereafter be referred to as the “ribbing.”

    Row 2: CH1, turn. Skipping over the 2 SL STS you put in Round 22, SC in BLO of each of the first 7 STS of the ribbing. SC in both loops of the last ST. (8)

    Row 3: CH1, turn. SC in 1st ST. SC in BLO of each of the remaining 7 STS of the ribbing. SL ST in each of the next 2 STS of Round 22. (8, plus the 2 SL STS along Round 22)

    Row 4: CH1, turn. Skipping over the 2 SL STS you put in Round 22, SC in BLO of each of the first 7 STS of the ribbing. SC in both loops of the last ST. (8)

    Rows 5-74: Repeat Rows 3-4 all the way along Round 22.

    Fasten off and use your tail to sew together the gap between the first and last rows of the ribbing, then weave in your ends.

    Optional: Use a large Clover Pom Maker to make a pom pom (or make one by hand) and attach it to the top of the hat.

    LANDON SLOUCH HAT (CHILD)

    Finished Size: 8.5” tall x 9” wide
    Yarn:
    Lion Brand Scarfie (105 yards) and Wool-Ease (30 yards)

    With larger hook and Scarfie yarn,
    Round 1:
    10 HDC in MC. (10)

    Round 2: 2 HDC in each ST around. (20)

    Round 3: 2 HDC in each ST around. (40)

    Round 4: 2 HDC in each of the next 2 STS, HDC in each of the next 2 STS. (2 HDC in each of the next 3 STS, HDC in next ST) 4 times. 2 HDC in each of the next 2 STS, HDC in each of the next 2 STS. (2 HDC in each of the next 3 STS, HDC in next ST) 4 times. (68)

    Rounds 5-19: (MBS in next ST, SK next ST) around. (68)

    Round 20: (MBS in next ST, SK next ST) around. Join with a SL ST to the top of the first ST of the round. (68)

    Switch to smaller hook and Wool-Ease yarn. Fasten off Scarfie yarn.

    Round 21: CH1. SC in each ST around. Join with a SL ST to the top of the first ST of the round. (68)

    – – – – – –

    Next we’re going to make the band of the hat, and we will be working in vertical rows, attaching it to Round 21 (the final round of the hat) with SL STS as we go. If you need a little extra help, click here for a video tutorial on how to add ribbing at the end of a project.

    – – – – – –

    CH7.
    Row 1:
    SC in 2nd chain from hook and in each of the remaining 5 chains. SL ST into the first SC from Round 21, the stitch on which your CH7 was built. SL ST into the next SC from Round 21. (6, plus the two slip stitches along Round 21)

    The section we just created, built on the CH7, will hereafter be referred to as the “ribbing.”

    Row 2: CH1, turn. Skipping over the 2 SL STS you put in Round 21, SC in BLO of each of the first 5 STS of the ribbing. SC in both loops of the last ST. (6)

    Row 3: CH1, turn. SC in 1st ST. SC in BLO of each of the remaining 5 STS of the ribbing. SL ST in each of the next 2 STS of Round 21. (6, plus the 2 SL STS along Round 21)

    Row 4: CH1, turn. Skipping over the 2 SL STS you put in Round 21, SC in BLO of each of the first 5 STS of the ribbing. SC in both loops of the last ST. (6)

    Rows 5-68: Repeat Rows 3-4 all the way along Round 21.

    Fasten off and use your tail to sew together the gap between the first and last rows of the ribbing, then weave in your ends.

    Optional: Use a large Clover Pom Maker to make a pom pom (or make one by hand) and attach it to the top of the hat.

    LANDON SCARF (TEEN / ADULT SMALL)

    Finished Size: 6.5” wide x 60” around
    Yarn:
    Lion Brand Scarfie (310 yards)
    Notes:
    (1) For this pattern, use the larger of the two hooks (6.5mm, or whichever one you used to complete your gauge swatch).
    (2) Working into the back bump of the starting chain during Round 1 will help to keep the scarf from curling. It is a bit slower than working into one of the top loops, but worth it in the end.

    To Begin: CH192. Join with a SL ST, being careful not to twist the chain. (192)

    Round 1: CH1. Working in the back bumps of the starting chain, MBS in first ST, SK next ST. (MBS in next ST, SK next ST) around. (192)

    Rounds 2-18: (MBS in next ST, SK next ST) around. (192)

    Round 19: (MBS in next ST, SK next ST) around. SL ST into the first ST of the round. (192)

    Fasten off and weave in all ends.

    LANDON SCARF (CHILD)

    Finished Size: 5” wide x 46” around
    Yarn:
    Lion Brand Scarfie (180 yards)
    Notes:

    (1) For this pattern, use the larger of the two hooks (6.5mm, or whichever one you used to complete your gauge swatch).
    (2) Working into the back bump of the starting chain during Round 1 will help to keep the scarf from curling. It is a bit slower than working into one of the top loops, but worth it in the end.

    To Begin: CH 148. Join with a SL ST, being careful not to twist the chain. (148)

    Round 1: CH1. Working in the back bumps of the starting chain, MBS in first ST, SK next ST. (MBS in next ST, SK next ST) around. (148)

    Rounds 2-13: (MBS in next ST, SK next ST) around. (148)

    Round 14: (MBS in next ST, SK next ST) around. SL ST into the first ST of the round. (148)

    Fasten off and weave in all ends.

    Done! If you’re sharing on social media, be sure to hashtag #landonslouch and #landonscarf, and tag me @yarnandchai. Hope you enjoyed it!

  • Barista Slouch Hat

    Barista Slouch Hat

    Thank you to Lion Brand Yarn for providing the yarn for this sample.

    It’s official… the Fall ’17/Winter ’18 season has begun and I am sooooooooo excited! Granted I’m a little behind on life being that I spent my summer cuddling an adorable little baby boy instead of prepping my upcoming collection, but whatev. I’m ready to dive in now, and let’s all hope and pray that Henry will start taking longer naps so I can get some things done.

    I’m debuting the season with a hat pattern that I just love. This season I’m experimenting with different shapes of slouch, and this pattern has a rounder, more “droopy” look to it than my patterns from previous seasons. It’s worked from the top-down but uses the faux-cinched method I tend to favor, but amped up a bit. We’re cramming so many stitches into those first few rounds that you might be thinking “yeah right, Rebecca” as you’re getting started, but trust me, just get through those first rounds and it will get easier and the finished look will be so worth it.

    For this pattern I used Lion Brand Yarn’s Vanna’s Style, a #3 weight (not to be confused with Vanna’s Choice, which is a #4 aran). It has beautiful stitch definition and drape which is perfect for this hat.

    My model is rocking this hat with her natural waves, but it would also look gorgeous over cascading curls or even a loose braid.

    Prefer a PDF?

    This pattern can be completed using the 100% free version right here on this page. However, many people prefer the convenience of a printable, ad-free PDF.

    All-Access Passholders get the ad-free version of this and all of my other blog patterns. It’s a pretty sweet deal, if I do say so myself! Learn more about it here or continuing scrolling for the free version.

    BARISTA SLOUCH HAT

    add-to-ravelry-favorites

    Difficulty: Easyish

    Finished Size: 9.5″ tall x 9″ wide at bottom of hat (when laid flat) and 14″ wide at widest point (when laid flat).

    Hook: G (4.0 mm)

    Yarn: Approximately 290 yards of Vanna’s Style, a #3 light weight yarn by Lion Brand. Sample shown in “Silver”.

    Gauge: 6 increase rounds (beginning with 10 HDC) = 3.75″.

    Pattern for Gauge:
    Round 1: 10HDC in MC; join. (10)
    Round 2: CH1, 2HDC in each ST around, join. (20)
    Round 3: CH1, (2HDC, HDC) around, join. (30)
    Round 4: CH1, (2HDC, HDC, HDC) around, join. (40)
    Round 5: CH1, (2HDC, HDC, HDC, HDC) around, join. (50)
    Round 6: CH1, (2HDC, HDC, HDC, HDC, HDC) around, join. (60)

    You’ll also need: Yarn needle, stitch marker

    Abbreviations Used:
       MC (magic circle – view tutorial here)
    ST/STS
     (stitch/stitches)
    SL ST (slip stitch)
    SK (skip)
    CH (chain)
    SC (single crochet)
    BLO (back loop only)
    MBS (mini bean stitch – see “Special Stitch”)

    Special Stitch – Mini Bean Stitch (MBS): Insert hook into stitch, yarn over, pull through (2 loops on hook), yarn over, insert hook into same stitch, yarn over, pull through (4 loops on hook), yarn over, pull through all 4 loops, chain 1 to close stitch. (Please note that this CH1 does count as a stitch in the final stitch counts of each round; so each MBS you complete will count for 2 stitches.)

    Notes:
    (1) This pattern is written in American Standard Terms.
    (2) Pattern is worked in a continuous, seamless round until the band. Use a stitch marker to mark the beginning of rounds and do not join or turn unless instructed to do so.
    (3) Any CH1s at the beginning of rounds do not count as stitches and are not included in the stitch count.
    (4) Because of the “chain 1 to close stitch” at the end of the instructions for the MBS, each MBS will count as 2 stitches in the final stitch counts for each round – one for the bean, and one for the CH1.)

    – – – – – – – – – – – – – – – – – – – – – – – –

    THE PATTERN

    To begin: Make a magic circle; CH1 (does not count as a stitch).

    Round 1: 16 HDC in MC. (16)

    Round 2: 2 HDC in each ST around. (32)

    Round 3: 2 HDC in each ST around. (64)

    Round 4: MBS in each ST around. (128)

    Rounds 5-32: (MBS in next ST, SK next ST) around. (128)

    Round 33: (MBS in next ST, SK next ST) around. Join with a SL ST to 1st ST of round. (128)

    Round 34: CH1. SC2TOG, SC in each of the next 2 STS. (SC2TOG in next ST, SC in each of the next 2 STS) around. Join with a SL ST to the top of the first ST. (96)

    Round 35-36: CH1. SC in each ST around. Join with a SL ST to the top of the first ST. (96)

    Next we’re going to make the band of the hat, and we will be working in vertical rows, attaching it to the final round of the hat (Round 36) with SL STS as we go. If you need a little extra help, click here for a video tutorial on how to add ribbing at the end of a project.

    CH9.

    Row 1: SC in 2nd chain from hook and in each of the remaining 7 chains. SL ST into the first SC from Round 36, the stitch on which your CH9 was built. SL ST into the next SC from Round 36. (8, plus the two slip stitches along Round 36)

    The section we just created, built on the CH9, will hereafter be referred to as the “ribbing.”

    Row 2: CH1, turn. Skipping over the 2 SL STS you put in Round 36, SC in BLO of each of the first 7 STS of the ribbing. SC in both loops of the last ST. (8)

    Row 3: CH1, turn. SC in 1st ST. SC in BLO of each of the remaining 7 STS of the ribbing. SL ST in each of the next 2 STS of Round 36. (8, plus the 2 SL STS along Round 36)

    Row 4: CH1, turn. Skipping over the 2 SL STS you put in Round 36, SC in BLO of each of the first 7 STS of the ribbing. SC in both loops of the last ST. (8)

    Rows 5-96: Repeat Rows 3-4 all the way along Round 36.

    Fasten off and use your tail to sew together the first and last rows of the ribbing, then weave in your ends.

  • Classic Beach Bag (Adult & Child Sizes)

    Classic Beach Bag (Adult & Child Sizes)

    Thank you Lion Brand Yarn for providing the yarn for this pattern!

    Summer is in full swing here, and we Michiganders work hard to enjoy every sunny day we possibly can since our mitten state is icy cold for half the year.  So when the temperatures heat up, we trade in powdery white snow for sandy white beaches. I may be a little bias, but I think we have some of the most beautiful beaches around. (Here’s my proof!)

    I promised you guys a full-sized beach bag a couple of months ago when I published this little mini beach bag gift card holder. Baby Henry has kept this mama’s hands full, so crocheting time has been really limited these days… but it’s finally here! And let me tell you what, this bag has given me grief. I’ve worked and reworked it to find the best possible construction to deliver you a pattern that is super easy and very durable. But, I think I’ve succeeded!

    A confident beginner could make this bag, easily, and yet it still looks like something you could buy at the surf shop. It has a very classic nautical-style pattern, but with really fun color options thanks to the yarn (Lion Brand’s 24/7 Cotton).  I am absolutely in love with it!

    Oh, and did I mention… I made two sizes! One is perfect for you, and the other is perfect for your mini-me.

    About the Yarn

    24/7 Cotton by Lion Brand Yarn is a worsted-weight, mercerized 100% natural fiber yarn. It has ah-ma-zing color, sheen and stitch definition, and a range of 24 fun shades. There are so many beautiful color combos you could utilize with this beach bag… you might just have to make more than one!

    Don’t let the grommets scare you…

    When I was trying to figure out the sturdiest way to add handles to this bag, I decided to try something I’d never used before – grommets! I took a chance and ordered some from Amazon, and I was so pleased with how easy they were to attach. Now, I am not a DIY girl, as much as I’d like to be. I’ve used a hammer maybe three times in my life. So take it from me… if I can do it, you can do it! And it will make such a huge difference in the sturdiness of your bag. Combined with the rope handles, the grommets take the weight of the bag on themselves, and since they don’t stretch like crocheted fabric does, your bag won’t stretch out the first time you put something in it. Click here to purchase the same grommet set I used. (You’ll get enough grommets for two bags, plus have 2 left over.)

    Prefer a PDF?

    This pattern can be completed using the 100% free version right here on this page. However, many people prefer the convenience of a printable, ad-free PDF.

    All-Access Passholders get the ad-free version of this and all of my other blog patterns. It’s a pretty sweet deal, if I do say so myself! Learn more about it here or continuing scrolling for the free version.

    CLASSIC BEACH BAG

    add-to-ravelry-favorites

    Difficulty: Easy

    Finished Size: 20″ width x 14″ height x 6″ depth (adult size) / 15.5″ width x 12″ height x 6″ depth (child size)

    Hook:  E (3.5mm)

    Yarn: Lion Brand 24/7 Cotton in 3 different colors. 24/7 Cotton is a worsted-weight, mercerized yarn. Individual sizes and amounts are listed below.

    Adult Size:
    COLOR A (360 yards, or 2 skeins). Sample shown in “Rose.”
    COLOR B (340 yards, or 2 skeins). Sample shown in “White.”
    COLOR C (300 yards, or 2 skeins). Sample shown in “Navy.”

    Child Size:
    COLOR A (310 yards, or 2 skeins). Sample shown in “Aqua.”
    COLOR B (220 yards, or 2 skeins). Sample shown in “White.”
    COLOR C (180 yards, or 1 skein). Sample shown in “Silver.”

    Gauge: 10 rows of 10 SC = 2″ square

    You’ll also need:
    Yarn needle
    Scissors
    3/8″ twisted rope for handles (two 36″ lengths for adult size, or two 30″ lengths for child size – I found mine at Joann Fabrics)
    Size 4 (1/2″ diameter) grommet kit – one beach bag uses 4 grommets (I used this one – it came with 10 grommets and was super easy to use)
    Hammer

    Abbreviations Used:
    ST/STS
     (stitch/stitches)
    SL ST (slip stitch)
    SK (skip)
    CH (chain)
    SC (single crochet)

    Notes:
    (1) This pattern is written in American Standard Terms.
    (2) CH1 at the beginning of round does not count as a stitch.
    (3) Both Adult and Child sizes are written out in full below. After that section, you’ll find instructions for shaping the bag and attaching the handles. These instructions are the same for both sizes.
    – – – – – – – – – – – – – – – – – – – – – – – –

    INSTRUCTIONS (ADULT SIZE)

    To begin: With COLOR A, CH192. Join to first CH with a SL ST, being careful to not twist the chain. (Briana K has an awesome video tutorial here for how to do this perfect every time.) (192)

    Rounds 1-24: CH1. SC in each ST around. Join with a SL ST to top of first SC. (192)

    Rounds 25-28: Attach COLOR B; fasten off COLOR A. CH1. SC in each ST around. Join with a SL ST to top of first SC. (192)

    Rounds 29-32: Attach COLOR C; drop COLOR B (do not fasten off). CH1. SC in each ST around. Join with a SL ST to top of first SC. (192)

    From this point until instructed otherwise, you will drop yarn at color changes and pick it back up again when needed. Do not fasten it off.

    Rounds 33-36: Switch to COLOR B. CH1. SC in each ST around. Join with a SL ST to top of first SC. (192)

    Rounds 37-40: Switch to COLOR C. CH1. SC in each ST around. Join with a SL ST to top of first SC. (192)

    Rounds 41-44: Switch to COLOR B. CH1. SC in each ST around. Join with a SL ST to top of first SC. (192)

    Rounds 45-48: Switch to COLOR C. CH1. SC in each ST around. Join with a SL ST to top of first SC. (192)

    Rounds 49-52: Switch to COLOR B. CH1. SC in each ST around. Join with a SL ST to top of first SC. (192)

    Rounds 53-56: Switch to COLOR C. CH1. SC in each ST around. Join with a SL ST to top of first SC. (192)

    Rounds 57-60: Switch to COLOR B. CH1. SC in each ST around. Join with a SL ST to top of first SC. (192)

    Rounds 61-64: Switch to COLOR C. CH1. SC in each ST around. Join with a SL ST to top of first SC. (192)

    Rounds 65-68: Switch to COLOR B. CH1. SC in each ST around. Join with a SL ST to top of first SC. (192)

    Rounds 69-72: Switch to COLOR C. CH1. SC in each ST around. Join with a SL ST to top of first SC. (192)

    Rounds 73-76: Switch to COLOR B. CH1. SC in each ST around. Join with a SL ST to top of first SC. (192)

    Rounds 77-80: Switch to COLOR C. CH1. SC in each ST around. Join with a SL ST to top of first SC. (192)

    Rounds 81-84: Switch to COLOR B; fasten off COLOR C. CH1. SC in each ST around. Join with a SL ST to top of first SC. (192)

    Rounds 85-89: Switch to COLOR A; fasten off COLOR B. CH1. SC in each ST around. Join with a SL ST to top of first SC. (192)

    Round 90: CH1. SC in each of the first 30 STS. CH3; SK 3 STS. SC in each of the next 30 STS. CH3; SK 3 STS. SC in each of the next 60 STS. CH3; SK 3 STS. SC in each of the next 30 STS. CH3; SK 3 STS. SC in each of the next 30 STS. Join with a SL ST to top of first SC. (180 SC + 4 CH3 holes)

    Round 91: CH1. SC in each ST around, putting 3SC in each CH3 space from previous round. (192)

    Rounds 92-94: CH1. SC in each ST around. Join with a SL ST to top of first SC. (192)

    Round 95: CH1, turn. SC in each ST around. Join with a SL ST to top of first SC. (192)

    Fasten off; weave in all ends.

    INSTRUCTIONS (CHILD SIZE)

    To begin: With COLOR A, CH156. Join to first CH with a SL ST, being careful to not twist the chain. (Briana K has an awesome video tutorial here for how to do this perfect every time.) (156)

    Rounds 1-24: CH1. SC in each ST around. Join with a SL ST to top of first SC. (156)

    Rounds 25-28: Attach COLOR B; fasten off COLOR A. CH1. SC in each ST around. Join with a SL ST to top of first SC. (156)

    Rounds 29-32: Attach COLOR C; drop COLOR B (do not fasten off). CH1. SC in each ST around. Join with a SL ST to top of first SC. (156)

    From this point until instructed otherwise, you will drop yarn at color changes and pick it back up again when needed. Do not fasten it off.

    Rounds 33-36: Switch to COLOR B. CH1. SC in each ST around. Join with a SL ST to top of first SC. (156)

    Rounds 37-40: Switch to COLOR C. CH1. SC in each ST around. Join with a SL ST to top of first SC. (156)

    Rounds 41-44: Switch to COLOR B. CH1. SC in each ST around. Join with a SL ST to top of first SC. (156)

    Rounds 45-48: Switch to COLOR C. CH1. SC in each ST around. Join with a SL ST to top of first SC. (156)

    Rounds 49-52: Switch to COLOR B. CH1. SC in each ST around. Join with a SL ST to top of first SC. (156)

    Rounds 53-56: Switch to COLOR C. CH1. SC in each ST around. Join with a SL ST to top of first SC. (156)

    Rounds 57-60: Switch to COLOR B. CH1. SC in each ST around. Join with a SL ST to top of first SC. (156)

    Rounds 61-64: Switch to COLOR C. CH1. SC in each ST around. Join with a SL ST to top of first SC. (156)

    Rounds 65-68: Switch to COLOR B; fasten off COLOR C. CH1. SC in each ST around. Join with a SL ST to top of first SC. (156)

    Rounds 69-73: Switch to COLOR A; fasten off COLOR B. CH1. SC in each ST around. Join with a SL ST to top of first SC. (156)

    Round 74: CH1. SC in each of the first 24 STS. CH3; SK 3 STS. SC in each of the next 24 STS. CH3; SK 3 STS. SC in each of the next 48 STS. CH3; SK 3 STS. SC in each of the next 24 STS. CH3; SK 3 STS. SC in each of the next 24 STS. Join with a SL ST to top of first SC. (144 SC + 4 CH3 holes)

    Round 75: CH1. SC in each ST around, putting 3SC in each CH3 space from previous round. (156)

    Rounds 76-78: CH1. SC in each ST around. Join with a SL ST to top of first SC. (156)

    Round 79: CH1, turn. SC in each ST around. Join with a SL ST to top of first SC. (156)

    Fasten off; weave in all ends.

    – – – – – – – – – – –

    ATTACHING GROMMETS (SAME INSTRUCTIONS FOR BOTH BAG SIZES)

    Open your grommet kit (I used this one) and retrieve the following items:

    Turn your bag inside out, and follow the instructions on your grommet kit to add grommets to each of the four holes at the top of the bag. I’ve got 2 important tips for you here…

    Important tip #1: If I had to do it again, I would not have rested the base on the lower layer of fabric as shown in the photo below; beating it with a hammer caused a slight discoloration in the fabric. Not cool. #lessonlearned)
    Important tip #2: When I was reading the reviews for the grommet set before I purchased it, I learned that it’s best to do your hammering on a very hard surface (like your cement garage floor). This worked great for me.

    – – – – – – – – – – –

    SEWING THE BOTTOM (SAME INSTRUCTIONS FOR BOTH BAG SIZES)

    Keeping the bag inside out, lay it flat, lining up the grommets. Use COLOR A (a length about 4x the width of the bag) to sew the bottom of the bag closed, stitch by stitch. Fasten off and weave in ends.

    With the bag still inside out, turn it upside down and position the bottom so that one end lays out in a triangular shape, with the seam centered. Use a ruler and a piece of tape to measure and mark a 5″ line across the corner of the base. Sew a seam across the line (through both layers) with COLOR A. Repeat on the opposite side. This will make the inside of the bag roomy.

    Turn bag right-side out. Here’s what it should look like on the inside:

    And here’s what it should look like on the bottom:

    – – – – – – – – – – –

    ADDING ROPE HANDLES (SAME INSTRUCTIONS FOR BOTH BAG SIZES)

    Take your first rope handle and insert it through one of the grommets, going from the inside of the bag to the outside. Tie a knot near the bottom of the rope on the outside of the bag and pull it tight (you can use your grommet to help by gently but firmly pulling the rope from the inside of the bag, which will pull the knot against the grommet and tighten it up). Then, use good scissors to cut the excess rope about 1/2″ below the knot.

    If your rope looks like mine, it will have a couple strands of thread wrapped tightly around each twist. These are pretty easy to locate by gently pulling on the tips of the yarn. When you find them, pull them away from the yarn right up to the knot. Then use scissors to cut them off at that point. Give the exposed thread a little ruffle with your fingers; this will give your handles that classic weathered tassel look.

    Repeat these instructions with the other end of the same rope (attaching it through the other grommet on the same side of the bag) to complete your first handle. Then, do everything again for the 2nd handle on the other side. Note that you’ll want both handles to be the same length, so be sure to compare them when you’re about to tie your final knot to ensure that the handle sizes match.

    – – – – – – – – – – –

    That’s it – you’re done! Grab your favorite sunglasses and a beach towel and head to your favorite sandy spot in style. And don’t be surprised if someone asks you where you got your gorgeous beach bag!

  • Mini Beach Bag Gift Card Holder

    Mini Beach Bag Gift Card Holder

    Thank you Lion Brand Yarn for providing the yarn for this pattern!

    I’m a textbook procrastinator, so with just 4 days left of preschool for the middle monkey, of course I was scrambling this weekend to figure out what to give his teachers. I was also working on a really fun beach bag pattern (to be released soonish), and a couple nights ago the idea for this gift card holder dawned on me as I was working on the other pattern. What says “Summer’s here!” more than a beach bag filled with a beach ball, flip flops and sunglasses?

    So I whipped up this little mini bag and then put together an adorable printable to go with it. (Patterns rarely come together this quickly for me, so I was pretty proud of myself!) I used Lion Brand’s 24/7 Cotton yarn, because its bright colors are so summery.

    I included the phrase “School’s out, summer’s here… thanks for all you’ve done this year!” on the printable. But don’t worry; if you love the gift card holder but don’t have any teachers to buy for this year, you can also download the free printable without the phrase on it!

    Prefer a PDF?

    This pattern can be completed using the 100% free version right here on this page. However, many people prefer the convenience of a printable, ad-free PDF.

    All-Access Passholders get the ad-free version of this and all of my other blog patterns. It’s a pretty sweet deal, if I do say so myself! Learn more about it here or continuing scrolling for the free version.

    MINI BEACH BAG GIFT CARD HOLDER

    Difficulty: Easy

    Finished Size: 3″ wide at bottom, 4″ wide at top, and 2.5″ tall (not including straps)

    Hook:  E (3.5mm)

    Yarn: Less than 40 yards of #4 medium weight yarn. I used Lion Brand’s 24/7 Cotton in “Aqua” (COLOR A, about 11 yards); “White” (COLOR B, about 13 yards); and “Silver” (COLOR C, about 11 yards).

    Gauge: 10 rows of 10 SC = 2″ square. Starting chain should wrap snuggly around a gift card.

    You’ll also need: Yarn needle, tape, and this downloadable insert for teachers or this generic downloadable insert printed on card stock. Starfish charm optional (I found mine at Hobby Lobby)

    Abbreviations Used:
    ST/STS
     (stitch/stitches)
    SL ST (slip stitch)
    SK (skip)
    CH (chain)
    SC (single crochet)

    Notes:
    (1) This pattern is written in American Standard Terms.
    (2) CH1 at the beginning of round does not count as a stitch.

    – – – – – – – – – – – – – – – – – – – – – – – –

    THE PATTERN

    To begin: With COLOR A, leaving a 12″ tail, CH33. Join to first CH with a SL ST, being careful to not twist the chain. (Briana K has an awesome video tutorial here for how to do this perfect every time.) (33)

    Rounds 1-2: CH1. SC in same ST and in each ST around. Join with a SL ST to the top of the first SC. (33)

    Switch to COLOR B; fasten off COLOR A.

    Round 3: CH1. SC in same ST and in each ST around. Join with a SL ST to the top of the first SC. (33)

    Switch to COLOR C (do not fasten off COLOR B).

    Round 4: CH1. SC in same ST and in each ST around. Join with a SL ST to the top of the first SC. (33)

    Switch to COLOR B (do not fasten off COLOR C).

    Round 5: CH1. SC in same ST and in each ST around. Join with a SL ST to the top of the first SC. (33)

    Switch to COLOR C (do not fasten off COLOR B).

    Round 6: CH1. 2SC in same ST. SC in each of the next 16 STS. 2SC in next ST. SC in each of the next 15 STS. Join with a SL ST to the top of the first SC. (35)

    Switch to COLOR B (do not fasten off COLOR C).

    Round 7: CH1. SC in same ST and in each ST around. Join with a SL ST to the top of the first SC. (35)

    Switch to COLOR C (do not fasten off COLOR B).

    Round 8: CH1. 2SC in same ST. SC in each of the next 17 STS. 2SC in next ST. SC in each of the next 16 STS. Join with a SL ST to the top of the first SC. (37)

    Switch to COLOR B (do not fasten off COLOR C).

    Round 9: CH1. SC in same ST and in each ST around. Join with a SL ST to the top of the first SC. (37)

    Switch to COLOR C (do not fasten off COLOR B).

    Round 10: CH1. 2SC in same ST. SC in each of the next 18 STS. 2SC in next ST. SC in each of the next 17 STS. Join with a SL ST to the top of the first SC. (39)

    Switch to COLOR B; fasten off COLOR C.

    Round 11: CH1. SC in same ST and in each ST around. Join with a SL ST to the top of the first SC. (39)

    Switch to COLOR A; fasten off COLOR B.

    Round 12: CH1. 2SC in same ST. SC in each of the next 19 STS. 2SC in next ST. SC in each of the next 18 STS. Join with a SL ST to the top of the first SC. (41)

    Round 13: CH1. SC in same ST and in each ST around. Join with a SL ST to the top of the first SC. (41)

    Fasten off and weave in all ends except your starting tail. Turn your bag inside out and lay it flat so that the starting tail is at one end, then use it to sew the bottom together, stitch by stitch. Turn bag right side out.


    Straps

    1. Cut 6 strands of white yarn, each 10″ long. Take 3 of them and tie them together with a knot toward one end (pictured). Do the same with the other 3 strands.

    2. Take one set of strands and tape the knotted end down to something sturdy, then braid the three strands until the braided section measures 5″. Tie another knot to secure the braid. Repeat with the other set of strands.

    3. Lay your bag flat and locate the spaces between the final two rounds (the tiny spaces created by the stitches). Count 7 stitches from the top left edge of the bag and use a crochet hook to draw a knot from one of your braids through that space from the inside of the bag to the outside. Count 7 stitches from the top right edge and do the same with the other end of the same braid. Tie an additional knot over each of the original knots to make them big enough that they won’t slip back through the holes. Trim the excess yarn from each end.

    4. Turn bag over and repeat step 3 with the remaining braid.

    Free Printable

    Don’t forget the adorable printable for your mini beach bag! I’ve created two versions: one specifically for teachers with the saying “School’s out, summer’s here… thanks for all you’ve done this year!” and one blank version in case you want to write your own message or use this for someone other than a teacher.

    Download the Mini Beach Bag Gift Card Holder Insert – for Teachers
    Download the Mini Beach Bag Gift Card Holder Insert – Generic

    Cut out your insert, add your gift card, stuff it in your beach bag, and you’re done! I just know that the recipient will get a kick out of this adorable and reusable gift card holder.

  • Bean Stitch Accent Pillow

    Bean Stitch Accent Pillow

    Two things I’m loving this spring: the Bean Stitch, and accent pillows!

    So, to make this free pattern I combined the Bean Stitch with a classic ribbing to create this beautiful pillow. Vanna’s Choice in “Linen” and “Graphite” come together to give it that rustic-modern look that is always a winner to me.

    Once you get the hang of the Bean Stitch, this pillow works up quick. I made it in two days while watching Nashville reruns during my son’s naps… and he’s a catnapper (UGH), so I think that’s pretty impressive! (Any of you other mamas who’ve had catnappers, I know you’re feeling my pain right now. Seriously, my laundry piles are sky high and we’ve had pizza for dinner one too many times this month. Good thing he’s cute!)

    Scroll down for the free pattern, or Klik hier voor de Nederlandse vertaling (Dutch translation). (Nederlandse vertaling gemaakt door Rita van Someren voor Haken voor Iedereen en Summerday’s CreationsDit patroon mag niet in andere groepen, websites, blogs etc. gedeeld worden.)

    Prefer a PDF?

    This pattern can be completed using the 100% free version right here on this page. However, many people prefer the convenience of a printable, ad-free PDF.

    All-Access Passholders get the ad-free version of this and all of my other blog patterns. It’s a pretty sweet deal, if I do say so myself! Learn more about it here or continuing scrolling for the free version.

    BEAN STITCH ACCENT PILLOW

    add-to-ravelry-favorites

    Level: Easyish

    Size: 11.5″ x 11.5″ (stretches to fit a 12″ square pillow insert)

    Hooks: I (5.5mm) and H (5.0mm)

    Yarn: I used about 275 yards of Vanna’s Choice (from Lion Brand), a #4 aran weight yarn. The breakdown is as follows:

    COLOR A (ribbing): Vanna’s Choice “Linen” (about 75 yards)
    COLOR B (main section): Vanna’s Choice “Graphite” (about 200 yards)

    You’ll also need: Yarn needle for weaving in ends, 12″ pillow insert

    Gauge: Your 15 rows of ribbing (as instructed in the “first ribbing” section of the pattern) should measure about 4″ unstretched.

    Abbreviations Used:
       ST/STS (stitch/stitches)
    SL ST (slip stitch)
    SK (skip)
    CH (chain)
    SC (single crochet)
    BLO (back loops only)

    Special Stitch:

    Bean Stitch – Insert hook into stitch, yarn over and pull through (2 loops on hook). Yarn over, insert hook into same stitch, yarn over and pull through (4 loops on hook). Yarn over, insert hook into same stitch, yarn over and pull through (6 loops on hook). Yarn over and pull through all 6 loops. Chain 1 to close the stitch.

    Notes:
    (1) This pattern is written in American Standard Terms.
    (2) Starting CHs do not count as stitches.
    (3) Make 2.
    (4) Each side of the pillow is worked in one piece (with color changes). In other words, the second ribbing section is not created and sewn on separately. Once both sides of the pillow are complete, you will follow the instructions to sew them together with your pillow insert inside.
    (5) A Dutch translation is available here. Nederlandse vertaling gemaakt door Rita van Someren voor Haken voor Iedereen en Summerday’s CreationsDit patroon mag niet in andere groepen, websites, blogs etc. gedeeld worden.

    – – – – – – – – – – – – – – – –

    SECTION 1: FIRST RIBBING

    To begin: With larger hook and COLOR A, CH9.

    Row 1: SC in 2nd CH from hook and in each remaining CH. (8)

    Rows 2-40:  CH1, turn. SC in 1st ST. SC in BLO of each of the next 6 STS. SC in last ST. (8)

    – – – – – – – – –

    SECTION 2: BODY OF PILLOW

    Body, Row 1: CH1, do not turn. SC evenly down the long edge of the ribbing, putting 1SC in each ribbing row (each peak and each valley). (40)

    Switch to COLOR B, fasten off previous color.

    Row 2: CH1, turn. SC in each ST across. (40)

    Note: At this point we will begin using the Bean Stitch. The bulkiness of this stitch might cause you to unintentionally loosen your tension significantly. To rectify this, you can switch to a smaller hook size. The ribbing will stretch around the pillow so it is not imperative that your bean stitch rows be exactly the same length as your strip of ribbing, but you will want to measure a bean stitch row every so often to make sure you aren’t crocheting the beans so loosely that the length is more than 11.5″. If it is, you’ll want to lower your hook size even more.

    Rows 3-22: CH1, turn. SK 1st ST, BEAN STITCH in next ST. (SK next ST, BEAN STITCH in next ST) across. (40, or 20 bean stitches)

    Note: If you switched to a lower hook size for rows 3-22, you can switch back to your first hook size now.

    Row 23: CH1, turn. SC in each ST across. (40)

    Switch to COLOR A, fasten off previous color.

    Row 24: CH1, turn. SC in each ST across. (40)

    – – – – – – – – –

    SECTION 3: LAST RIBBING

    In this section, we will be creating the second ribbing by making vertical ribs and attaching them with slip stitches to the last row of the body as we go. We’ll be referring to “Row 24” quite a bit; that’s the last row of the body of the pillow we completed, and that’s what the ribbing will be attaching to. 

    With hook still in your last stitch from Row 24, CH9.

    Last Ribbing, Row 1: Turn work and SC in 2nd CH from hook and in each remaining CH (Fig. A). SL ST in the first SC of Row 24, then SL ST in the next SC of Row 24 as well (Fig. B). (8, plus the 2 SL STS along Row 24)

    Row 2: CH1, turn. Skipping over the 2 SL STS you put in Row 24 (Fig. C), SC in BLO of each of the first 7 STS of the ribbing. SC in final ST (Fig. D). (8)

    Row 3: CH1, turn. SC in first ST of ribbing. SC in BLO of each of the next 7 STS of ribbing. SL ST in each of the next 2 STS of Row 24 (Fig. E). (8, plus the 2 SL STS along Row 24)

    Row 4: CH1, turn. Skipping over the 2 SL STS you put in Row 24, SC in BLO of each of the first 7 STS of the ribbing. SC in final ST. (8)

    Repeat Rows 3-4 all the way along Row 24 (See Fig. F for a progress photo). You should end up with 40 rows of ribbing, which is the number of stitches in Row 2

    Do not fasten off, but do take a moment to weave in your other ends, then proceed to Edging.

    – – – – – – – – –

    EDGING

    We need to put 40 STS along each edge of our square, and to keep it looking really nice, we’re going to edge each section in its own color. Continuing with COLOR A, CH1. SC evenly down the long edge of the ribbing, putting 1SC in each ribbing row (each peak and each valley) for 40 SC. CH1 to round the corner, then proceed to next edge. SC in each of the first 9 STS (8 ribbing stitches + Row 1 of the body). Attach COLOR B (Fig. G). (Note: You can decide if you want to carry the color you aren’t using behind the current color, or fasten it off and reattach it at the next appropriate section. I carried mine.) SC along the BEAN STITCH section of the pillow, putting 1SC in each BEAN STITCH row for a total of 20 SC. SC in the final row of COLOR B (Row 23, the row of single crochet). Switch to COLOR A. Complete 9 more SC to finish the edge, then CH1 to round the corner. Repeat the process for edges 3 & 4, then join with a SL ST to the top of the first SC.

    Fasten off and weave in all ends.

    – – – – – – – – –

    SEWING THEM TOGETHER

    Keeping your pillow insert handy, hold the two piece together exactly how you want them to be arranged on the pillow. Pick a spot on the edging that is the beginning of a COLOR A section, and attach COLOR A through the same stitch on both pieces (Fig. H). CH1, then SL ST evenly through both layers around the entire COLOR A section (Fig. I), putting (SC, CH1, SC) in each corner. When you come to the COLOR B section, attach COLOR B and fasten off COLOR A (or carry it along if you prefer) and continue. Once you’ve completed about 3/4 of the perimeter of the pillow, stuff your pillow insert inside (Fig. J). Continue to SC the rest of the way around. Join with a SL ST to the first SC.  Fasten off and weave in ends.

  • Spring Bean Cowl

    Spring Bean Cowl

    Thank you Lion Brand Yarn for providing the yarn for this pattern!

    I had the opportunity to try the new Mandala yarn from Lion Brand and I am sooooo excited about it! If you aren’t familiar with it yet, it’s Lion Brand’s take on the trendy yarn cakes that have taken the crochet world by storm recently. I knew I was going to love Mandala as soon as I heard that it was a #3 light yarn – that immediately set it apart in my mind from all the other versions. And the colors!

    Not only are there 16 beautiful color schemes to choose from, but the gradient effect they give is the best I’ve seen in these popular cakes. While not a true gradient, the creators of Mandala yarn were very intentional about their color changes. Instead of 3 or 4 abrupt color jumps, Mandala utilizes light and dark shades of the same color to gradually change from one color to the next. For example, in “Genie” (the sample with the green/white/gray colorway), the yarn started as a dark gray, then switched to medium gray, to grayish-green, to green, to light green, to even lighter green, to white, to lightest gray, to medium gray, and finally on back to the dark gray it began with. What a difference that makes in the overall look!

    I decided that a nice simple textured project would be perfect for showing off the pretty colors of this yarn. I’ve been playing with the bean stitch lately, so that’s what I used. I don’t know exactly why this stitch got its name, but I think it looks like an espresso bean, and coffee-related things always make me happy.

    I also worked this cowl up in two other fun colors – Sphinx (left) and Chamera (right). Mandala yarn definitely has something for everyone!

    What’s really great about this pattern is that it uses all of your Mandala cake without leaving any wasted yarn. That’s always a win for me (and for my overflowing yarn shelf)!

    Prefer a PDF?

    This pattern can be completed using the 100% free version right here on this page. However, many people prefer the convenience of a printable, ad-free PDF.

    All-Access Passholders get the ad-free version of this and all of my other blog patterns. It’s a pretty sweet deal, if I do say so myself! Learn more about it here or continuing scrolling for the free version.

    SPRING BEAN COWL

    add-to-ravelry-favorites

    Difficulty: Easy

    Finished Size: 29″ around x 16″ tall

    Hook:  H (5.0mm)

    Yarn: 1 full cake of Lion Brand Mandala (or about 590 yards of your favorite #3 light yarn from Lion Brand). Sample is shown in “Genie”.

    Gauge: 14 rows of 7 bean stitches = 4″ square. Or, your starting chain should measure about 27-28″.

    You’ll also need: Yarn needle

    Abbreviations Used:
    ST/STS
     (stitch/stitches)
    SL ST (slip stitch)
    SK (skip)
    CH (chain)
    SC (single crochet)

    Special Stitch:
       Bean Stitch – Completed, this stitch actually covers the ground of two stitches. Here’s how you do it:

    Insert hook into stitch, yarn over and pull through (2 loops on hook). Yarn over, insert hook into same stitch, yarn over and pull through (4 loops on hook). Yarn over, insert hook into same stitch, yarn over and pull through (6 loops on hook). Yarn over and pull through all 6 loops. Chain 1 to close the stitch, and skip the next stitch. (You will skip the next stitch every time you do a bean stitch.)

    Notes:
    (1) This pattern is written in American Standard Terms.
    (2) CH1 at the beginning of round does not count as a stitch.
    (3) Pattern is worked in a continuous, seamless round (spiral). Do notjoin, turn or chain except where instructed.
    – – – – – – – – – – – – – – – – – – – – – – – –

    THE PATTERN

    Fringe (optional)
    Before we make a single stitch, we’re going to cut our fringe. This enables us to have enough yarn for the fringe while still using up every yard of the Mandala cake for the pattern. Since we want our fringe to blend right into the gradient of the pattern, carefully remove the label and find the end of the yarn. (We’ll be pulling from the center while we crochet, so the bottom of the cowl will be the end you find along the outside wall of the cake). Handle your cake with care so that you can slip that label back on it when you’re done.

    Find something in your home that is approximately 9″ wide – I used a 9″ cutting board. Wrap the yarn all the way around the object 55 times, keeping it taught, but not pulling super tight (Figure 1). Cut once at the halfway point (Figure 2). Carefully gather the strands in your hand and fold them in half, then cut again at the halfway point (figure 3). You should now have about 110 pieces of fringe. (We only need 100, but usually a few of them end up too short.) Carefully replace the label on your yarn cake, and proceed to the pattern.

    For the pattern, use the beginning of the yarn from the center of the yarn cake.

    To begin: CH100. Join to first CH with a SL ST, being careful to not twist the chain. (Briana K has an awesome video tutorial here for how to do this perfect every time.) (100)

    Round 1: CH1. SC in same ST and in each ST around. Do not join. (100)

    Round 2: Do not chain. Complete a bean stitch in the first SC from the previous round (see “Special Stitch” for instructions). Bean stitch around. (100, or 50 bean stitches)

    Rounds 3-52 (or until you almost run out of yarn): Bean Stitch around. (100, or 50 bean stitches)

    To finish: After your last completed bean stitch, SC in next ST and SL ST in next ST. Fasten off and weave in ends. In groups of 4 strands, attach fringe every 4 stitches (every other bean).

  • Henry’s Accent Pillow

    Henry’s Accent Pillow

    When I was choosing the theme for my newest little monkey’s nursery, I fell in love with this gorgeous navy, gray and green bedding set. In the spirit of keeping things simple and inexpensive, I bought the bed skirt and some off-brand coordinating sheets and changing pad covers. I wanted to add an accent pillow for the rocker to help tie everything together, but the pillow that came with the set was $52.

    FIFTY-TWO DOLLARS.

    It was really cute, but who has that much money to spend on a decorative pillow? So instead, after making Henry’s Baby Blanket in his nursery colors, I decided to just make a coordinating pillow. I’m giving you the pattern for it today!

    As you can see, the pillow only includes 2 color blocks (as opposed to Henry’s Baby Blanket, which uses 3 different colors of blocks). There just wasn’t room for 3 of them on a 12″ pillow without them being reeeaaally skinny. I opted to leave out the green color simply because I figure that when Henry grows out of his nursery, the pillow will be easier to coordinate with a different decor later if it doesn’t have the green in it.

    So, if you’re making the baby blanket for someone in their chosen nursery colors, now you can blow them away with a coordinating accent pillow!

    Prefer a PDF?

    This pattern can be completed using the 100% free version right here on this page. However, many people prefer the convenience of a printable, ad-free PDF.

    All-Access Passholders get the ad-free version of this and all of my other blog patterns. It’s a pretty sweet deal, if I do say so myself! Learn more about it here or continuing scrolling for the free version.

    HENRY’S ACCENT PILLOW

    add-to-ravelry-favorites

    Level: Easyish

    Size: 11″ x 11″ (stretches to fit a 12″ square pillow insert)

    Hook: H (5.0mm)

    Yarn: I used about 325 yards of Cascade Longwood (from Jimmy Beans Wool), a lighter #4 worsted weight yarn. Here’s my breakdown, and the colors as assigned in the pattern:

    COLOR A (White): Cascade Longwood – 01 White (about 135 yards)
    COLOR B (Gray): Cascade Longwood – 02 Frost Gray (about 95 yards)
    COLOR C (Navy): Cascade Longwood – 40 Midnight (about 95 yards)

    You’ll also need: Yarn needle for weaving in ends, 12″ pillow insert

    Gauge: 11 rows of ribbing (as instructed in the “first ribbing” section of the pattern) should measure 2.5″.

    Abbreviations Used:
       ST/STS (stitch/stitches)
    SL ST (slip stitch)
    SK (skip)
    CH (chain)
    SC (single crochet)
    HDC (half double crochet)
       SC+HDC (this just means to put a single crochet and a half double crochet in the same stitch)
    HHDC (herringbone half double crochet; see “special stitch” below)
    BLO (back loops only)

    Special Stitch:
    HHDC – Herringbone Half Double Crochet. Here’s how you do it:

    HHDC: Yarn over, insert hook into stitch. Yarn over, pull loop through stitch AND through first loop on hook (this is similar to a slip stitch motion). Two loops remain on hook. Yarn over and pull through both loops.

    (If you need additional help, Moogly has an excellent video tutorial here. Please note that while her video considers the CH2 at the beginning of rows as a stitch, the pattern below does not.)

    Notes:
    (1) This pattern is written in American Standard Terms.
    (2) Starting CHs do not count as stitches.
    (3) Pillow is worked in one piece (with color changes). In other words, the ribbing at the bottom is not created and sewn on separately.
    (4) You need to make 2. I switched the colors for the color block sections on the second side so that the sides of the pillow would be slightly different (on one side, the herringbone section is gray and the SC+HDC combo section is navy, and vice versa on the other side).

    – – – – – – – – – – – – – – – –

    SECTION 1: FIRST RIBBING

    To begin: With COLOR A (white), CH9.

    Row 1: SC in 2nd CH from hook and in each remaining CH. (8)

    Rows 2-48:  CH1, turn. SC in BLO of each ST across. (8)

    – – – – – – – – –

    SECTION 2: BODY OF PILLOW

    Body, Row 1: CH1, do not turn. SC evenly down the long edge of the ribbing, putting 1SC in each ribbing row (each peak and each valley). (48)

    Switch to COLOR B (gray), fasten off previous color.

    Row 2: CH1, turn. SC in each ST across. (48)

    Rows 3-12: CH1, turn. HDC in 1st ST. (SK next ST, SC+HDC in next ST) across until 1 ST remains. SC in remaining ST. (48)

    Row 13: CH1, turn. SC in each ST across. (48)

    Switch to COLOR A (white), fasten off previous color.

    Rows 14-15: CH1, turn. SC in each ST across. (48)

    Switch to COLOR C (navy), fasten off previous color.

    Row 16: CH1, turn. SC in each ST across. (48)

    Rows 17-26: CH1, turn. HHDC in each ST across. (48)

    Row 27: CH1, turn. SC in each ST across. (48)

    Switch to COLOR A (white), fasten off previous color.

    Row 28: CH1, turn. SC in each ST across. (48)

    – – – – – – – – –

    SECTION 3: LAST RIBBING

    In this section, we will be creating the second ribbing by making vertical ribs and attaching them with slip stitches to the last row of the body as we go. We’ll be referring to “Row 28” quite a bit; that’s the last row of the body of the pillow we completed, and that’s what the ribbing will be attaching to. 

    With hook still in your last stitch from Row 28, CH9.

    Last Ribbing, Row 1: Turn work and SC in 2nd CH from hook and in each remaining CH. SL ST in the first SC of Row 28, then SL ST in the next SC of Row 28 as well. (8, plus the 2 SL STS along Row 28)

    Row 2: CH1, turn. Skipping over the 2 SL STS you put in Row 28, SC in BLO of each of the 8 STS of the ribbing to create another row of ribbing. (8)

    Row 3: CH1, turn. SC in BLO of each of the 8 STS of the ribbing to create another row of ribbing. SL ST in each of the next 2 STS of Row 28. (8, plus the 2 SL STS along Row 28)

    Row 4: CH1, turn. Skipping over the 2 SL STS you put in Row 28, SC in BLO of each of the 8 STS of the ribbing to create another row of ribbing. (8)

    Repeat Rows 3-4 all the way along Row 28. (You should end up with 48 rows of ribbing, which is the number of stitches in Row 28).

    – – – – – – – – –

    EDGING

    Explanation: We need to put a SC edging around the entire pillow. Ideally, we want this to be a perfect square, so we need to make sure that we are putting 48 stitches along each side. The sides with the ribbing are easy; there are 48 rows of ribbing, so we’ll just put 1 stitch in each ribbing row (each peak and each valley). The other two sides are comprised of 44 rows (28 rows in the body + 8 stitches in each ribbing section), so we need to make sure we’re adding 4 stitches to get to 48. To do that, we’ll put 1 SC in each row of the pattern (including one in each of the 8 ribbing stitches) except for the color blocks. The color blocks are each 12 rows tall, so we’re going to put 14 stitches along each color block (just eyeball it the best you can). To get around corners, we’ll simply chain 1.

    Here’s a visual:

    So, to do this, keep your hook in the final stitch you completed in the second ribbing section. CH1, and SC evenly around the entire piece according to the directions above. When you get back to the beginning, join with a SL ST to the first SC you made.

    Fasten off and weave in all ends.

    – – – – – – – – –

    SEWING THEM TOGETHER

    Keeping your pillow insert handy, hold the two piece together exactly how you want them to be arranged on the pillow. Pick a spot on the edging and join COLOR A through the same stitch on both pieces. CH1, then SC evenly through both layers around the entire pillow, putting (SC, CH1, SC) in each corner. Once you’ve completed about 3/4 of the perimeter, stuff your pillow insert inside. Continue to SC the rest of the way around. Join with a SL ST to the first SC.  Fasten off and weave in ends.

  • Comfy Squares Buttoned Cowl

    Comfy Squares Buttoned Cowl

    I love buttoned cowls! I already have 3 on the blog (the Sparkly, the Apple Crisp and the Herringbone Buttoned Cowls), but I’ve been wanting to do a “comfy squares” version for a while. It seemed like a simple project for easing back into pattern designing after my little newborn-snuggles-filled hiatus, so on Henry’s first trip with me to the yarn store, we picked up a few skeins of Lion Brand’s Wool-Ease.


    (Henry was a little overwhelmed by all the choices.)

    I haven’t used this yarn much at all, but now that I’m reminded of what a nice drape it has, I’m definitely going to be using it more often!

    I also picked up these cute wooden buttons. They’re 1-1/8″, and you’ll need two of them in your favorite style.

    Prefer a PDF?

    This pattern can be completed using the 100% free version right here on this page. However, many people prefer the convenience of a printable, ad-free PDF.

    All-Access Passholders get the ad-free version of this and all of my other blog patterns. It’s a pretty sweet deal, if I do say so myself! Learn more about it here or continuing scrolling for the free version.

    COMFY SQUARES BUTTONED COWL

    add-to-ravelry-favorites

    Difficulty: Easyish

    Finished Size: 32″ wide x 13.5″ tall (when laid flat)

    Hook:  H (5.0mm)

    Yarn: About 470 yards of Wool-Ease yarn by Lion Brand (that’s less than 3 skeins). Wool-Ease is a #4 worsted yarn, and the sample is shown in “Natural Heather”.

    Gauge: The first 8 rows of the pattern (the ribbing) should measure 2.25″ square.

    You’ll also need: Yarn needle, 2 buttons (1 1/8″), sewing needle, and thread to match yarn color.

    Abbreviations Used:
    ST/STS
     (stitch/stitches)
    SL ST (slip stitch)
    SK (skip)
    CH (chain)
    SC (single crochet)
    SC+HDC (this just means to put a single crochet and a half double crochet in the same stitch)
    BLO (back loops only)

    Notes:
    (1) This pattern is written in American Standard Terms.
    (2) CH1 at the beginning of rows does not count as a stitch.
    (3) The pattern is divided into 3 parts: the Top Band, the Body, and the Side Band. The pattern as a whole is worked in one piece (there is no sewing at the end).
    Herringbone Buttoned Cowl Crochet Pattern  |  Free Cowl Scarf Pattern by Little Monkeys Crochet

    – – – – – – – – – – – – – – – – – – – – – – – –

    THE PATTERN


    Part 1: Top Band

    To begin: CH9.

    Top Band, Row 1: SC in 2nd CH from hook and in each remaining CH. (8)

    Rows 2-121: CH1, turn. SC in first ST. SC in BLO of each of the next 6 STS. SC in last ST. (8)

    Row 122 (buttonhole): CH1, turn. SC in first ST. SC in BLO of each of the next 2 STS. CH2, SK 2 STS. SC in BLO of each of the next 2 STS. SC in last ST. (6 + CH2)

    Row 123: CH1, turn. SC in first ST. SC in BLO of each of the next 2 STS. 2SC in CH2 space. SC in BLO of each of the next 2 STS. SC in last ST. (8)

    Rows 124-125: CH1, turn. SC in first ST. SC in BLO of each of the next 6 STS. SC in last ST. (8)


    Part 2: Body
    (Note that for ease of row counting, we are referring to the next row as “Row 1” instead of “Row 126”.)

    Body, Row 1: CH1, do not turn. SC evenly down the long edge of the piece, putting 1SC in each row. (125)

    Row 2: CH1, turn. SK first ST, SC+HDC in next ST. (SK next ST, SC+HDC in next ST) 57 times; 9 STS remain unworked (and will remain so for the remainder of Part 2). (116)

    Rows 3-44: CH1, turn. SK first ST, SC+HDC in next ST. (SK next ST, SC+HDC in next ST) across. (116)

    Note: At this point, you should be on the same side of the cowl as the buttonhole we made back in Row 122 of the Top Band. If you’re on the opposite side you probably miscounted something, but it’s no big deal; just do one more row to get yourself to where you need to be.

    Row 45: CH1, do not turn. SC evenly up the side of the cowl, working toward the buttonhole, putting 1SC in each row until you reach the inner corner where the top band and the body meet. (43 SC)


    Part 3: Side Band
    (Remember back in Row 2 of the body, when we left 9 stitches unworked? We’re going to be working in those now.)

    Side Band, Row 1 (highlighted in yellow in the photo below): SL ST to the closest unworked ST from Row 2 of the body section. CH1. SC in BLO of each of the next 7 unworked STS. SC in both loops of the final unworked ST. (8 SC)

    Row 2: CH1, turn. SC in first ST. SC in BLO of each of the next 7 STS. SL ST in each of the next 2 STS along Row 45 of the body. (8, + the 2 SL STS along Row 45)

    Row 3: CH1, turn. Skipping over the 2 SL STS, SC in BLO of each of the next 7 STS. SC in both loops of the last ST. (8)

    Rows 4-21: Repeat rows 2-3. (8)

    Row 22 (buttonhole): CH1, turn. SC in first ST. SC in BLO of each of the next 2 STS. CH2, SK 2 STS. SC in BLO of each of the remaining 3 STS. SL ST in each of the next 2 STS along Row 45 of the body. (6SC + CH2 buttonhole, + the 2 SL STS along Row 45)

    Row 23: CH1, turn. Skipping over the 2 SL STS, SC in BLO of each of the next 3 STS. 2SC in CH2 space. SC in BLO of each of the next 2 STS. SC in last ST. (8)

    Rows 24-43: Repeat rows 2-3. (8)

    Row 44: CH1, turn. SC in first ST. SC in BLO of each of the next 7 STS. SL ST in the final ST of Row 45 of the body. (8, + 1 SL ST along Row 45)

    Edging: CH1, turn. SC evenly around the entire piece, putting 3SC in each corner. Join with a SL ST to the first SC.

    Fasten off and weave in ends.

    Buttons: Lay your cowl flat, with the corner buttonhole at the top left corner. Your first button should be sewn 1.25″ from the bottom edge and 1.25″ from the right edge; your second button should be sewn in line with the first button, 1.25″ from the bottom edge and 7″ from the right edge.

    To Wear:

    It can feel a bit tricky at first! Start by putting it around your neck with the buttonhole on your left, and the Top Band at the top. The button that is NOT in the corner is the button that will go through the top buttonhole. Once you’ve joined those together, you can slip the corner button through the second buttonhole, then tuck the extra fabric under the cowl. If you need a little extra help, watch this video of the Sparkly Buttoned Cowl (it’s the same style of cowl):

  • Annabelle Slouch Hat

    Annabelle Slouch Hat

    Thank you to Chandi at Expression Fiber Arts for providing the yarn for this sample!

    This season has been all about stepping out of my comfort zone with my yarn choices. One thing I’ve never done, until now, is get my hands on hand-dyed yarn. But when Expression Fiber Arts showed up on my Facebook feed one day, I was captivated by the gorgeousness of the yarn. I knew I had to try it! Chandi was gracious enough to send me some Superwash Merino Silk Pearlescent Worsted to play with, and there are a few things I noticed right away when I held it in my hands:

    1. “Pearlescent” is a perfect description for this yarn. I wondered, when I saw the photos on the web site, if it really would look as shiny in real life. It does! And while cheaper yarns tend to sacrifice stitch definition for sheen, this yarn doesn’t at all.

    2. It’s soft! Like, super soft. But sturdy.

    3. The colors are incredible. I chose a colorway that isn’t available anymore (I think I grabbed the last one, sorry!) that is a mixture of the palest pink and icy blue, but if you look on the web site, you’ll see that there are plenty of totally gorgeous colorways to choose from!

    Now, you know me; I love my big box store yarns, and they’re what I typically use; because not only am I on a budget, but I know many of you are, too. But, I also know that there is a whole world of absolutely stunning yarns out there that are worth exploring, especially for those super special projects. Don’t be afraid to branch out; you might just discover something beautiful!

    After I finished the pattern for this hat, I felt like it needed a little contrast. So, I added a pom pom with some white unlabeled yarn from my stash. The pom pom is totally optional and is not included in the yardage count.

    Prefer a PDF?

    This pattern can be completed using the 100% free version right here on this page. However, many people prefer the convenience of a printable, ad-free PDF.

    All-Access Passholders get the ad-free version of this and all of my other blog patterns. It’s a pretty sweet deal, if I do say so myself! Learn more about it here or continuing scrolling for the free version.

    ANNABELLE SLOUCH HAT

    add-to-ravelry-favorites

    Difficulty: Easy

    Finished Size: 9″ tall x 9.5″ wide (when laid flat)

    Hook: I (5.50mm) and G (4.25mm)

    Yarn: Approximately 185 yards (not including optional pom pom) of Superwash Merino Silk Pearlescent Worsted, a #4 weight medium yarn by Expression Fiber Arts.

    Gauge: With larger hook, 16 rows of 8 (skip 1 ST, SC+HDC in next ST) combos = 4″ square

    You’ll also need: Yarn needle, stitch marker

    Abbreviations Used:
       MC (magic circle – view tutorial here)
    ST
     (stitch)
    SL ST (slip stitch)
    SK (skip)
    CH (chain)
    SC (single crochet)
    HDC (half double crochet)
    SC+HDC (this just means to put 1 SC and 1 HDC in the same ST)
    BLO (back loop only)

    Notes:
    (1) This pattern is written in American Standard Terms.
    (2) Pattern is worked in a continuous, seamless round until the band. Use a stitch marker to mark the beginning of rounds and do not join or turn unless instructed to do so.

    – – – – – – – – – – – – – – – – – – – – – – – –

    THE PATTERN

    To begin: With larger hook, make a magic circle; CH1 (does not count as a stitch).

    Round 1: 10 HDC in MC. (10)

    Round 2: 2 HDC in each ST around. (20)

    Round 3: 2 HDC in each ST around. (40)

    Round 4: 2 HDC in each ST around. (80)

    Round 5: (SC+HDC in next ST, SK next ST) around. (80)

    Rounds 6-26: Repeat Round 5.

    Round 27: (SC+HDC in next ST, SK next ST) 39 times; 2 STS remain. SC in next ST; SL ST next (final) ST. (80)

    Round 28: CH1. SC in each ST around. Join with a SL ST to the top of the first SC. (80)

    Next we’re going to make the band of the hat, and we will be working in vertical rows, attaching it to the final round of the hat with SL STS as we go.

    Switch to G Hook.

    Row 1: CH7. SC in 2nd CH from hook. SC in remaining 5 CHS. SL ST in next 2 SCs of Round 28. (6, plus the 2 SL STS at the base of the hat)

    Row 2: CH1, turn. Skipping over the 2 SL STS, SC in BLO of each of the next 5 STS. SC in both loops of the last ST. (6)

    Row 3: CH1, turn. SC in first ST. SC in BLO of each of the next 5 STS. SL ST in next 2 SCs of Round 28. (6, plus the 2 SL STS at the base of the hat)

    Repeat Rows 2-3 all the way around the hat (80 rows). Fasten off and use your tail to whip stitch the first and last rows together. Weave in all ends.

    Attach pom pom (optional).