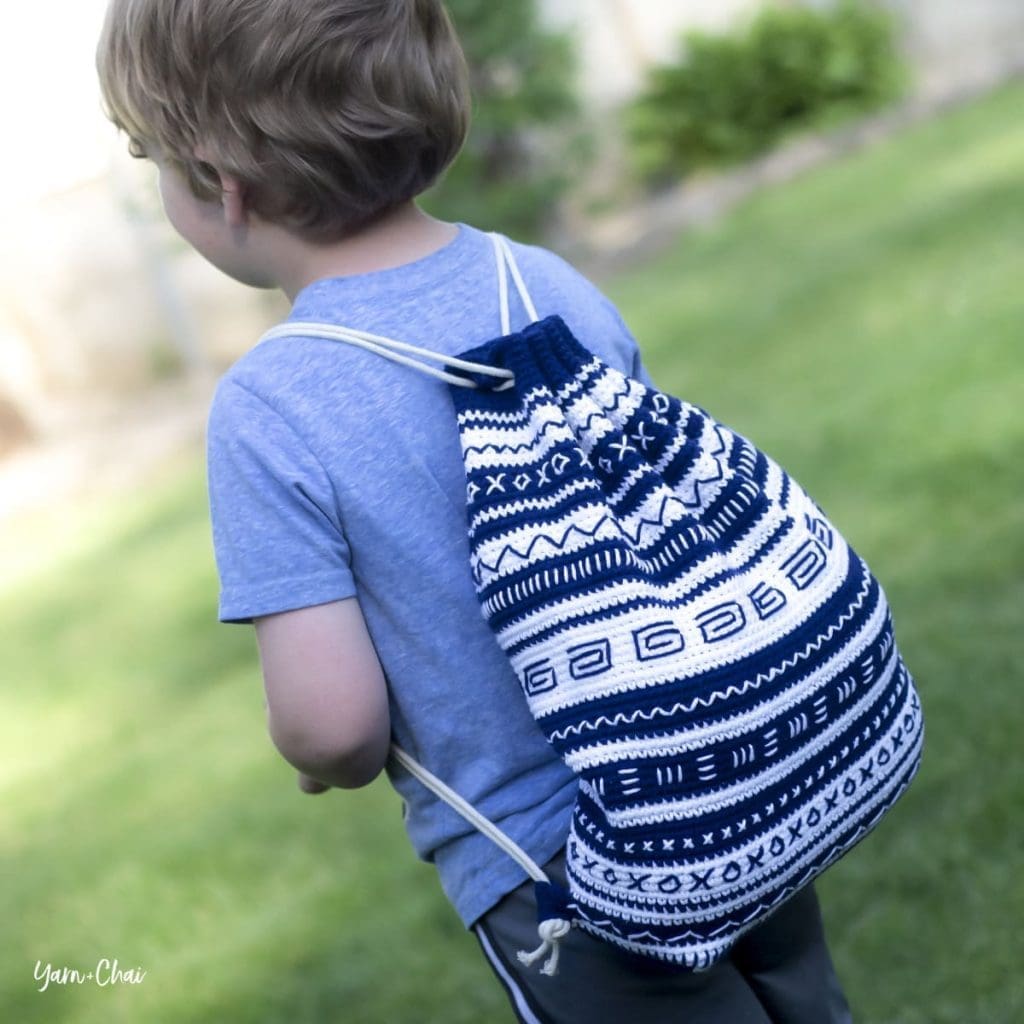
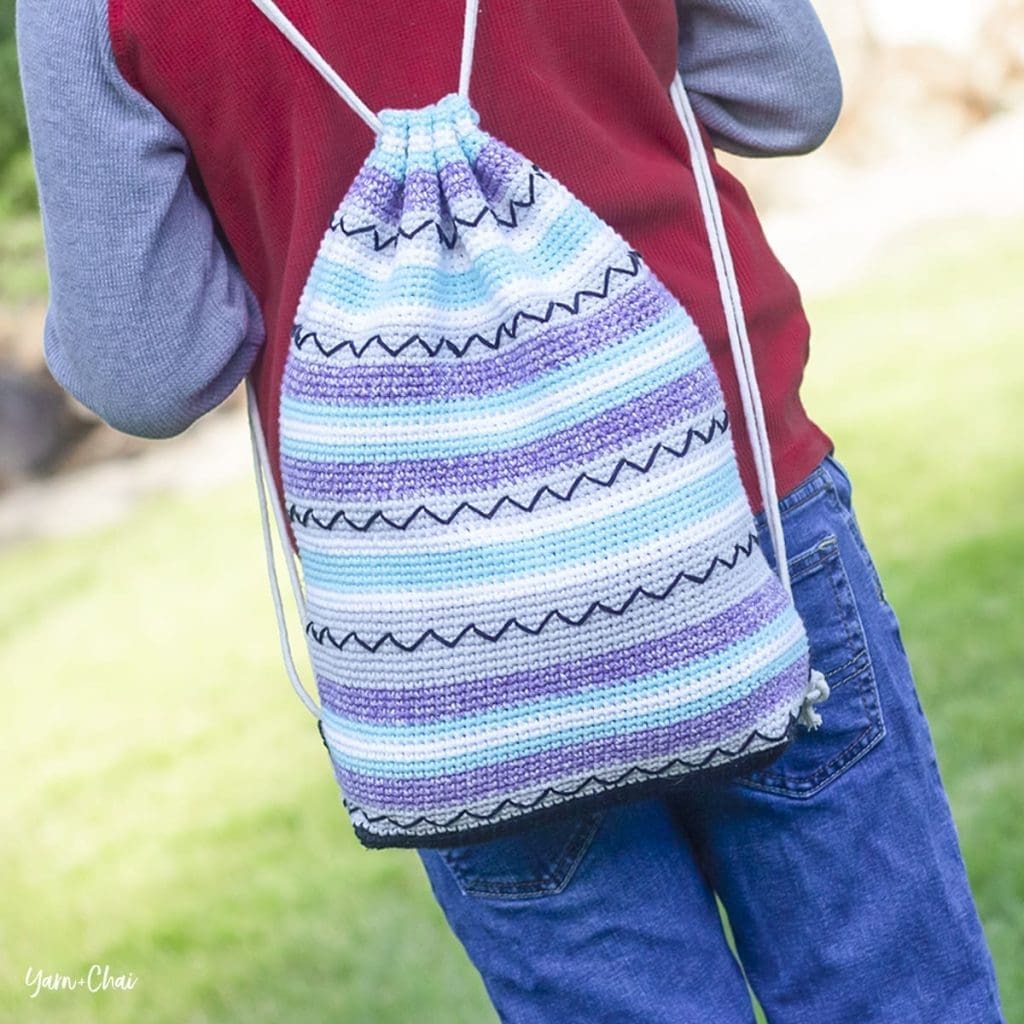
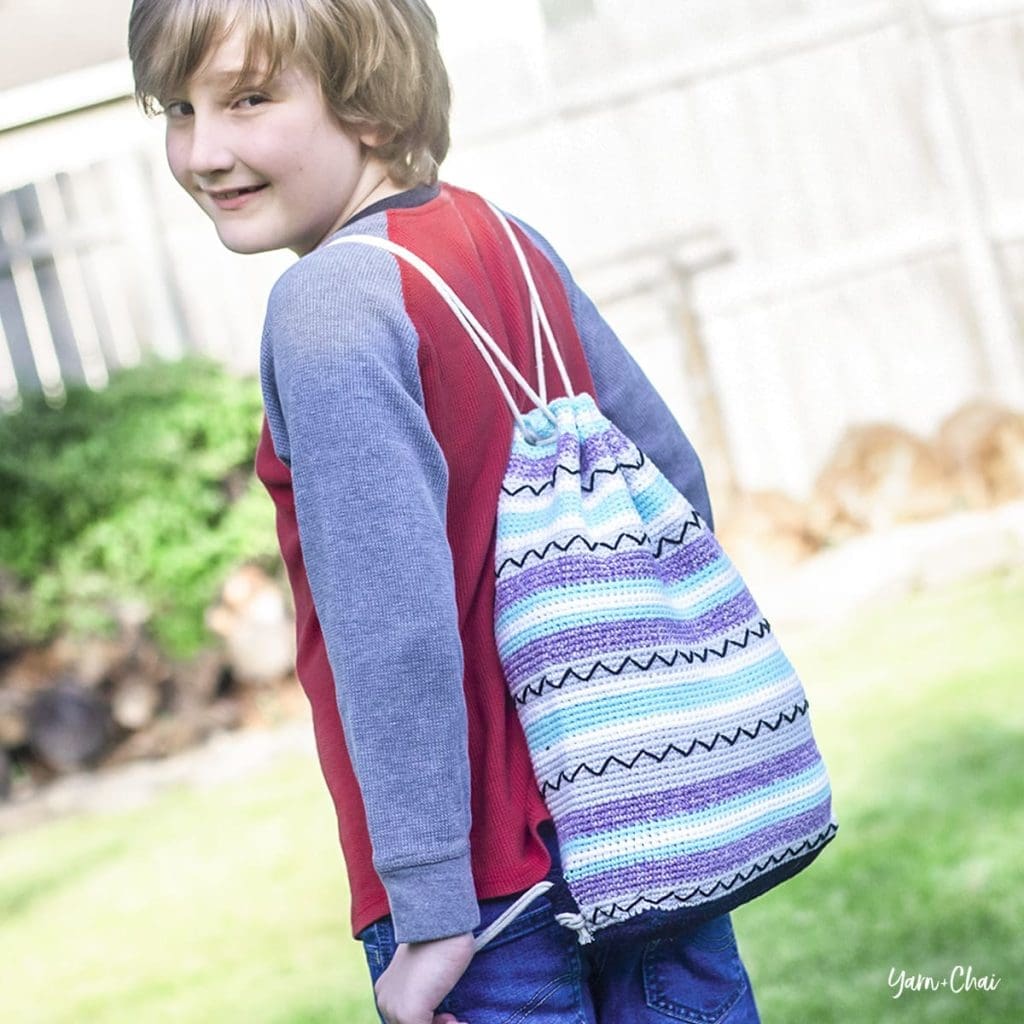
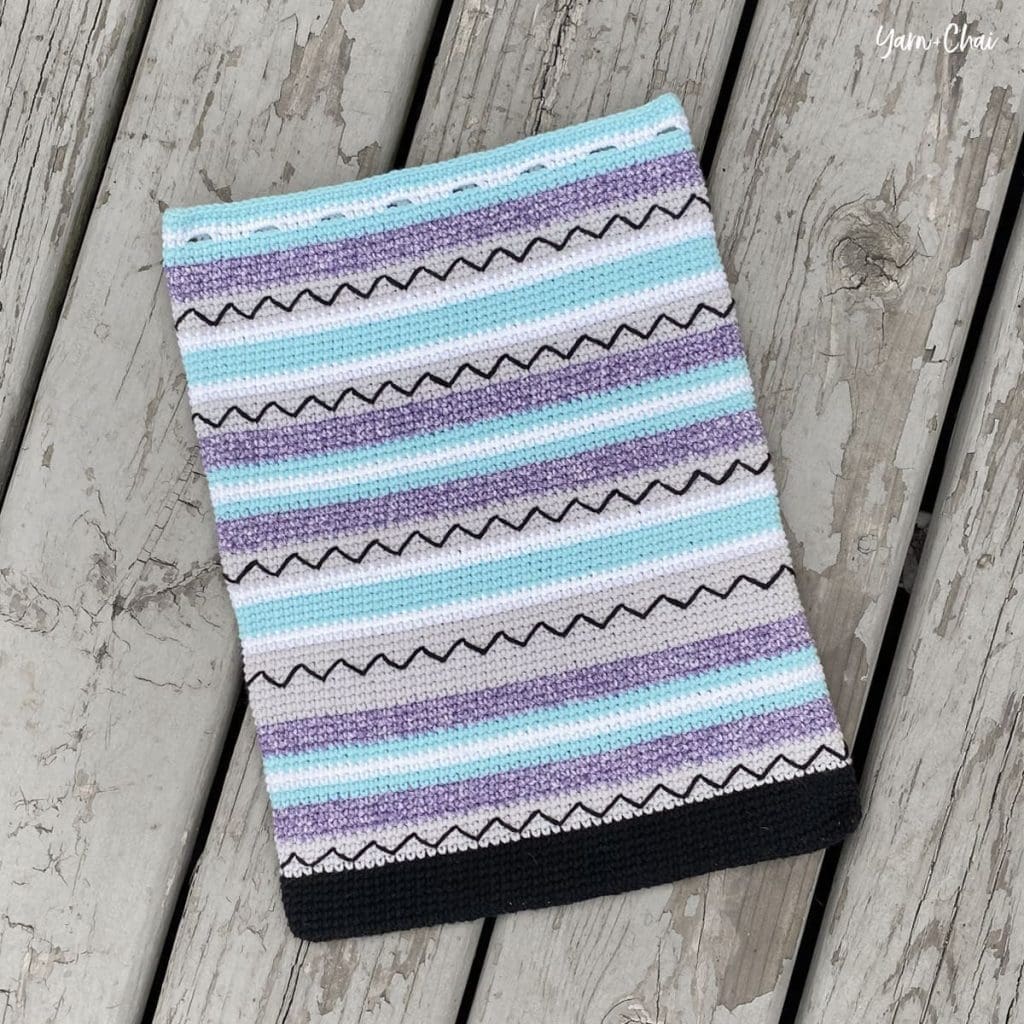
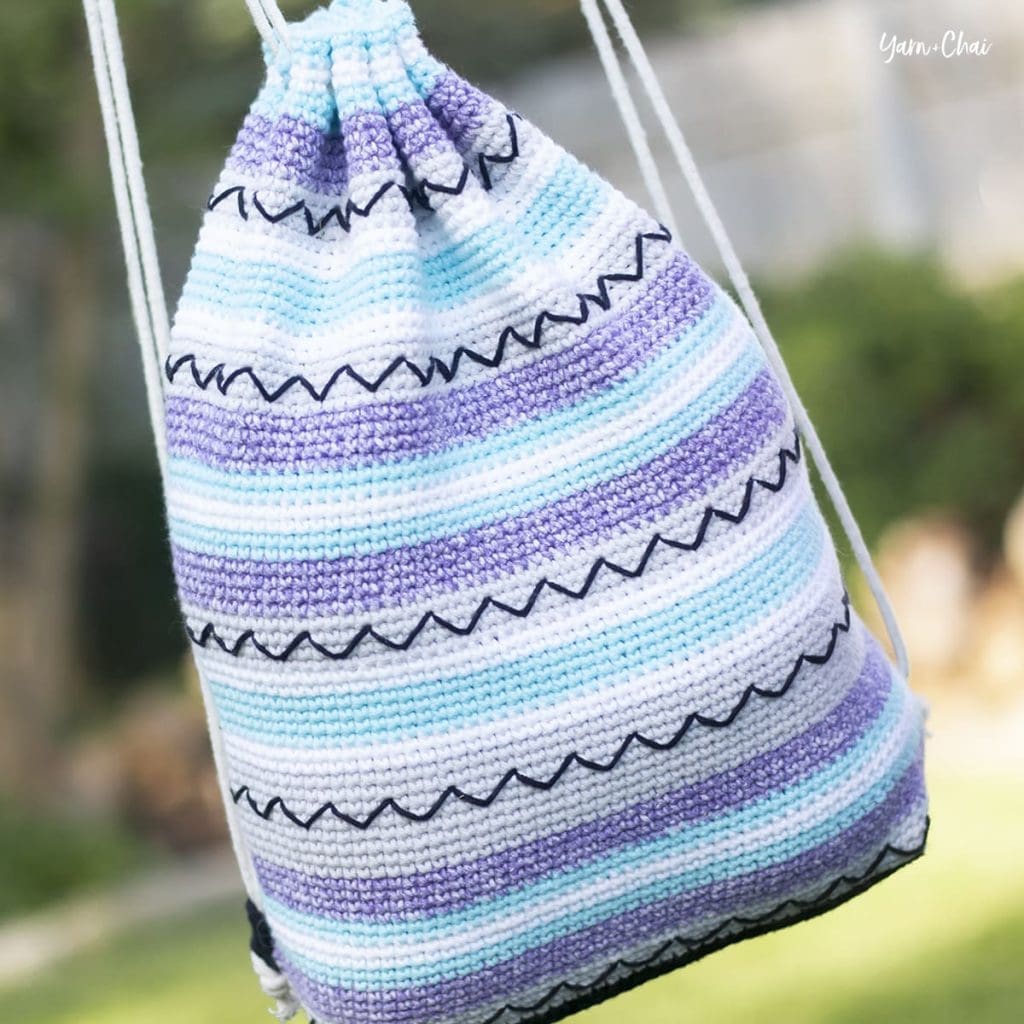
This bright and colorful backpack is my 2nd design in a small series of artistic backpacks that are super simple to create! The Zig Zag Bag features five colors of yarn in a loose striping pattern, with some simple zigzags added at the end to give it a little extra oomph.
And can I brag about my middle child for a moment? This kid is always ready and willing to help me with blog stuff when I need it, even if it means modeling a “kinda girly bag” (his words). He’s always been interested in how I run my business, and I won’t be a bit surprised if he becomes an entrepreneur himself one day!
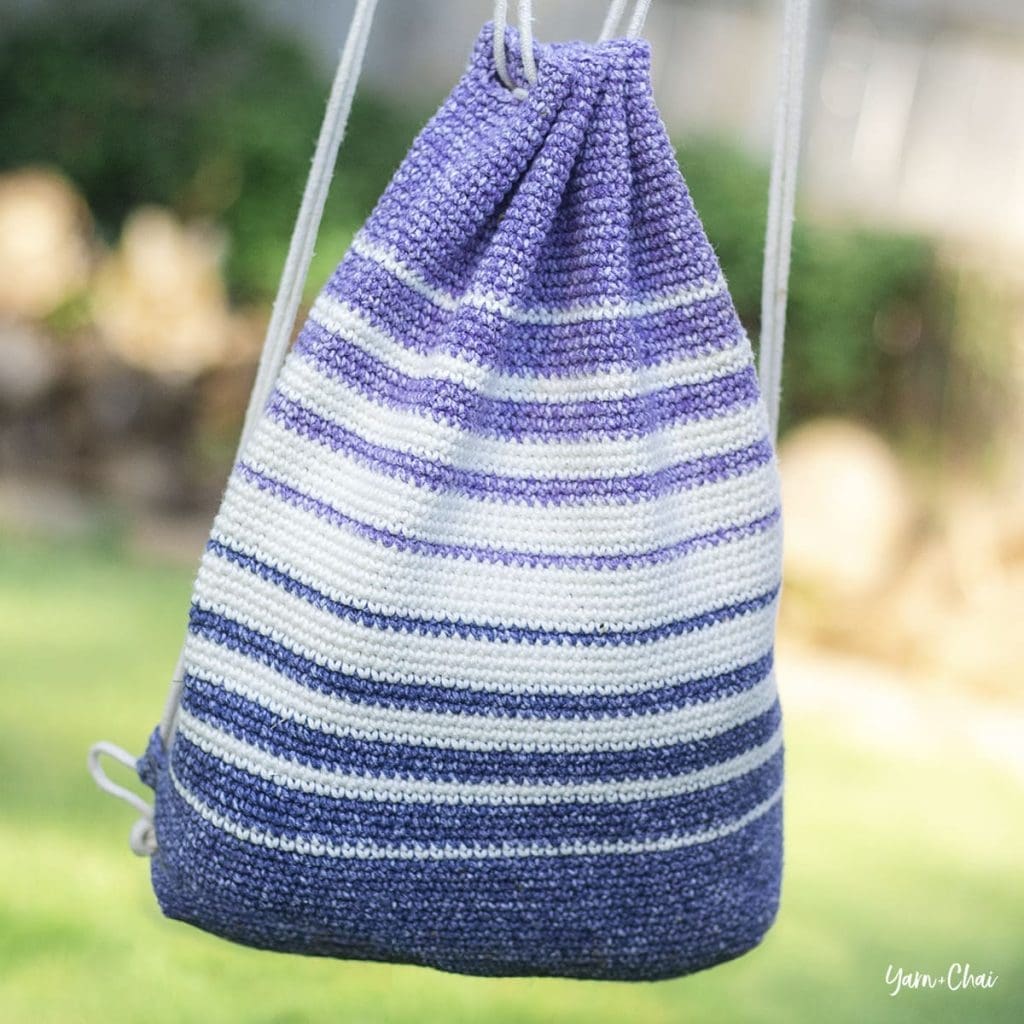
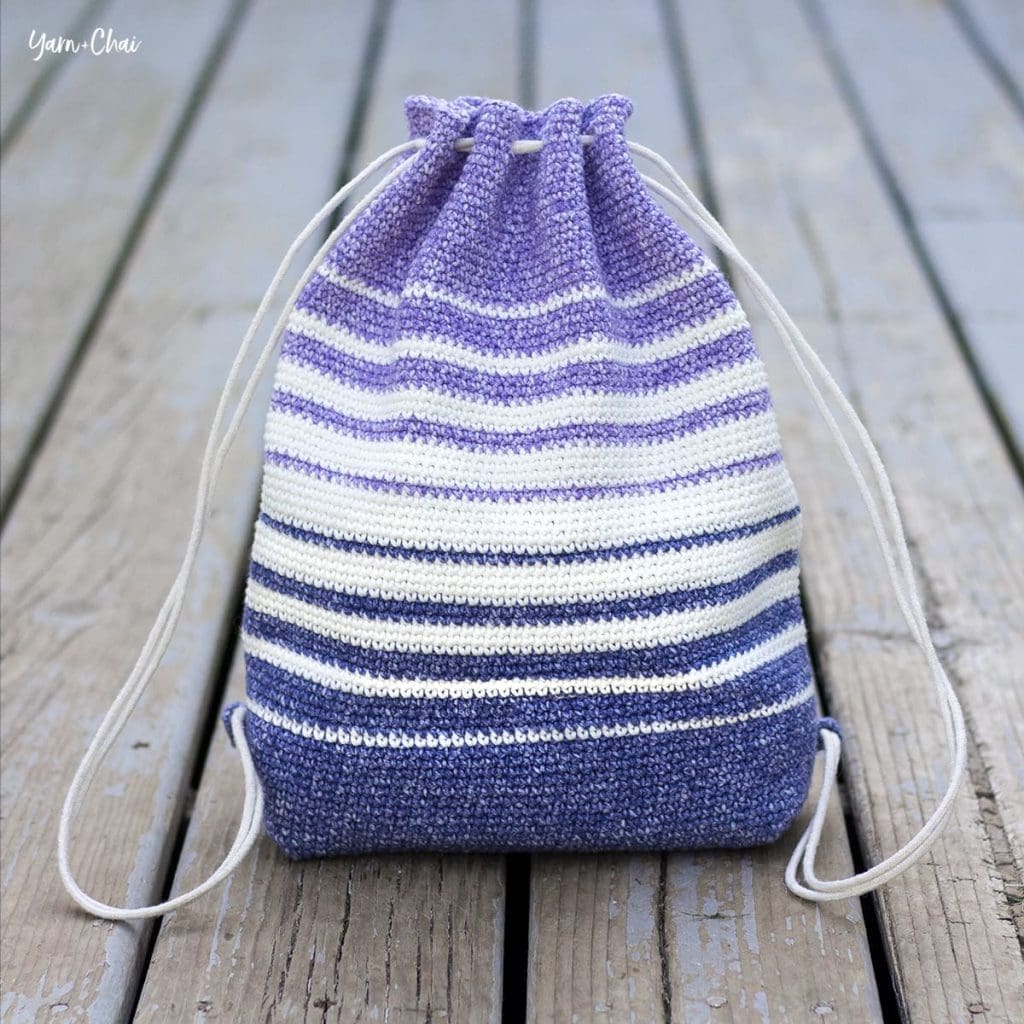
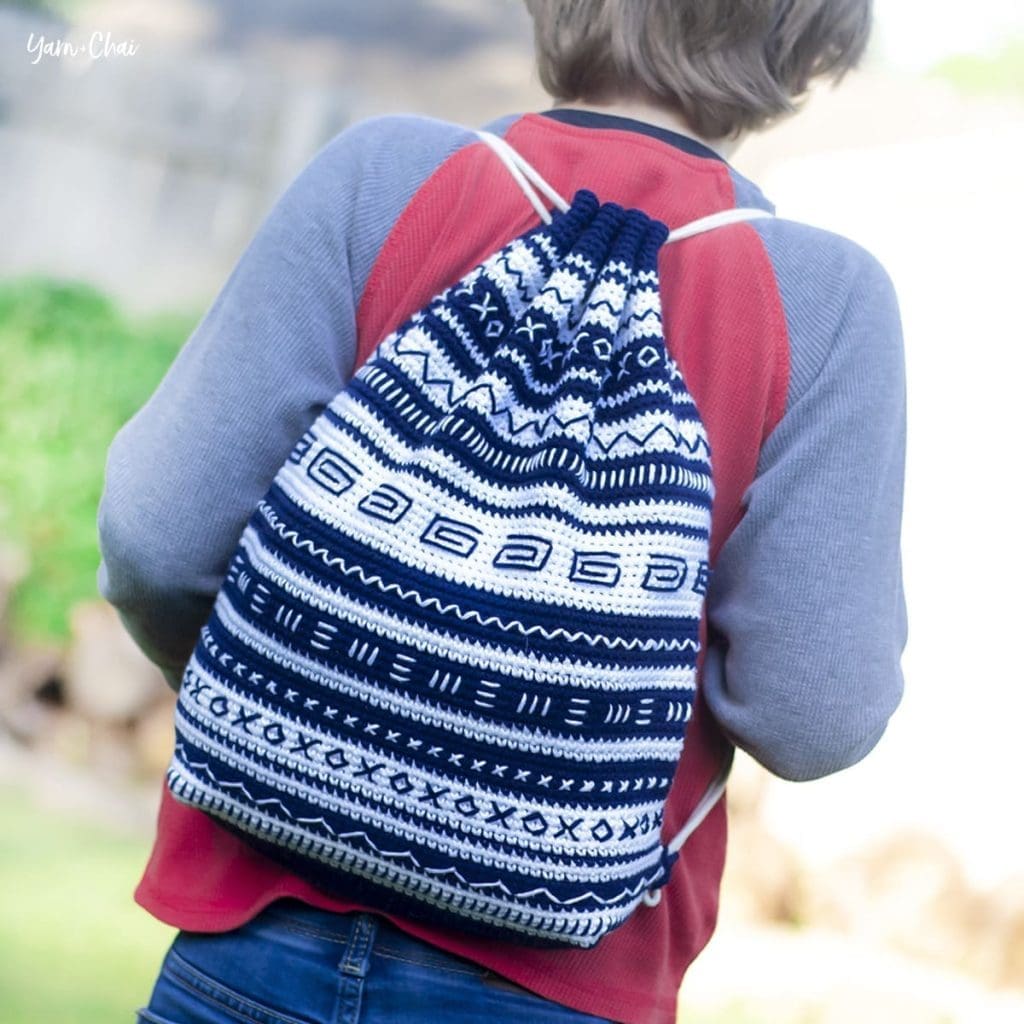
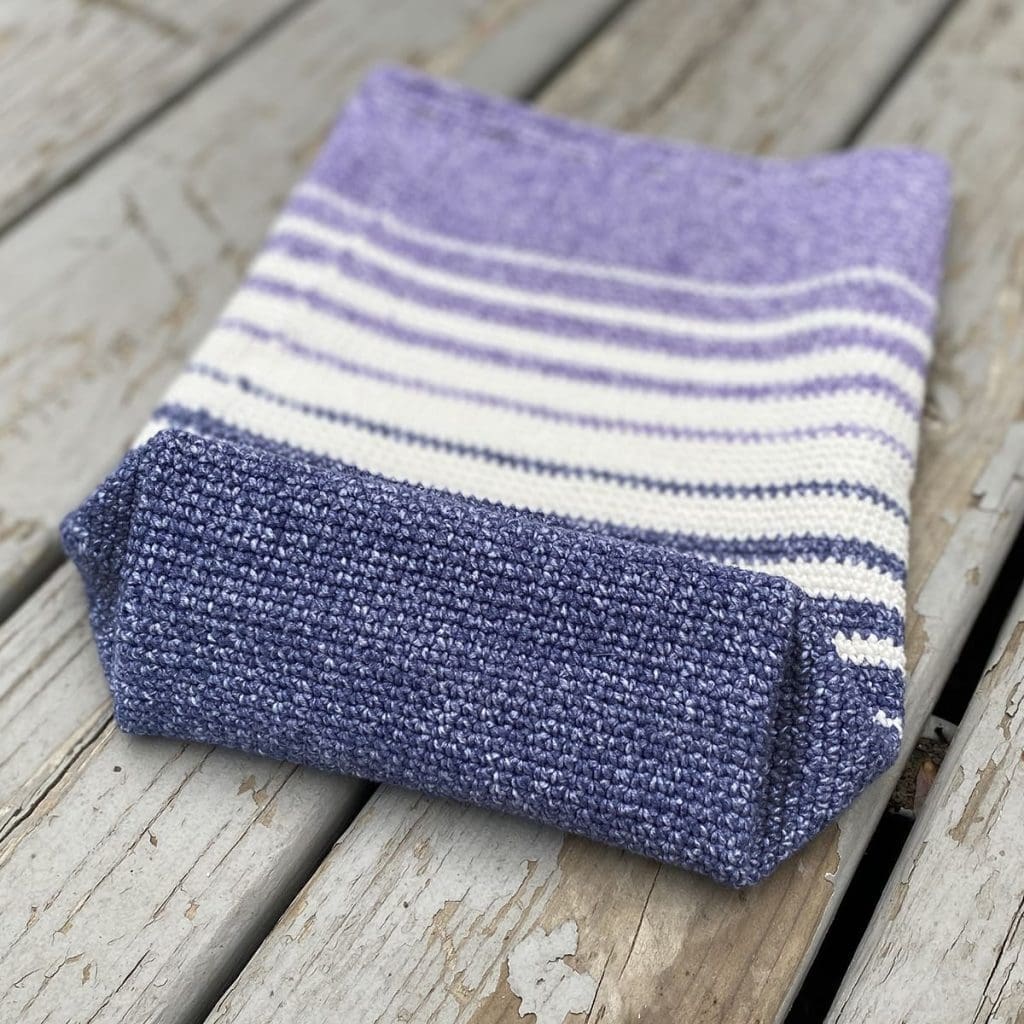
About the Cinch Bag Series
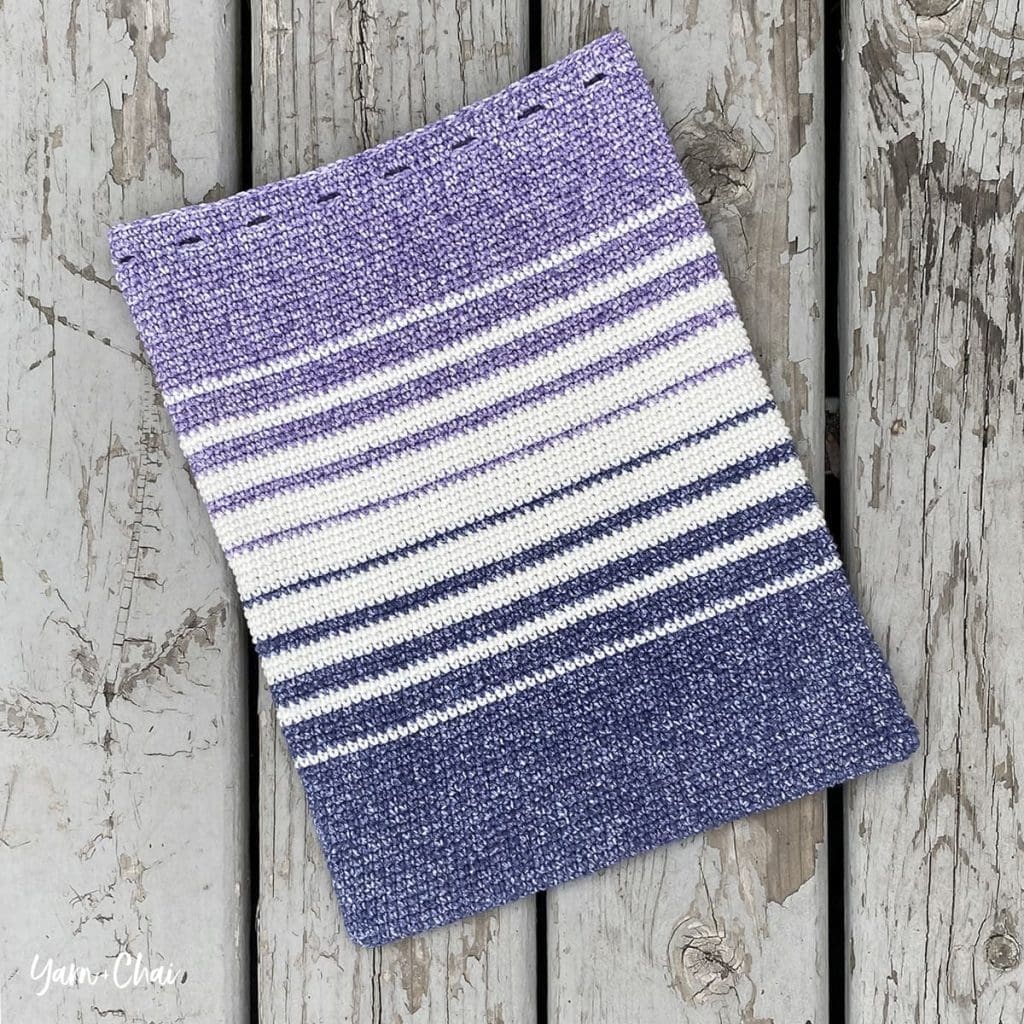
All designs in the Cinch Bag Series are made with the same pattern (all single crochet!), and use variations in color and surface detailing to produce unique designs with tons of personality. These easy-level patterns will make any newbie crocheter feel like a seasoned pro.
Here are each of the bags currently included in the collection:
About the Yarn
All of the samples I created for my Cinch Bag Series use Sarasota, a yarn by Cascade Yarns. Sarasota is a blend of cotton and acrylic in a #3 light weight. It’s soft enough to crochet with comfort, but sturdy enough to make a great bag. It comes in solids and heathers, and I’ve used both throughout the series.
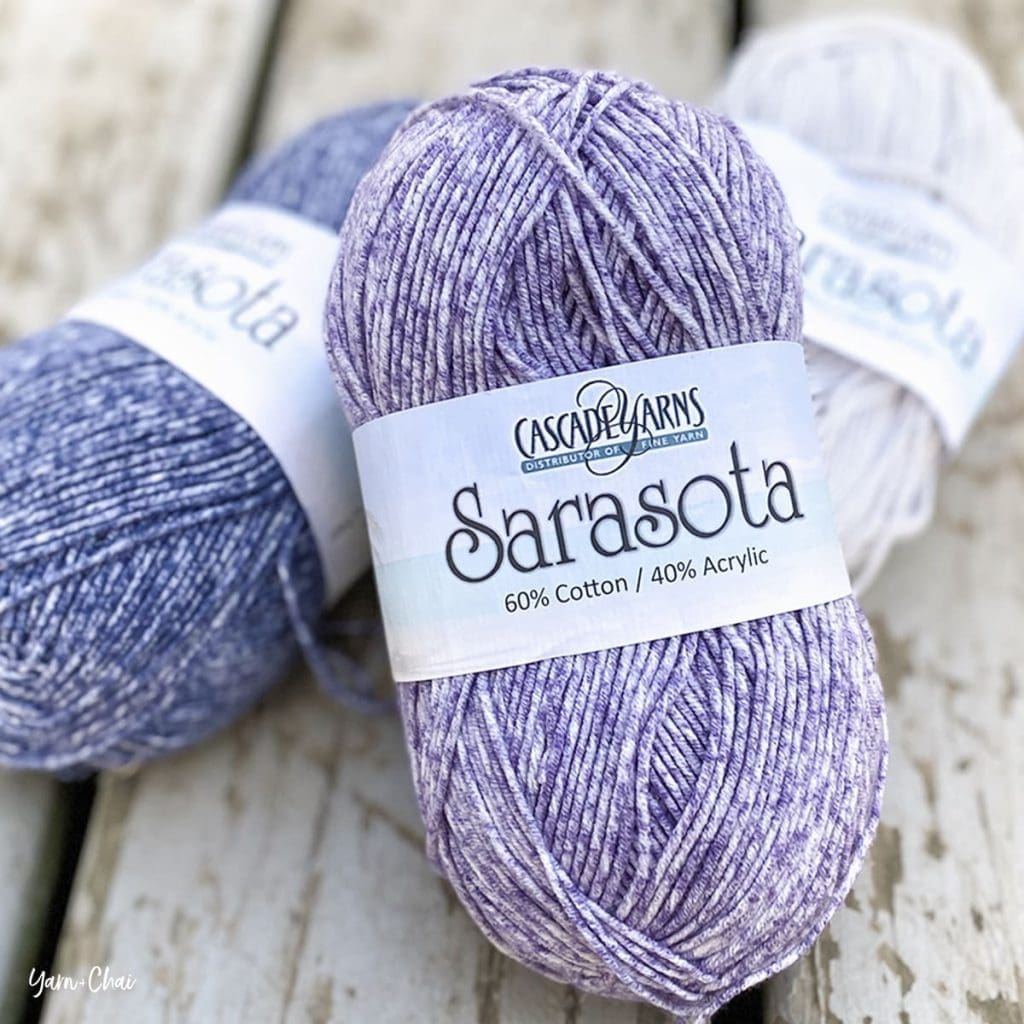
With its large range of color options, it’s safe to say that Sarasota is my new favorite cotton blend for bags. (And you know how I love making bags!)
Want to try Sarasota for yourself? I’ve found it at LoveCrafts, WEBS, and The Yarn Lady!
– – – – – – – – – – – – – – –
GIVEAWAY WITH LOVECRAFTS.COM!
A great place to find the yarn for any of the patterns in the Cinch Bag Series is LoveCrafts.com! LoveCrafts is a global Makers community offering all kinds of yarn and supplies for crocheters, knitters, and more. I’ve bought yarn from them several times, and they always deliver quick service and quality!
LoveCrafts offered to provide the necessary yarn for the Mudcloth Bag as part of a fun giveaway. So be sure to enter below! The winner will receive two skeins of Sarasota and a 50yd roll of 3mm macrame cord for the Mudcloth Bag pattern, as well as some extra yarn-lovers’ goodies. The giveaway runs through the end of Saturday, July 4, and the winner will be announced soon after. (See Terms and Conditions for details.) Best of luck!
a Rafflecopter giveaway– – – – – – – – – – – – – – – –
Prefer a PDF?
This pattern can be completed using the 100% free version right here on this page. However, many people prefer the convenience of a printable, ad-free PDF.
All-Access Passholders get the ad-free version of this and all of my other blog patterns. It’s a pretty sweet deal, if I do say so myself! Learn more about it here or continuing scrolling for the free version.
– – – – – – – – – – – – – – –
Zig Zag Bag
View on Ravelry
Difficulty: Easy
Finished Size: 11″ wide x 14.75″ tall when laid flat (before assembly)
Yarn: Approx. 525 yards of #3 (light) cotton or cotton/acrylic blend. I used Sarasota, a cotton/acrylic blend from Cascade Yarn, in 5 colors:
- COLOR A (“Black”): 60 yards
- COLOR B (“Lunar Rock”): 140 yards
- COLOR C (“Deep Violet”): 120 yards
- COLOR D (“Turquoise”): 120 yards
- COLOR E (“White”): 85 yards
Hook: E (3.5mm)
Gauge: 21 SC x 24 rows = 4″ square
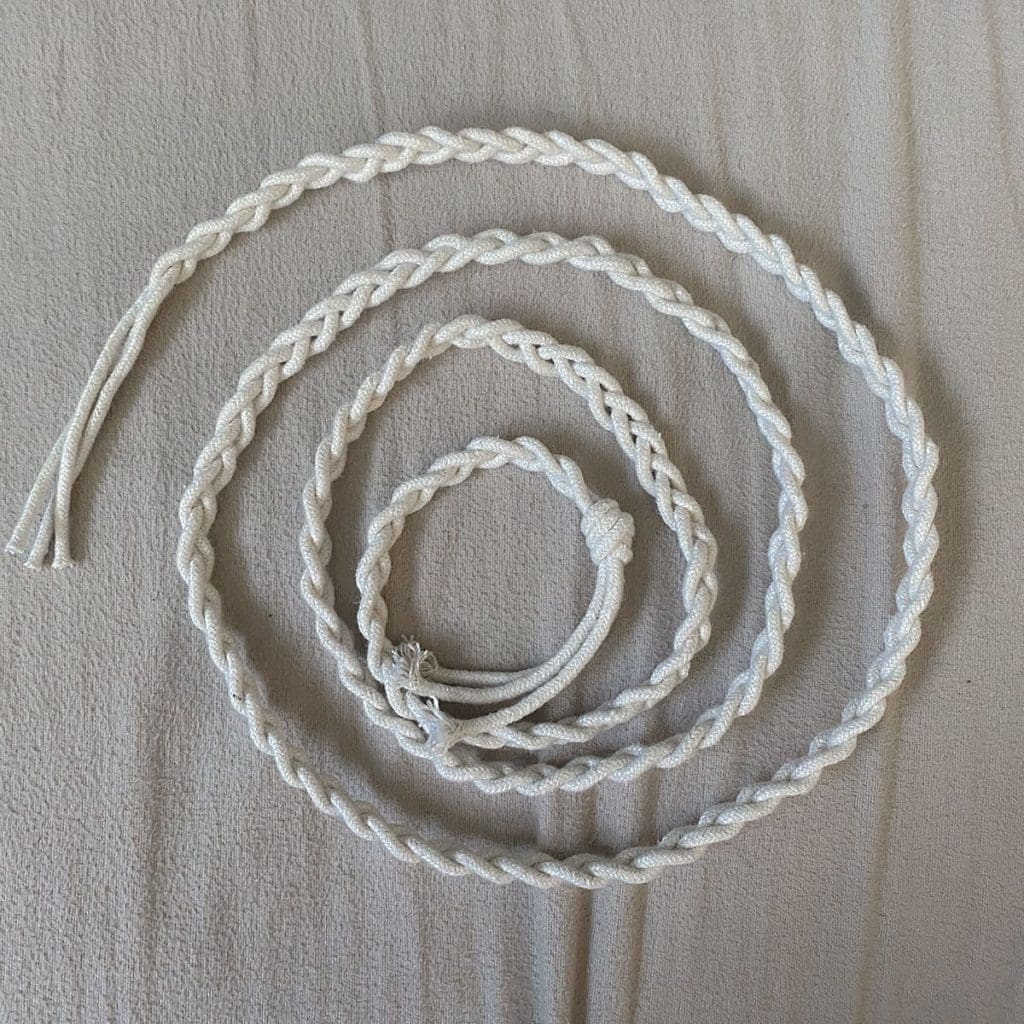
You’ll also need: Yarn needle, ruler, and 3 yards of 3mm macrame cord (or other chosen material for drawstring backpack strap)
Terms and Abbreviations:
ST/STS (stitch/stitches)
SK (skip)
CH (chain)
SC (single crochet)
FLO (front loop only)
Notes:
(1) This pattern is written in American Standard Terms.
(2) You may choose to fasten off after each color change or carry your yarn up through the inside of the bag. I did a mixture of both, depending on how soon I would be using the same color again.
(3) Your seam WILL be on a slant. This is due to the fact that we are joining but not turning our rounds; the slight offset of a crochet stitch’s top loops in relation to its base cause this slant to happen naturally. The only way to avoid the slant is to turn each round, but it results in a busier-looking fabric that doesn’t showcase the detailing of the bag nearly as well.
– – – – – – – – – – – – – – –
Instructions
– – – – – – – – – – – – – – –
PATTERN FOR BAG
– – – – – – – – – – – – – – –
To Begin: With COLOR A, CH57.
Round 1: Working into the back bumps, SC in 2nd CH from hook and in each remaining CH. Working in FLO down the opposite side of the chain, SC across. (You have now worked in both sides of each chain.) Join. (112)
Rounds 2-82: CH1, SC in same ST and in each ST around. Join. (112) Use the following color pattern:
Rounds 2-8 (8 rounds total, including Round 1): COLOR A
Rounds 9-12 (4 rounds): COLOR B
Rounds 13-16 (4 rounds): COLOR C
Rounds 17-18 (2 rounds): COLOR D
Rounds 19-20 (2 rounds): COLOR E
Rounds 21-22 (2 rounds): COLOR D
Rounds 23-26 (4 rounds): COLOR C
Rounds 27-34 (8 rounds): COLOR B
Rounds 35-36 (2 rounds): COLOR E
Rounds 37-40 (4 rounds): COLOR D
Rounds 41-42 (2 rounds): COLOR E
Rounds 43-46 (4 rounds): COLOR B
Rounds 47-50 (4 rounds): COLOR C
Rounds 51-52 (2 rounds): COLOR D
Rounds 53-54 (2 rounds): COLOR E
Rounds 55-56 (2 rounds): COLOR D
Rounds 57-60 (4 rounds): COLOR C
Rounds 61-64 (4 rounds): COLOR B
Rounds 65-66 (2 rounds): COLOR E
Rounds 67-70 (4 rounds): COLOR D
Rounds 71-72 (2 rounds): COLOR E
Rounds 73-76 (4 rounds): COLOR B
Rounds 77-80 (4 rounds): COLOR C
Rounds 81-82 (2 rounds): COLOR D
After Round 82 is complete, fasten off and weave in ends.
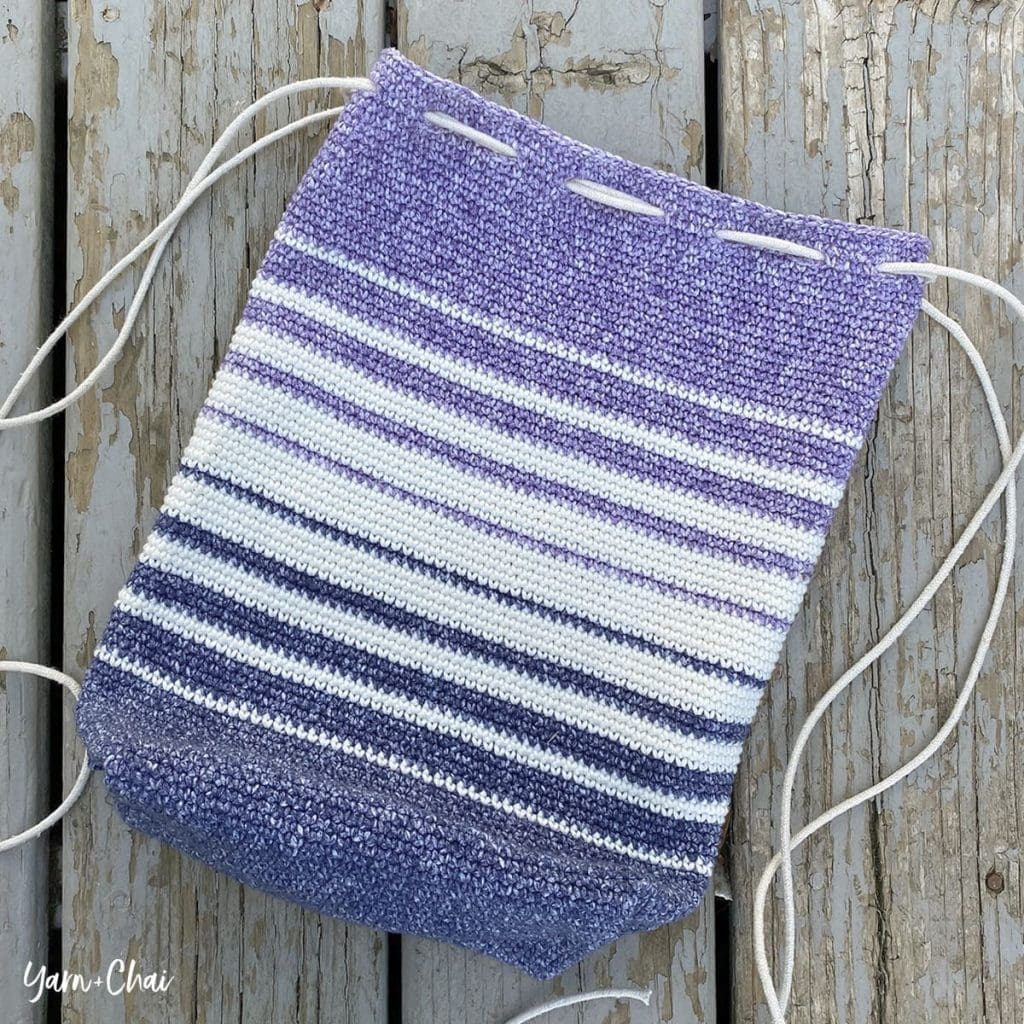
Lay bag flat, seam side facing down. Locate the rightmost top stitch (leftmost for lefties) and attach COLOR E in that stitch; proceed to Round 83.
Round 83 (drawstring holes): CH1. SC in same ST and in next ST. CH3, SK 3 STS. (SC in each of the next 4 STS, CH3, SK 3 STS) around until only 2 STS remain. SC in each of the remaining 2 STS. Join. (16 drawstring holes)
Round 84: CH1. SC in same ST and in each ST around, putting 3SC in each CH3 space. Join. (112)
Rounds 85-86: Switch to COLOR D. CH1, SC in same ST and in each ST around. Join. (112)
Fasten off and weave in all ends.
– – – – – – – – – – – – – – –
SURFACE DETAILING
– – – – – – – – – – – – – – –
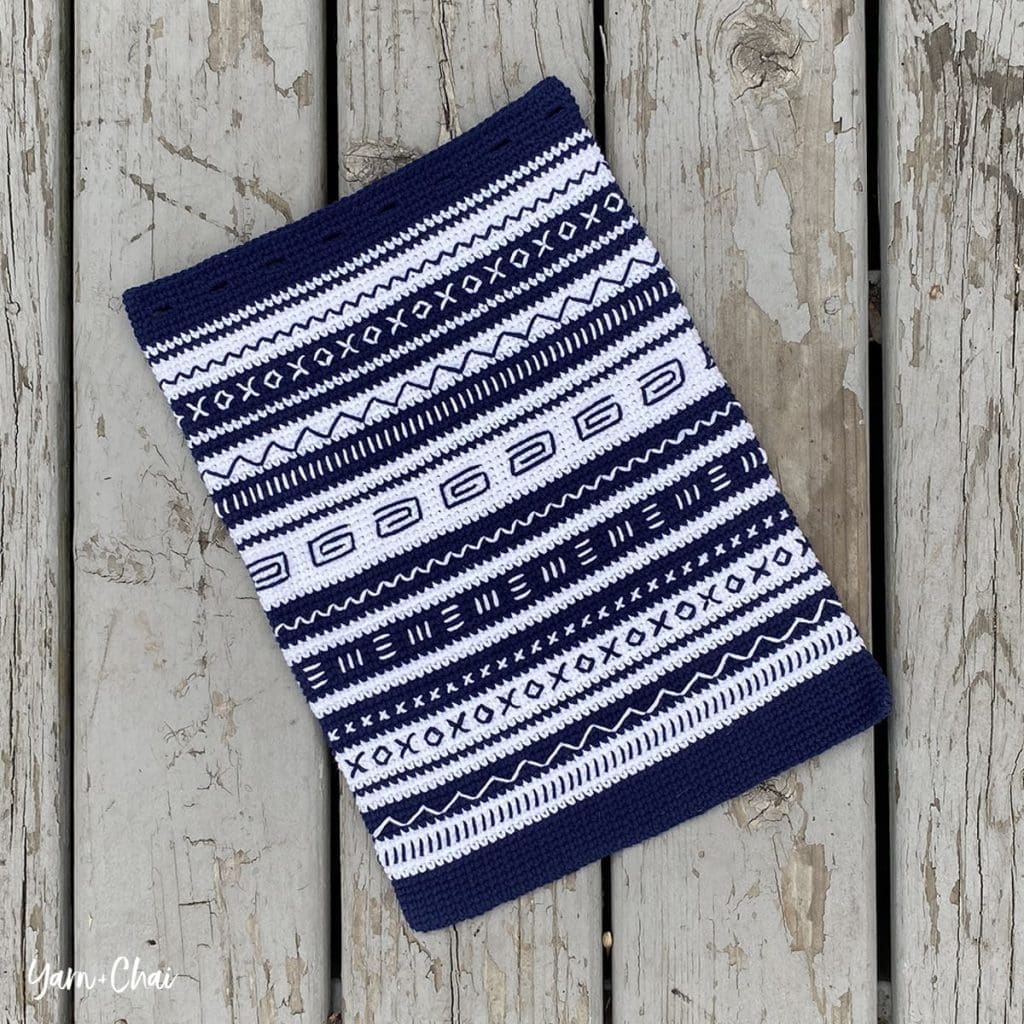
Using a yarn needle and COLOR A, add the surface detailing to the bag using the charts below. For this bag, the detailing is added to each section of COLOR B.
Hint: Click the image to make it larger on your screen. (I provided one color version and one black-and-white version; use whichever you find most helpful.)

Here area few tips for adding the detailing:
- Do each section separately. Cut your yarn first (each section will take a couple of yards), then start in the inside of the bag so that your starting tail can be woven in on the inside.
- Start each section right at the seam.
- Try adding all of the lines that go in the SAME direction before coming back around to add the remaining lines. (So instead of sewing like this: /\/\/\/\/\/\/\/\/\ , sew all of the / / / / / / / / and then come back and do the \ \ \ \ \ \ \ \ .) This will help your lines to look more consistent.
- If you run out of yarn before finishing a section, that’s ok! Just finish off with an additional strand.
- Don’t be alarmed that your surface stitches slant just a bit. This is due to the nature of crochet stitches worked in unturned rounds.
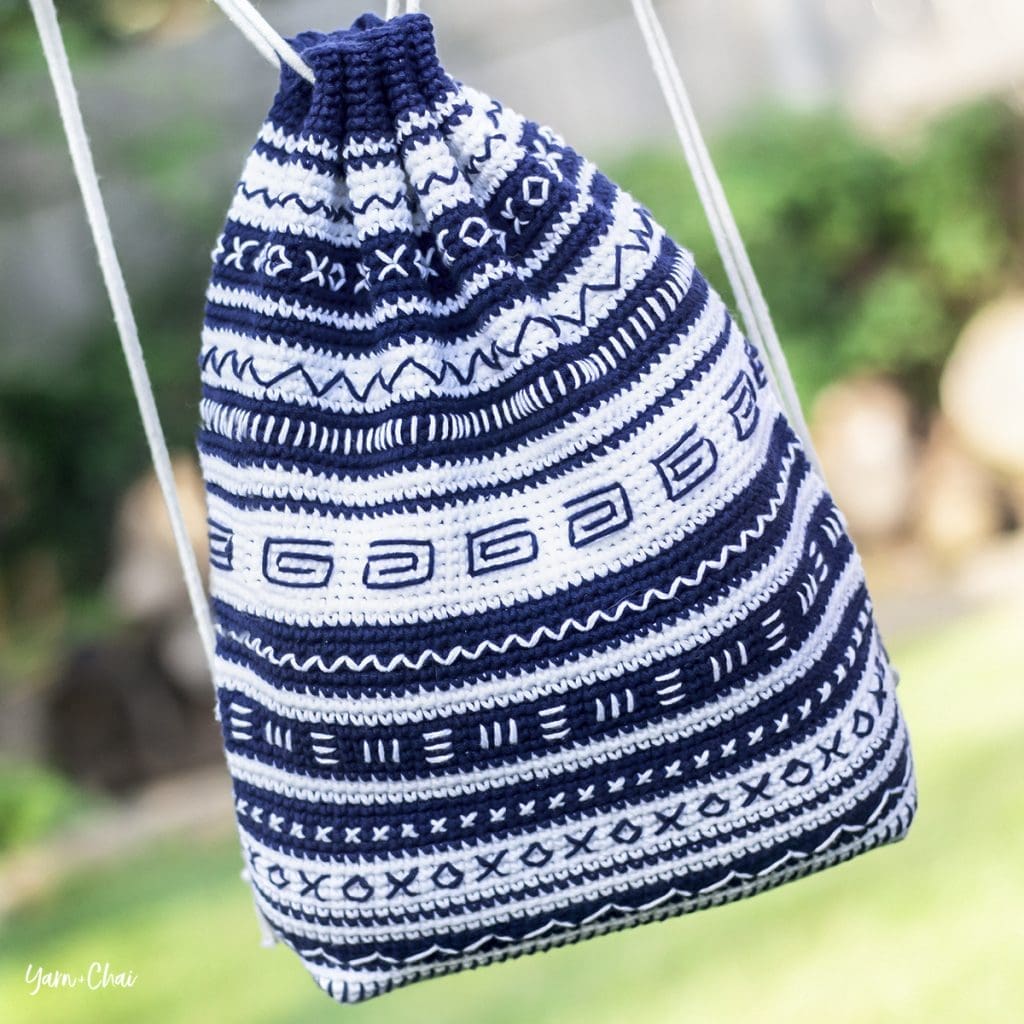
Please note that the images that follow are of a different bag from the Cinch Bag Collection, but all use the same techniques for shaping and adding drawstrings and tabs.
– – – – – – – – – – – – – – –
SHAPING THE BOTTOM
– – – – – – – – – – – – – – –
We’re going to use a simple trick to give our bag a little roominess at the bottom.
(If you need help visualizing this, I use the technique in my video tutorial for the Malia Shoulder Bag at timestamp 28:50.)
With the bag inside out, turn it upside down and position the bottom so that one end lays out in a triangular shape, with the seam going up the center. Use a ruler and measure a 3″ line across the corner of the base (mark the line with tape if it helps). Sew a seam across the line (through both layers) with COLOR A. Repeat on the opposite side.

Make sure all yarn is woven in, then turn bag right-side out. Here’s what it should look like on the bottom:
– – – – – – – – – – – – – – –
PATTERN FOR DRAWSTRING TABS
– – – – – – – – – – – – – – –
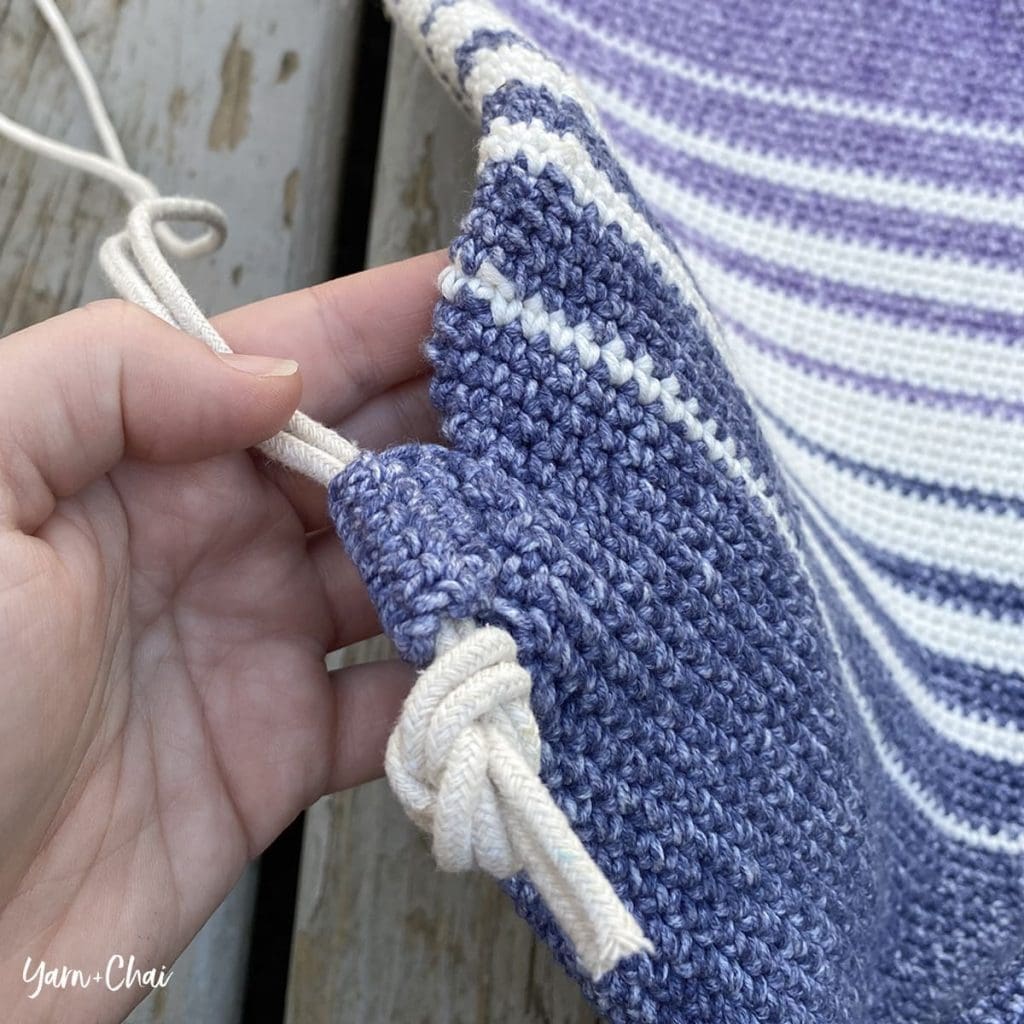
Next, we’ll make some little tabs to secure the ends of our drawstrings to the backpack. Use the following pattern to make two tabs:
To begin: With COLOR A, CH7.
Row 1: SC in 2nd CH from hook and in each remaining CH. (6)
Rows 2-6: CH1, turn. SC in each ST across. (6)
Fasten off leaving a 12″ finishing tail for sewing. Weave in starting tail.

Now, let’s attach them.
Step 1: Turn your bag so that the seam is facing UP. Locate the triangle on the bottom-left corner of the bag, formed when you shaped the bottom. Then, locate the edge of the triangle that is on the seamed side of the bag (pink arrow). This is the side to which we’ll attach our first tab.

Step 2: Using a yarn needle and the finishing tail, fold the tab over and sew it centered along the edge of the triangle. Work your yarn needle through a couple of stitches on the triangle edge as well as both top and bottom edges of the tab, so that you are sewing the tab closed while also attaching it to the bag.

Step 3: When finished, weave the tail into the inside of the bag.

Attach the second tab to the triangle at the bottom-right corner of the bag, again using the edge of the triangle that is on the seamed side of the bag.
– – – – – – – – – – – – – – –
ADDING DRAWSTRING
– – – – – – – – – – – – – – –
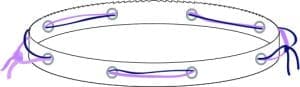
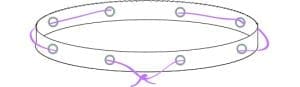
Cut two 1.5 yard lengths of macrame cord. Lay bag flat and locate the furthermost hole to the right; starting from the outside, thread the first length of cord through the hole and then, working leftward, proceed to weave it in and out of each hole around the entire bag. You should end up with the cord exiting the bag through the hole next to your starting hole.
Do the same thing with the other 1.5 yard length of cord, starting in the leftmost hole and working rightward, continuing around the entire bag. (Both cords will be entering and exiting the same drawstring holes, in opposite directions.)
Take each pair of drawstring ends and thread them through their corresponding tabs at the bottom of the bag. Tie ends together in a knot beneath each tab. Don’t cut off the excess yet.
Cinch the backpack and wear it to test the length of your drawstrings, then readjust knot placement as needed. Trim off excess cord.
Done!
– – – – – – – – – – – – – – –
Don’t forget to share your finished project!
Share it on FB, in our FB group, in other groups, on Instagram… wherever you want to spread joy! Be sure to and tag me @yarnandchai.design so I can see it, too!