

This pattern is part of the Yarn + Chai Spring 2023 Crochet-Along.
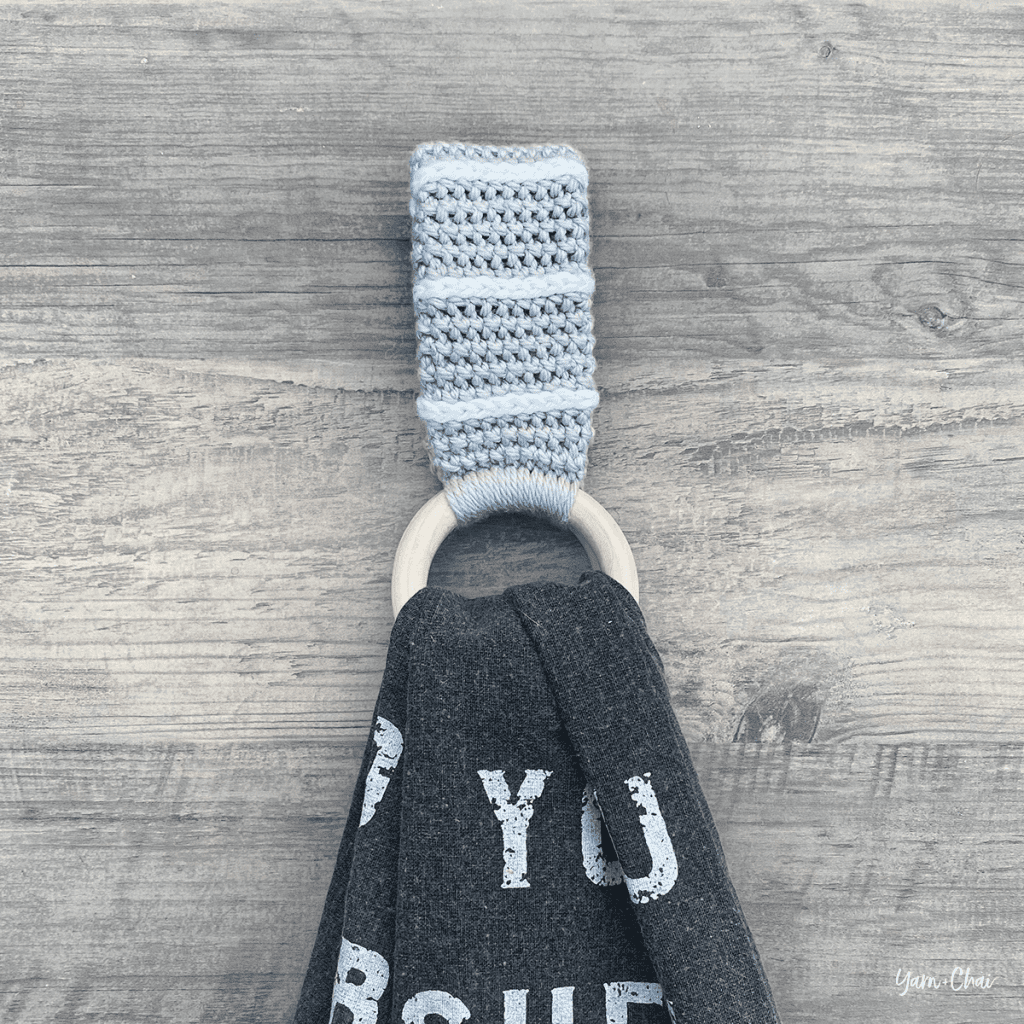
The final pattern in our kitchen-themed CAL is this cute and functional towel holder!
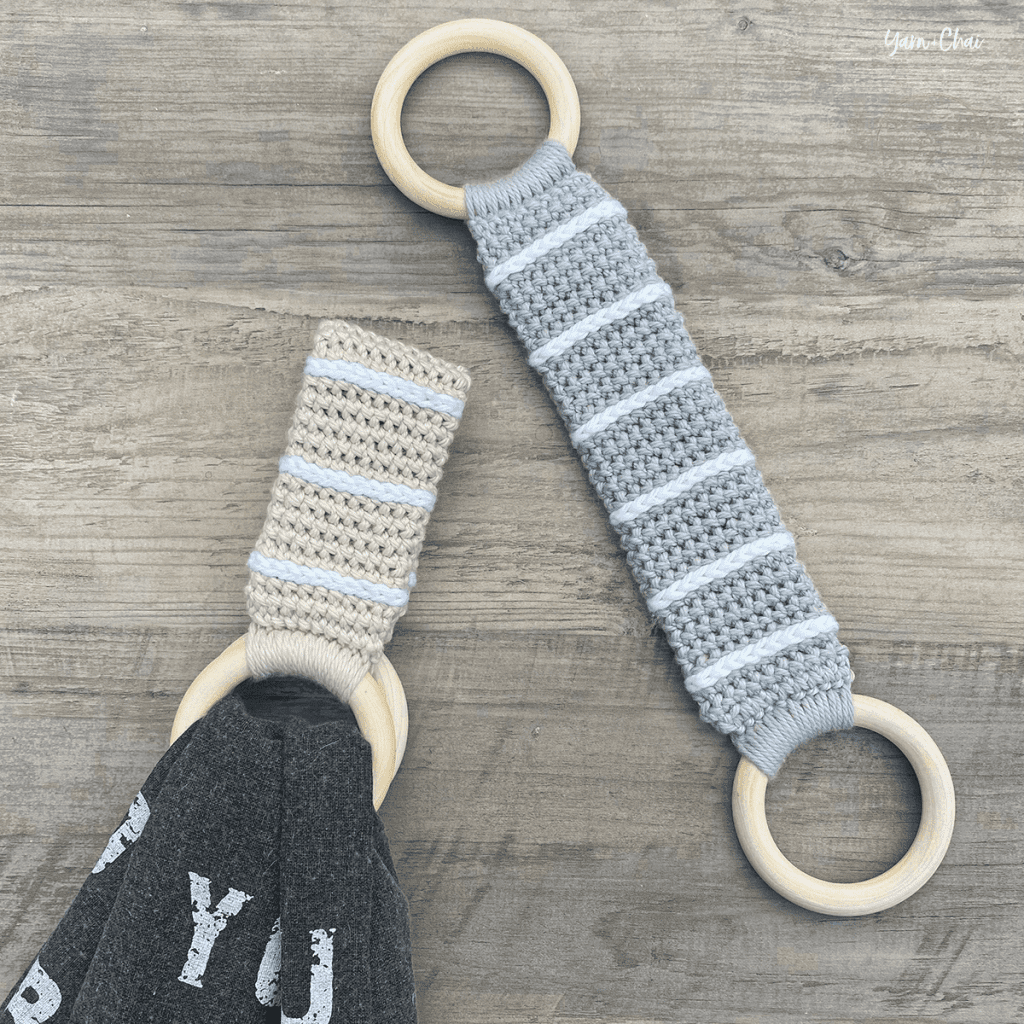
I went with the wooden ring style of towel holder because I love how it allows you to change out the towel whenever you need to without wearing out the crocheted part from over-washing.
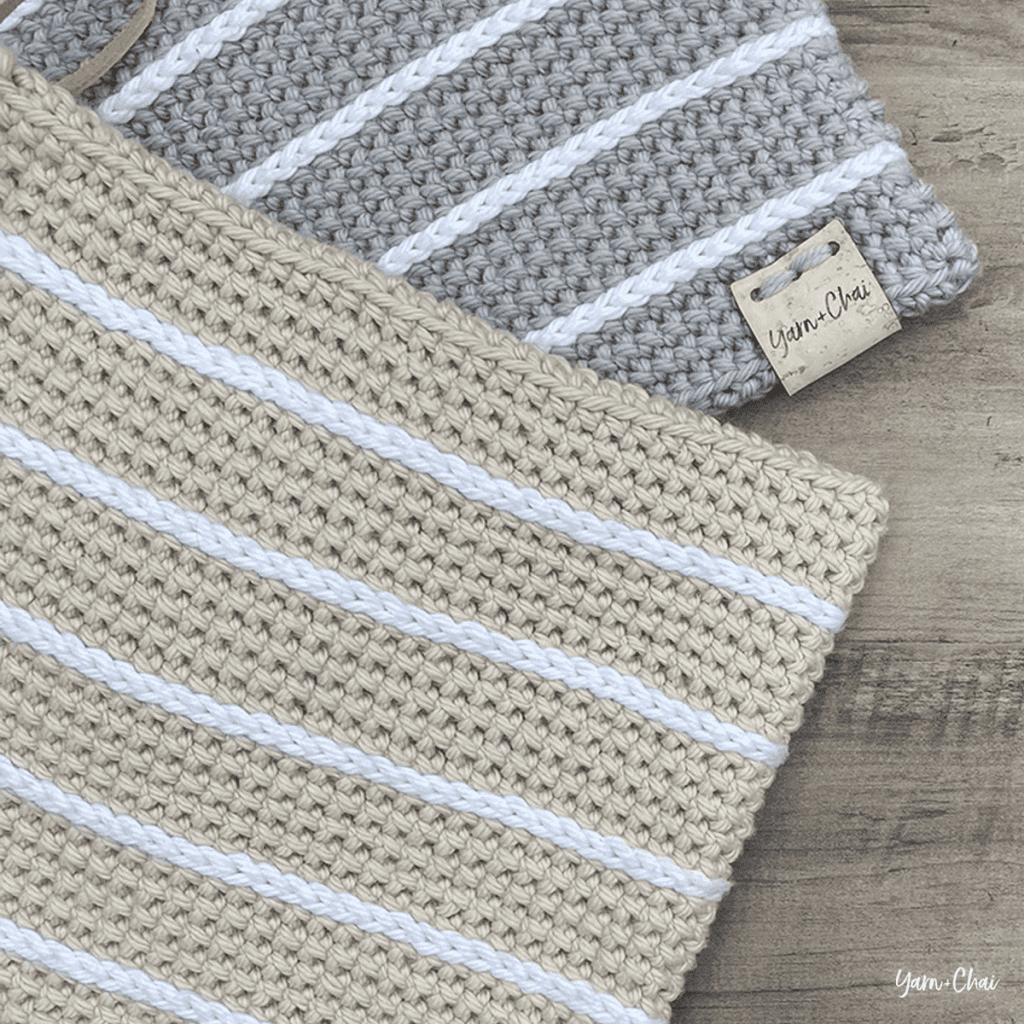
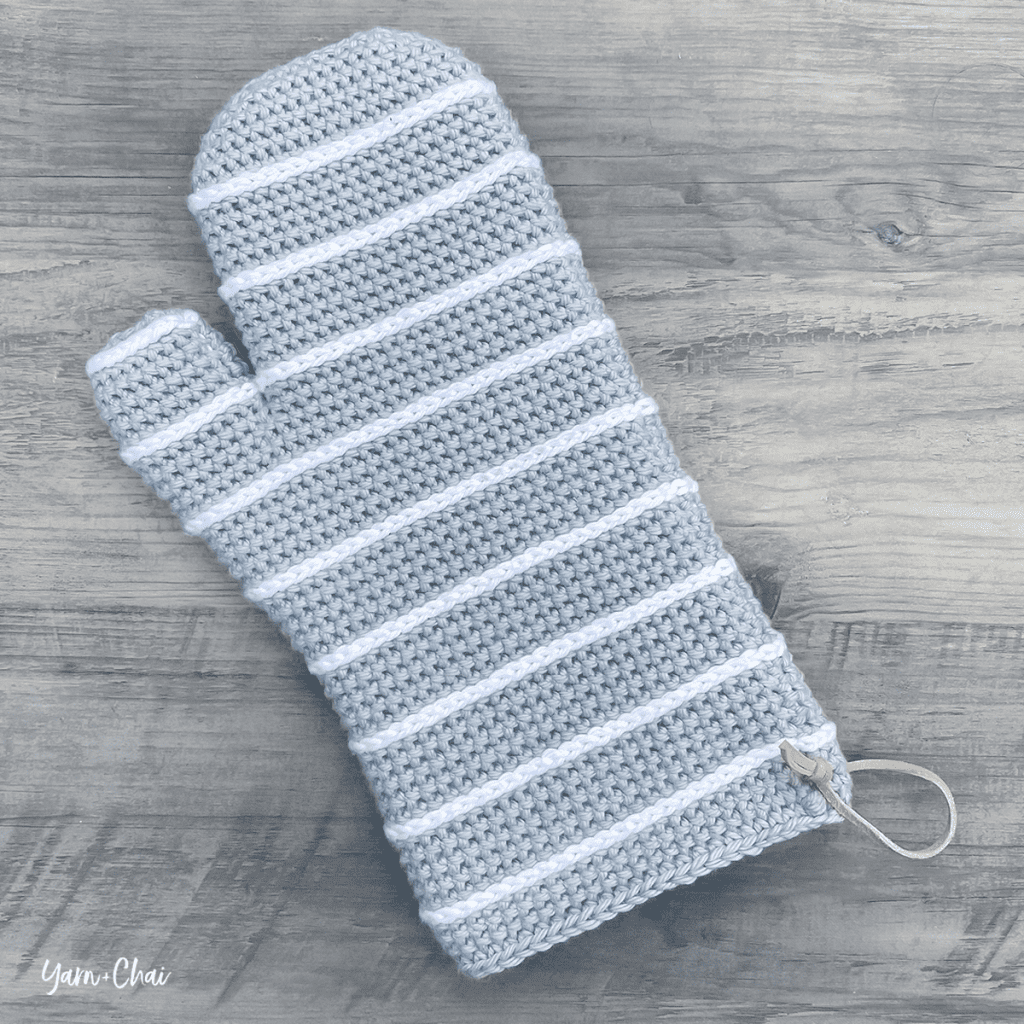
The Striped Towel Holder is part of a matching set of three cute + modern kitchen accessories, which are all available as part of my Spring 2023 Crochet-Along. I strongly recommend completing each individual project in order (potholder, oven mitt, towel holder), as the techniques involved do build on each other somewhat.
Here is where you’ll be able to find the links for each project:
- Striped Potholder: Click here
- Striped Oven Mitt: Click here
- Striped Towel Holder: You are here!
About the Yarn
Hobby Lobby’s I Love This Cotton has definitely become my go-to cotton. It’s affordable and soft, and there are lots of colors available! But there are several other cottons to choose from when crocheting kitchen items. Here are a few other options you could use:
- K + C Essential Cotton (available at Joann Fabrics)
- Lily Sugar ‘n Cream
- Lion Brand 24/7 Cotton
- Yarn Bee Fundamental Cotton (available at Hobby Lobby)
Whatever you pick, make sure it’s a 100% cotton yarn if you’ll be making the coordinating potholder and oven mitt. Other fibers like wool and acrylic will melt if they get too hot… and what a mess that would be!
Prefer a PDF?
This pattern can be completed using the 100% free version right here on this page. However, many people prefer the convenience of a printable, ad-free PDF to holders of an All Access Pass.
– – – – – – – – – – – – – –
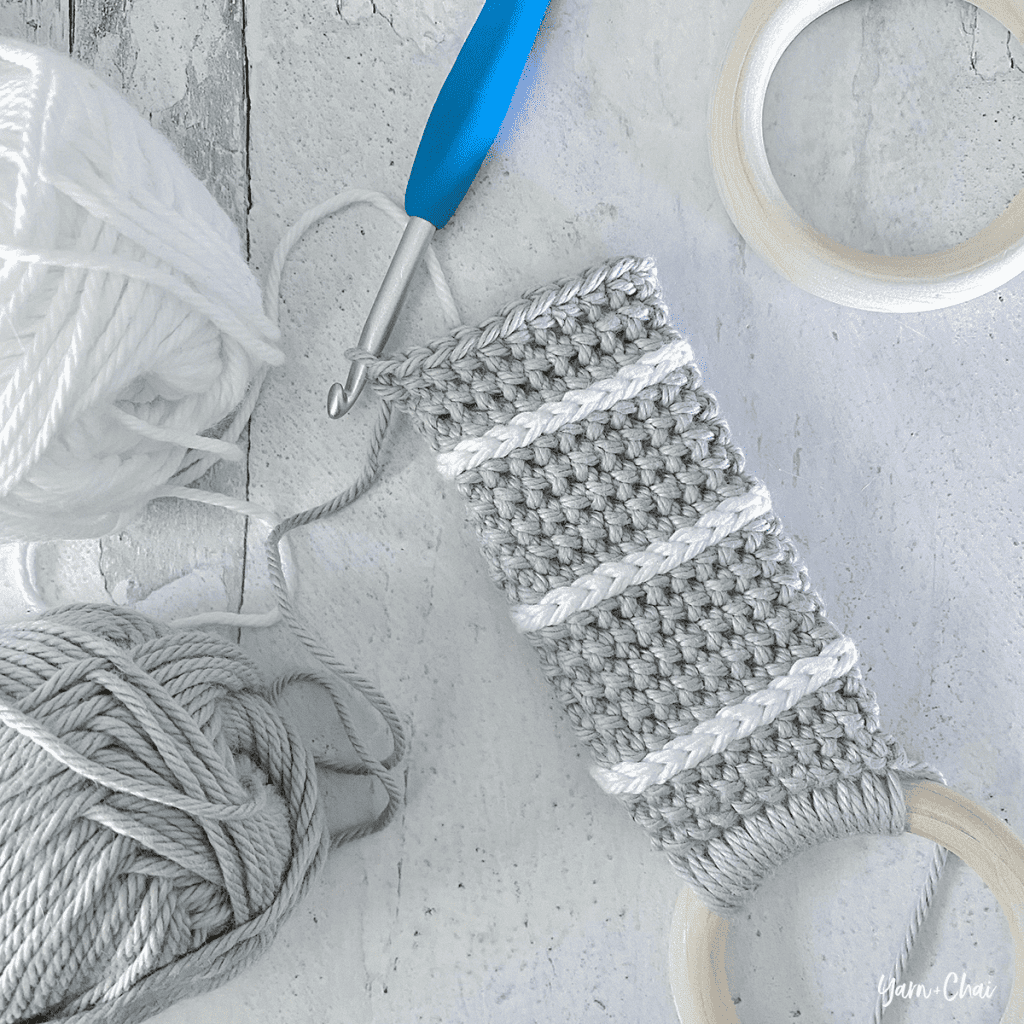
Striped Towel Holder
Difficulty: Easyish
Crochet Language: American Standard
Finished Size: 8.5″ long x 1.75″ wide (laid flat), not including wooden rings. When in use, towel will hang about 5.5″ from top.
Yarn: I used Hobby Lobby’s I Love This Cotton, but you can use your favorite #4 weight kitchen cotton. You’ll need approximately 50 yards of BASE COLOR (I used “Parchment” and “Dove” in my samples), and 10 yards of STRIPE COLOR (I used “White”).
Hook: H (5.5mm), or whichever hook size is needed to achieve gauge.
Gauge: 20 CSC x 19 rows = 4″ square
You’ll Also Need: 2 wooden macrame craft rings, large enough to run a towel through. I used 2.75″ wide rings (with an approx. 2″ wide opening).
Terms and Abbreviations:
ST/STS (stitch/stitches)
SL ST (slip stitch)
CH (chain)
SC (single crochet)
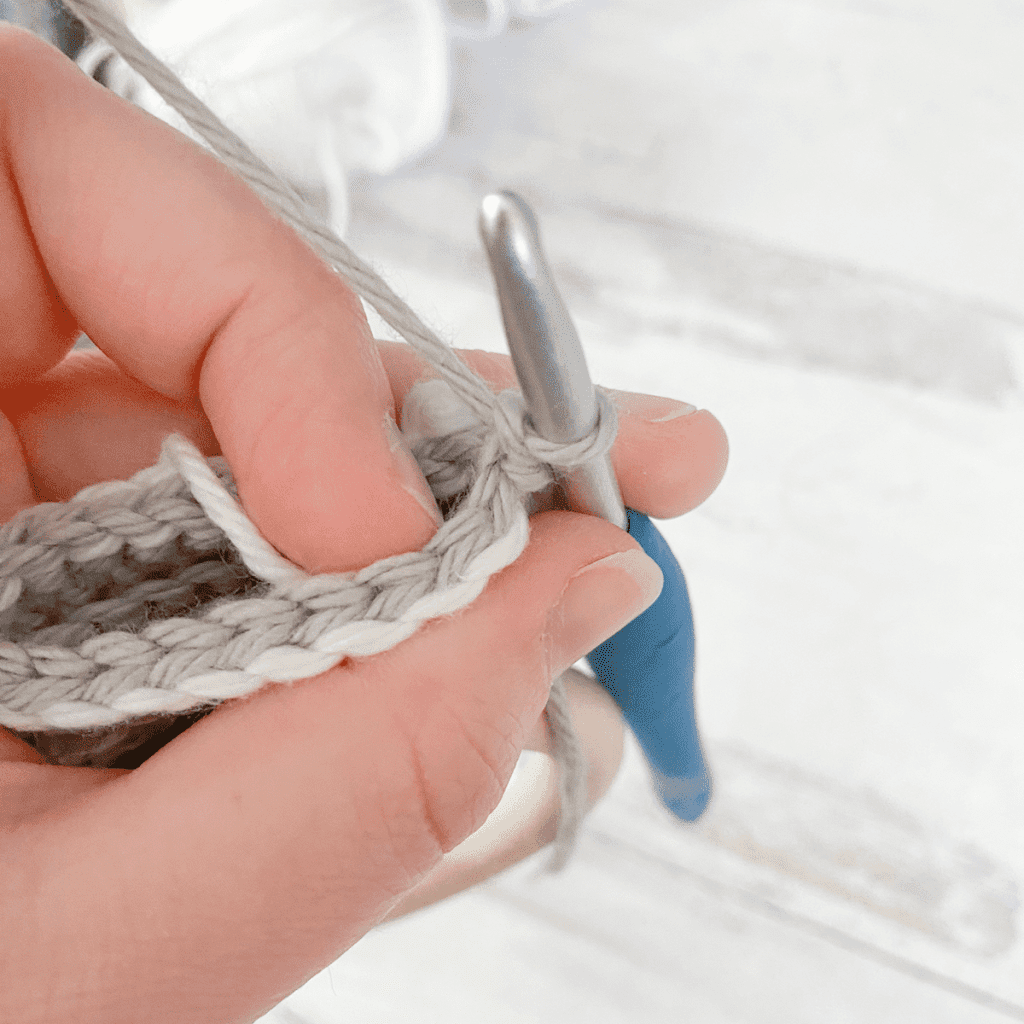
CSC (crossed single crochet: Insert hook into stitch. Yarn UNDER, pull through; 2 loops on hook. Yarn over, pull through both loops.
FLO (front loop only)
JOIN (Join with a SL ST to the top loops of the first ST of the round)
Notes:
(1) Pattern is worked in joined, unturned rounds. CSC stitches worked into FLO stack nice and straight on top of each other, which allows the seam to stay straight and clean.
(2) CH1s at the beginning of rounds do not count as stitches in final stitch counts.
(3) Unless otherwise noted, the first stitch of each round is always worked into the same ST as the CH1.
(4) The slip stitched stripes (worked in white in my sample) are labeled in the pattern as “STRIPE #1”, “STRIPE #2”, etc. They are not a part of the main round count because when we work these stripes after a round of CSC, the top loops of those CSCs remain exposed so that when we move on to the next round of CSC, we are still working into the loops from the previous round of CSC. (This will probably make more sense once you’ve gotten started!)
(5) Instructional photos are located below their respective written instructions.
– – – – – – – – – – – – – – –
PATTERN
– – – – – – – – – – – – – – –
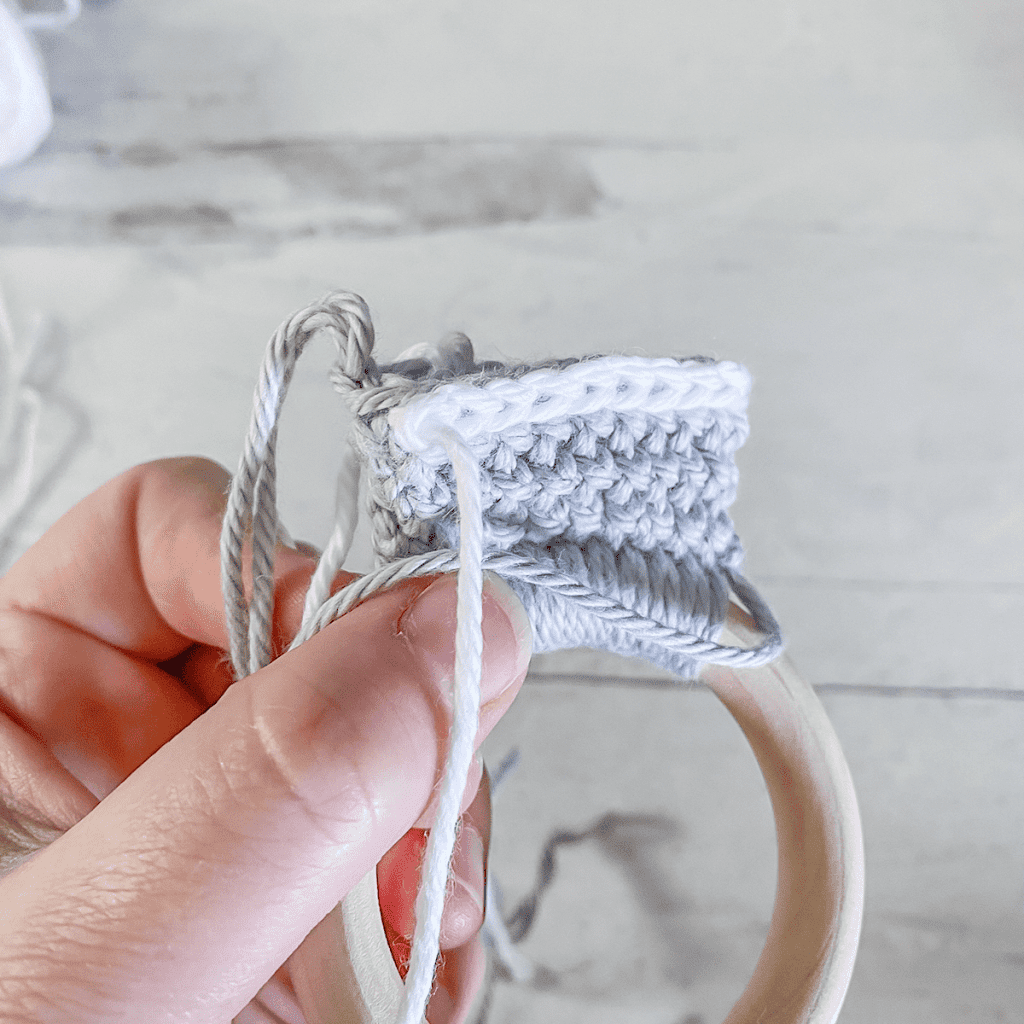
To begin: With BASE COLOR, make a slipknot (1st image). Drape working yarn over top of ring (2nd image).
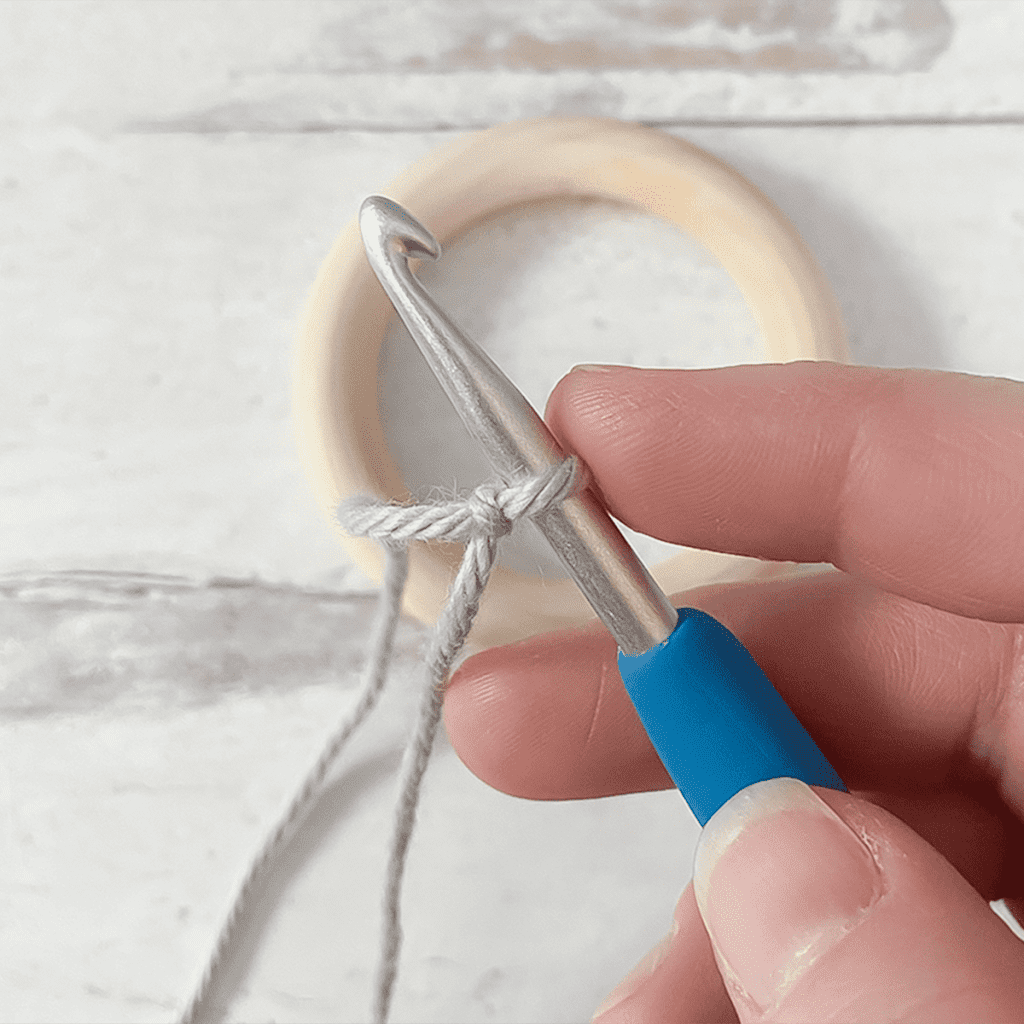

Base Row: Reach hook through ring opening, yarn over, pull hook back through opening; two loops on hook (1st image — one loop will be loose). Yarn over and pull through both loops — this is your first SC (2nd image). Repeat 9 times for a total of 10 SC (3rd image).

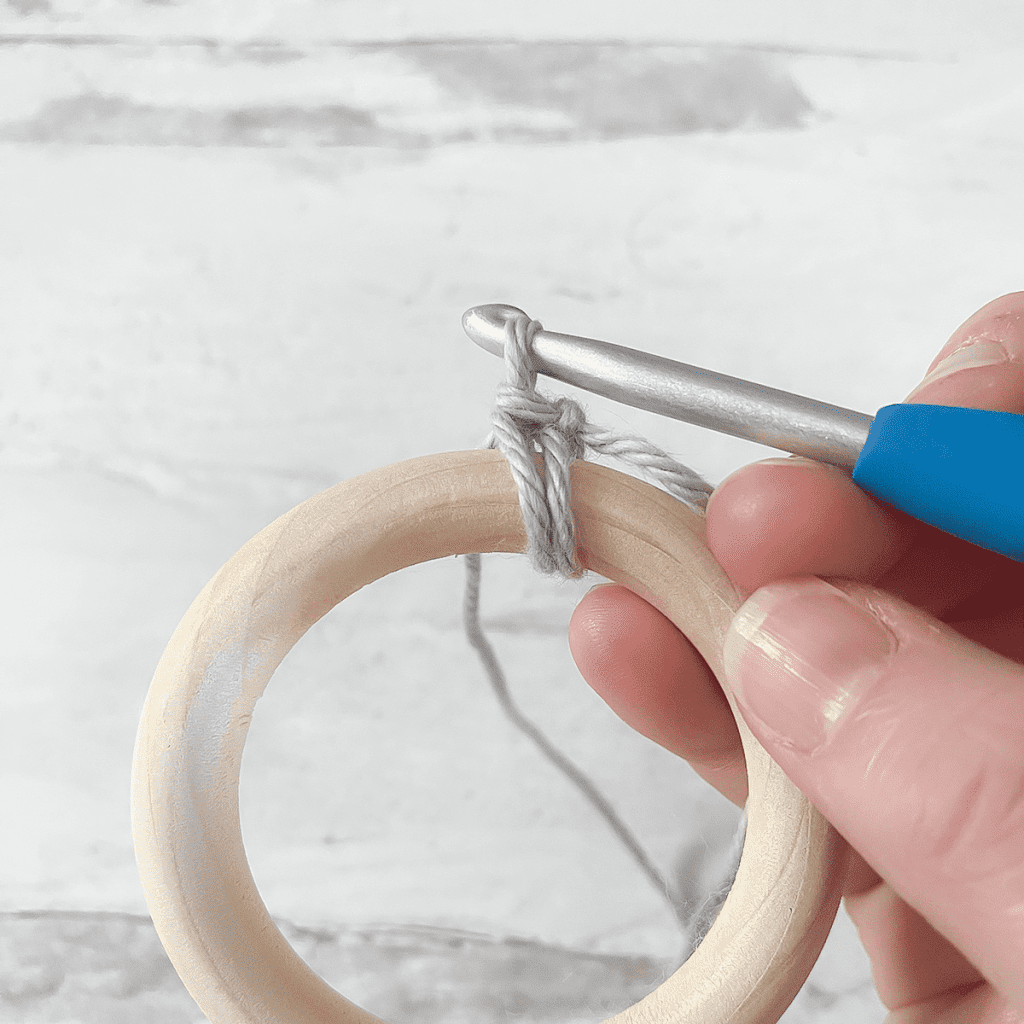
Tip: If any of the strands around the ring are crossed with each other, you can use a yarn needle to uncross them for a nice clean look.
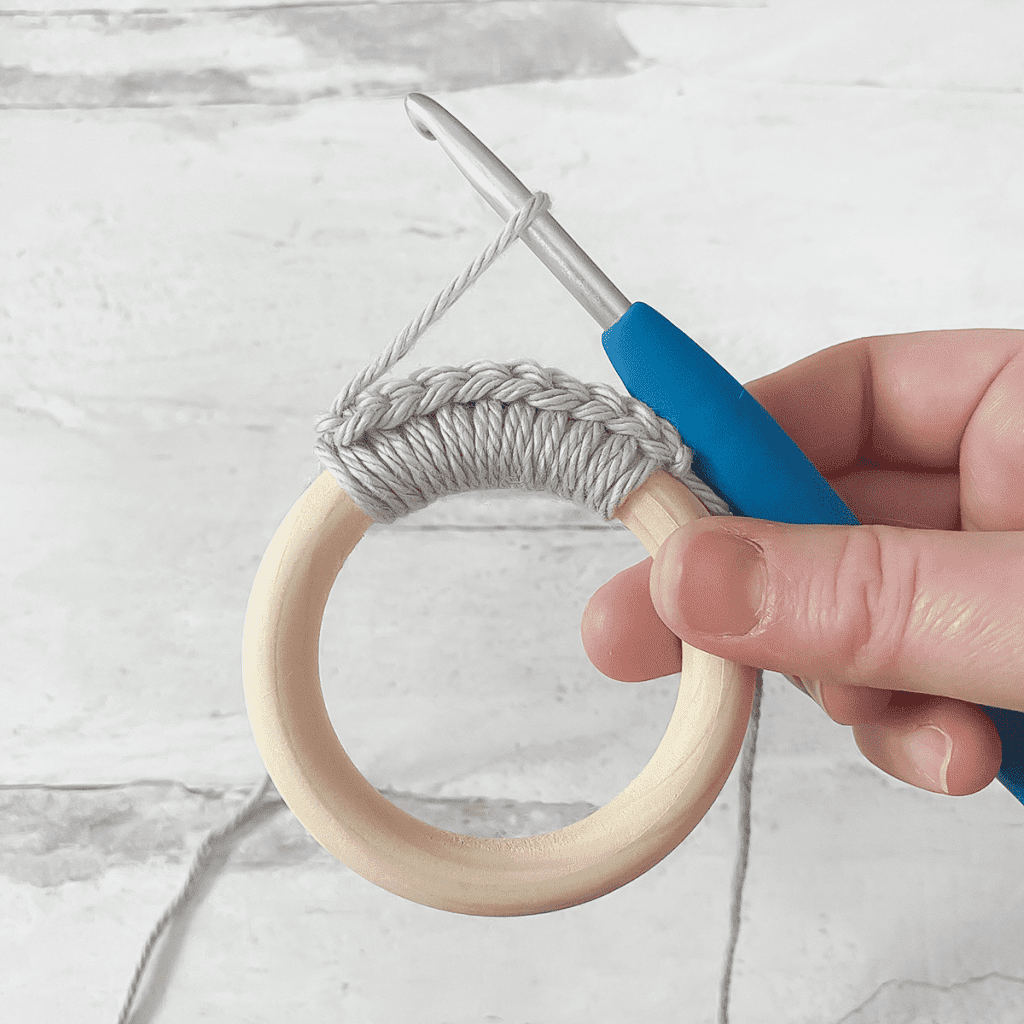
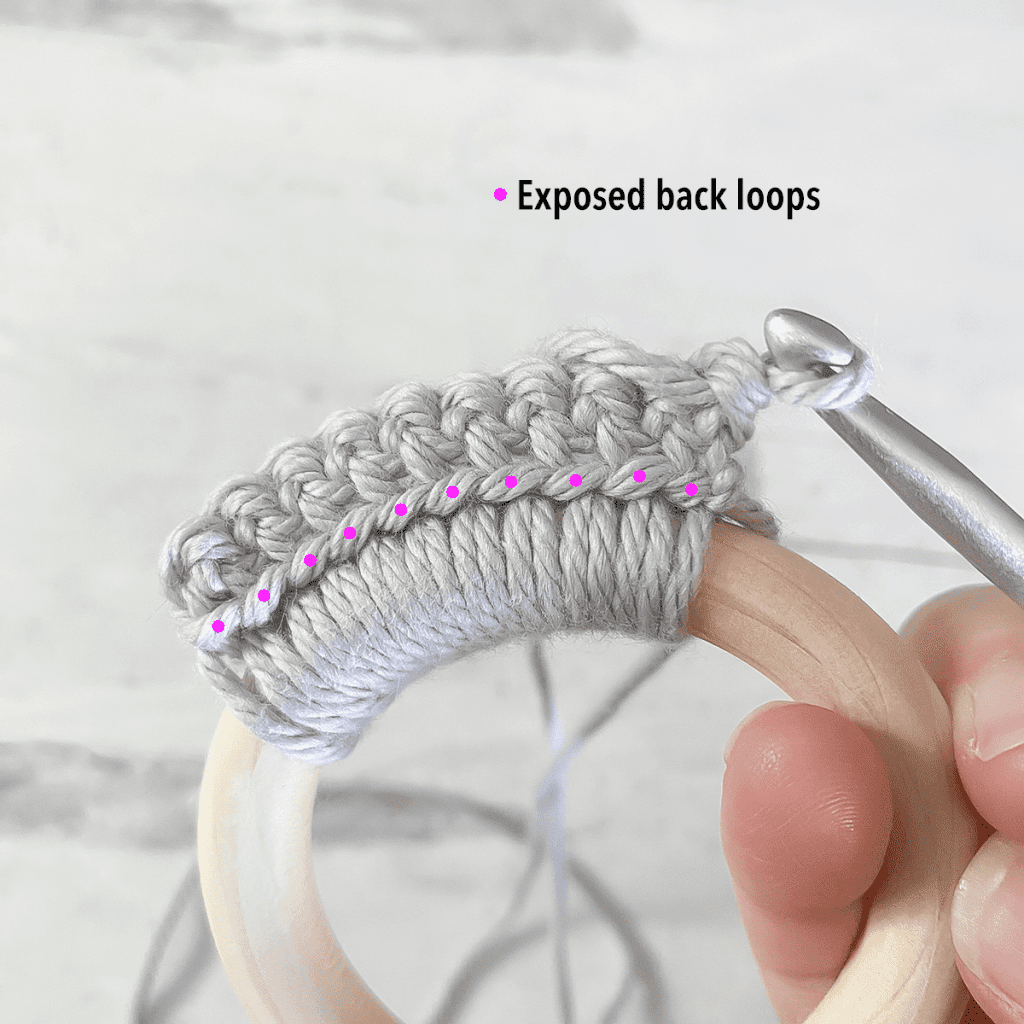
Round 1: CH1, turn. CSC in FLO of each ST across (1st image). Turn again, and notice the 10 back loops left exposed (2nd image). CSC in each one. Join (3rd image, top view). (20)

Rounds 2-3: CH1 (do not turn). CSC in FLO of each ST around. Join. (20)
Pull up a large loop so that your work doesn’t unravel, then remove your hook.
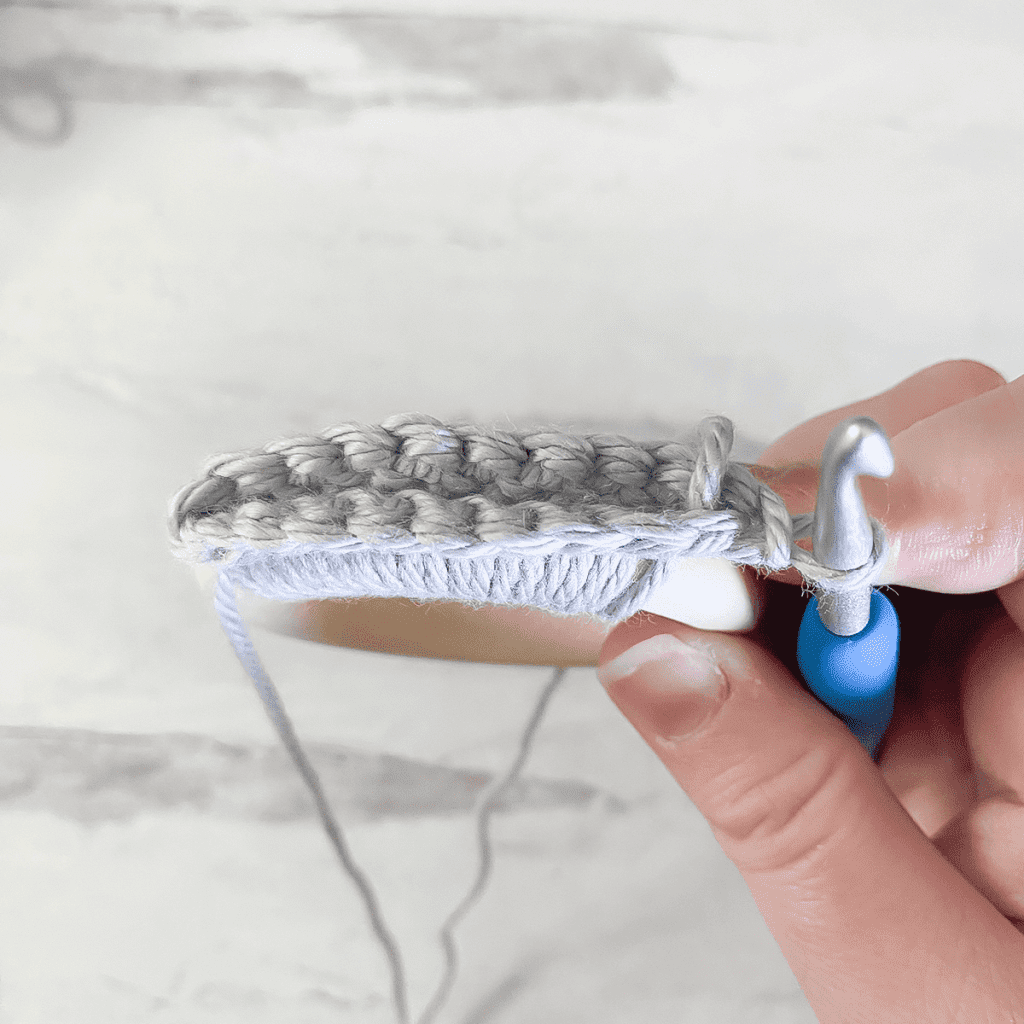
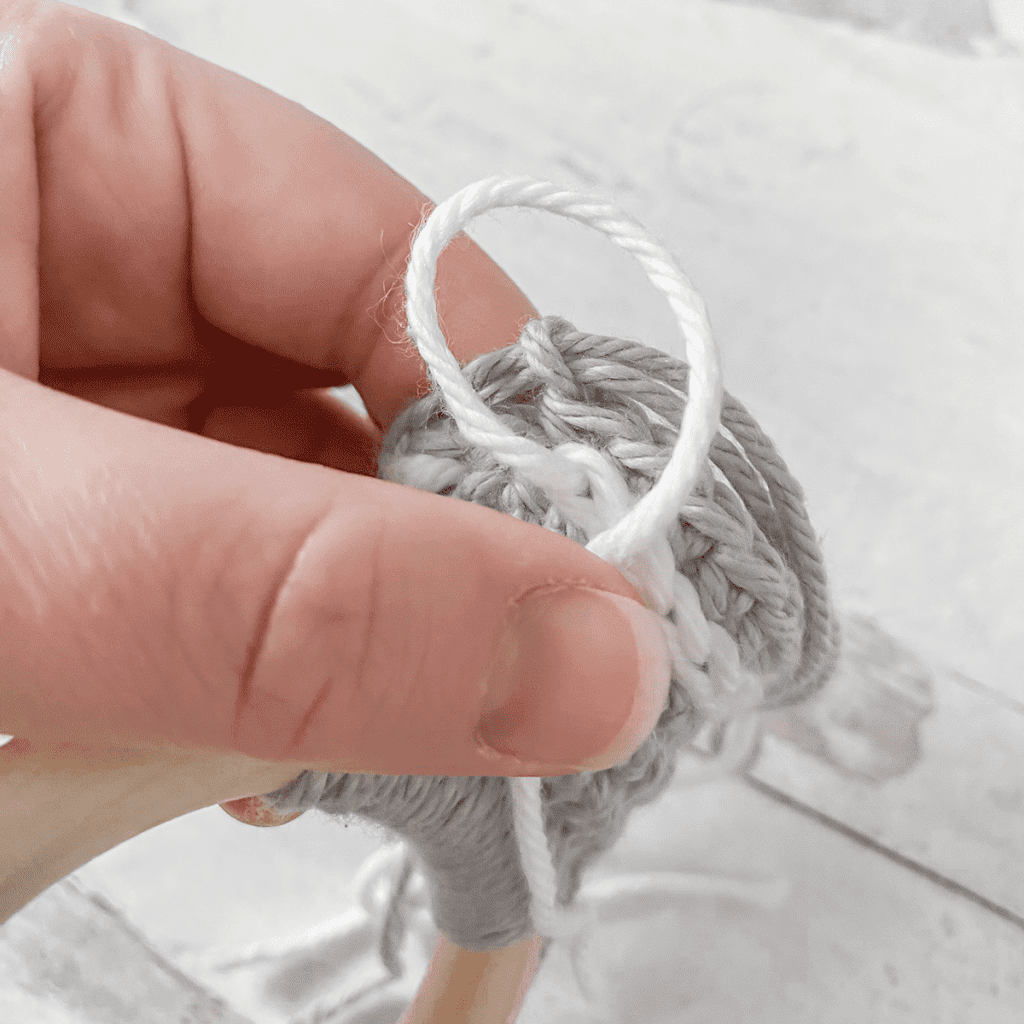
STRIPE #1: Pull STRIPE COLOR through top loops of first ST of the round. Do not chain; instead, immediately insert hook into next stitch (1st image) and work a SL ST (2nd image). Continue to SL ST in each ST around (3rd image). Fasten off without joining (4th image). (19)

Notice how the top loops from the previous BASE COLOR round are still visible (image); that’s where you’ll work the next round as we continue on.

Round 4: Reinsert hook into loop from BASE COLOR. CH1 (do not turn). CSC in FLO of each ST around. Join. (20)
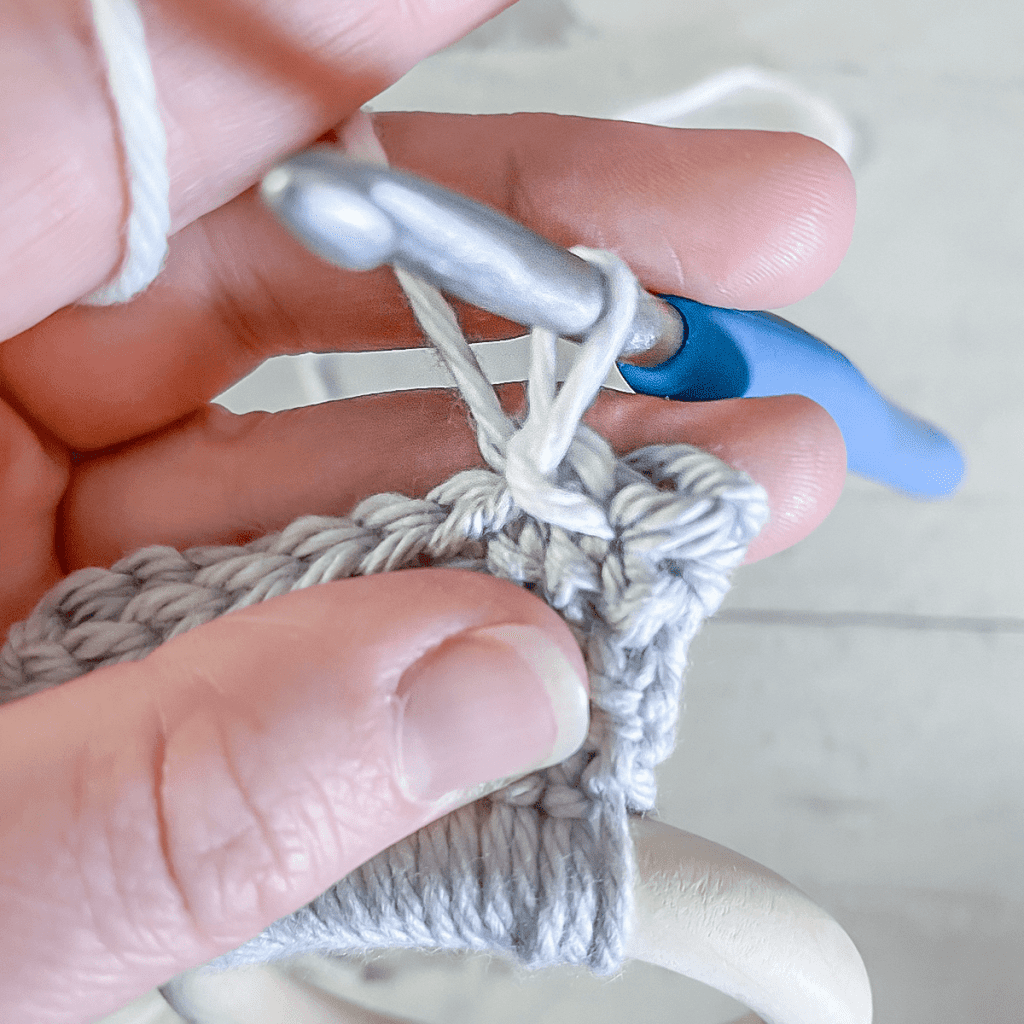
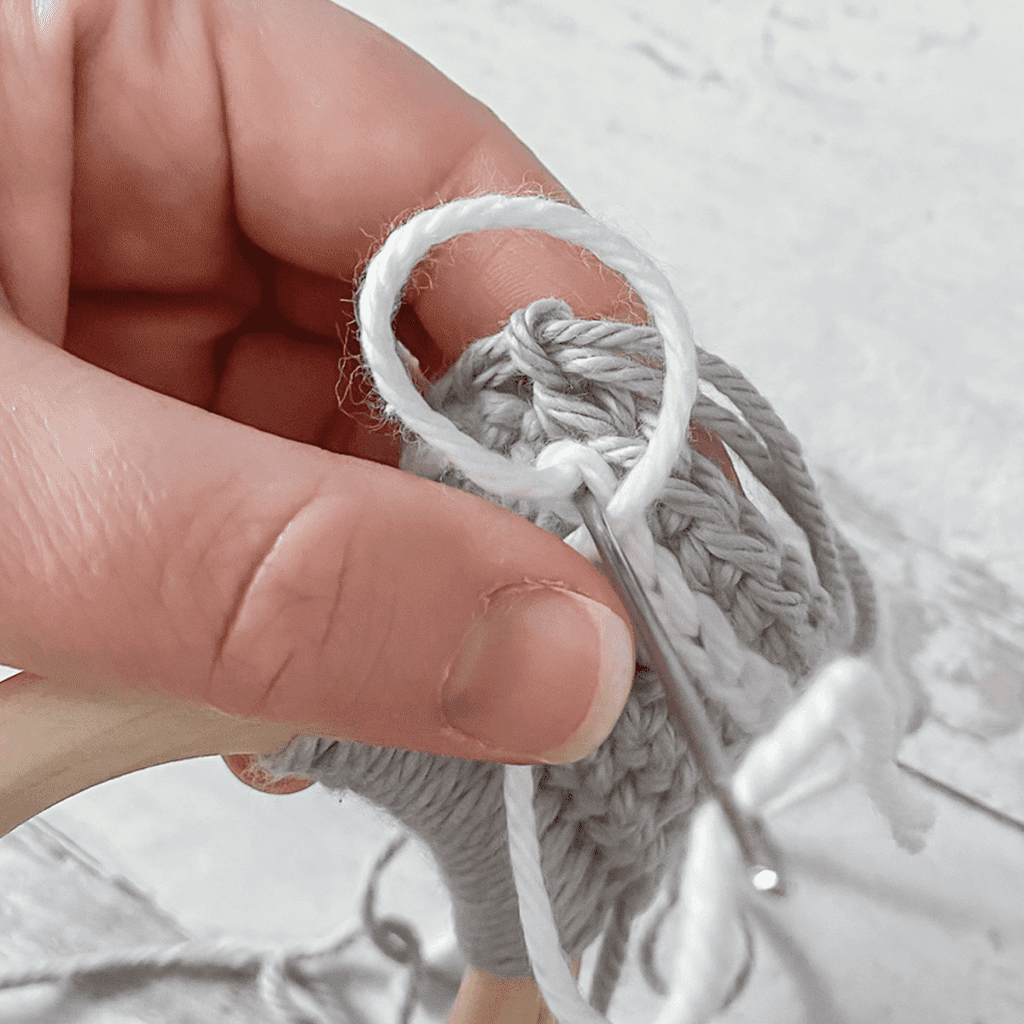
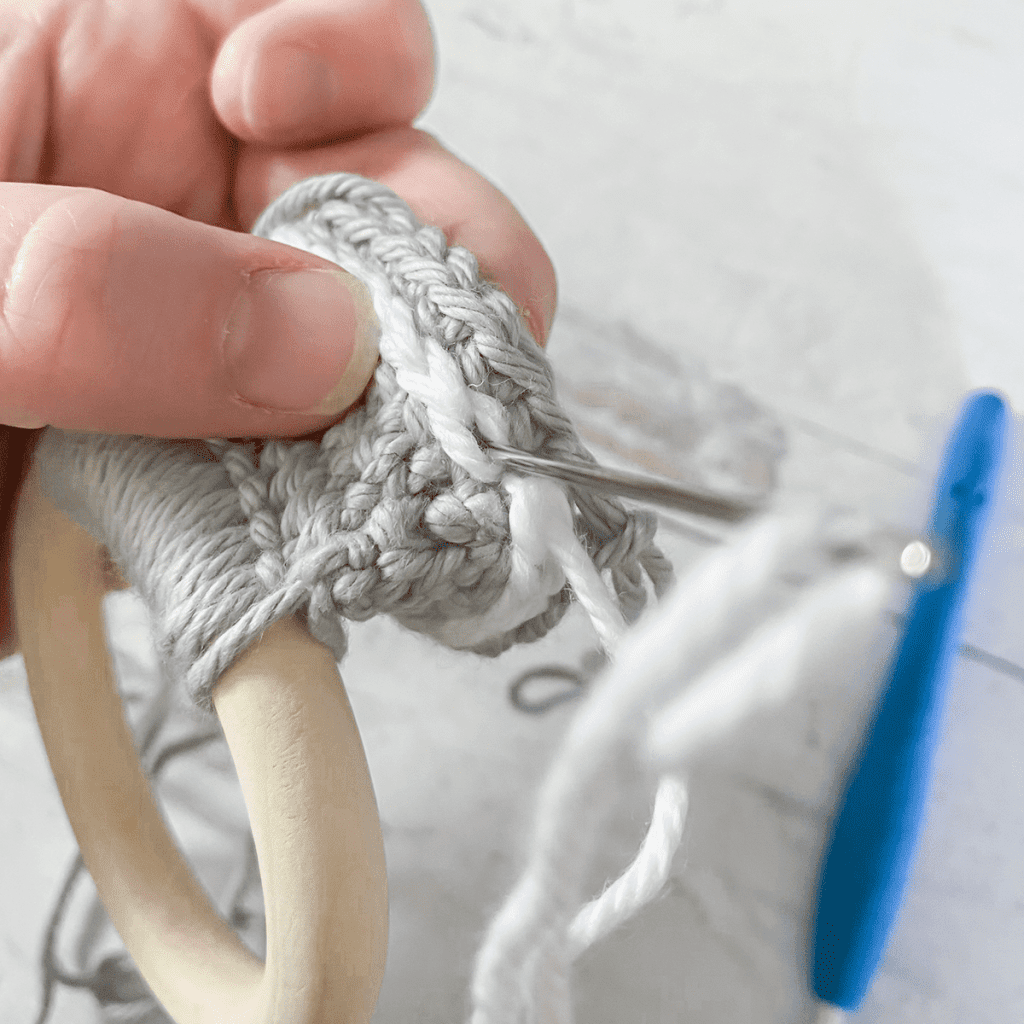
At this point, we’re going to PAUSE to take care of our STRIPE ends before they get buried too far inside the project and out of reach. We’ll use our yarn needle to manually create two more stitches to close the gap between the first and last slip stitches, giving us an almost seamless finish for the stripes. Here’s how to do it:
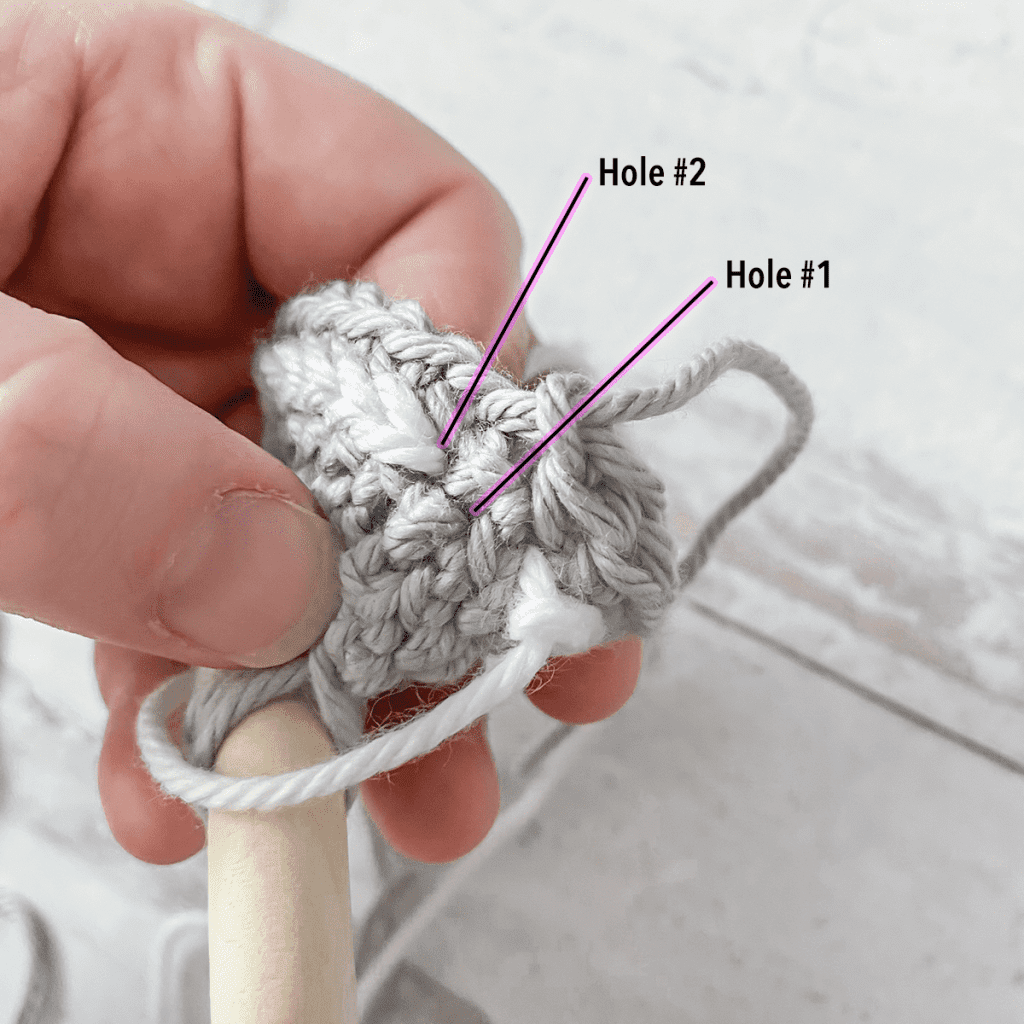
1. With seam area visible, notice two locations (holes) as marked on the image. Hole #1 is halfway between the first and last slip stitches of the STRIPE round; Hole #2 is where the top loops of the first slip stitch come together (the bottom of the sideways “V”). Keep these locations in mind.
2. Thread finishing tail through yarn needle, and make a loop. Hold it in place with your thumb.
3. Insert yarn needle down between the two loops of the last SL ST (same place the tail is coming from) …
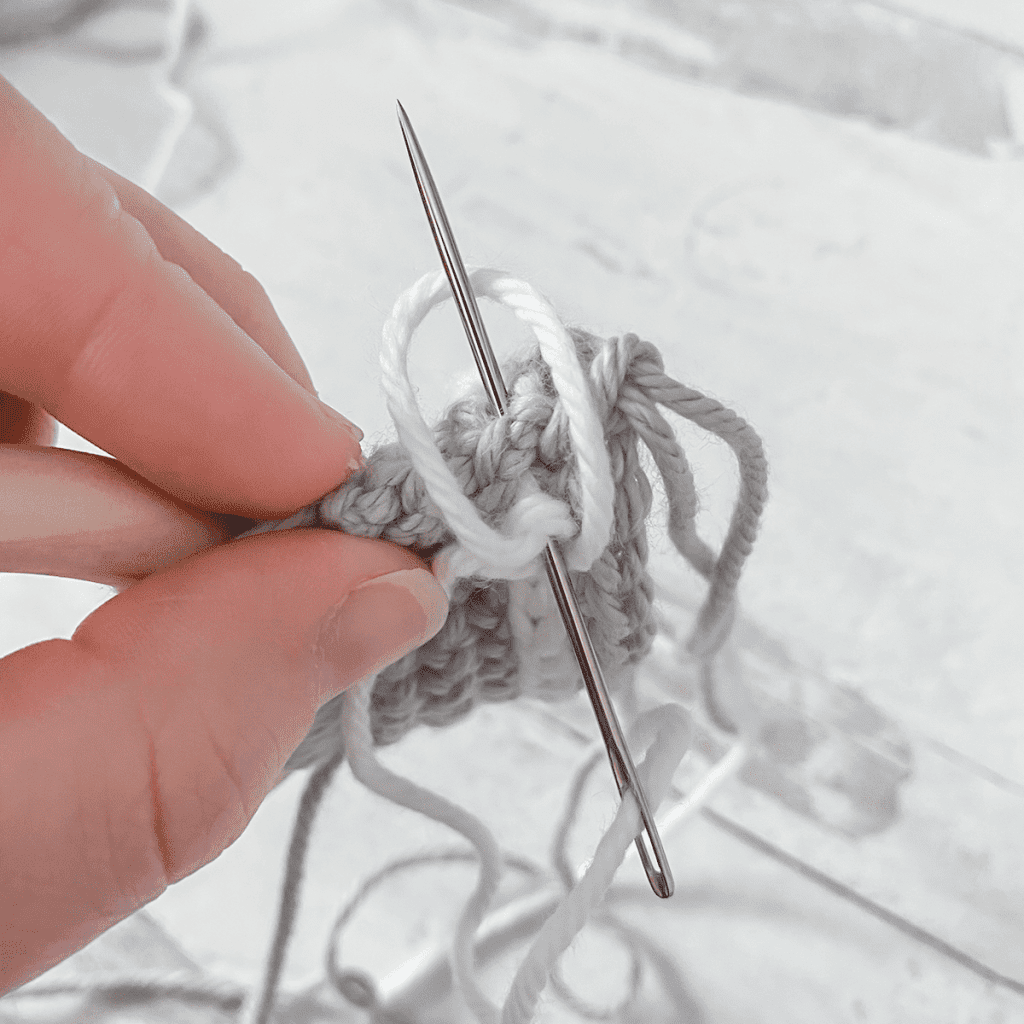
4. … and up through Hole #1, making sure it travels up through the loop you created.
5. Pull it through; you’ll see our first manually-created stitch form.
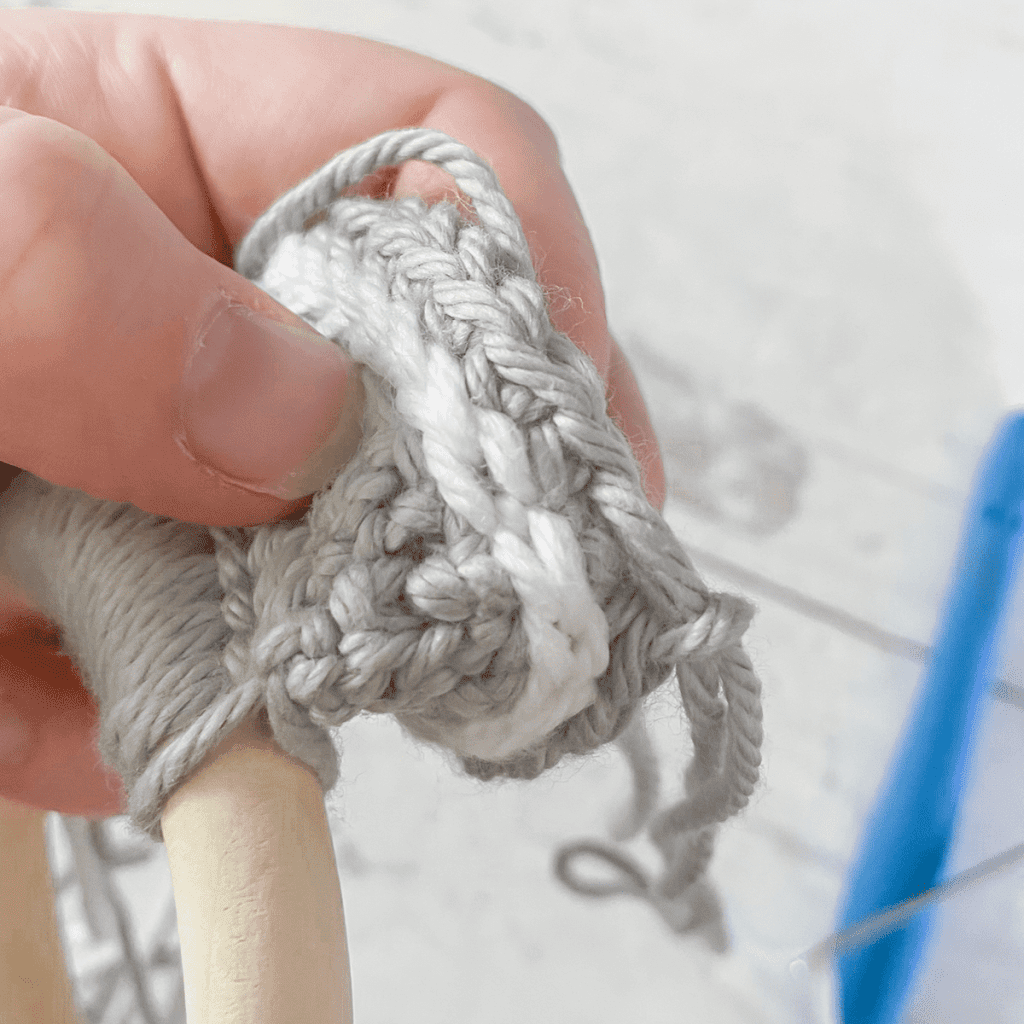
6. Repeat the process: Make a loop, insert needle down into the same place the tail is emerging from, and up through Hole #2 this time. Pull through. Image shows what it should look like once you’ve finished both stitches.
7. We need the finishing tail on the inside of our project, so insert yarn needle into the first slip stitch of the round …
8. … and pull it tight.
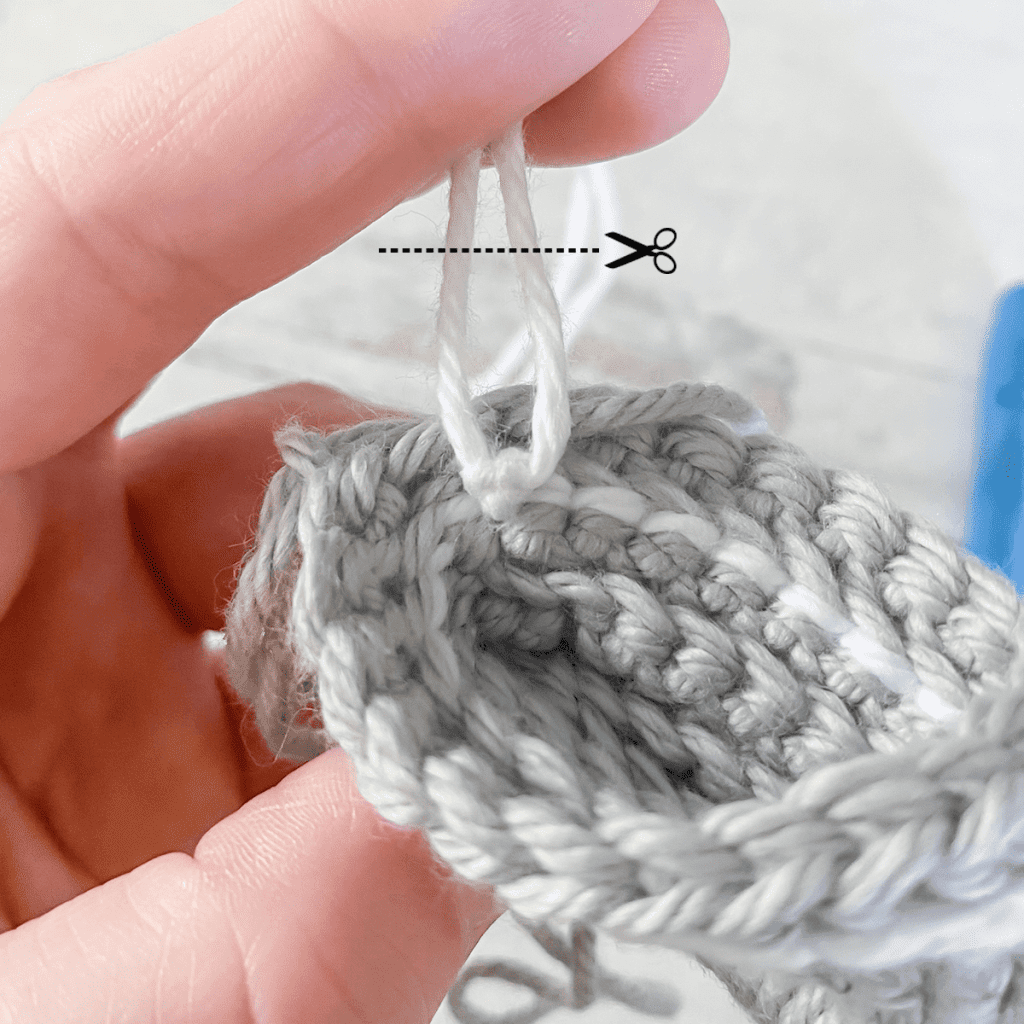
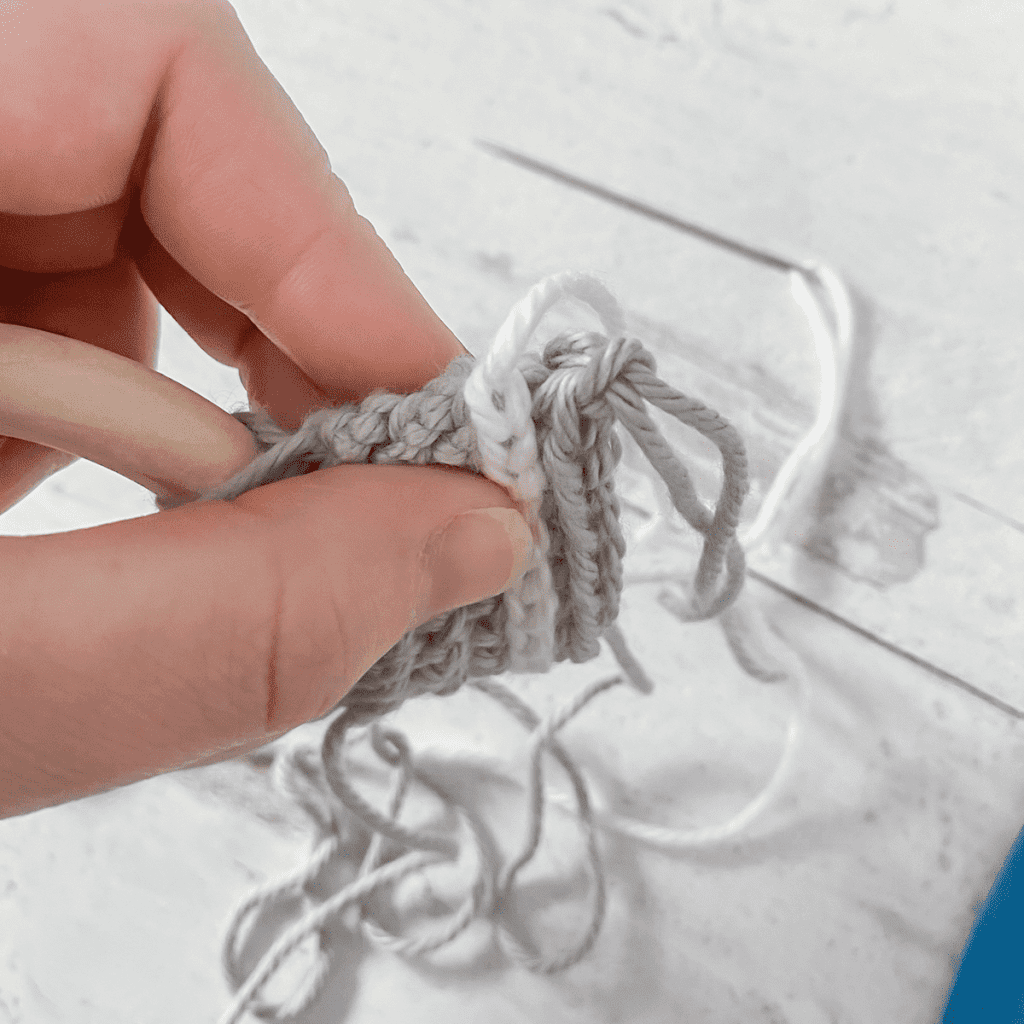
9. Tie 3 or 4 knots with the yarn tails, then trim the excess yarn. (This will be hidden inside the project, but if you would rather weave in your ends, go ahead.)
Continuing on with our pattern…
Rounds 5-8: CH1 (do not turn). CSC in FLO of each ST around. Join. (20)
STRIPE #2: Follow instructions from STRIPE #1. (19)
Round 9: Return to BASE COLOR, CH1 (do not turn). CSC in FLO of each ST around. Join. (20)
Take care of STRIPE #2 ends the same way you did for STRIPE #1.
Rounds 10-13: CH1 (do not turn). CSC in FLO of each ST around. Join. (20)
STRIPE #3: Follow instructions from STRIPE #1. (19)
Round 14: Return to BASE COLOR, CH1 (do not turn). CSC in FLO of each ST around. Join. (20)
Take care of STRIPE #3 ends.
Rounds 15-18: CH1 (do not turn). CSC in FLO of each ST around. Join. (20)
STRIPE #4: Follow instructions from STRIPE #1. (19)
Round 19: Return to BASE COLOR, CH1 (do not turn). CSC in FLO of each ST around. Join. (20)
Take care of STRIPE #4 ends.
Rounds 20-23: CH1 (do not turn). CSC in FLO of each ST around. Join. (20)
STRIPE #5: Follow instructions from STRIPE #1. (19)
Round 24: Return to BASE COLOR, CH1 (do not turn). CSC in FLO of each ST around. Join. (20)
Take care of STRIPE #5 ends.
Rounds 25-28: CH1 (do not turn). CSC in FLO of each ST around. Join. (20)
STRIPE #6: Follow instructions from STRIPE #1. (19)
Round 29: Return to BASE COLOR, CH1 (do not turn). CSC in FLO of each ST around. Join. (20)
Take care of STRIPE #6 ends.
Rounds 30-31: CH1 (do not turn). CSC in FLO of each ST around. Join. (20)
Fasten off and weave in any ends.
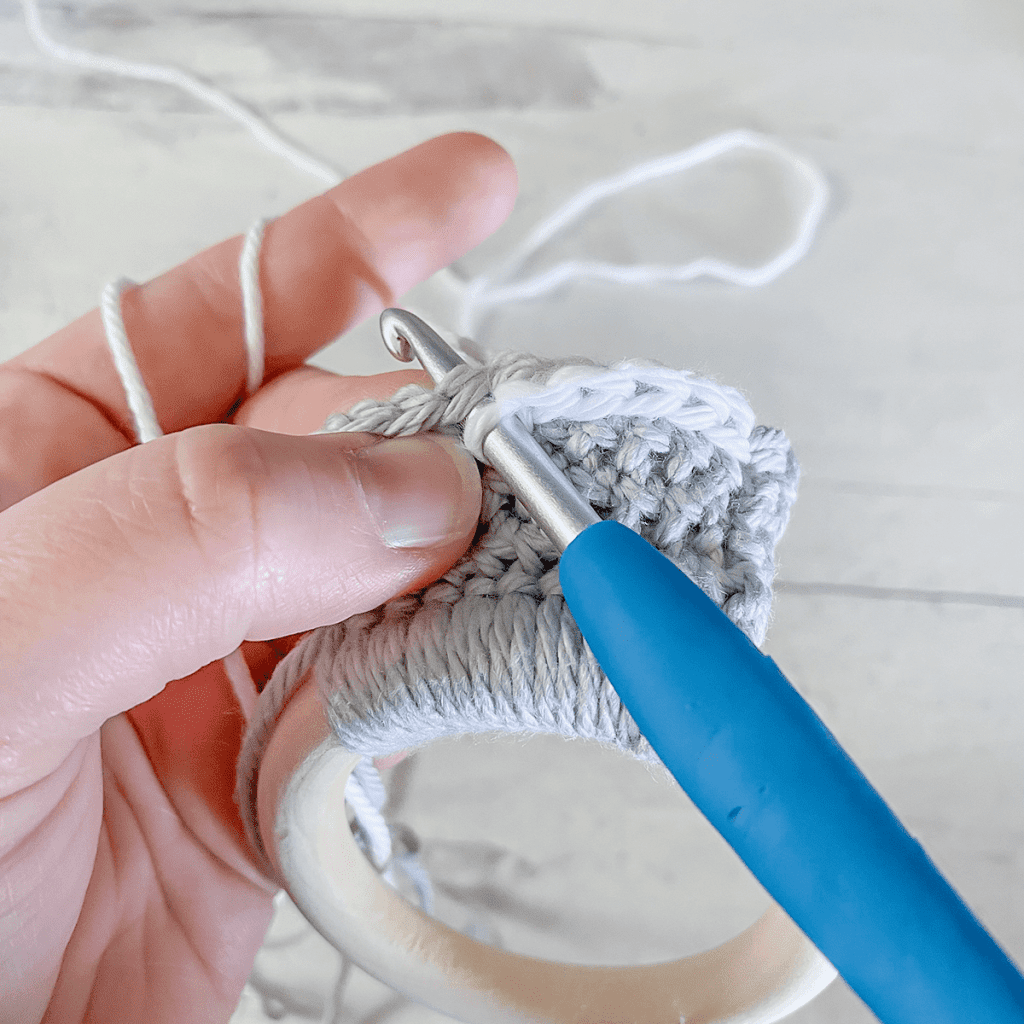
SEAMING + ADDING SECOND RING
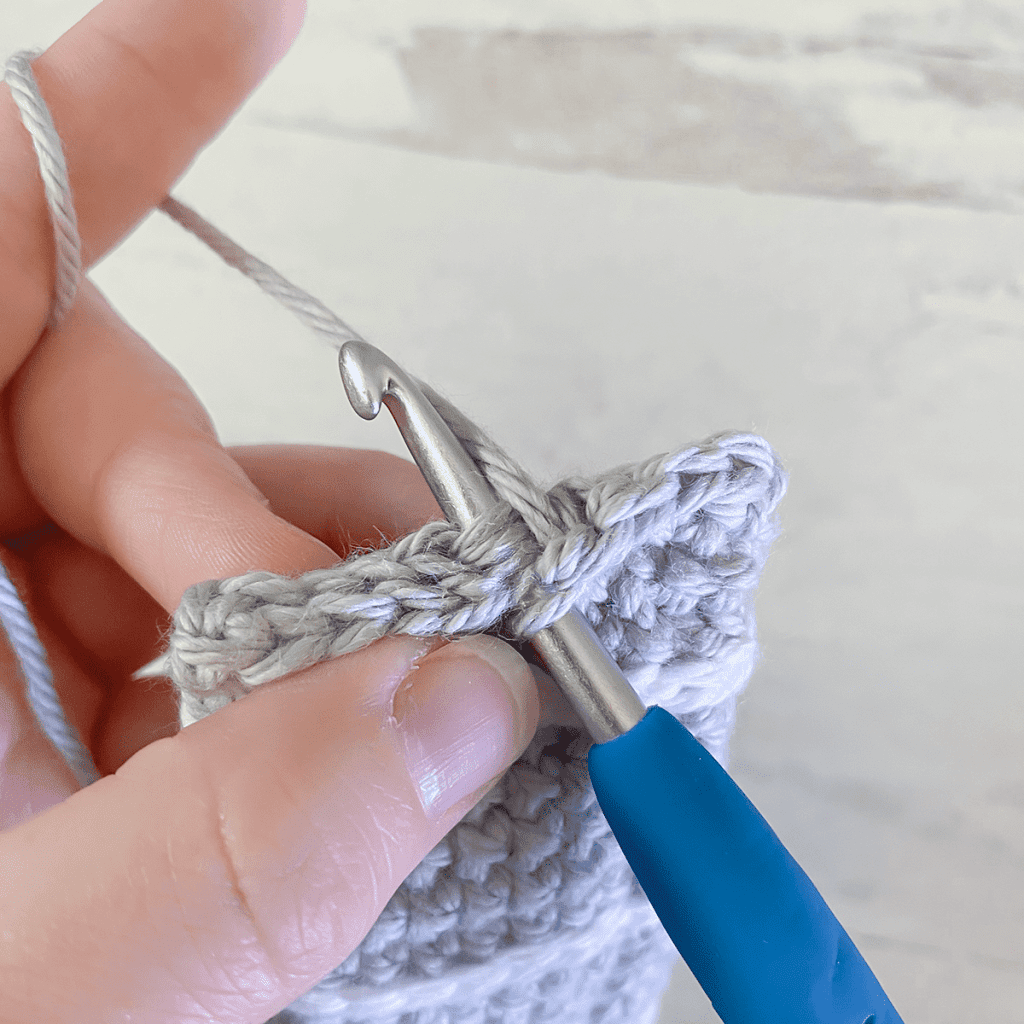
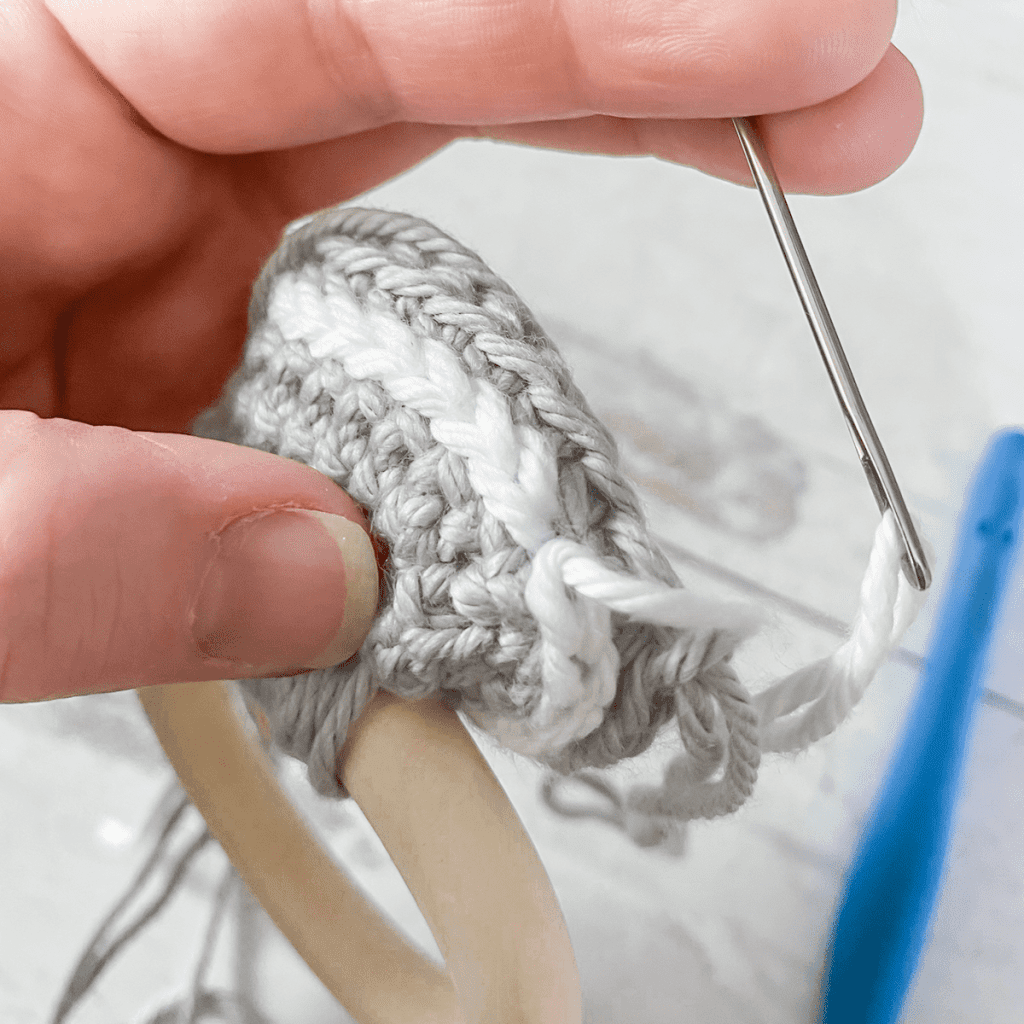
Lay work flat, make sure seam is straight, and align the top stitches; rejoin BASE COLOR at rightmost stitch, going through all 4 loops (2 loops from the front stitch, and two loops from the corresponding back stitch).
CH1, CSC in same ST and in each ST across. Fasten off, leaving a long finishing tail (about a yard) for attaching second ring. Weave in starting tail.
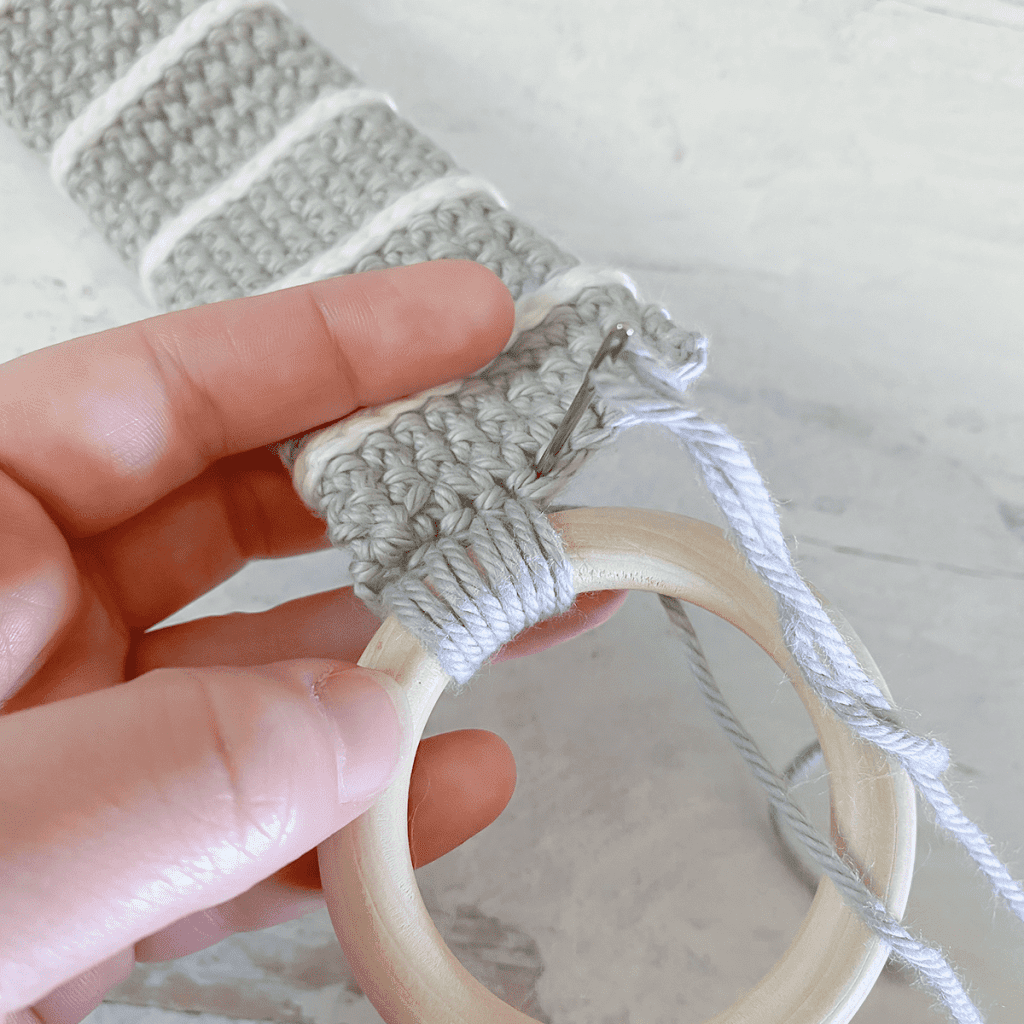
Thread finishing tail through yarn needle. Hold ring up to edge of project and begin to attach it by inserting yarn needle up through ring and down through first stitch; repeat, working through the same stitch a second time. Continue process with each stitch across the seam, being sure to work into each stitch twice. You should finish with about 20 loops around the ring.
Fasten off and weave in finishing tail.
That’s it!
I hope you enjoyed this tutorial. If you’re sharing your project on social media, be sure to tag me @yarnandchai.design!

