Tag: pattern

  • Mosaic Pumpkin

    Mosaic Pumpkin

    For several Fall seasons, I’ve thought to myself, “I bet a mosaic pumpkin would be really cute.” But I never got around to making one until now, and let me tell you… I was right. IT’S SO CUTE!

    If you’ve done any of my other mosaic patterns (like the Mosaic Basket, Mosaic Potholder or Mosaic Bucket Bag), then this pumpkin should be a breeze. If you haven’t, that’s ok too… it’s not as complicated as it looks!

    About the Yarn

    My mosaic patterns call for one yarn color as a base, and another darker color for the spike stitches. For these pumpkins, I mostly opted for the new Lazy Days yarn from Lion Brand as my base color (it’s an awesome chainette-style yarn that is so easy to work with). I say “mostly” because the light tan pumpkin in my photos was actually made with Yarn Bee Comfy Classic, which is a slightly thicker #4 yarn… so it came out slightly larger than the other size large pumpkin I made. And for the thread color on all of my pumpkins, I used #10 cotton crochet thread.

    For reference, here’s a breakdown of the yarn and size of each pumpkin in my photos:

    YARN A:

    • Purple pumpkin (small): LB Lazy Days in “Woodrose”
    • Orange pumpkin (large): LB Lazy Days in “Clay”
    • Tan pumpkin (large): Yarn Bee Comfy Classic in “Linen”
    • Greenish yellow pumpkin (small): LB Lazy Days in “Lichen”
    • Aqua pumpkin (medium): LB Lazy Days in “Surf Spray”

    YARN B:

    • All pumpkins: Artiste #10 Cotton Crochet Thread in “Chocolate”

    Video Help (sort of)

    I do not currently have a video tutorial for the mosaic pumpkins. However, if you need a visual on how the spike stitches work to form the mosaic pattern, you might take a look at my video tutorial for the Mosaic Basket! Start at the 19:33 mark for a demonstration on the spike stitch and how to switch between yarns.

    Prefer a PDF?

    This pattern can be completed using the 100% free version right here on this page. However, many people prefer the convenience of a printable, ad-free PDF.

    All-Access Passholders get the ad-free version of this and all of my other blog patterns. It’s a pretty sweet deal, if I do say so myself! Learn more about it here or continuing scrolling for the free version.

    – – – – – – – – – – – – – –

    Mosaic Pumpkin

    View on Ravelry

    Difficulty: Easyish

    Crochet Language: American Standard

    Finished Sizes:
    Laid flat, before stuffing: 4″ x 4″ (S), 4.75″ x 4.75″ (M), 5.5″ x 5.5″ (L)
    Stuffed and assembled: 3.5″ x 2.25″ (S), 4″ x 2.5″ (M), 4.5″ x 2.75″ (L)

    Yarn:

    • Yarn A: Approximately 50 yards (S), 65 yards (M), or 80 yards (L) of Lion Brand Lazy Days, a #4 weight chainette-style yarn, or other #4 weight yarn.
    • Yarn B: Approximately 45 yards (S), 60 yards (M), or 75 yards (L) of Artiste #10 Cotton Crochet Thread or other #10 crochet thread. For best results, YARN B should be a darker color than YARN A.

    Hook: G (4.0mm)

    Gauge: Not crucial, but 18 SC x 22 rows = 4″

    You’ll also need:
    Yarn needles, regular & extra long (your fingers will thank you!)
    Polyester fiber-fill
    1″ stick or other chosen material for stem
    Fast-acting glue
    Twine and other decorations (optional)

    Terms and Abbreviations:
    MC (magic circle – view tutorial here)
    ST/STS (stitch/stitches)
    SL ST (slip stitch)
    CH (chain)

    SC (single crochet)
    SC Spike Stitch (Instead of inserting your hook into the top loops of the stitch, insert them into its base, then complete an SC. This will wrap your SCs over the top of the SCs from the previous round.)

    Notes:
    (1) Pattern is worked in a seamless round. Do not join, chain and/or turn unless instructed. If needed, use a stitch marker to mark the beginning of your rounds.
    (2) Pattern is written for the smallest size, with medium and large sizes in parentheses. Any time there is only one number, it applies to all sizes.
    (3) Because we utilize the SC Spike Stitch for entire rounds throughout the pattern, we will be referring to those rounds as an extension of the SC rounds they are being worked into. For example, if Round 3 is a round of SC, then the very next round which places spike stitches on top of those SCs will be referred to as Round 3B. This just makes for easier counting.
    (4) Yarn, hook size and gauge are only meant as a guide, and this pattern will work with any yarn you choose; just use a hook that is smaller than the yarn’s recommended size for a nice tight fabric, and keep in mind your yarn amounts and finished dimensions will be affected by any changes.
    (5) When stuffing your pumpkins, it’s important that you don’t over-stuff. If the rounds start to separate and the stuffing is showing through them, ease up.

    – – – – – – – – – – – – – – –

    INSTRUCTIONS

    To begin: With YARN A, make a magic circle; CH1.

    Round 1: 12 (14, 16) SC in MC. (Don’t pull the circle closed yet; we’ll do that later!)
    Stitch count: 12 (14, 16)

    Round 2: 3SC in each ST around. (It will be crowded; that’s ok.)
    Stitch count: 36 (42, 48)

    Round 3: SC in each ST around. Pull the loop on your hook up a couple inches so it doesn’t unravel, then remove your hook.
    Stitch count: 36 (42, 48)

    Round 3B: Insert hook into top loops of next ST. Attach YARN B and CH1; SC into same ST, then SC SPIKE STITCH into next ST and each remaining ST around. Pull the loop on your hook up a couple inches so it doesn’t unravel, then remove your hook.
    Stitch count: 36 (42, 48)

    Round 4: Reinsert hook into loop from YARN A. SC in each ST around (you’re working in the top loops of the SC Spike Stitches from the previous round). Remove hook.
    Stitch count: 36 (42, 48)

    Round 4B: Reinsert hook into loop from YARN B. SC Spike Stitch in each ST around. Remove hook. 
    Stitch count: 36 (42, 48)

    Rounds 5 – 18B (5 – 20B, 5 – 22B): Repeat Rounds 4 – 4B.

    Round 19 (21, 23): Reinsert hook into loop from YARN A. SC in each ST around (still working in the top loops of the SC Spike Stitches from the previous round).
    Stitch count: 36 (42, 48)

    To finish: SL ST in FLO of each of the next 2 STS to smooth down the round, then fasten off, leaving a finishing tail about a yard long. Fasten off YARN B and weave in end. Pull on your YARN A starting tail to cinch the first round of the pumpkin closed, then weave in that tail securely and trim excess. Weave in YARN B starting tail and any other loose ends, not including the long YARN A finishing tail.

    Cinching, Stuffing and Closing:
    Make sure pumpkin is right-side out. Use yarn needle and finishing tail to weave in and out along the stitches of the final round, weaving every 3 stitches until you’re back where you started (1st photo*). Set yarn needle down and stuff pumpkin (2nd photo), then pull yarn tail to cinch closed (3rd photo). Weave yarn needle across the cinch in a couple different directions to reinforce closure; tie a knot, but do not fasten off.

    Shaping:
    Using extra long yarn needle and finishing tail, bring the tail down along the outside of the pumpkin, then back through the pumpkin down the center (1st photo). Pull tight to cinch the pumpkin (2nd photo) and hold it in place with your other hand as you move on to the next cinch, continuing the process around the whole pumpkin (3rd photo). I eyeballed where I wanted my cinches, and ended up with 6; but pumpkins come in all different variations, so feel free to play with it to find whatever you think looks best!

    When you finish the last cinch, tie a knot and weave in the end, or pull the knot inside the pumpkin to hide it.

    Stem
    Embellish chosen stem with leaves, twine, covered wire, etc. (optional), then use fast-acting glue to secure to the center of the pumpkin.

    That’s it!

    I hope you enjoyed this pattern. If you’re sharing your project on social media, be sure to hashtag #mosaicpumpkin and tag me @yarnandchai.design so that I can see your beautiful creations!

  • Country Cottage Pumpkin

    Country Cottage Pumpkin

    “It wouldn’t be fall without a new Yarn + Chai pumpkin pattern!”

    That’s what someone commented when I showed a preview of this pattern, and it put such a smile on my face. And she’s right. It wouldn’t!

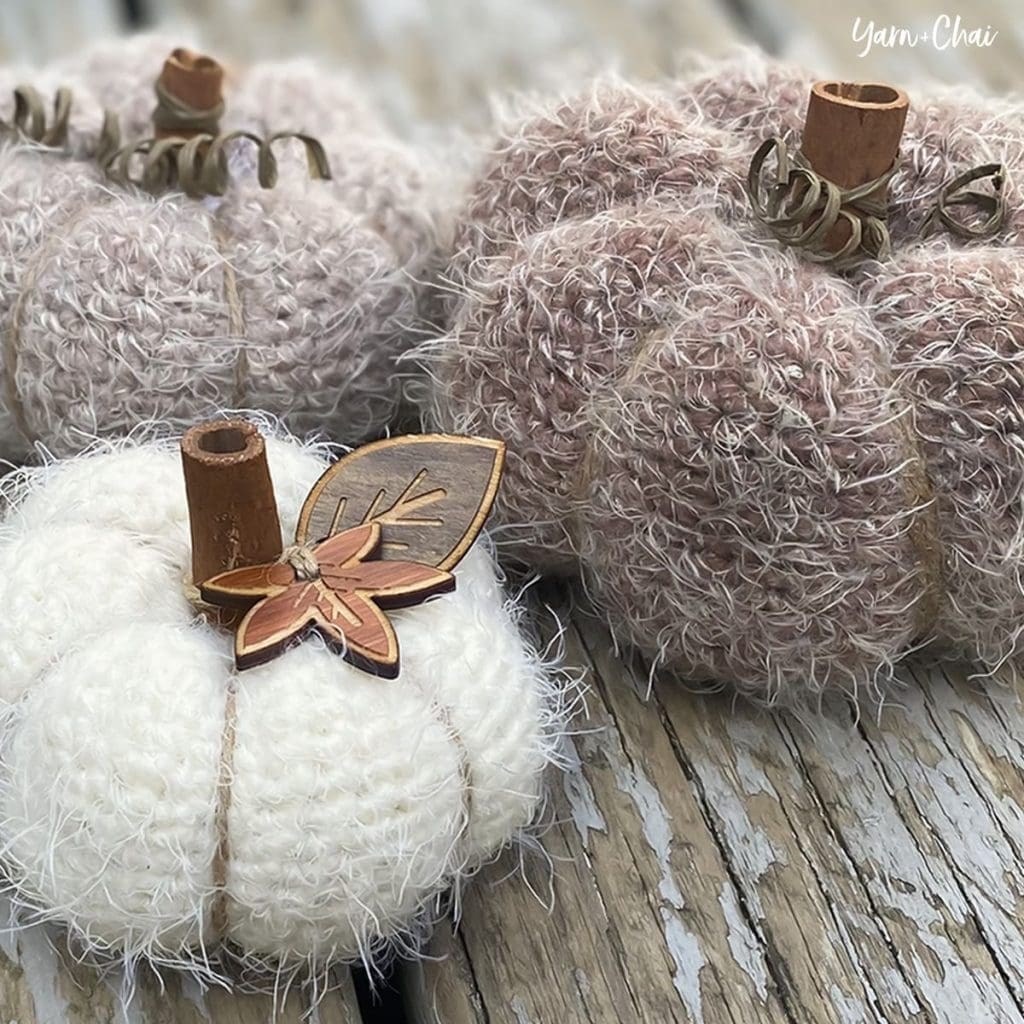
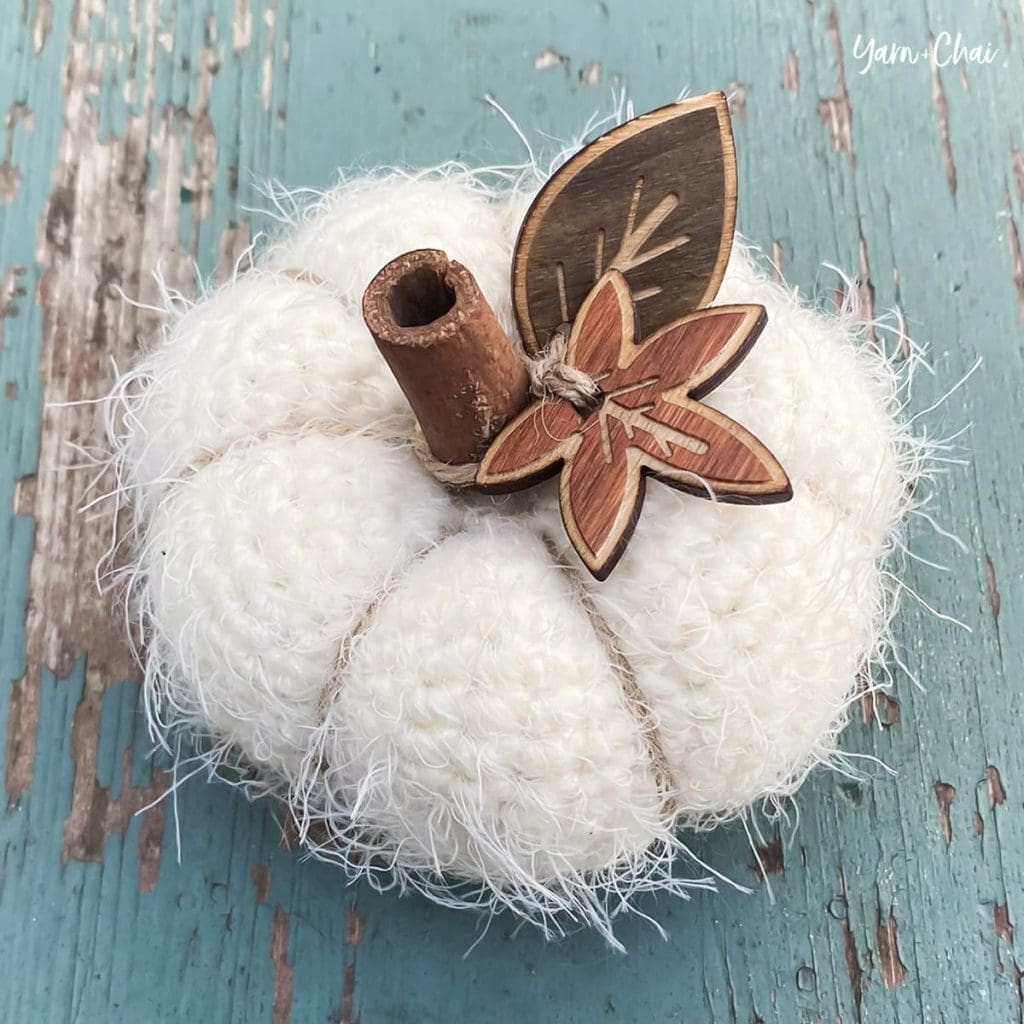
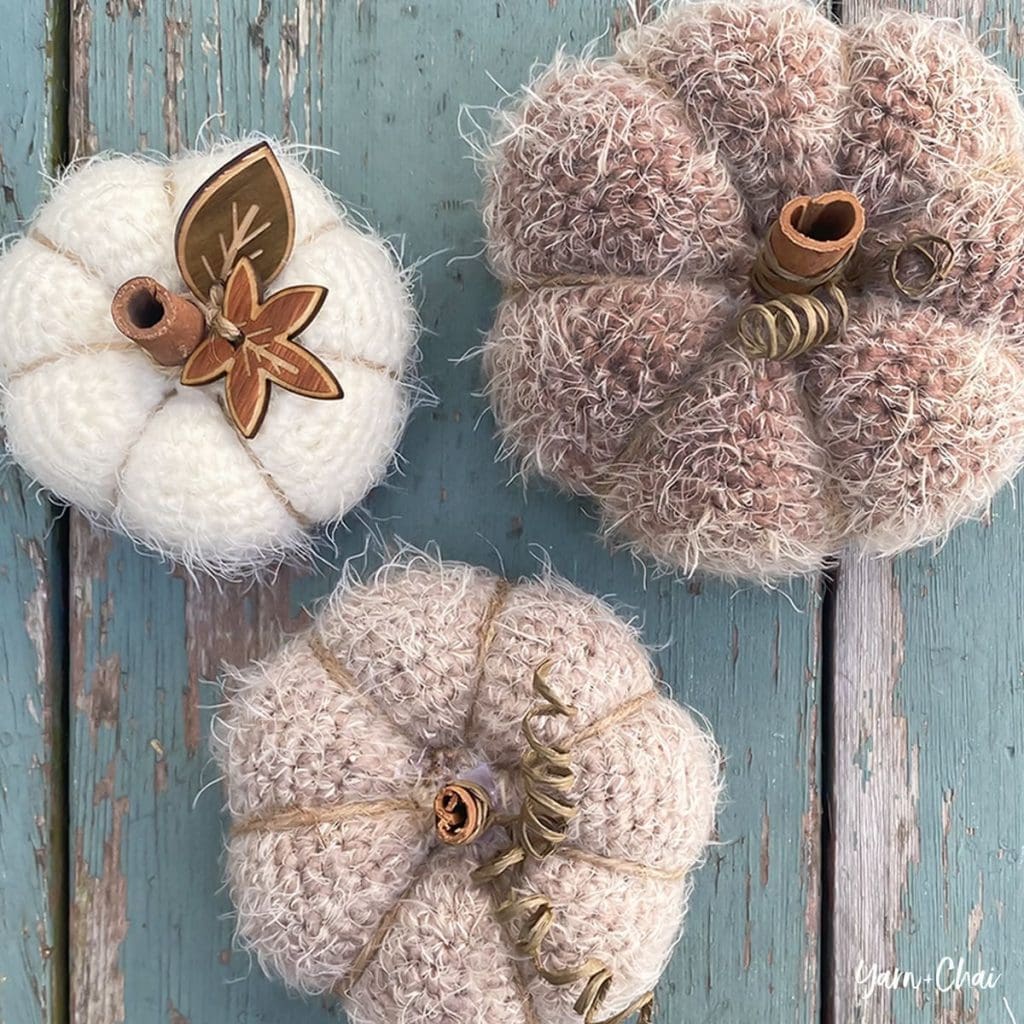
    Pumpkins are such a fun, simple home decor item to crochet. And you can get away with making different styles and throwing them all together… and they’ll still look great! So why not try adding a fuzzy pumpkin (or a dozen) to your home collection or your autumn fair booth?

    About the Yarn

    For this pattern, I chose Caron Latte Cakes. Despite the fuzziness of this eyelash yarn, Latte Cakes are actually really nice to work with. The yarn glides on the hook without being slippery, and the stitches are visible enough to be easily worked into. And it’s soooooooft.

    What makes the Caron Latte Cakes extra fun is the long sections of color contained in the self-striping versions. It makes creating a set of coordinated pumpkins a breeze… we just have to “deconstruct” the cakes to get to the colors we want! (Deconstructing is basically separating a multi-colored skein into its individual colors so that you can access them when needed. You can use a yarn winder, but I found it pretty easy to remove the colors one-by-one starting at the center of the cake.)

    And there’s a lot of yarn in one cake… enough for up to 6 of the large sized pumpkins!

    Wooden Leaves

    My absolute favorite feature of these pumpkins, though, is the wooden leaves, which arrived just in time for my little photo shoot. The moment I saw them online, I knew I had to have them for this year’s pumpkins!

    Not surprisingly, these gorgeous leaf tags come from my favorite Etsy shop: All This Wood. (That’s where I get cork and leather tags for my hats and baskets, too!)

    Prefer a PDF?

    This pattern can be completed using the 100% free version right here on this page. However, many people prefer the convenience of a printable, ad-free PDF.

    All-Access Passholders get the ad-free version of this and all of my other blog patterns. It’s a pretty sweet deal, if I do say so myself! Learn more about it here or continuing scrolling for the free version.

    – – – – – – – – – – – – – –

    Country Cottage Pumpkin

    View on Ravelry

    Difficulty: Easy

    Crochet Language: American Standard

    Finished Sizes:
    Laid flat, before stuffing: 4″ x 4″ (S), 4.5″ x 4.5″ (M), 5″ x 5″ (L)
    Stuffed and assembled: 3.5″ x 1.75″ (S), 4″ x 2.25″ (M), 4.5″ x 2.75″ (L)

    Yarn: Approximately 40 yards (S), 60 yards (M), or 85 yards (L) of Caron Latte Cakes, a #5 weight, self-striping, eyelash-style acrylic/nylon yarn. I used color “Coconut Cream.” You’ll get several pumpkins from one Latte Cake!

    Hook: E (3.5mm)

    Gauge: Not crucial, but 18SC x 23 rows = 4″ square

    You’ll also need:
    Yarn needles, regular & extra long (your fingers will thank you!)
    Polyester fiber-fill
    1″ cinnamon stick or other chosen material for stem
    Fast-acting glue
    Twine and other decorations (optional)

    Terms and Abbreviations:
    MC (magic circle – view tutorial here)
    ST/STS (stitch/stitches)
    SL ST (slip stitch)
    CH (chain)

    SC (single crochet)

    Notes:
    (1) You’ll need to “deconstruct” your Latte Cake yarn to separate it into its various colors, since one pumpkin will probably require yarn from more than one section of the chosen color. I found it relatively easy to pull out one color at a time (starting from the center of the cake) and cut, but you could also use a yarn winder to wind the entire cake into several yarn balls.
    (2) Pattern is worked in a seamless round. Do not join, chain and/or turn unless instructed. Use a stitch marker to mark the beginning of your rounds.
    (3) Pattern is written for the smallest size, with medium and large sizes in parentheses. Any time there is only one number, it applies to all sizes.
    (4) Yarn, hook size and gauge are only meant as a guide, and this pattern will work with any yarn you choose; just use a hook that is smaller than the yarn’s recommended size for a nice tight fabric, and keep in mind your yarn amounts and finished dimensions will be affected by any changes.

    – – – – – – – – – – – – – – –

    INSTRUCTIONS

    To begin: Make a magic circle; CH1.

    Round 1: 12 (14, 16) SC in MC. (Don’t pull the circle closed yet; we’ll do that later!)
    Stitch count: 12 (14, 16)

    Round 2: 3SC in each ST around. (It will be crowded; that’s ok.)
    Stitch count: 36 (42, 48)

    Rounds 3-22 (3-26, 3-30): SC in each ST around.
    Stitch count: 36 (42, 48)

    To finish: SL ST in FLO of each of the next 2 STS to smooth down the round, then fasten off, leaving a finishing tail about 2 yards long. Pull on your starting tail to cinch the first round of the pumpkin closed, then weave in that tail securely and trim excess.

    Cinching, Stuffing and Closing:
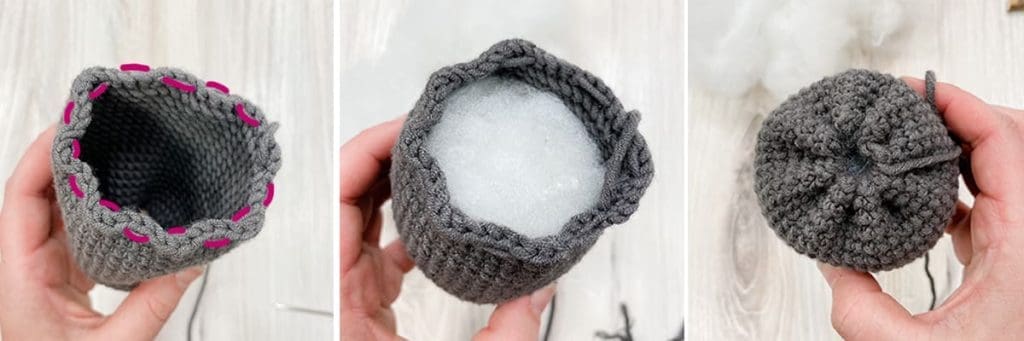
    Make sure pumpkin is right-side out. Use yarn needle and finishing tail to weave in and out along the stitches of the final round, weaving every 3 stitches until you’re back where you started (1st photo*). Set yarn needle down and stuff pumpkin (2nd photo), then pull yarn tail to cinch closed (3rd photo). Weave yarn needle across the cinch in a couple different directions to reinforce closure; tie a knot, but do not fasten off.

    *These photos are actually from the Petite Autumn Pumpkin pattern; the concept is the same, but much easier to see on a pumpkin that isn’t so fuzzy!

    Shaping:
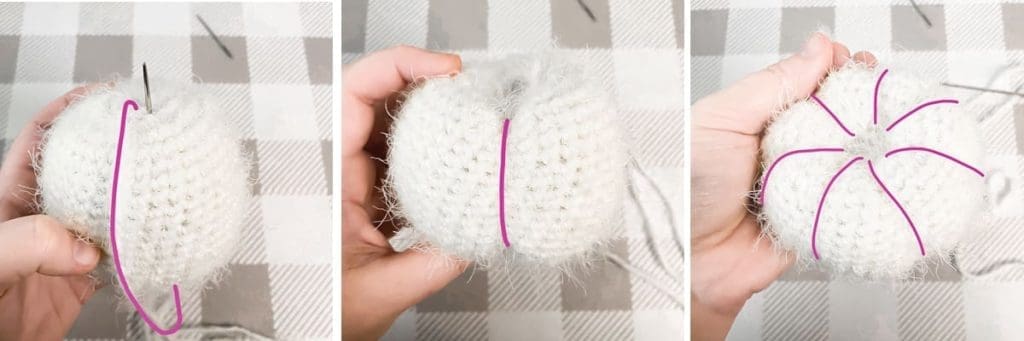
    Using extra long yarn needle and finishing tail, bring the tail down along the outside of the pumpkin, then back through the pumpkin up the center (1st photo). Pull tight to cinch the pumpkin (2nd photo) and hold it in place with your other hand as you move on to the next cinch, continuing the process around the whole pumpkin (3rd photo). I eyeballed where I wanted my cinches, and ended up with 7; but pumpkins come in all different variations, so feel free to play with it to find whatever you think looks best!

    When you finish the last cinch, tie a knot and weave in the end, or pull the knot inside the pumpkin to hide it.

    Adding Twine (Optional)
    Cut a long length of twine or jute and use a yarn needle to retrace the cinches, the same way you created them in the previous step. Secure and trim or hide excess.

    Stem
    Embellish chosen stem with leaves, twine, covered wire, etc. (optional), then use fast-acting glue to secure to the center of the pumpkin.

    That’s it!

    I hope you enjoyed this pattern. If you’re sharing your project on social media, be sure to hashtag #countrycottagepumpkin and tag me @yarnandchai.design so that I can see your beautiful creations!
  • 12 Days of Christmas: The Rhylee Scarf

    12 Days of Christmas: The Rhylee Scarf

    A classic scarf is always on-trend, so for Day #7 of my 12 Days of Christmas I’m giving you a new pattern for one!

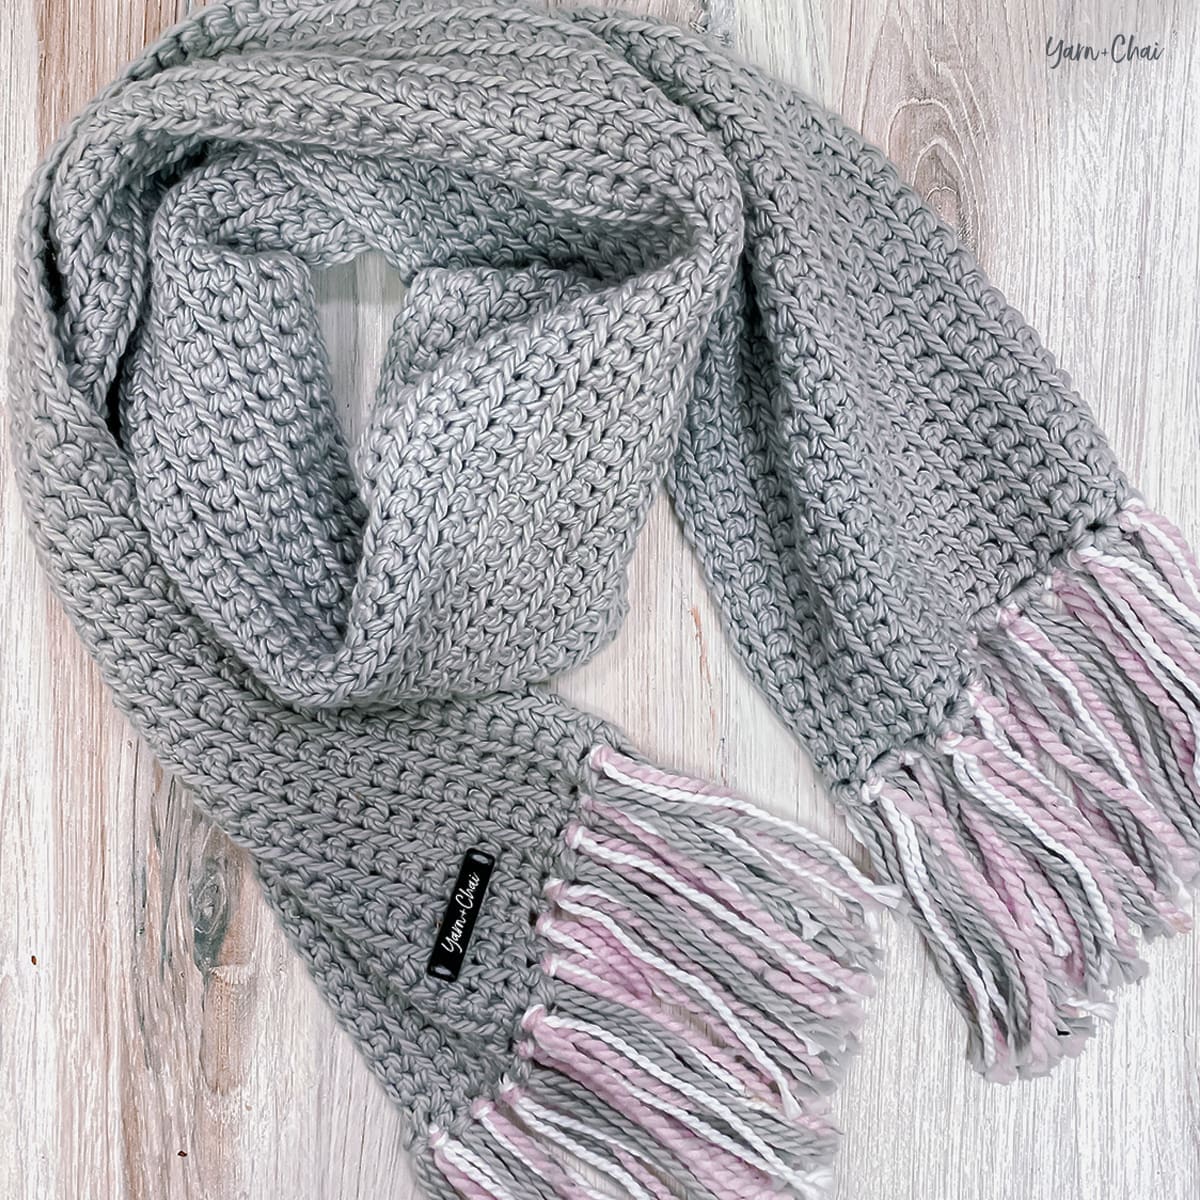
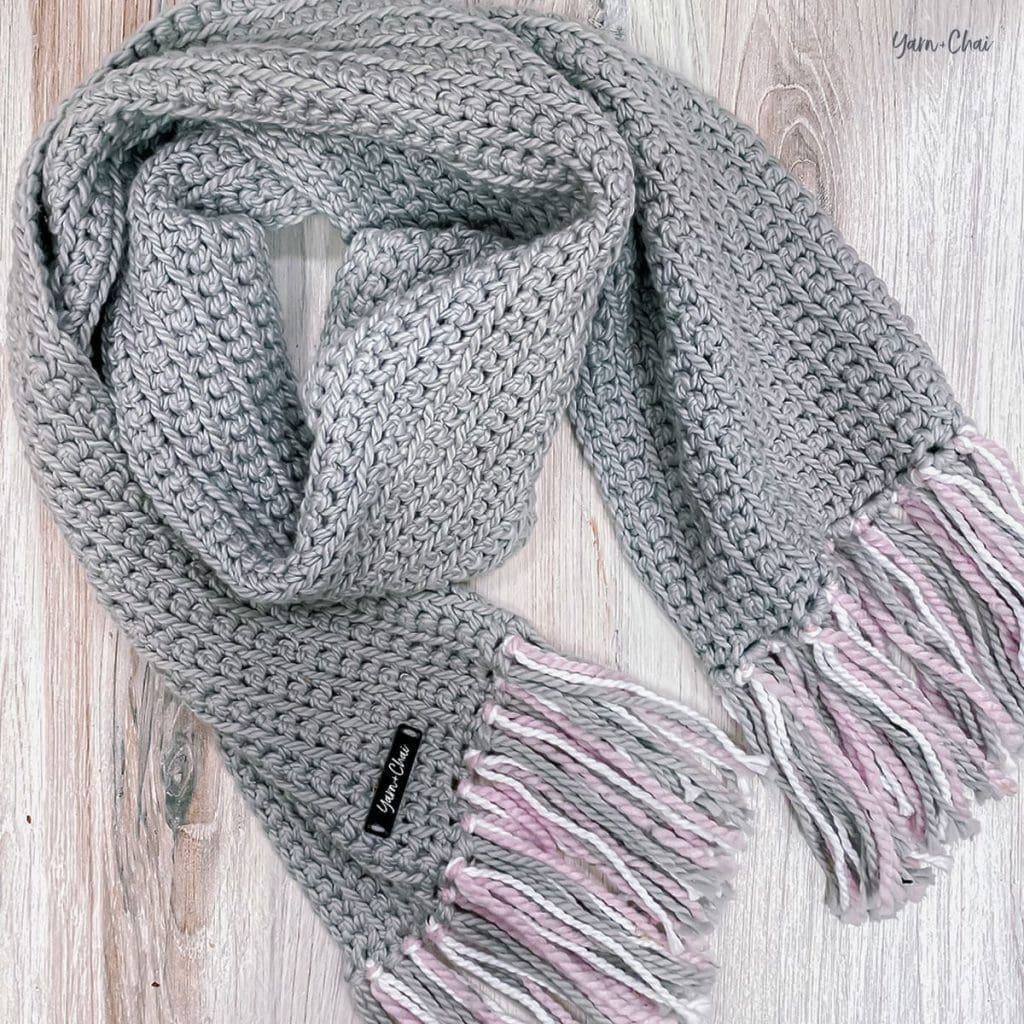
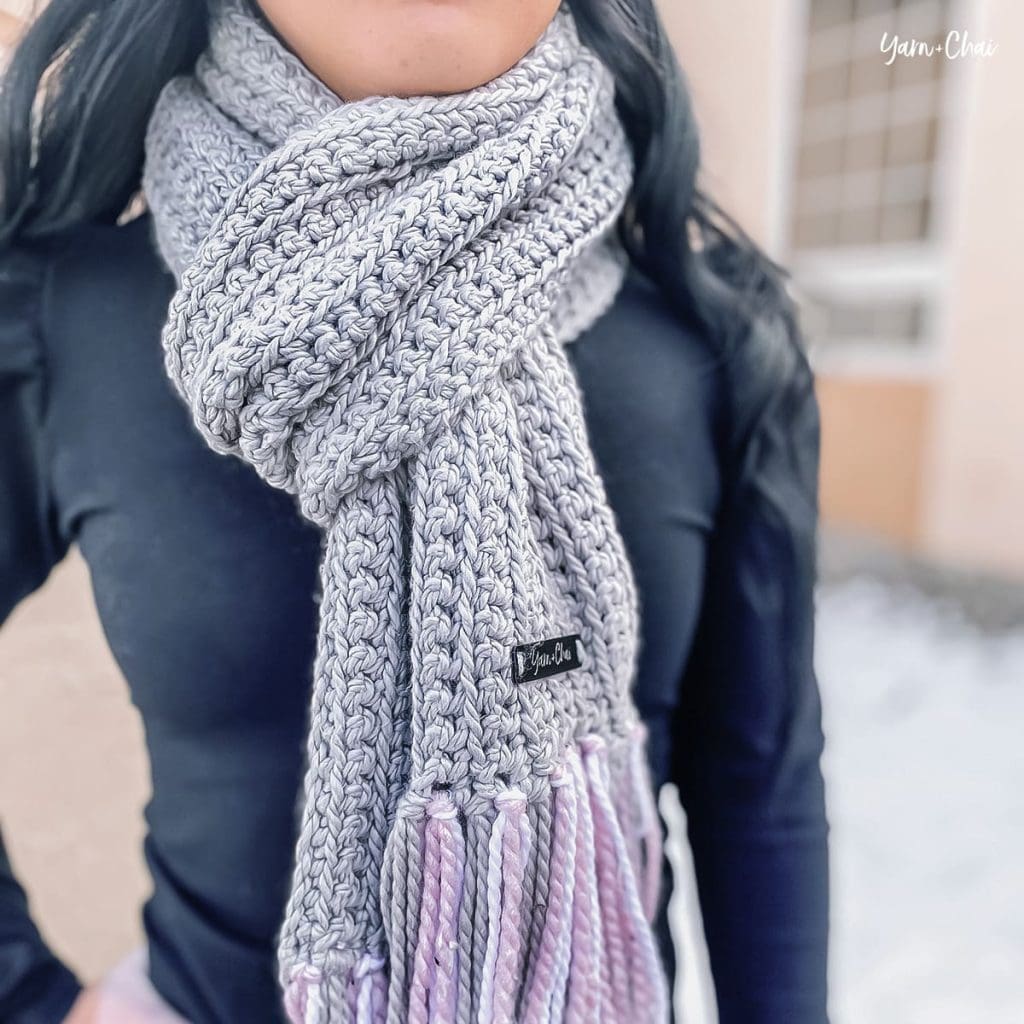
    I chose Yarn Bee’s Feelin’ Chunky for my sample scarf (which I’m totally keeping for myself). Feelin’ Chunky is a #5 weight cotton yarn… and I know cotton doesn’t seem like the ideal winter choice, but I’m one of those people that is always too warm so I love the soft, cool feel of this yarn. But you can, of course, choose whatever chunky yarn you love most!

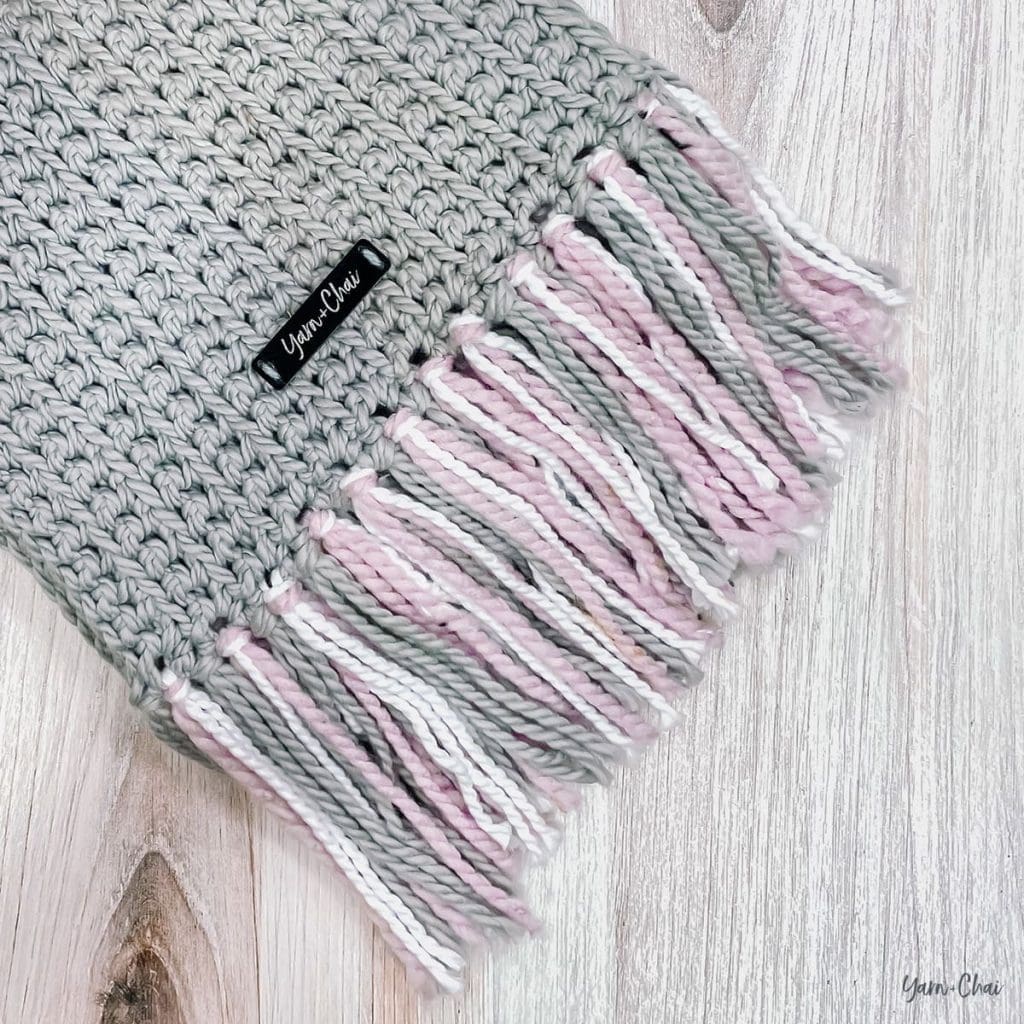
    This scarf would also make a great men’s pattern, don’t you think? The texture really isn’t feminine at all. I love the three different colors of tassels because it’s a great opportunity to incorporate color into the scarf without it becoming too busy.

    Prefer a PDF?

    This pattern can be completed using the 100% free version right here on this page. However, many people prefer the convenience of a printable, ad-free PDF.

    All-Access Passholders get the ad-free version of this and all of my other blog patterns. It’s a pretty sweet deal, if I do say so myself! Learn more about it here or continuing scrolling for the free version.

    THE RHYLEE SCARF

    View on Ravelry

    Language: American Standard

    Difficulty: Beginner / Easy

    Finished Size: 64″ long x 9″ wide

    Hook: L (8mm) or whichever hook is needed to obtain correct gauge

    Yarn: Approx. 320 yards of Yarn Bee Feelin’ Chunky, or other similar #5 weight yarn (COLOR A). I used colorway “Dove”. You’ll also need 10 yards each of two additional colors (COLOR B and COLOR C) for the fringe. (These don’t necessarily need to be the same yarn.) I used Yarn Bee Feelin’ Chunky in “White” and Loops & Threads Charisma in “Blush Tweed.”

    Gauge: 10 SC x 11 rows = 4″ square

    Terms and Abbreviations:
    ST/STS
     (stitch/stitches)
    CH (chain)
    SC (single crochet)
    FLO (front loop only)

    Notes:
    (1) CH1s at the beginning of rows do not count as a stitch in the final stitch count.
    (2) To change the length of your scarf, add to or subtract any number from your starting chain. To change the width, add to or subtract from the total number of rows. (Remember, increasing the size will increase the amount of yarn required.)

    INSTRUCTIONS

    To begin: With COLOR A, CH151.

    Row 1: SC in 2nd CH from hook and in each remaining CH. (150)

    Rows 2-24: CH1, turn. SC in first ST. SC in FLO across until 1 ST remains. SC in final ST. (150)

    Fasten off and weave in all ends.

    Adding the Fringe

    For the fringe, I cut several 10″ strands of each of my three chosen colors. I attached them in groups of 4 at the end of each row, alternating between using 4 of color A (the main scarf color) and 2 each of colors B and C.

    Done! If you’re sharing on social media, be sure to tag me @yarnandchai.design so I can see your beautiful work!

  • 12 Days of Christmas: Chunky Twisted Earwarmer

    12 Days of Christmas: Chunky Twisted Earwarmer

    If you’re looking for a fast one-skein project, you’ve come to the right place, because day 3 of my 12 Days of Christmas is something you can create in practically no time at all!

    Last Christmas, I needed to come up with gifts for my three nieces, who are all young adults. It was coming down to the wire — I’m talking way too late to order from Amazon — and I knew the quickest option would be to look at my yarn stash and come up with a trendy and fast pattern. I grabbed a skein of bulky #5 yarn and got to work on a chunky version of my Simple Twisted Earwarmer. I was so happy when the end result looked cute and cozy… and it only took me about 30 minutes from start to finish!

    I wrote out the pattern below in case you’re in need of a speedy project for yourself, for a gift, or even for a holiday craft fair.

    Prefer a PDF?

    This pattern can be completed using the 100% free version right here on this page. However, many people prefer the convenience of a printable, ad-free PDF.

    All-Access Passholders get the ad-free version of this and all of my other blog patterns. It’s a pretty sweet deal, if I do say so myself! Learn more about it here or continuing scrolling for the free version.

    CHUNKY TWISTED EARWARMER

    View on Ravelry

    Language: American Standard

    Difficulty: Beginner/Easy

    Finished Sizes: 17″ x 3.5″ (toddler), 18″ x 4″ (child), 20″ x 4.5″ (teen/adult small), 21″ x 4.5″ (adult large)

    Hook: L (8mm) or whichever hook is needed to obtain correct gauge

    Yarn: I used Loops & Threads Charisma, a soft, acrylic #5 weight yarn. (Loops & Threads is a Michael’s brand.) You’ll need about 30 yards (toddler), 45 yards (child), 60 yards (teen / adult small), or 65 yards (adult large). My samples were worked in colorways White Tweed, Cloud, and Blush Tweed. (If you order this yarn online, note that the Tweed version of Charisma has a separate listing!)

    Gauge: 9HDC x 7 rows = 4″ square.

    Terms and Abbreviations:
    ST/STS
     (stitch/stitches)
    CH (chain)
    HDC (half double crochet)
    BLO (back loop only)

    Notes:
    (1) CH1s at the beginning of rows do not count as a stitch in the final stitch count.
    (2) If you’re a visual learner, you can follow my video tutorial for the Simple Twisted Earwarmer. That pattern uses a #4 weight yarn, but you can substitute the starting chain and stitch count from this pattern and still follow along.
    (3) To change the length of your earwarmer, add or subtract any number from your starting chain. To change the width, add or subtract from the total number of rows. There is no stitch multiple to worry about.
    (4) Pattern is written for toddler size with additional sizes in parentheses (child, teen/adult small, adult large).

    INSTRUCTIONS

    To begin: CH39 (41, 46, 48).

    Row 1: HDC in 2nd CH from hook and in each remaining CH.
    Stitch count: 38 (40, 45, 47)

    Rows 2-6 (2-7, 2-8, 2-8): CH1, turn. HDC in first ST. HDC in BLO across until 1 ST remains. HDC in final ST.
    Stitch count: 38 (40, 45, 47)

    Fasten off, leaving a 12″ tail for seaming. Weave in starting tail.

    Adding the Twist

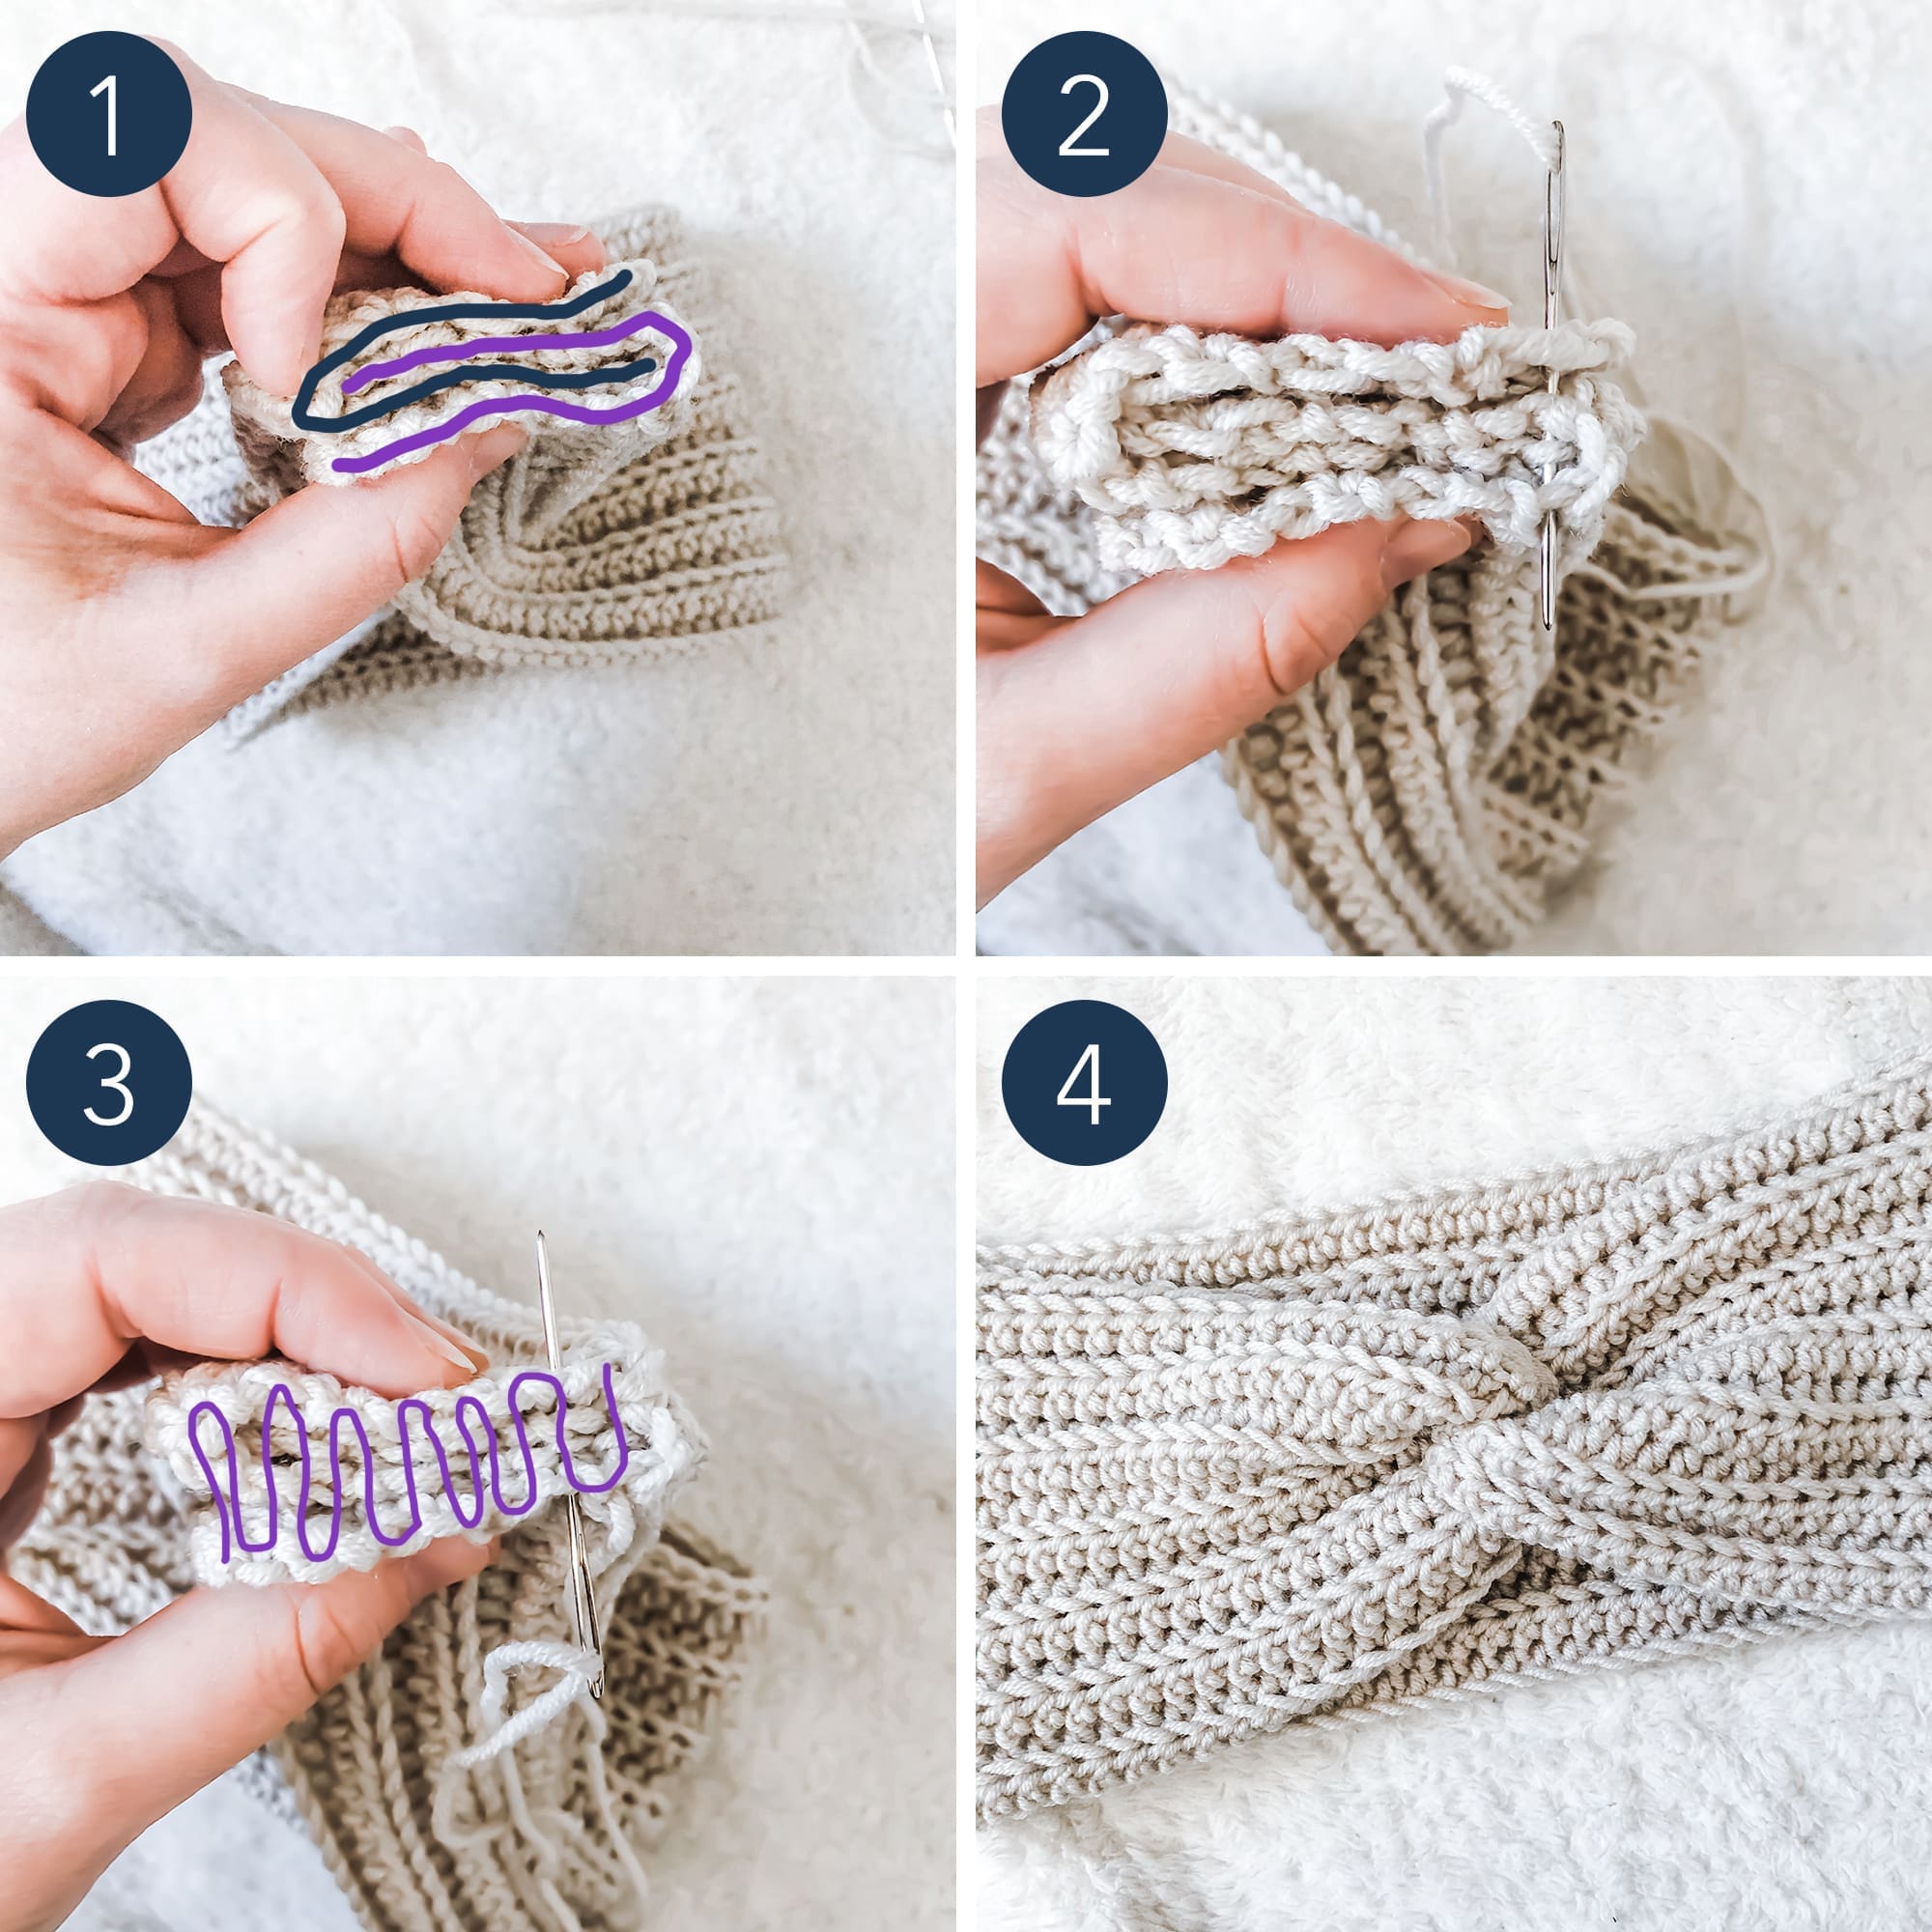
    Follow the instructions below to seam your earwarmer with a twist. Use the image below to guide you. (They are actually from my Simple Twisted Earwarmer pattern, but the technique is the same.)

    1. Thread the long finishing tail through your yarn needle and gently set it aside. Lay ear warmer flat, then gather the edges and layer them together as shown, making sure that the corner with the finishing tail is at either the top or the bottom (not one of the layers in the middle).

    2. Thread the yarn needle across the edges, being sure to grab yarn from all four layers.

    3. Continue to weave the yarn needle back and forth across the surface of the edges, being sure to grab yarn from all four layers each time.

    4. Weave in the tail, then turn earwarmer right side out.

    Done! If you’re sharing on social media, be sure to tag me @yarnandchai.design so I can see your beautiful work!

    This pattern is originally part of my 12 Days of Christmas!
    Click here to return to the 12 Days of Christmas homepage.

  • Malia Twisted Earwarmer

    Malia Twisted Earwarmer

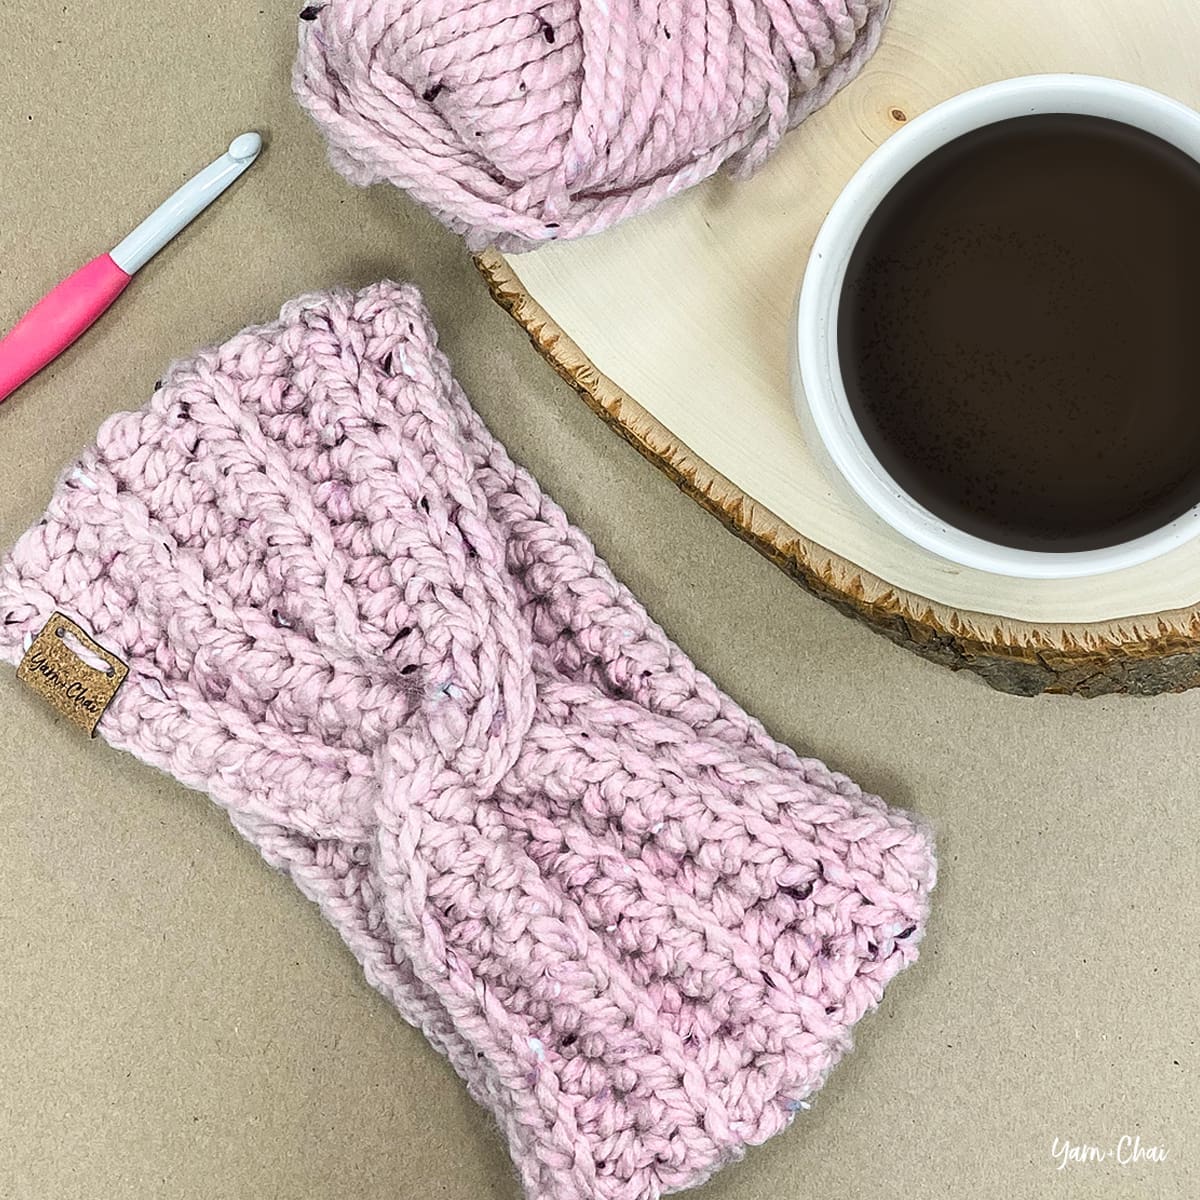
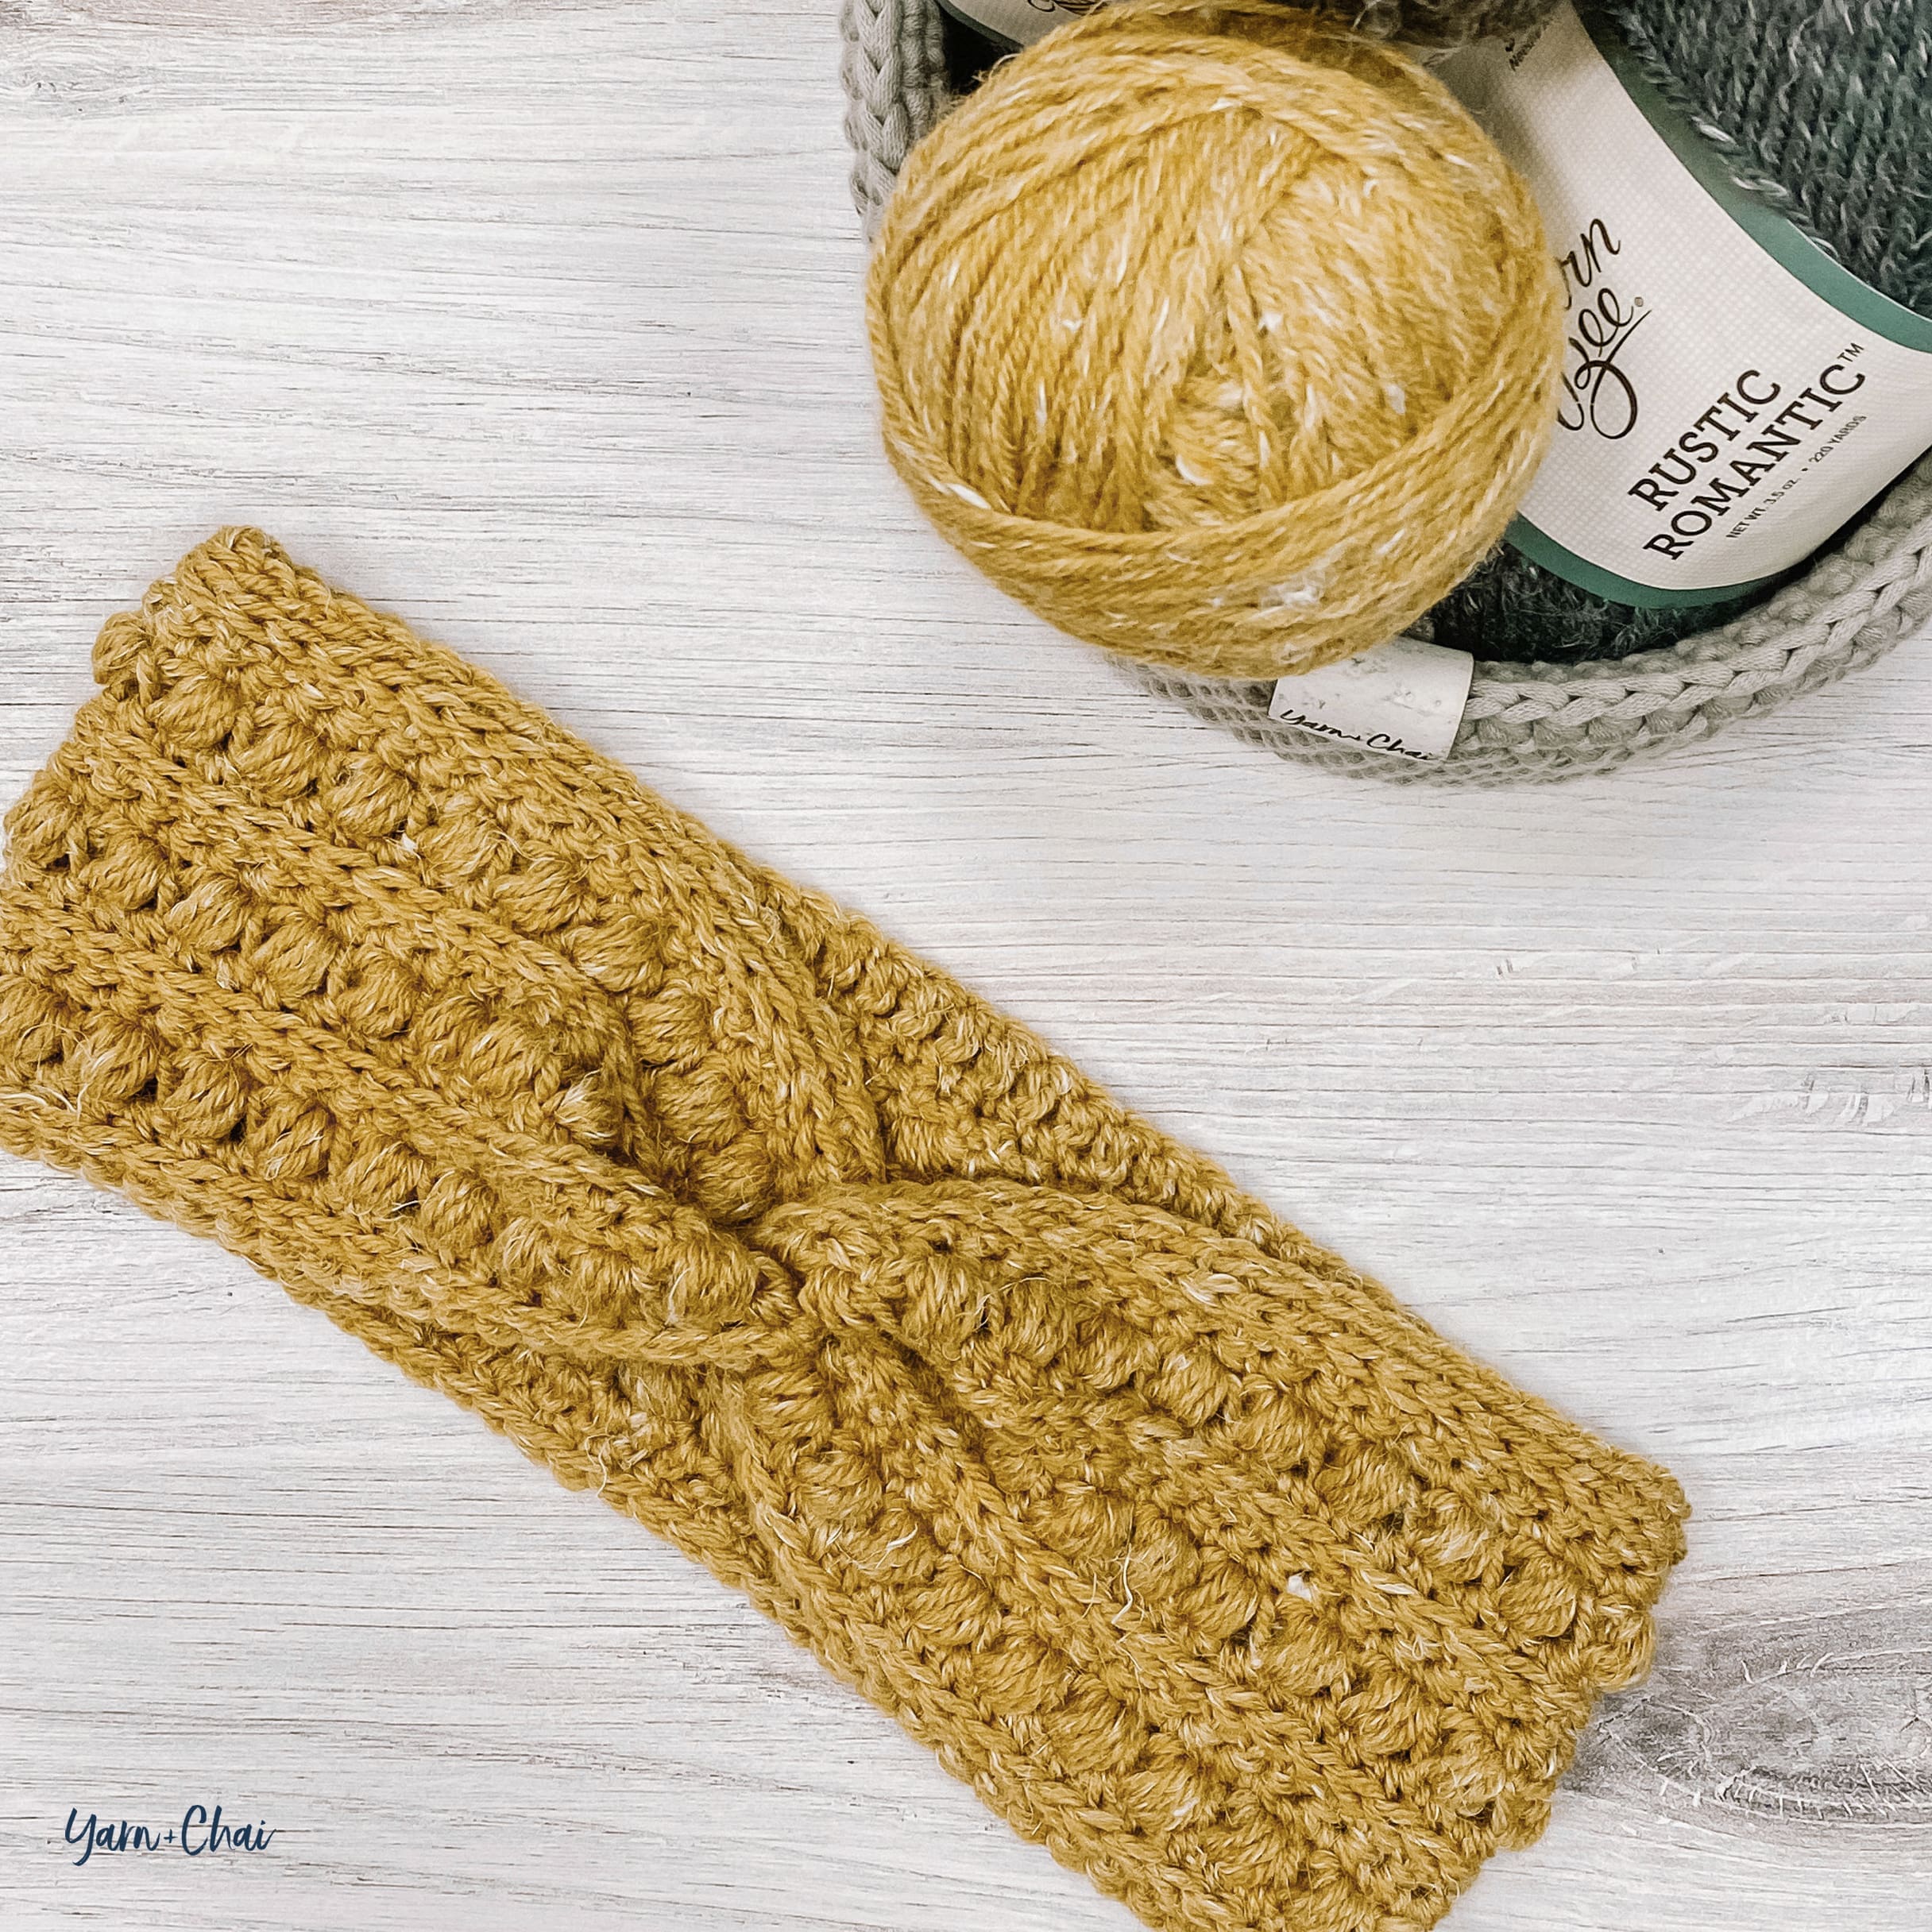
    Malia is making a quick reappearance this season, in the form of a cute twisted earwarmer!

    I always thought this stitch pattern would look great as a twisted earwarmer, and with the weather finally starting to cool off here, it’s time for me to start thinking about how to keep cozy! I always love a good earwarmer / headband, because it does the job with minimal fuss.

    If you need a little help with the stitches, check out the tutorial video I made during the original Malia Crochet-Along for the cowl and scarf; just use the numbers in this pattern instead of the ones called for on the video!

    Prefer a PDF?

    This pattern can be completed using the 100% free version right here on this page. However, many people prefer the convenience of a printable, ad-free PDF.

    All-Access Passholders get the ad-free version of this and all of my other blog patterns. It’s a pretty sweet deal, if I do say so myself! Learn more about it here or continuing scrolling for the free version.

    MALIA TWISTED EARWARMER

    View on Ravelry

    Difficulty: Easy

    Finished Size: 20″ long (before seaming) x 3.75″ wide

    Hook: I (5.50 mm) or whichever hook is needed to obtain correct gauge

    Yarn: 100 yards of a #4 aran weight. I used Yarn Bee’s Rustic Romantic in “Okie Wheat” for my sample.

    Gauge: To ensure the best results, the gauge check is a swatch taken straight from the pattern. Upon completion, you should have a 4” square. If yours is larger, consider using a smaller hook or a thinner #4 yarn. If yours is smaller, consider using a larger hook.

    Pattern for Gauge:
    CH17.
    Row 1: SC in 2nd CH from hook and in each remaining CH. (16)
    Row 2: CH1, turn. SC in first ST. (SK next ST, LBS in next ST) 7 times. SC in final ST. (16)
    Row 3: CH1, turn. HDC in each ST across. (16)
    Row 4: CH1, turn. SC in first ST. SC in 3rd loop of each of the next 14 STS. SC in final ST. (16)
    Row 5: CH1, turn. SC in each ST across. (16)
    Row 6: CH1, turn. SC in first ST. (LBS in next ST, SK next ST) 7 times. SC in final ST. (16)
    Row 7: CH1, turn. HDC in each ST across. (16)
    Row 8: CH1, turn. SC in first ST. SC in 3rd loop of each of the next 14 STS. SC in final ST. (16)
    Row 9: CH1, turn. SC in each ST across. (16)
    Rows 10-16: Repeat Rows 2-8. (16)

    Terms and Abbreviations:
    ST/STS (stitch/stitches)
    SL ST (slip stitch)
    SK (skip)
    CH (chain)
    SC (single crochet)
    HDC (half double crochet)
    LBS (large bean stitch – see “Special Stitches”)
    BLO (back loop only)
    3rd LOOP (work stitch into 3rd loop only – see “Special Stitches”)

    Special Stitches:

    Large Bean Stitch (LBS)
    Insert hook into stitch, yarn over and pull through (2 loops on hook). Yarn over, insert hook into same stitch, yarn over and pull through (4 loops on hook). Yarn over, insert hook into same stitch, yarn over and pull through (6 loops on hook). Yarn over, insert hook into same stitch, yarn over and pull through (8 loops on hook). Yarn over and pull through all 8 loops. Chain 1 to close the stitch. (Because this stitch creates two sets of loops – one when creating the bean, and one when closing the stitch – each completed Large Bean Stitch will count for two stitches in the row or round’s final stitch count.)

    3rd Loop Only
    Half double crochet stitches have a 3rd loop that we utilize in this pattern. When working in turned rows, as in this pattern, the 3rd loop can be found just below the front loop on the side of the work that is facing you. When instructed to work in “3rd loop only”, insert your hook into this special loop. This creates a delicate braided look on the opposite side of the pattern.

    Notes:
    (1) This pattern is written in American Standard Terms.
    (2) CH1s at the beginning of rows do not count as a stitch in the final stitch count.
    (3) A video tutorial for the stitch pattern is available up in the post, or by clicking here.
    (4) To make earwarmer larger or smaller, add or subtract an even number of stitches from the starting row or chain. For reference, if you met gauge, 4 stitches = 1″.

    INSTRUCTIONS

    To begin: CH79.

    Row 1: HDC in 2nd CH from hook and in each remaining CH. (78)

    Row 2: CH1, turn. SC in first ST. SC in 3rd loop of each of the next 76 STS. SC in final ST. (78)

    Row 3: CH1, turn. SC in each ST across. (78)

    Row 4: CH1, turn. SC in first ST. (SK next ST, LBS in next ST) 38 times. SC in final ST. (78)

    Row 5: CH1, turn. HDC in each ST across. (78)

    Row 6: CH1, turn. SC in first ST. SC in 3rd loop of each of the next 76 STS. SC in final ST. (78)

    Row 7: CH1, turn. SC in each ST across. (78)

    Row 8: CH1, turn. SC in first ST. (LBS in next ST, SK next ST) 38 times. SC in final ST. (78)

    Row 9: CH1, turn. HDC in each ST across. (78)

    Row 10: CH1, turn. SC in first ST. SC in 3rd loop of each of the next 76 STS. SC in final ST. (78)

    Row 11: CH1, turn. SC in each ST across. (78)

    Row 12: CH1, turn. SC in first ST. (SK next ST, LBS in next ST) 38 times. SC in final ST. (78)

    Row 13: CH1, turn. HDC in each ST across. (78)

    Row 14: CH1, turn. SC in first ST. SC in 3rd loop of each of the next 76 STS. SC in final ST. (78)

    Fasten off, leaving a long tail for seaming. Weave in starting tail.

    Adding the Twist

    Follow the instructions below to seam your earwarmer with a twist. Use the image below to guide you. (They are actually from my Simple Twisted Earwarmer pattern, but the technique is the same.)

    1. Thread the long finishing tail through your yarn needle and gently set it aside. Lay ear warmer flat, wrong side up, then gather the edges and layer them together as shown.

    2. Thread the yarn needle across the edges, being sure to grab yarn from all four layers.

    3. Continue to weave the yarn needle back and forth across the surface of the edges, being sure to grab yarn from all four layers each time.

    4. Weave in the tail, then turn earwarmer right side out.

    Done! If you’re sharing on social media, be sure to tag me @yarnandchai.design. Hope you enjoyed it!

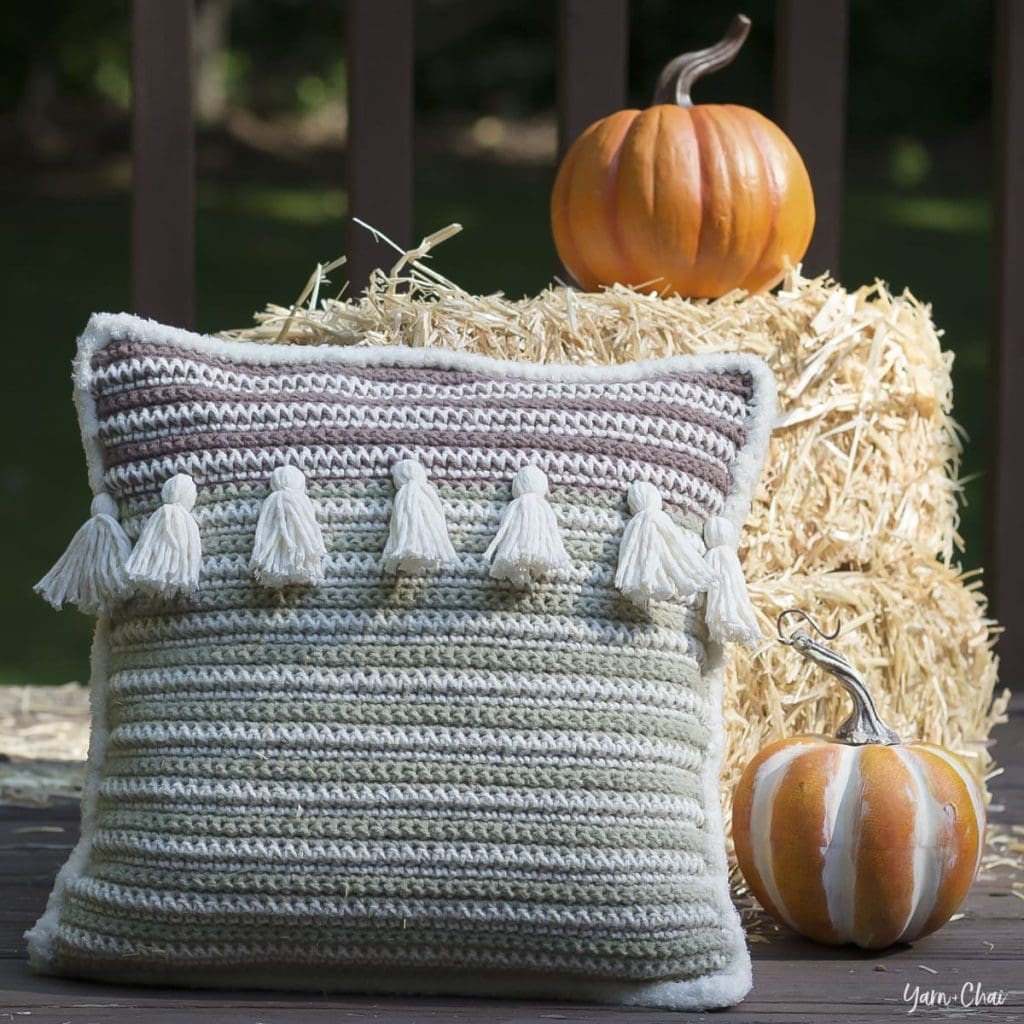
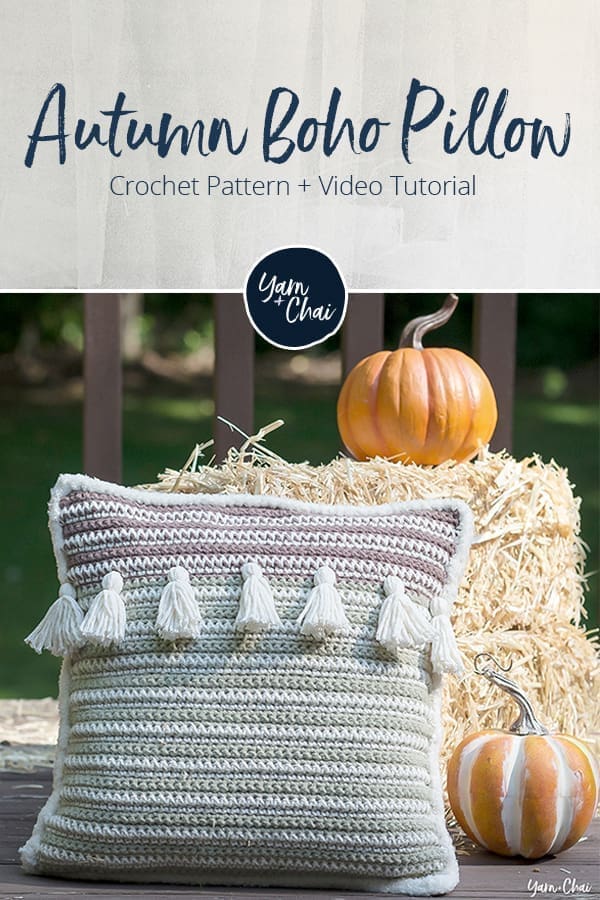
  • Autumn Boho Pillow

    Autumn Boho Pillow

    This post is sponsored by Hobby Lobby.

    I am so excited to team up with Hobby Lobby to bring you my newest pattern – the Autumn Boho Pillow!

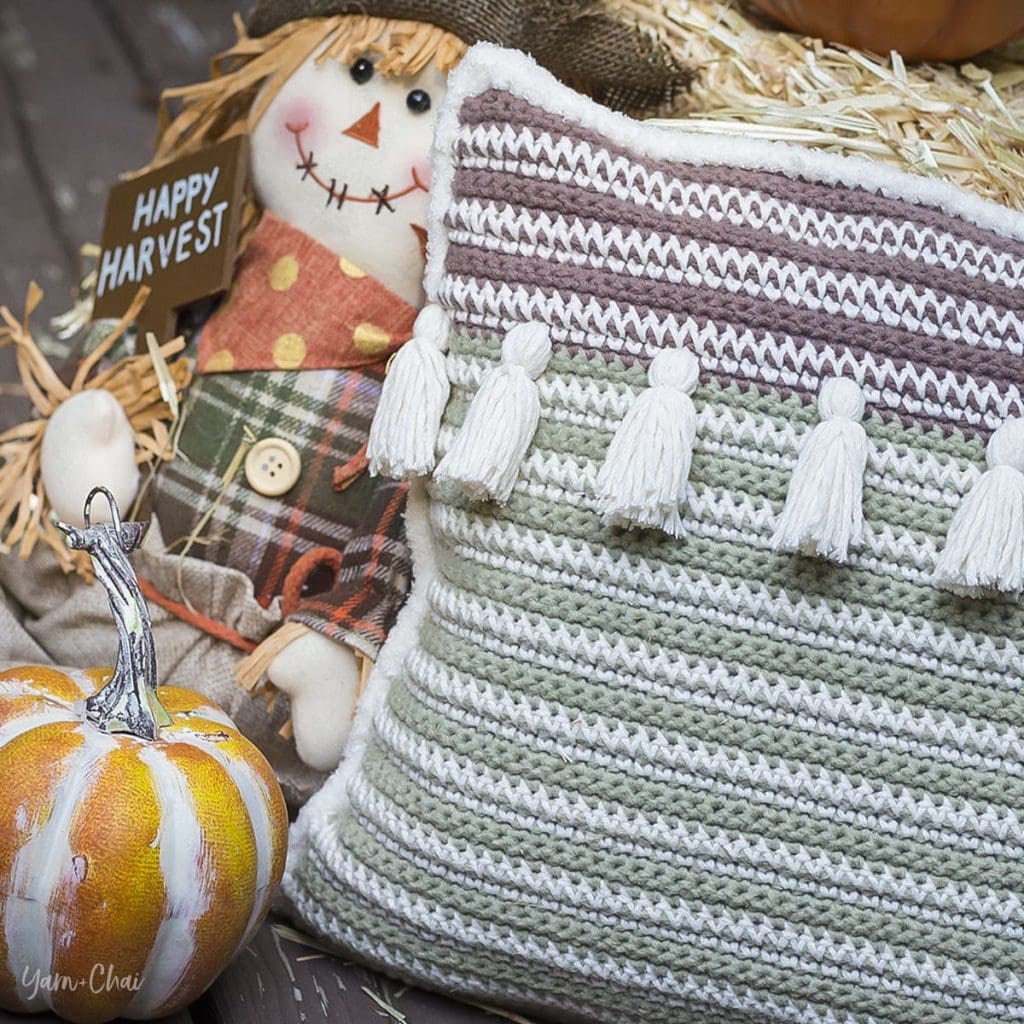
    I’ve been playing around with different ways to do single crochet stitches to make unique designs, so when Hobby Lobby asked me to make a fun fall pattern with some of their new Yarn Bee yarn, I knew right away that I wanted to incorporate the stitches into a cozy fall pillow! I’m really loving the boho style right now – I’ve always loved tassels and fur – and this pillow incorporates all of that to produce a piece of fresh, modern fall decor.

    Let’s Talk About This Yarn!

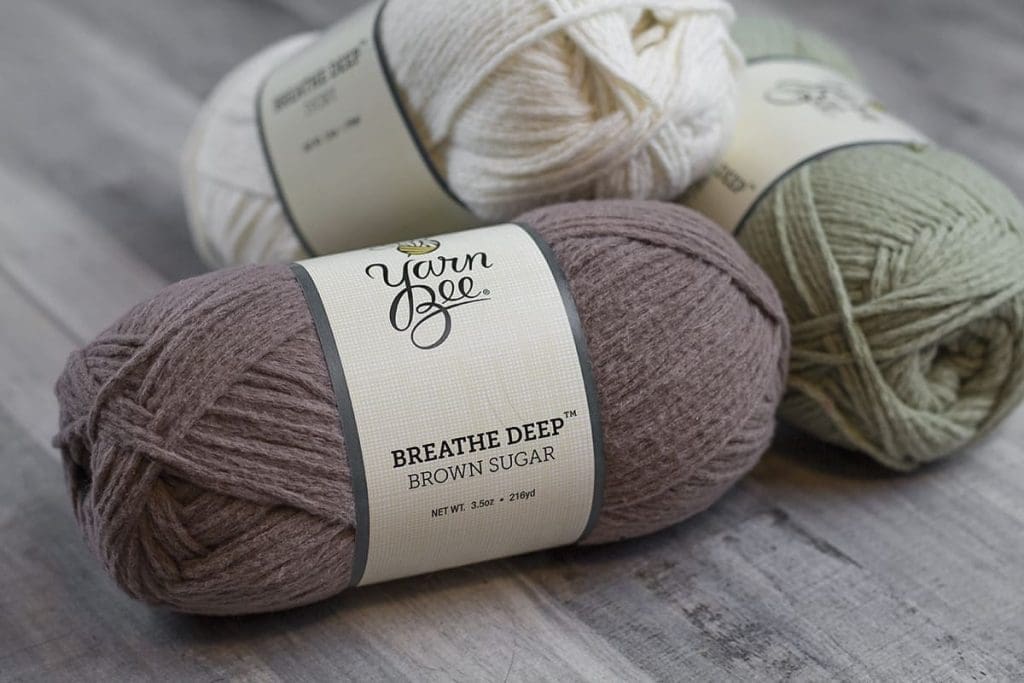
    I don’t know if you’ve noticed, but over the last few months, Hobby Lobby has been adding a ton of new yarns to their Yarn Bee line. One of those yarns is called Breathe Deep, and I’m not sure what I’m more drawn to — that name, or the crazy soft yarn it represents. Breathe Deep is an airy worsted weight yarn that’s available in a range of soft, modern shades. The strands have a rustic look to them, perfect for fall, and the polyester fibers are squishy and soft. It was a dream to work with — there was very little splitting, the stitches were easy to see, and the fibers didn’t irritate my sensitive skin.

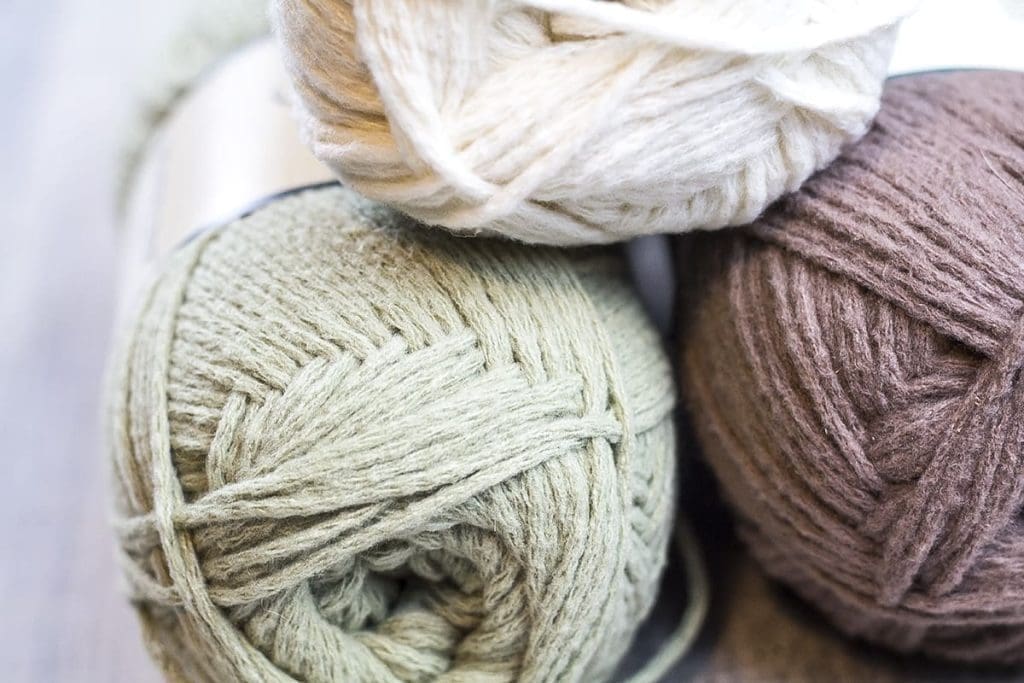
    In the pattern, I used the colors “Sage”, “Ivory”, and “Brown Sugar.” Sounds like autumn to me!

    The pillow is edged in Fur-Ever Style, another Yarn Bee Yarn. Even if you’re intimidated by fur yarns, give it a try! This is an easy project to practice on because we only use a little, but it adds such a cozy finishing touch.

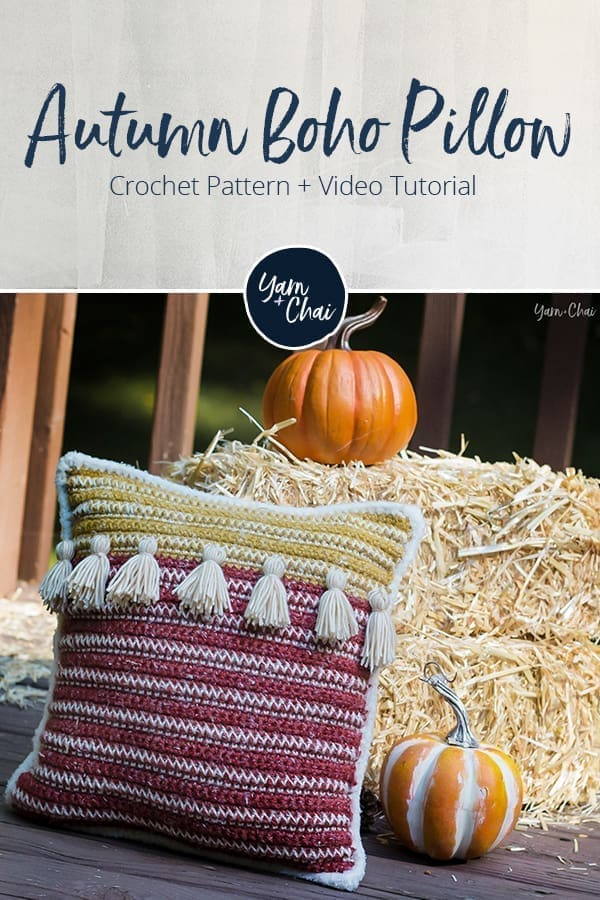
    My Second Sample

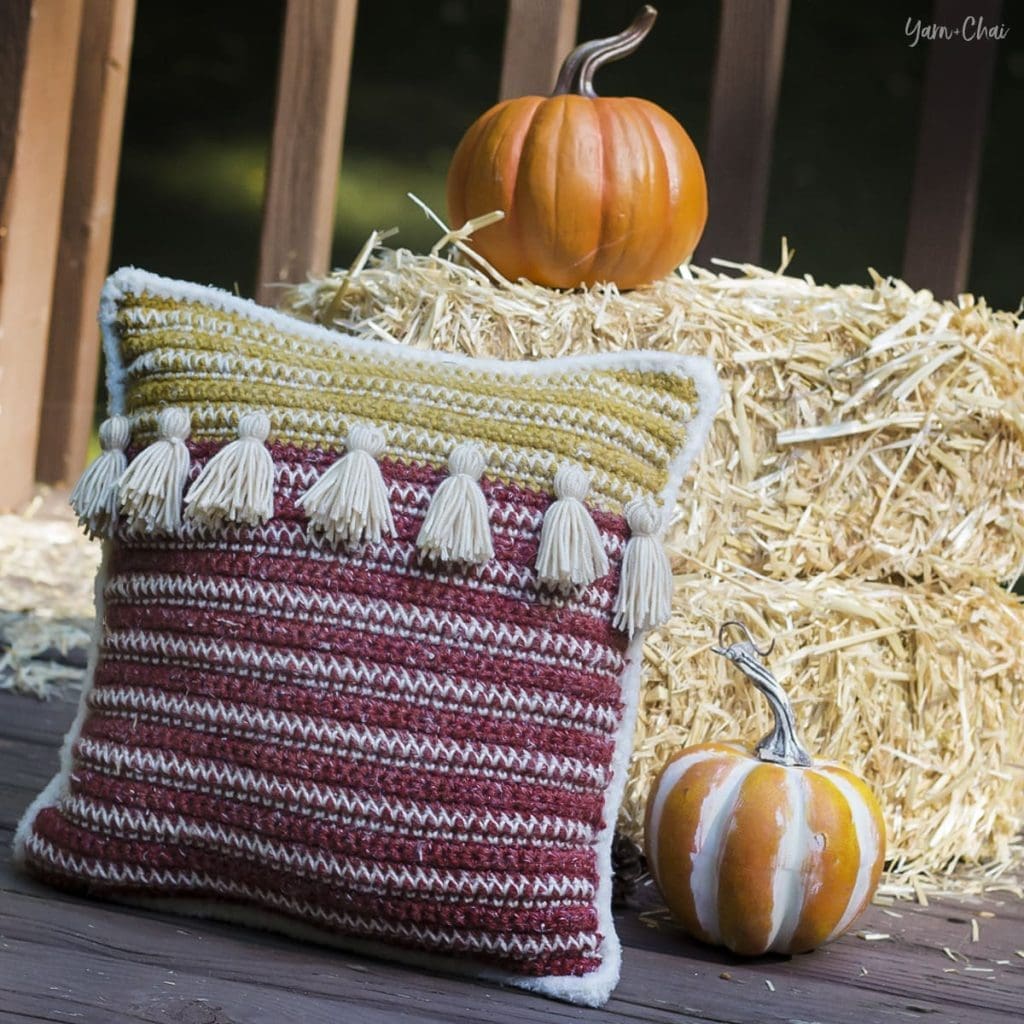
    I also worked up a second sample in one of my all-time favorite yarns, Yarn Bee’s Rustic Romantic. This was totally a personal project and I had no intention of showing it here, but it turned out so pretty that I had to photograph it. For this pillow, I used “Red Roads” and “Okie Wheat” for the deep red and mustard colors, as well as Yarn Bee’s Must Be Merino in “Ivory” for the detailing and tassels. (Must Be Merino is actually a #3 weight yarn, but in this specific case, it doesn’t matter all that much. I grabbed it because I wanted a super smooth yarn to contrast against the heathered look of the Rustic Romantic.) I did chain 4 less in the beginning because the Rustic Romantic is a little thicker than the Breathe Deep yarn, but this pattern doesn’t have a stitch multiple, so it’s easy to adapt!

    Full Video Tutorial

    If you’re the type who prefers to learn by watching (I know I am!), I have a complete, start-to-finish video tutorial for you right here! Or, scroll down to view the written pattern.

    Prefer a PDF?

    This pattern can be completed using the 100% free version right here on this page. However, many people prefer the convenience of a printable, ad-free PDF.

    All-Access Passholders get the ad-free version of this and all of my other blog patterns. It’s a pretty sweet deal, if I do say so myself! Learn more about it here or continuing scrolling for the free version.

    AUTUMN BOHO PILLOW

    Difficulty: Easy

    Finished Size: Fits a standard 12″x12″ pillow insert (easily adapted to other sizes)

    Hook: 4.5mm (US-7 / G) hook

    Yarn: This pattern was written for Breathe Deep, a super-soft #4 worsted weight polyester yarn by Yarn Bee (a Hobby Lobby brand), and edged in Fur-Ever Style, a #4 worsted weight nylon yarn (also by Yarn Bee). Amounts used are as follows: 

    Breathe Deep Yarn:
    COLOR A (“Sage”): 185 yds
    COLOR B (“Ivory”): 160 yds
    COLOR C (“Brown Sugar”): 65 yds

    Fur-Ever Style Yarn:
    FUR EDGING  (“Ivory”): 65 yds

    Gauge: 9SC x 11 rows = 2″ square

    You’ll also need: Yarn needle, 12″ square pillow insert

    Terms and Abbreviations:
    ST/STS (stitch/stitches)
    SL ST (slip stitch)
    CH (chain)
    SC (single crochet)
    SC SPIKE STITCH (single crochet spike stitch; see “Special Stitch”, below)

    Special Stitch:

    SC SPIKE STITCH – Instead of inserting your hook into the top loops of a stitch, insert it into the bottom of the stitch where the “V” meets. See photo (click to enlarge):

    Notes:
    (1) This pattern is written in American Standard Terms.
    (2) CH1s and CH2s at the beginning of rows do not count as a stitch in the final stitch count.
    (3) There is no stitch multiple for this pattern. If you want to make it wider, add more chains at the beginning. If you want to make it taller, complete the repeated section more times than instructed, switching from COLOR A to COLOR C about 2/3 – 3/4 way up the pillow cover. (Be sure to chain an even number in the beginning in order to have an odd numbered stitch count, so that you can use the stitch in the very center of the pillow to place your first tassel.)

    INSTRUCTIONS (make 2)

    To begin: With COLOR A, CH50.

    Row 1: SC in 2nd CH from hook and in each remaining CH. (49)

    Row 2: CH1, turn. SC in each ST across. (49)

    Row 3: CH1, turn. SC in each ST across. Pull up a loop and remove hook. (49)

    Row 4: Without turning your work, insert hook into the first stitch of Row 3, and attach COLOR B (Ivory). CH1. SC in each ST across. Pull up a loop and remove hook.  (49)

    Row 5A: Reinsert hook into loop from COLOR A, making sure to insert from behind previous color’s loop and working yarn. CH1, turn. SC in each ST across. Pull up a loop and remove hook. (49)

    Row 5B: Turn work and reinsert hook into loop from COLOR B. CH1, turn. SC SPIKE STITCH in each ST across. Pull up a loop and remove hook. (49)

    Row 6: Reinsert hook into loop from COLOR A, making sure to insert from behind previous color’s loop and working yarn. CH1, turn. SC in each ST across. (49)

    Row 7: CH1, turn. SC in each ST across. (49)

    Row 8: CH1, turn. SC in each ST across. Pull up a loop and remove hook. (49)

    Row 9: Turn work and reinsert hook into loop from COLOR B. CH2, turn. SC in each ST across. Pull up a loop and remove hook. (49)

    Row 10A: Reinsert hook into loop from COLOR A, making sure to insert from behind previous color’s loop and working yarn. CH1, turn. SC in each ST across. Pull up a loop and remove hook. (49)

    Row 10B: Turn work and reinsert hook into loop from COLOR B. CH1, turn. SC SPIKE STITCH in each ST across. Pull up a loop and remove hook. (49)

    Row 11: Reinsert hook into loop from COLOR A, making sure to insert from behind previous color’s loop and working yarn. CH1, turn. SC in each ST across. (49)

    Row 12: CH1, turn. SC in each ST across. (49)

    Rows 13-47: Repeat Rows 8-12, 7 times. (49)

    Switch to COLOR C; fasten off COLOR A.

    Rows 48-62: Repeat Rows 8-12, 3 times, using COLOR C in place of COLOR A. (49)

    At this point, measure the height of your pillow cover. We want to get it to right about 11.5″, so if you need to do a row or two more, simply continue on with the repeat. If you need to remove a row or two, that’s ok, too. The measurement is more important than the number of rows completed.

    Fasten off and weave all ends into the wrong side of the pillow cover.


    Edging

    With right side facing you, attach COLOR B in top right stitch and CH1. SC around perimeter of square, putting 3SC in each corner. Join with a SL ST to the top of the first SC. Fasten off and weave in ends.


    Tassels

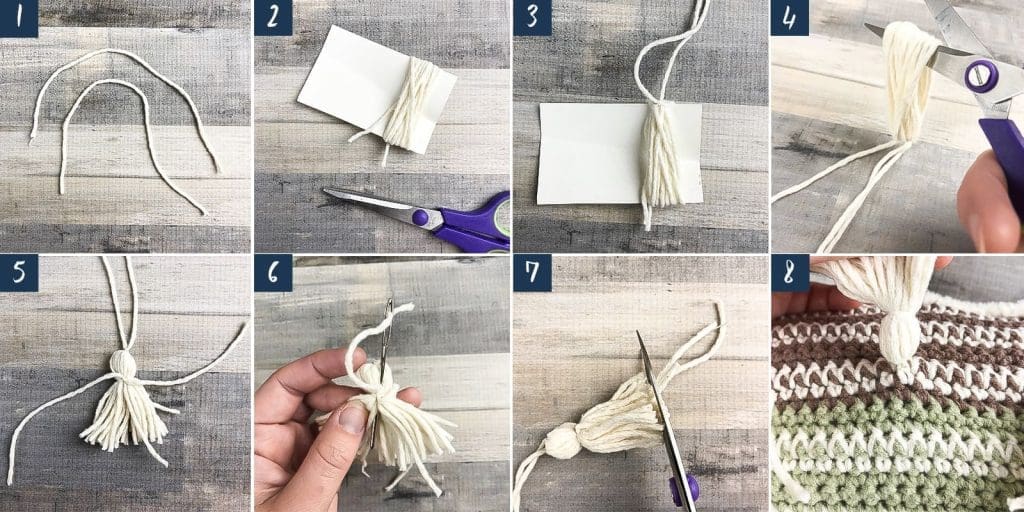
    With COLOR B, use the following steps to make 7 2″ tassels:

    1. With COLOR B, cut 2 8″ lengths of yarn; set aside.
    2. Wrap COLOR B around a 2″ tall piece of cardstock (you can use a credit card) 20 times; fasten off.
    3. Slip one 8″ length of yarn under the strands and pull it up to the top of the card; tie a tight double knot.
    4. Carefully remove yarn from card and cut at the opposite end from the tied-off part.
    5. Take the other 8″ length of yarn and wrap it around the yarn, about 1/2″ below the top knot, and tie a tight double knot.
    6. Thread into a yarn needle each end of the 2nd tie-off yarn (one at a time) and insert the needle just above the knot and down into the middle of the yarn to hide the knot.
    7. Trim yarn at the bottom.
    8. Attach tassel to pillow by using a yarn needle to insert each top strand around a single stitch; double knot on the opposite side and trim the ends. (This will be hidden inside the pillow cover.)

    Space all 7 tassels across the pillow evenly and attach them all. Additionally, you can use a small dot of fabric glue under the ball section of the tassel to hold it in place on the pillow; use a pin to hold it where you want it while it dries overnight.


    Seaming

    Hold both squares together with wrong sides facing each other and right sides facing out. Attach Fur-Ever Style yarn in one corner; CH1 and SC SPIKE STITCH around 3 sides of the pillow, being sure to put 3SC SPIKE STITCHES in the same places you put the 3 SC stitches when you edged each piece individually. Stuff your pillow insert into the cover, then continue the rest of the way around the pillow until it is completely enclosed. Join with a SL ST to the top of the first SC, then CH1, turn, and repeat in the opposite direction (still working the spike stitches for a nice, thick ending). Join, fasten off, and weave in ends.

    Done! If you’re sharing on social media, be sure to hashtag #autumnbohopillow and tag me @yarnandchai.design!

    Hope you enjoyed it!