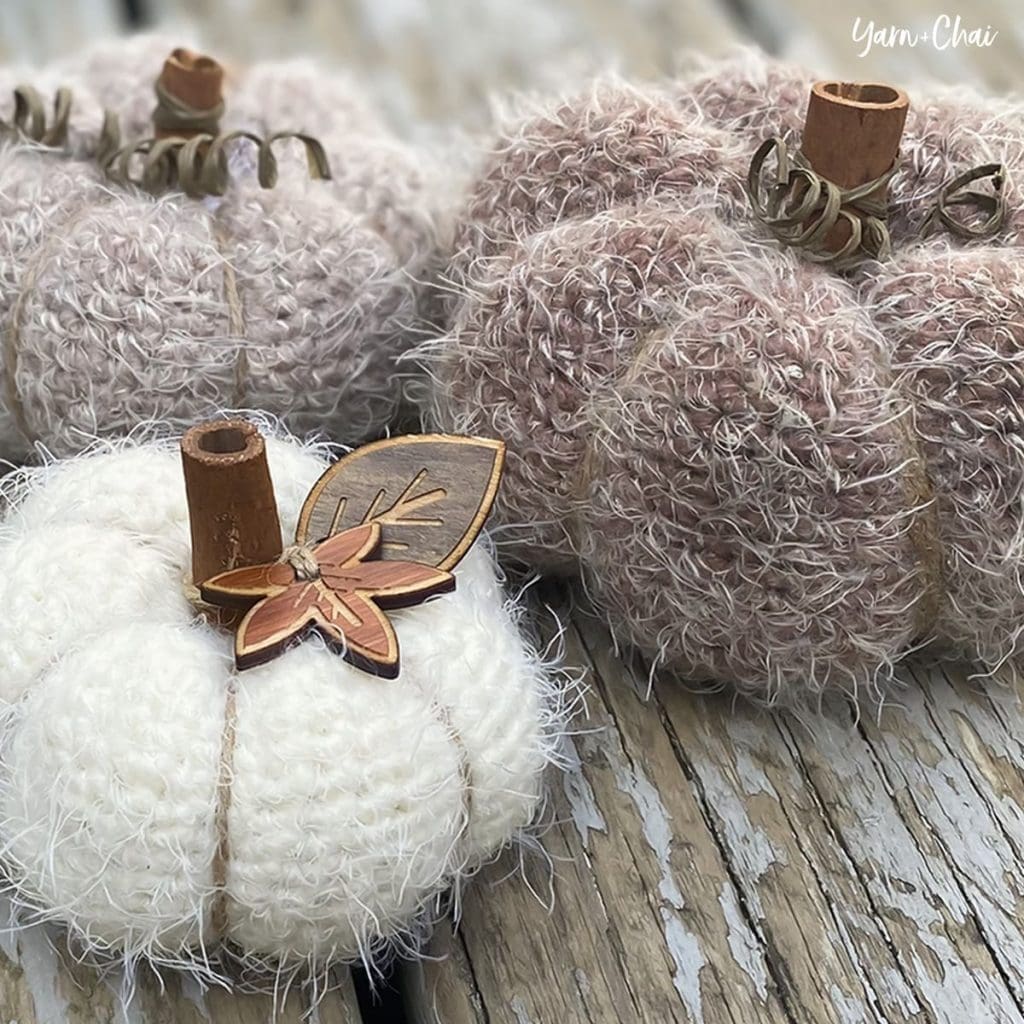
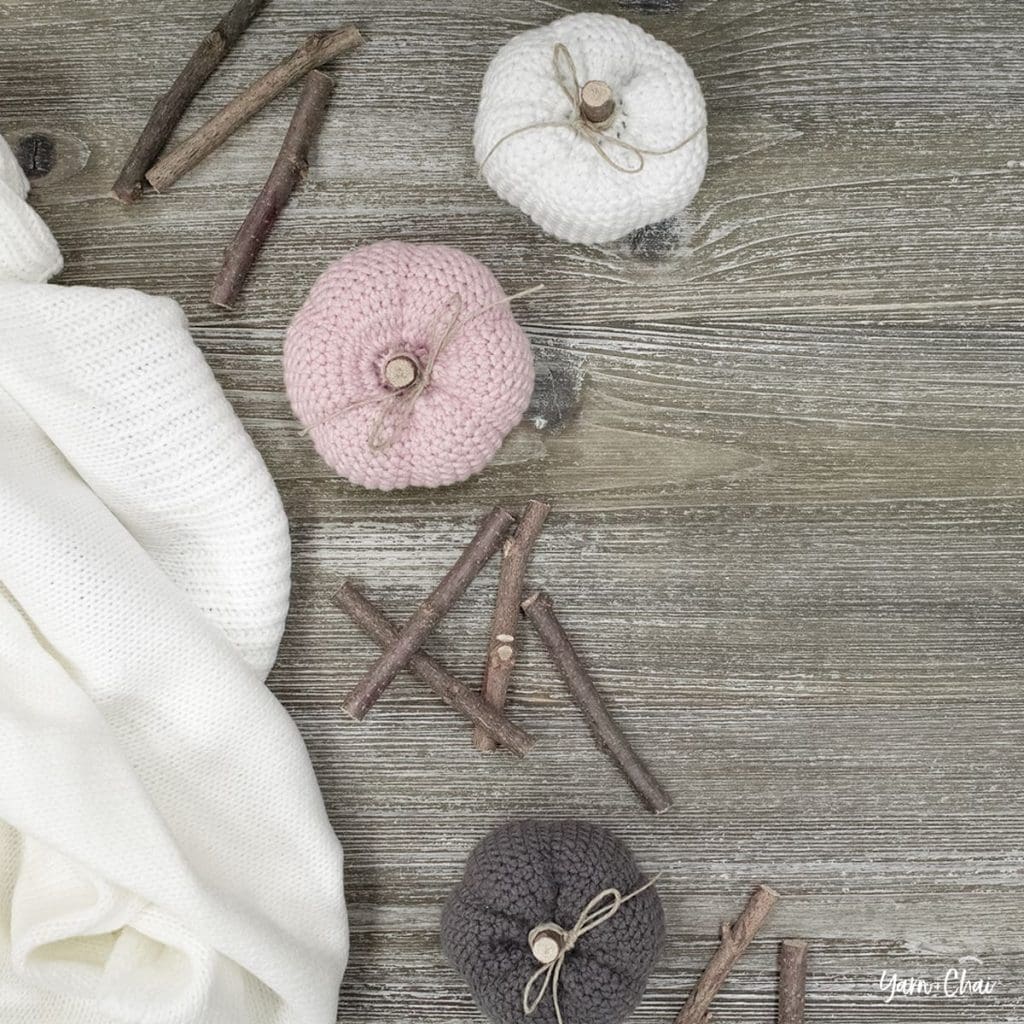
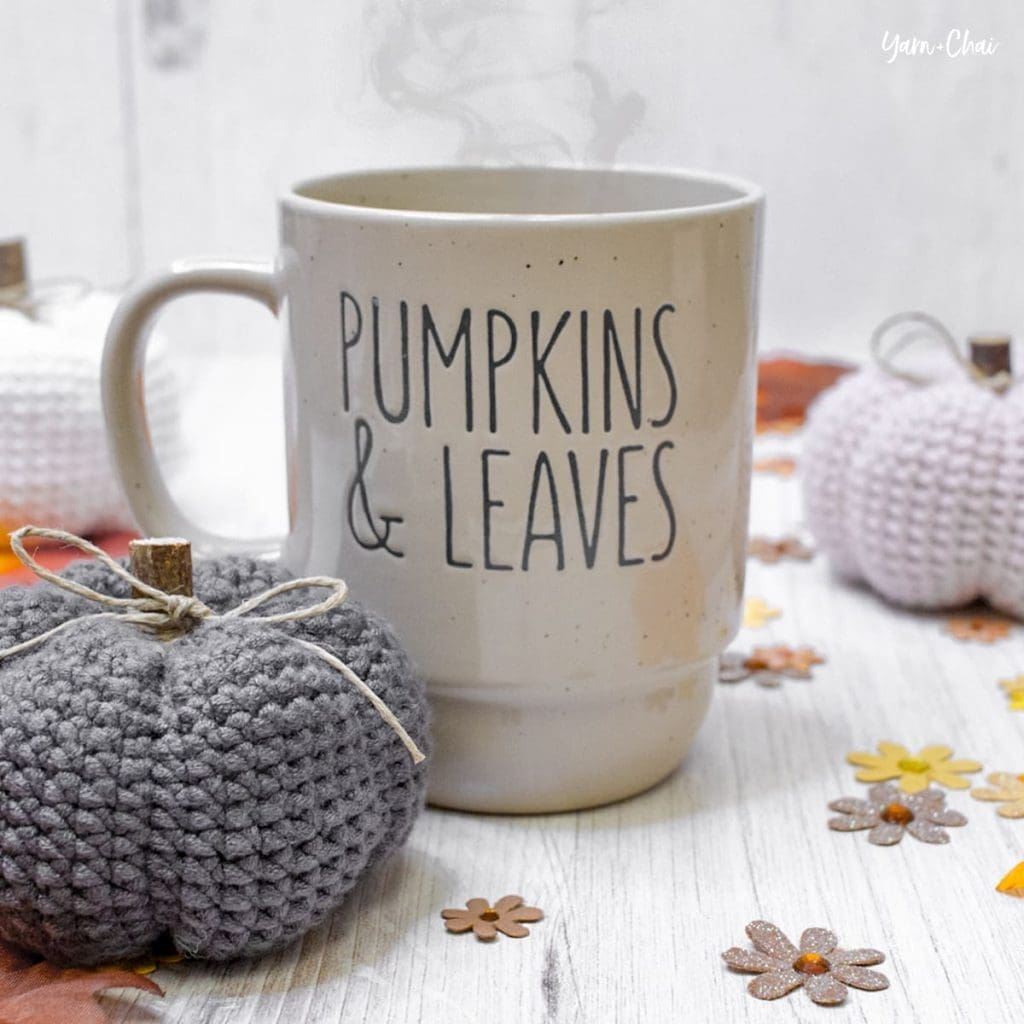
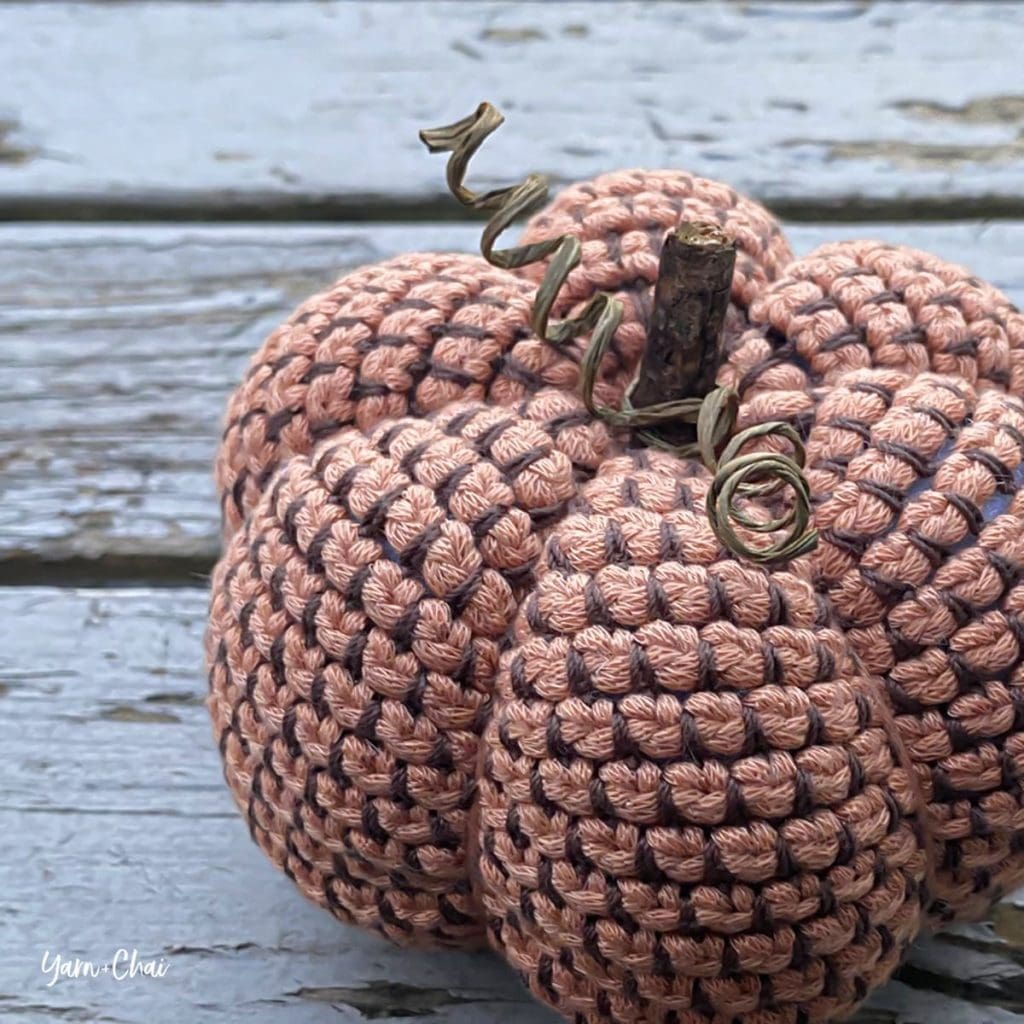
For several Fall seasons, I’ve thought to myself, “I bet a mosaic pumpkin would be really cute.” But I never got around to making one until now, and let me tell you… I was right. IT’S SO CUTE!
If you’ve done any of my other mosaic patterns (like the Mosaic Basket, Mosaic Potholder or Mosaic Bucket Bag), then this pumpkin should be a breeze. If you haven’t, that’s ok too… it’s not as complicated as it looks!

About the Yarn
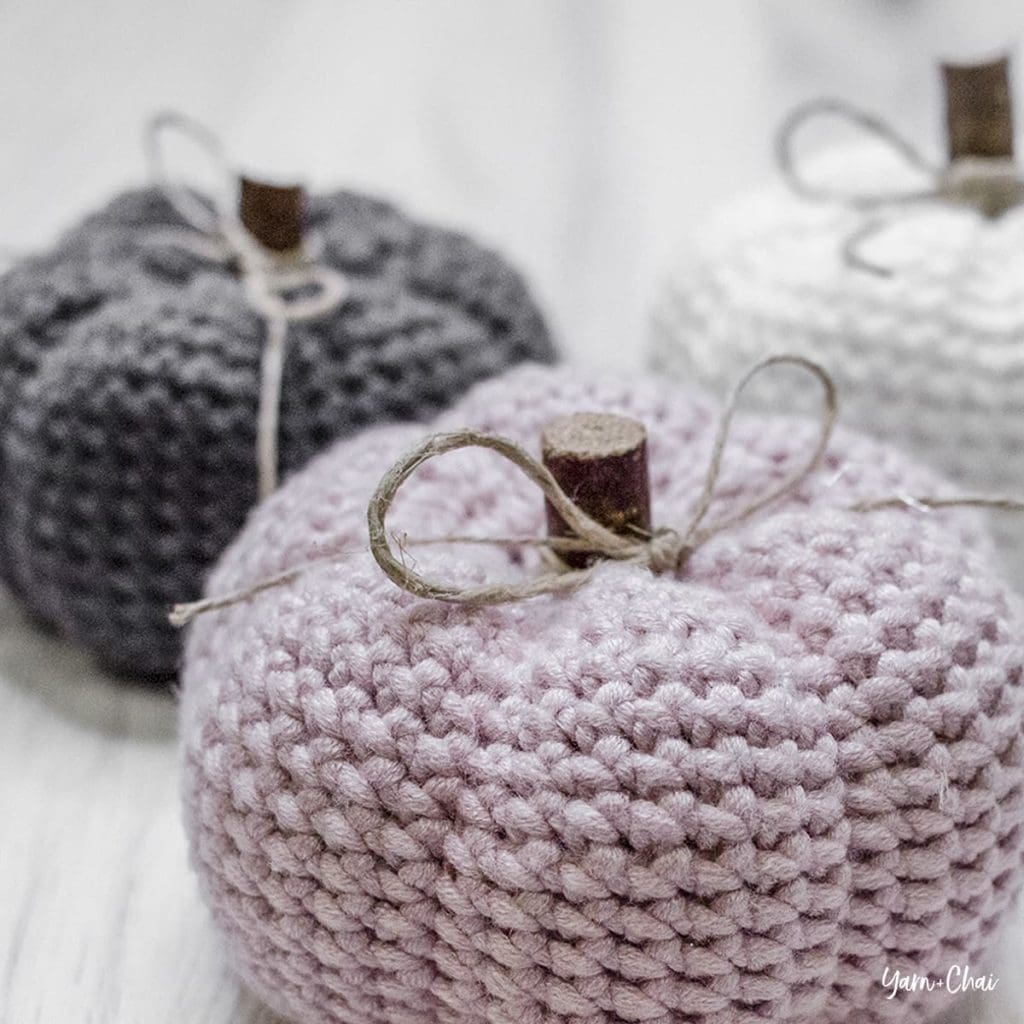
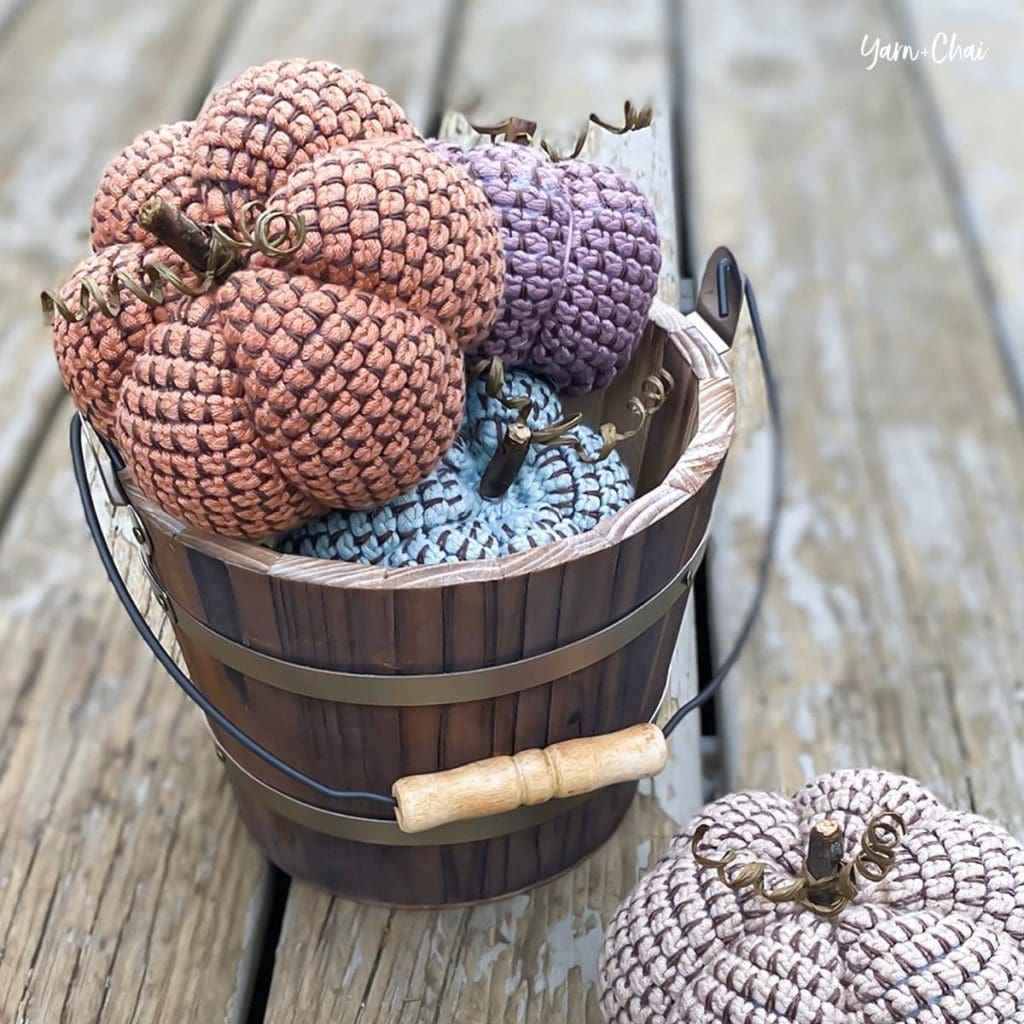
My mosaic patterns call for one yarn color as a base, and another darker color for the spike stitches. For these pumpkins, I mostly opted for the new Lazy Days yarn from Lion Brand as my base color (it’s an awesome chainette-style yarn that is so easy to work with). I say “mostly” because the light tan pumpkin in my photos was actually made with Yarn Bee Comfy Classic, which is a slightly thicker #4 yarn… so it came out slightly larger than the other size large pumpkin I made. And for the thread color on all of my pumpkins, I used #10 cotton crochet thread.
For reference, here’s a breakdown of the yarn and size of each pumpkin in my photos:
YARN A:
- Purple pumpkin (small): LB Lazy Days in “Woodrose”
- Orange pumpkin (large): LB Lazy Days in “Clay”
- Tan pumpkin (large): Yarn Bee Comfy Classic in “Linen”
- Greenish yellow pumpkin (small): LB Lazy Days in “Lichen”
- Aqua pumpkin (medium): LB Lazy Days in “Surf Spray”
YARN B:
- All pumpkins: Artiste #10 Cotton Crochet Thread in “Chocolate”
Video Help (sort of)
I do not currently have a video tutorial for the mosaic pumpkins. However, if you need a visual on how the spike stitches work to form the mosaic pattern, you might take a look at my video tutorial for the Mosaic Basket! Start at the 19:33 mark for a demonstration on the spike stitch and how to switch between yarns.
Prefer a PDF?
This pattern can be completed using the 100% free version right here on this page. However, many people prefer the convenience of a printable, ad-free PDF.
All-Access Passholders get the ad-free version of this and all of my other blog patterns. It’s a pretty sweet deal, if I do say so myself! Learn more about it here or continuing scrolling for the free version.
– – – – – – – – – – – – – –
Mosaic Pumpkin
View on Ravelry
Difficulty: Easyish
Crochet Language: American Standard
Finished Sizes:
Laid flat, before stuffing: 4″ x 4″ (S), 4.75″ x 4.75″ (M), 5.5″ x 5.5″ (L)
Stuffed and assembled: 3.5″ x 2.25″ (S), 4″ x 2.5″ (M), 4.5″ x 2.75″ (L)
Yarn:
- Yarn A: Approximately 50 yards (S), 65 yards (M), or 80 yards (L) of Lion Brand Lazy Days, a #4 weight chainette-style yarn, or other #4 weight yarn.
- Yarn B: Approximately 45 yards (S), 60 yards (M), or 75 yards (L) of Artiste #10 Cotton Crochet Thread or other #10 crochet thread. For best results, YARN B should be a darker color than YARN A.
Hook: G (4.0mm)
Gauge: Not crucial, but 18 SC x 22 rows = 4″
You’ll also need:
Yarn needles, regular & extra long (your fingers will thank you!)
Polyester fiber-fill
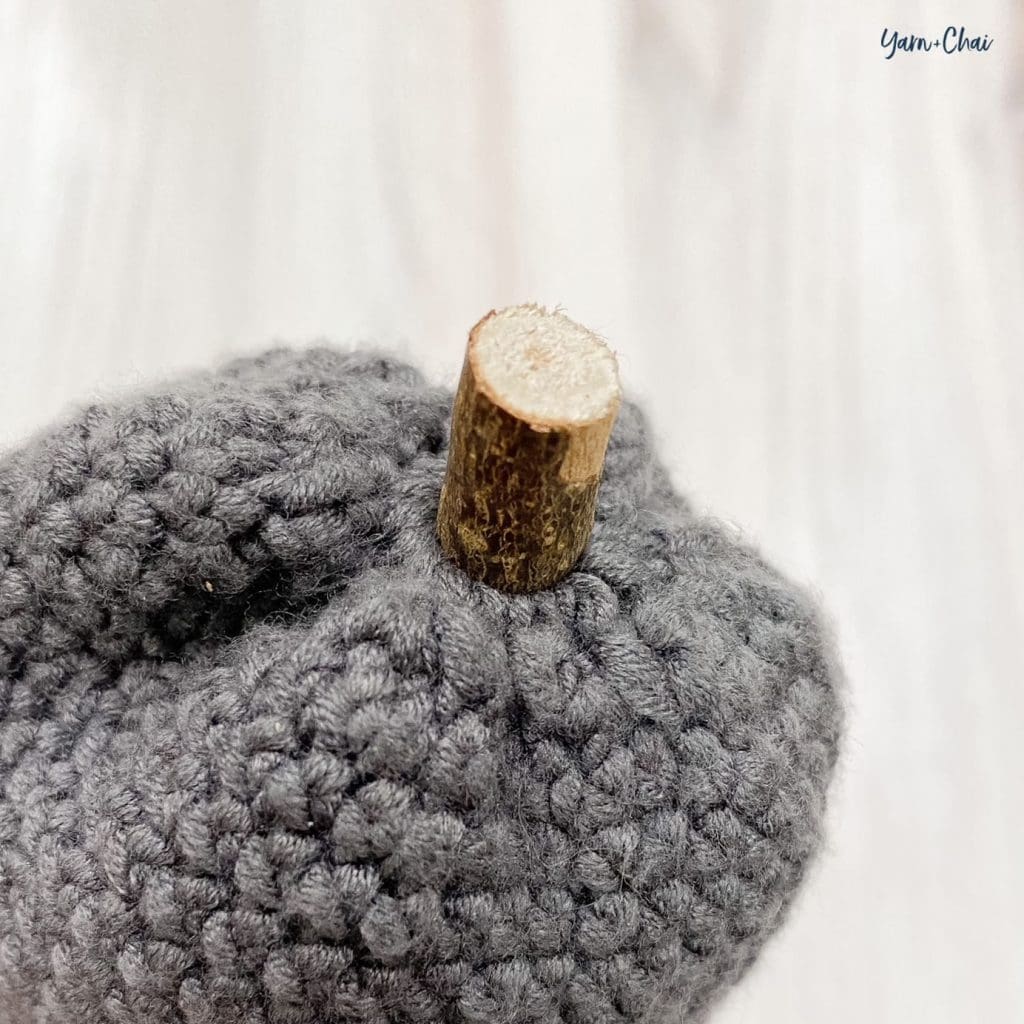
1″ stick or other chosen material for stem
Fast-acting glue
Twine and other decorations (optional)
Terms and Abbreviations:
MC (magic circle – view tutorial here)
ST/STS (stitch/stitches)
SL ST (slip stitch)
CH (chain)
SC (single crochet)
SC Spike Stitch (Instead of inserting your hook into the top loops of the stitch, insert them into its base, then complete an SC. This will wrap your SCs over the top of the SCs from the previous round.)
Notes:
(1) Pattern is worked in a seamless round. Do not join, chain and/or turn unless instructed. If needed, use a stitch marker to mark the beginning of your rounds.
(2) Pattern is written for the smallest size, with medium and large sizes in parentheses. Any time there is only one number, it applies to all sizes.
(3) Because we utilize the SC Spike Stitch for entire rounds throughout the pattern, we will be referring to those rounds as an extension of the SC rounds they are being worked into. For example, if Round 3 is a round of SC, then the very next round which places spike stitches on top of those SCs will be referred to as Round 3B. This just makes for easier counting.
(4) Yarn, hook size and gauge are only meant as a guide, and this pattern will work with any yarn you choose; just use a hook that is smaller than the yarn’s recommended size for a nice tight fabric, and keep in mind your yarn amounts and finished dimensions will be affected by any changes.
(5) When stuffing your pumpkins, it’s important that you don’t over-stuff. If the rounds start to separate and the stuffing is showing through them, ease up.
– – – – – – – – – – – – – – –
INSTRUCTIONS
To begin: With YARN A, make a magic circle; CH1.
Round 1: 12 (14, 16) SC in MC. (Don’t pull the circle closed yet; we’ll do that later!)
Stitch count: 12 (14, 16)
Round 2: 3SC in each ST around. (It will be crowded; that’s ok.)
Stitch count: 36 (42, 48)
Round 3: SC in each ST around. Pull the loop on your hook up a couple inches so it doesn’t unravel, then remove your hook.
Stitch count: 36 (42, 48)
Round 3B: Insert hook into top loops of next ST. Attach YARN B and CH1; SC into same ST, then SC SPIKE STITCH into next ST and each remaining ST around. Pull the loop on your hook up a couple inches so it doesn’t unravel, then remove your hook.
Stitch count: 36 (42, 48)
Round 4: Reinsert hook into loop from YARN A. SC in each ST around (you’re working in the top loops of the SC Spike Stitches from the previous round). Remove hook.
Stitch count: 36 (42, 48)
Round 4B: Reinsert hook into loop from YARN B. SC Spike Stitch in each ST around. Remove hook.
Stitch count: 36 (42, 48)
Rounds 5 – 18B (5 – 20B, 5 – 22B): Repeat Rounds 4 – 4B.
Round 19 (21, 23): Reinsert hook into loop from YARN A. SC in each ST around (still working in the top loops of the SC Spike Stitches from the previous round).
Stitch count: 36 (42, 48)
To finish: SL ST in FLO of each of the next 2 STS to smooth down the round, then fasten off, leaving a finishing tail about a yard long. Fasten off YARN B and weave in end. Pull on your YARN A starting tail to cinch the first round of the pumpkin closed, then weave in that tail securely and trim excess. Weave in YARN B starting tail and any other loose ends, not including the long YARN A finishing tail.
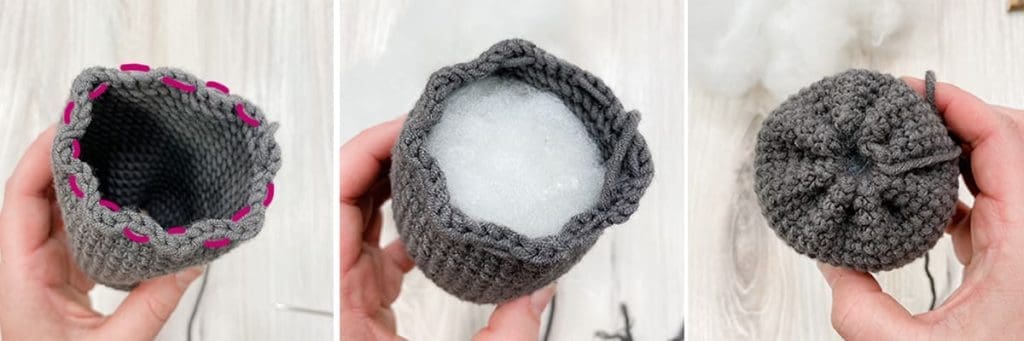
Cinching, Stuffing and Closing:
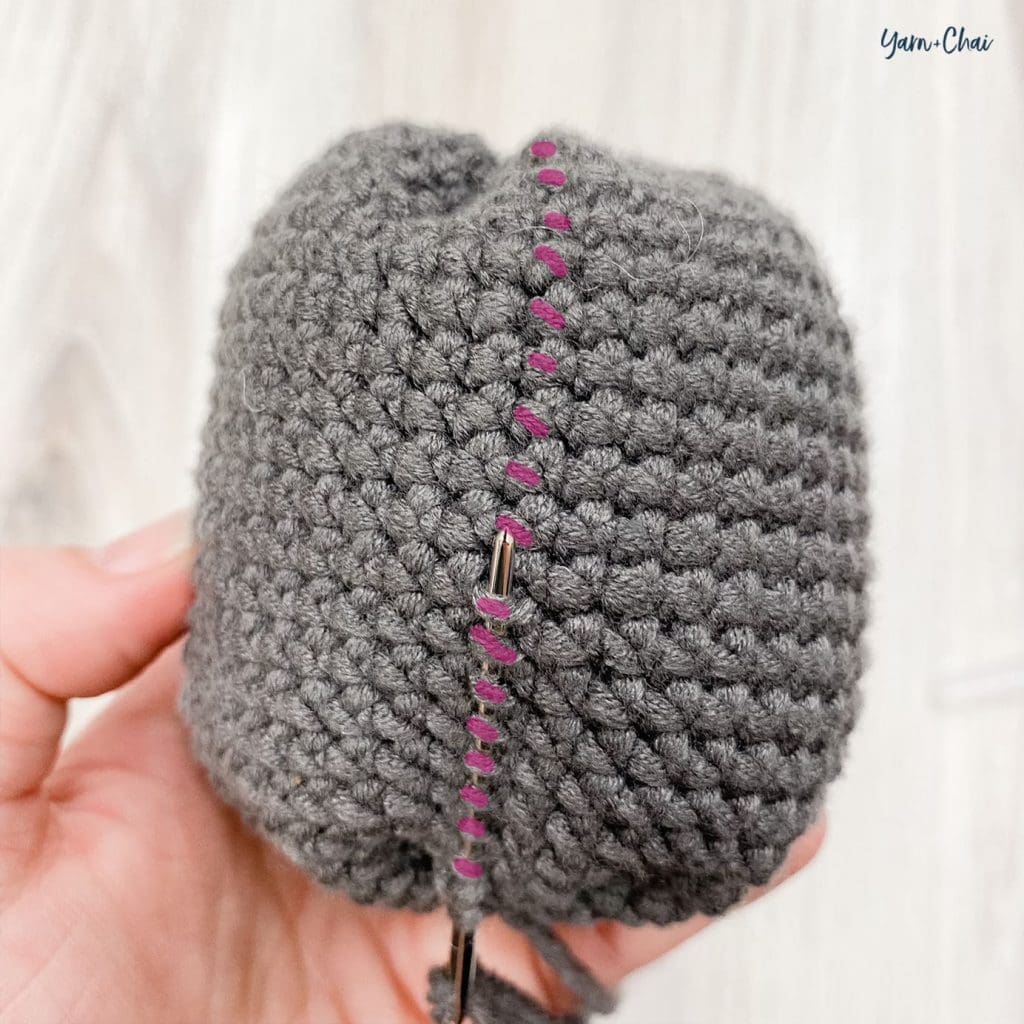
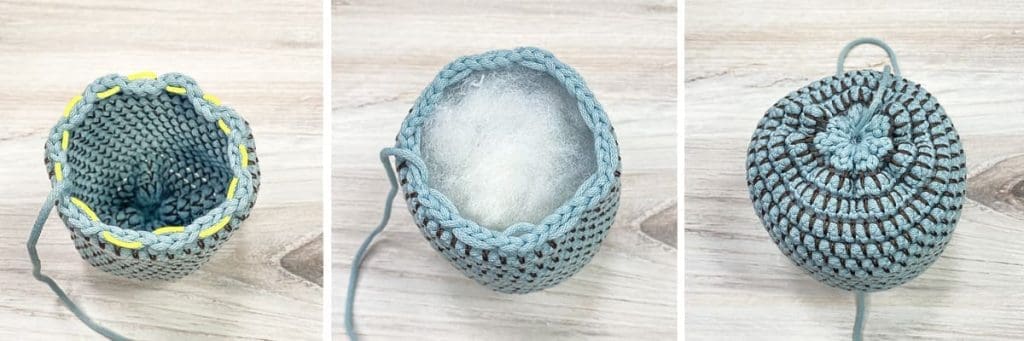
Make sure pumpkin is right-side out. Use yarn needle and finishing tail to weave in and out along the stitches of the final round, weaving every 3 stitches until you’re back where you started (1st photo*). Set yarn needle down and stuff pumpkin (2nd photo), then pull yarn tail to cinch closed (3rd photo). Weave yarn needle across the cinch in a couple different directions to reinforce closure; tie a knot, but do not fasten off.
Shaping:
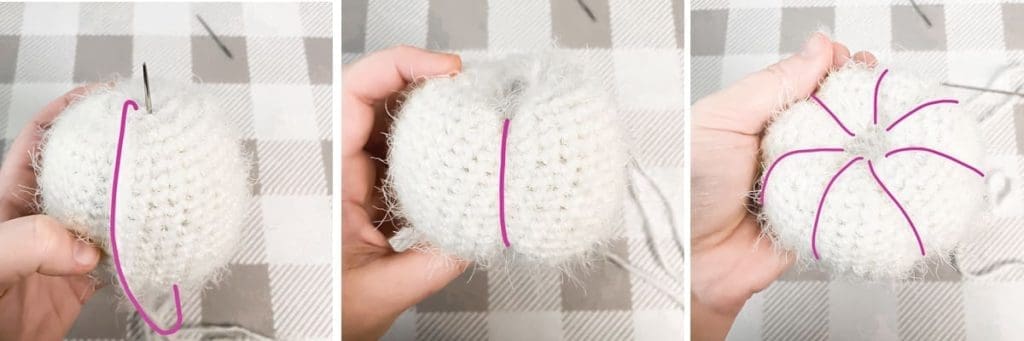
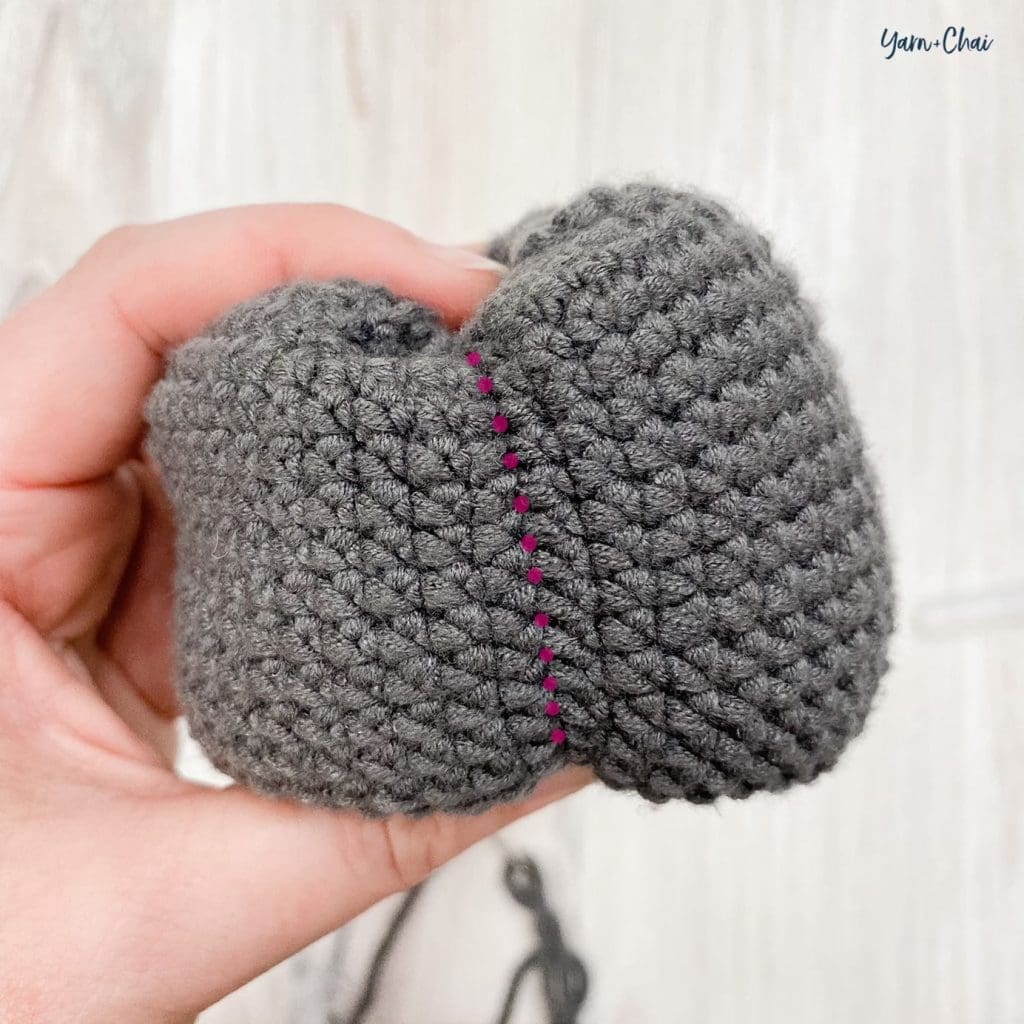
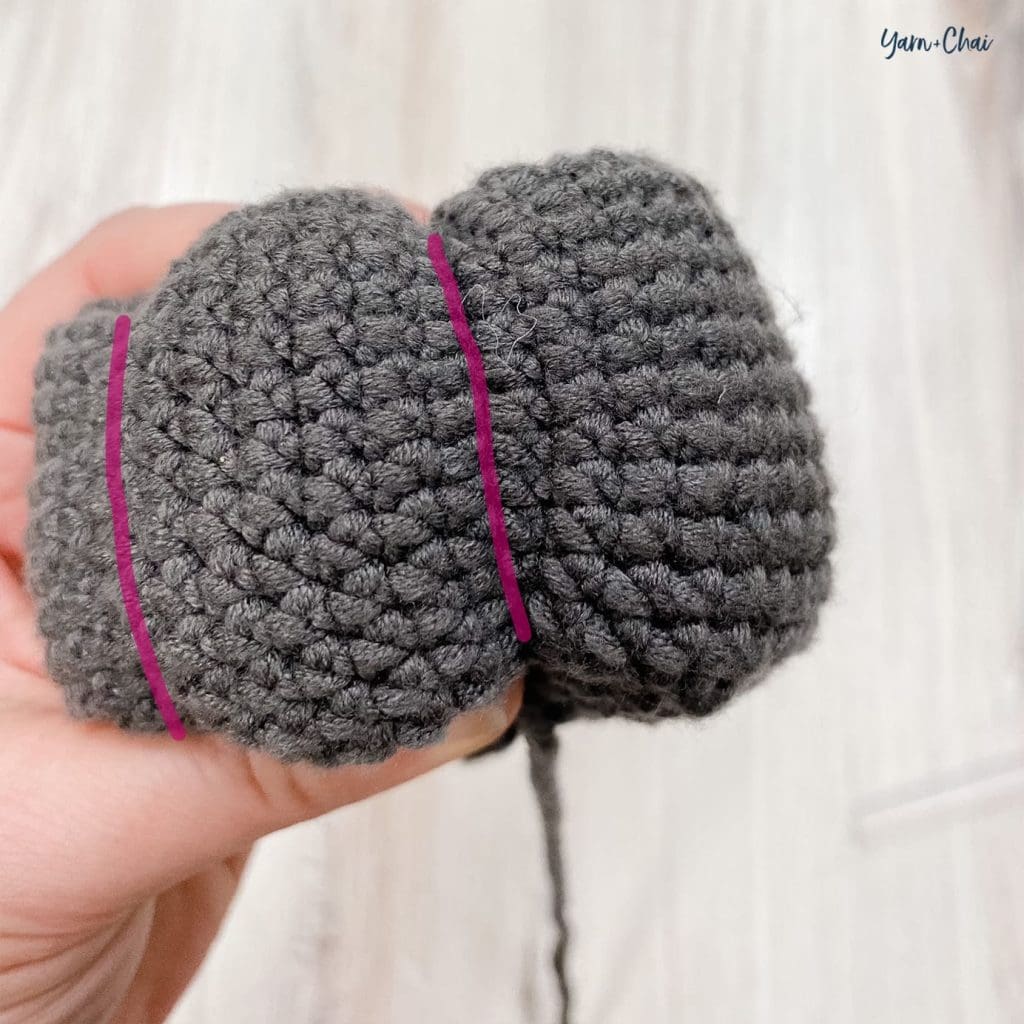
Using extra long yarn needle and finishing tail, bring the tail down along the outside of the pumpkin, then back through the pumpkin down the center (1st photo). Pull tight to cinch the pumpkin (2nd photo) and hold it in place with your other hand as you move on to the next cinch, continuing the process around the whole pumpkin (3rd photo). I eyeballed where I wanted my cinches, and ended up with 6; but pumpkins come in all different variations, so feel free to play with it to find whatever you think looks best!
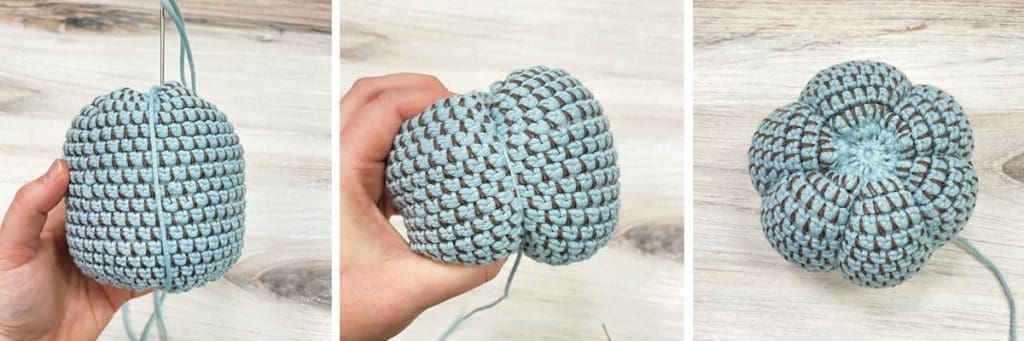
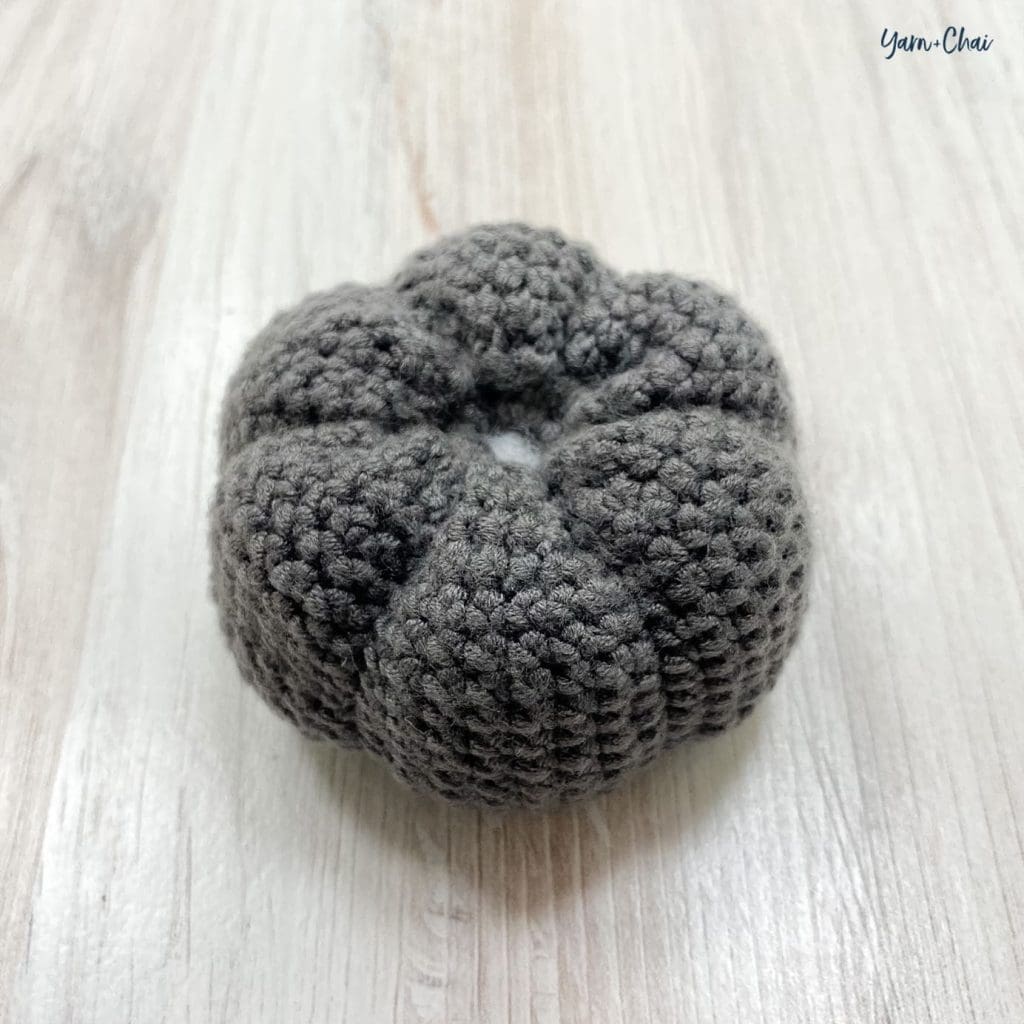
When you finish the last cinch, tie a knot and weave in the end, or pull the knot inside the pumpkin to hide it.
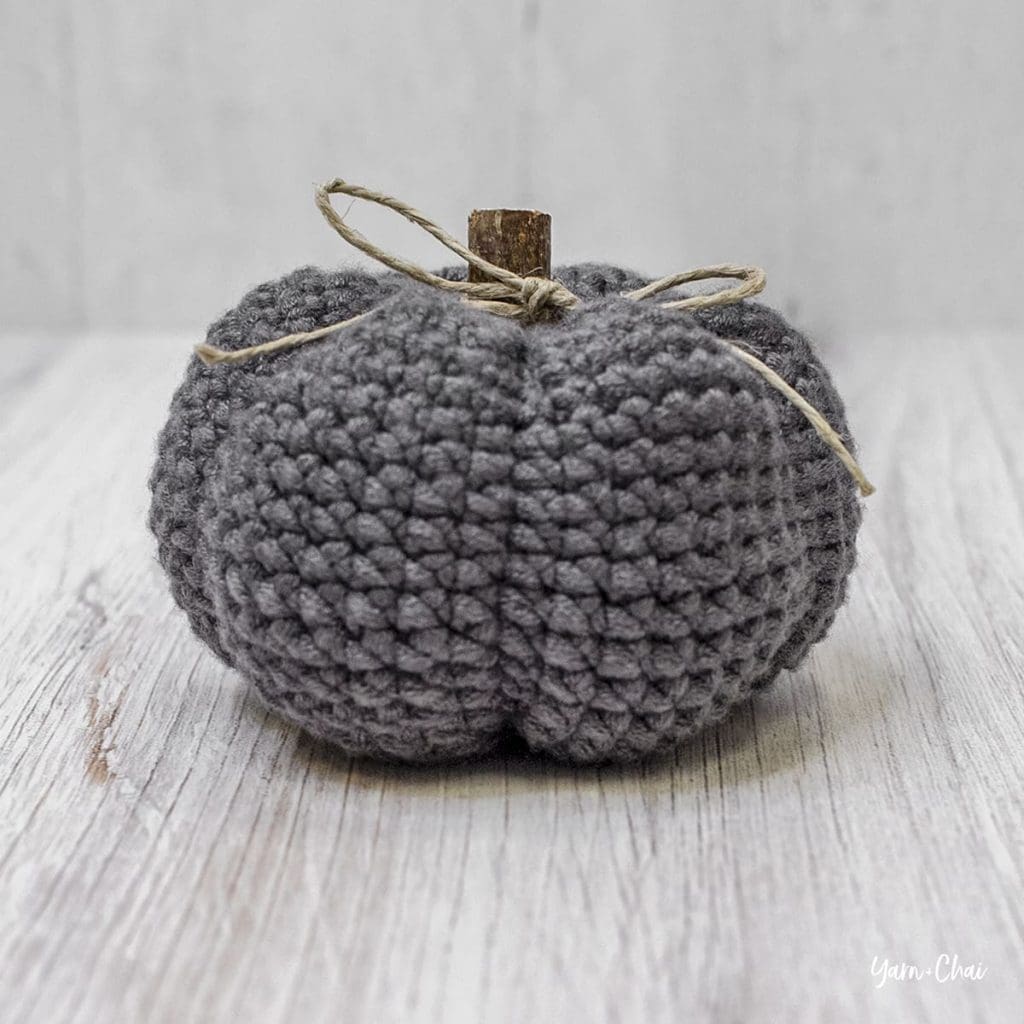
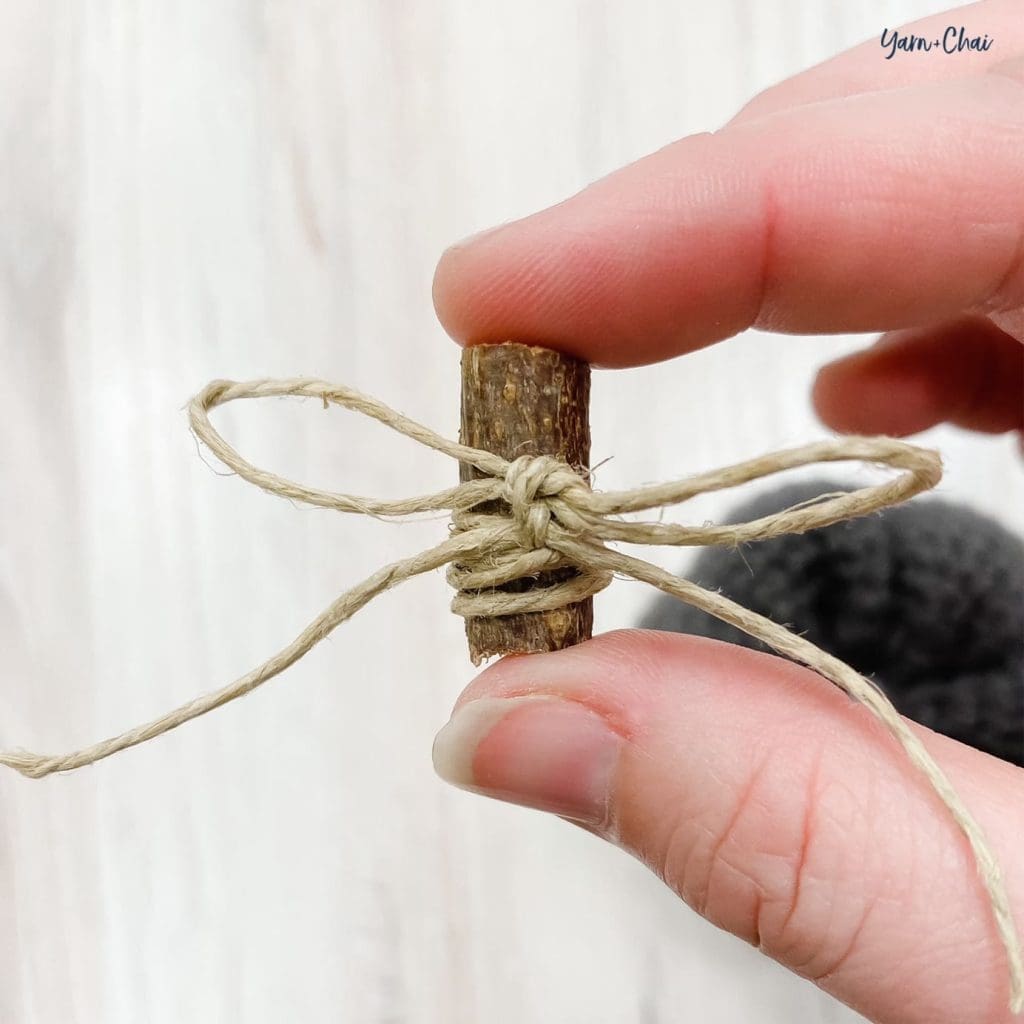
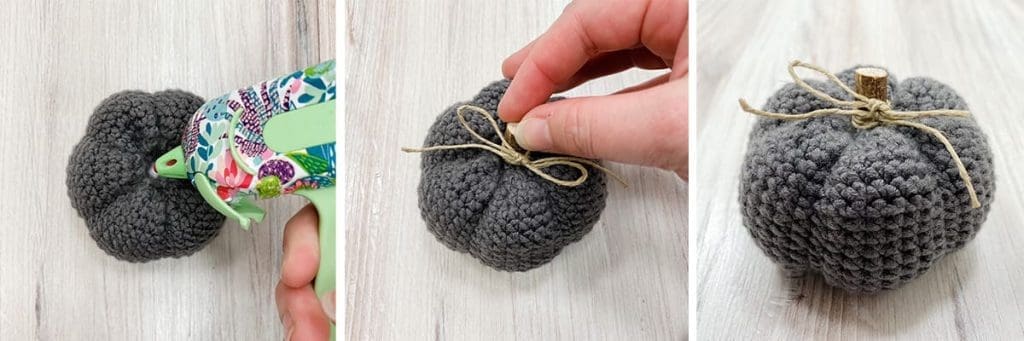
Stem
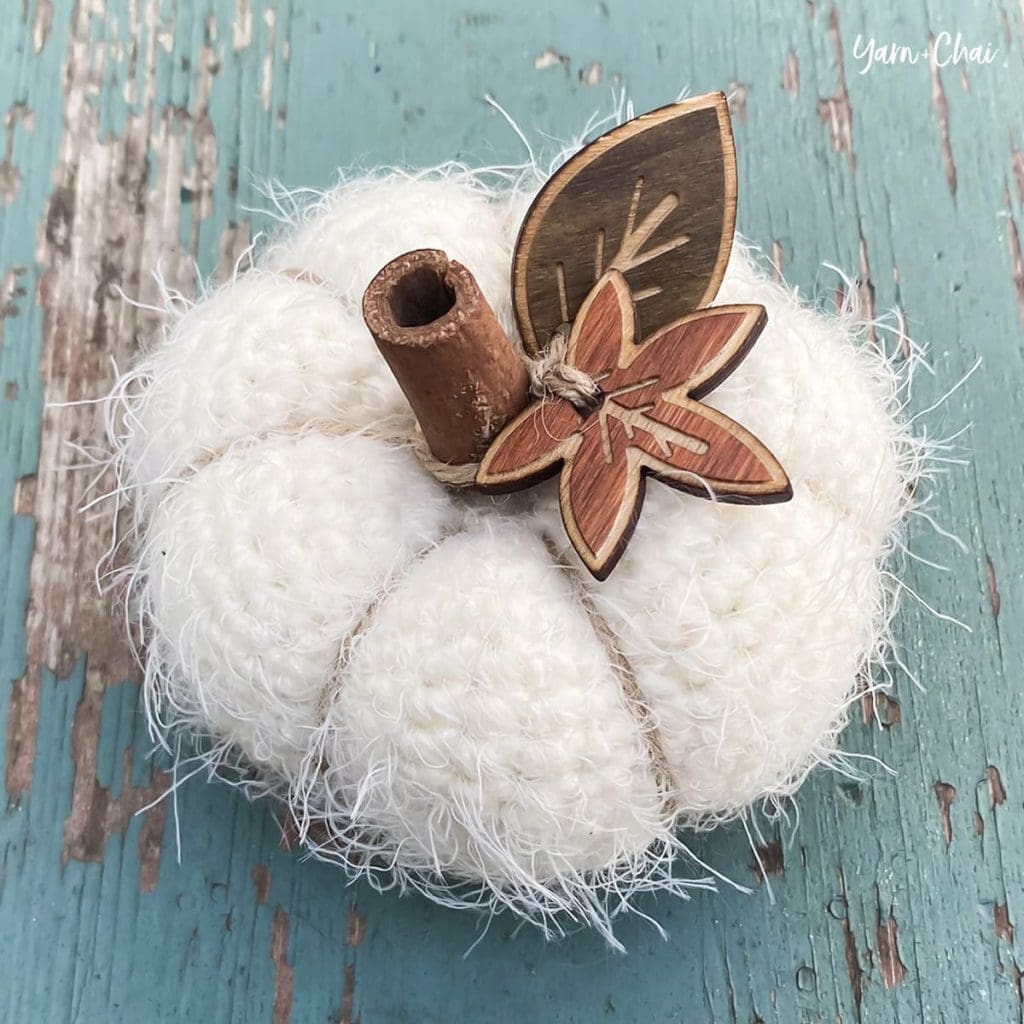
Embellish chosen stem with leaves, twine, covered wire, etc. (optional), then use fast-acting glue to secure to the center of the pumpkin.
That’s it!
I hope you enjoyed this pattern. If you’re sharing your project on social media, be sure to hashtag #mosaicpumpkin and tag me @yarnandchai.design so that I can see your beautiful creations!