Category: Earwarmers

  • 12 Days of Christmas: Chunky Twisted Earwarmer

    12 Days of Christmas: Chunky Twisted Earwarmer

    If you’re looking for a fast one-skein project, you’ve come to the right place, because day 3 of my 12 Days of Christmas is something you can create in practically no time at all!

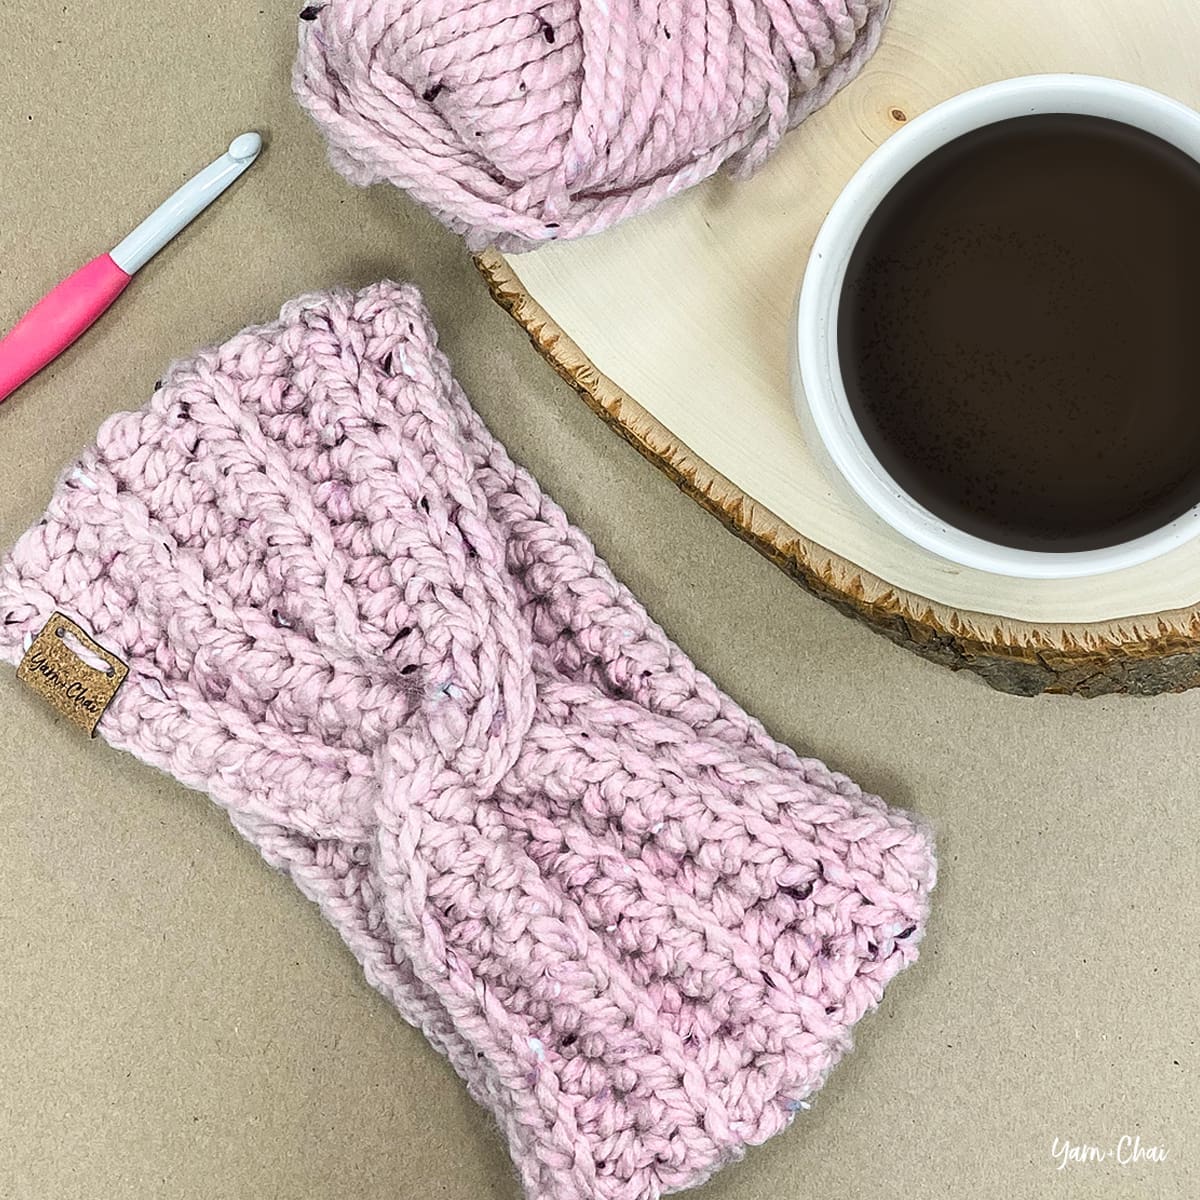
    Last Christmas, I needed to come up with gifts for my three nieces, who are all young adults. It was coming down to the wire — I’m talking way too late to order from Amazon — and I knew the quickest option would be to look at my yarn stash and come up with a trendy and fast pattern. I grabbed a skein of bulky #5 yarn and got to work on a chunky version of my Simple Twisted Earwarmer. I was so happy when the end result looked cute and cozy… and it only took me about 30 minutes from start to finish!

    I wrote out the pattern below in case you’re in need of a speedy project for yourself, for a gift, or even for a holiday craft fair.

    Prefer a PDF?

    This pattern can be completed using the 100% free version right here on this page. However, many people prefer the convenience of a printable, ad-free PDF.

    All-Access Passholders get the ad-free version of this and all of my other blog patterns. It’s a pretty sweet deal, if I do say so myself! Learn more about it here or continuing scrolling for the free version.

    CHUNKY TWISTED EARWARMER

    View on Ravelry

    Language: American Standard

    Difficulty: Beginner/Easy

    Finished Sizes: 17″ x 3.5″ (toddler), 18″ x 4″ (child), 20″ x 4.5″ (teen/adult small), 21″ x 4.5″ (adult large)

    Hook: L (8mm) or whichever hook is needed to obtain correct gauge

    Yarn: I used Loops & Threads Charisma, a soft, acrylic #5 weight yarn. (Loops & Threads is a Michael’s brand.) You’ll need about 30 yards (toddler), 45 yards (child), 60 yards (teen / adult small), or 65 yards (adult large). My samples were worked in colorways White Tweed, Cloud, and Blush Tweed. (If you order this yarn online, note that the Tweed version of Charisma has a separate listing!)

    Gauge: 9HDC x 7 rows = 4″ square.

    Terms and Abbreviations:
    ST/STS
     (stitch/stitches)
    CH (chain)
    HDC (half double crochet)
    BLO (back loop only)

    Notes:
    (1) CH1s at the beginning of rows do not count as a stitch in the final stitch count.
    (2) If you’re a visual learner, you can follow my video tutorial for the Simple Twisted Earwarmer. That pattern uses a #4 weight yarn, but you can substitute the starting chain and stitch count from this pattern and still follow along.
    (3) To change the length of your earwarmer, add or subtract any number from your starting chain. To change the width, add or subtract from the total number of rows. There is no stitch multiple to worry about.
    (4) Pattern is written for toddler size with additional sizes in parentheses (child, teen/adult small, adult large).

    INSTRUCTIONS

    To begin: CH39 (41, 46, 48).

    Row 1: HDC in 2nd CH from hook and in each remaining CH.
    Stitch count: 38 (40, 45, 47)

    Rows 2-6 (2-7, 2-8, 2-8): CH1, turn. HDC in first ST. HDC in BLO across until 1 ST remains. HDC in final ST.
    Stitch count: 38 (40, 45, 47)

    Fasten off, leaving a 12″ tail for seaming. Weave in starting tail.

    Adding the Twist

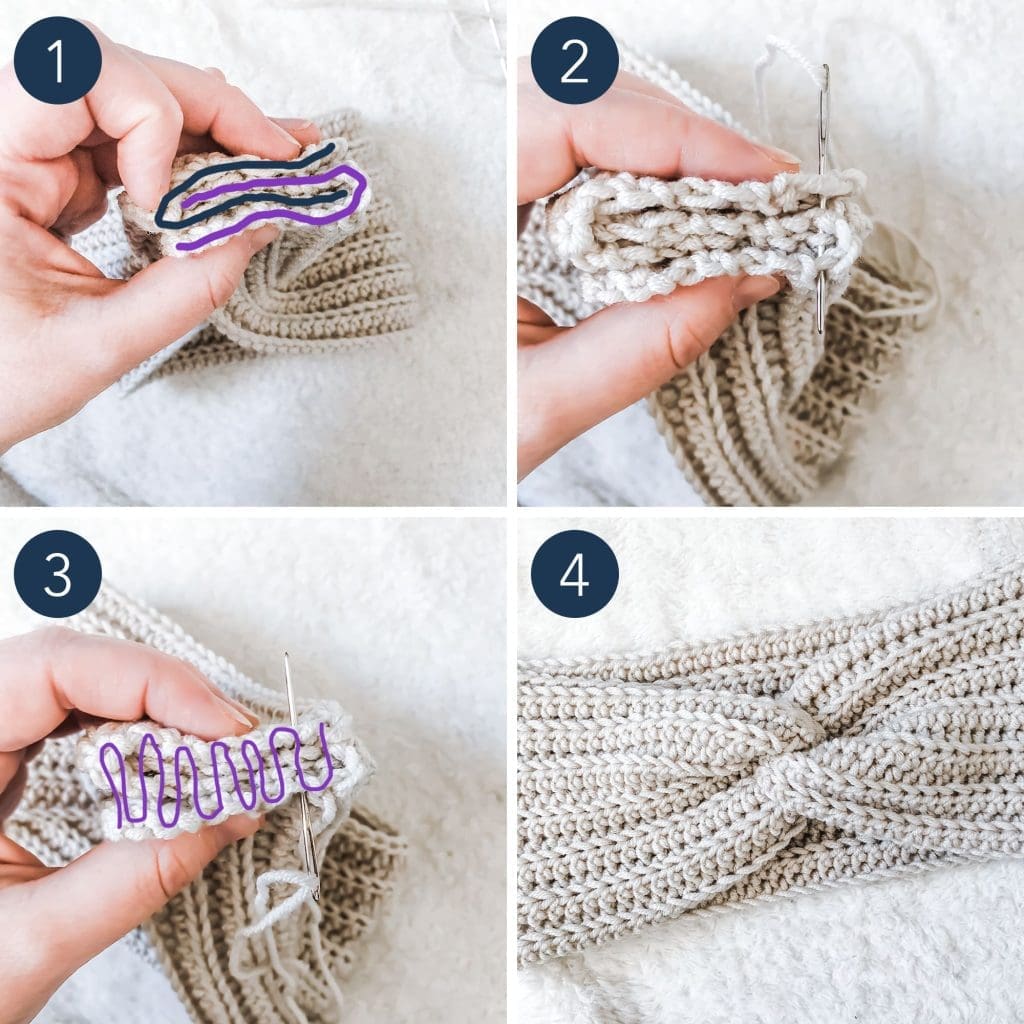
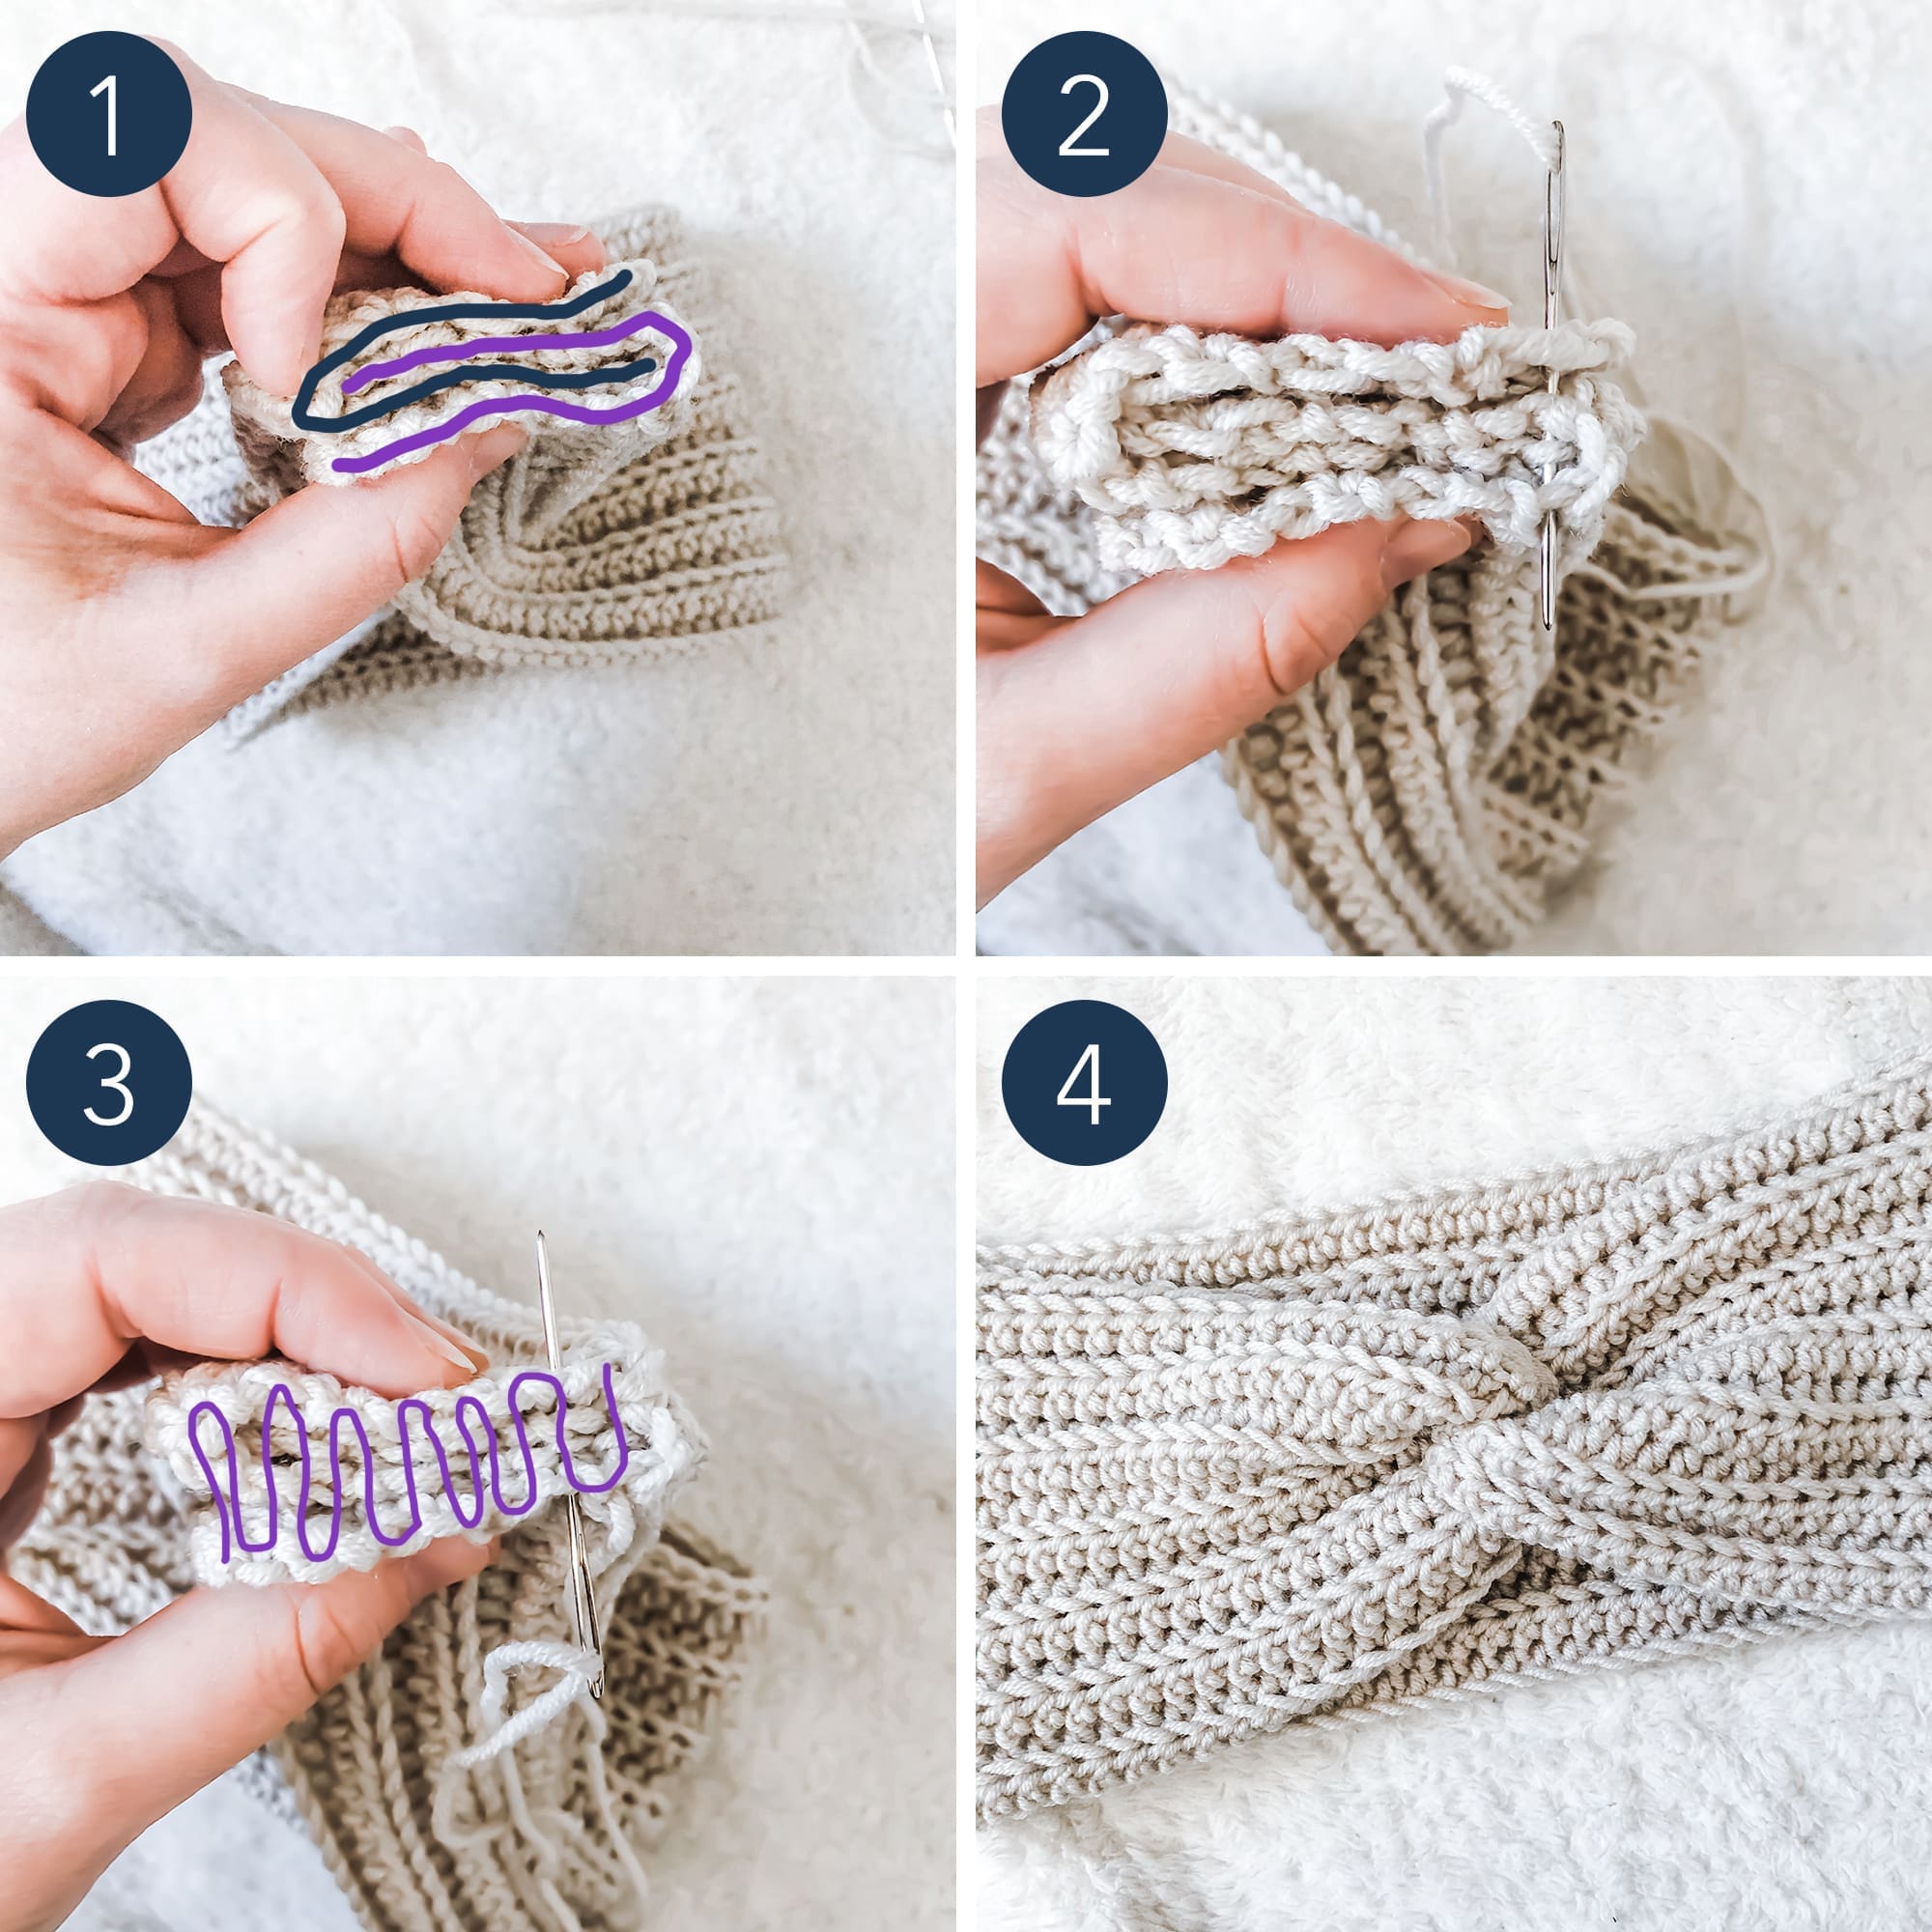
    Follow the instructions below to seam your earwarmer with a twist. Use the image below to guide you. (They are actually from my Simple Twisted Earwarmer pattern, but the technique is the same.)

    1. Thread the long finishing tail through your yarn needle and gently set it aside. Lay ear warmer flat, then gather the edges and layer them together as shown, making sure that the corner with the finishing tail is at either the top or the bottom (not one of the layers in the middle).

    2. Thread the yarn needle across the edges, being sure to grab yarn from all four layers.

    3. Continue to weave the yarn needle back and forth across the surface of the edges, being sure to grab yarn from all four layers each time.

    4. Weave in the tail, then turn earwarmer right side out.
    Done! If you’re sharing on social media, be sure to tag me @yarnandchai.design so I can see your beautiful work!

    This pattern is originally part of my 12 Days of Christmas!
    Click here to return to the 12 Days of Christmas homepage.

  • Malia Twisted Earwarmer

    Malia Twisted Earwarmer

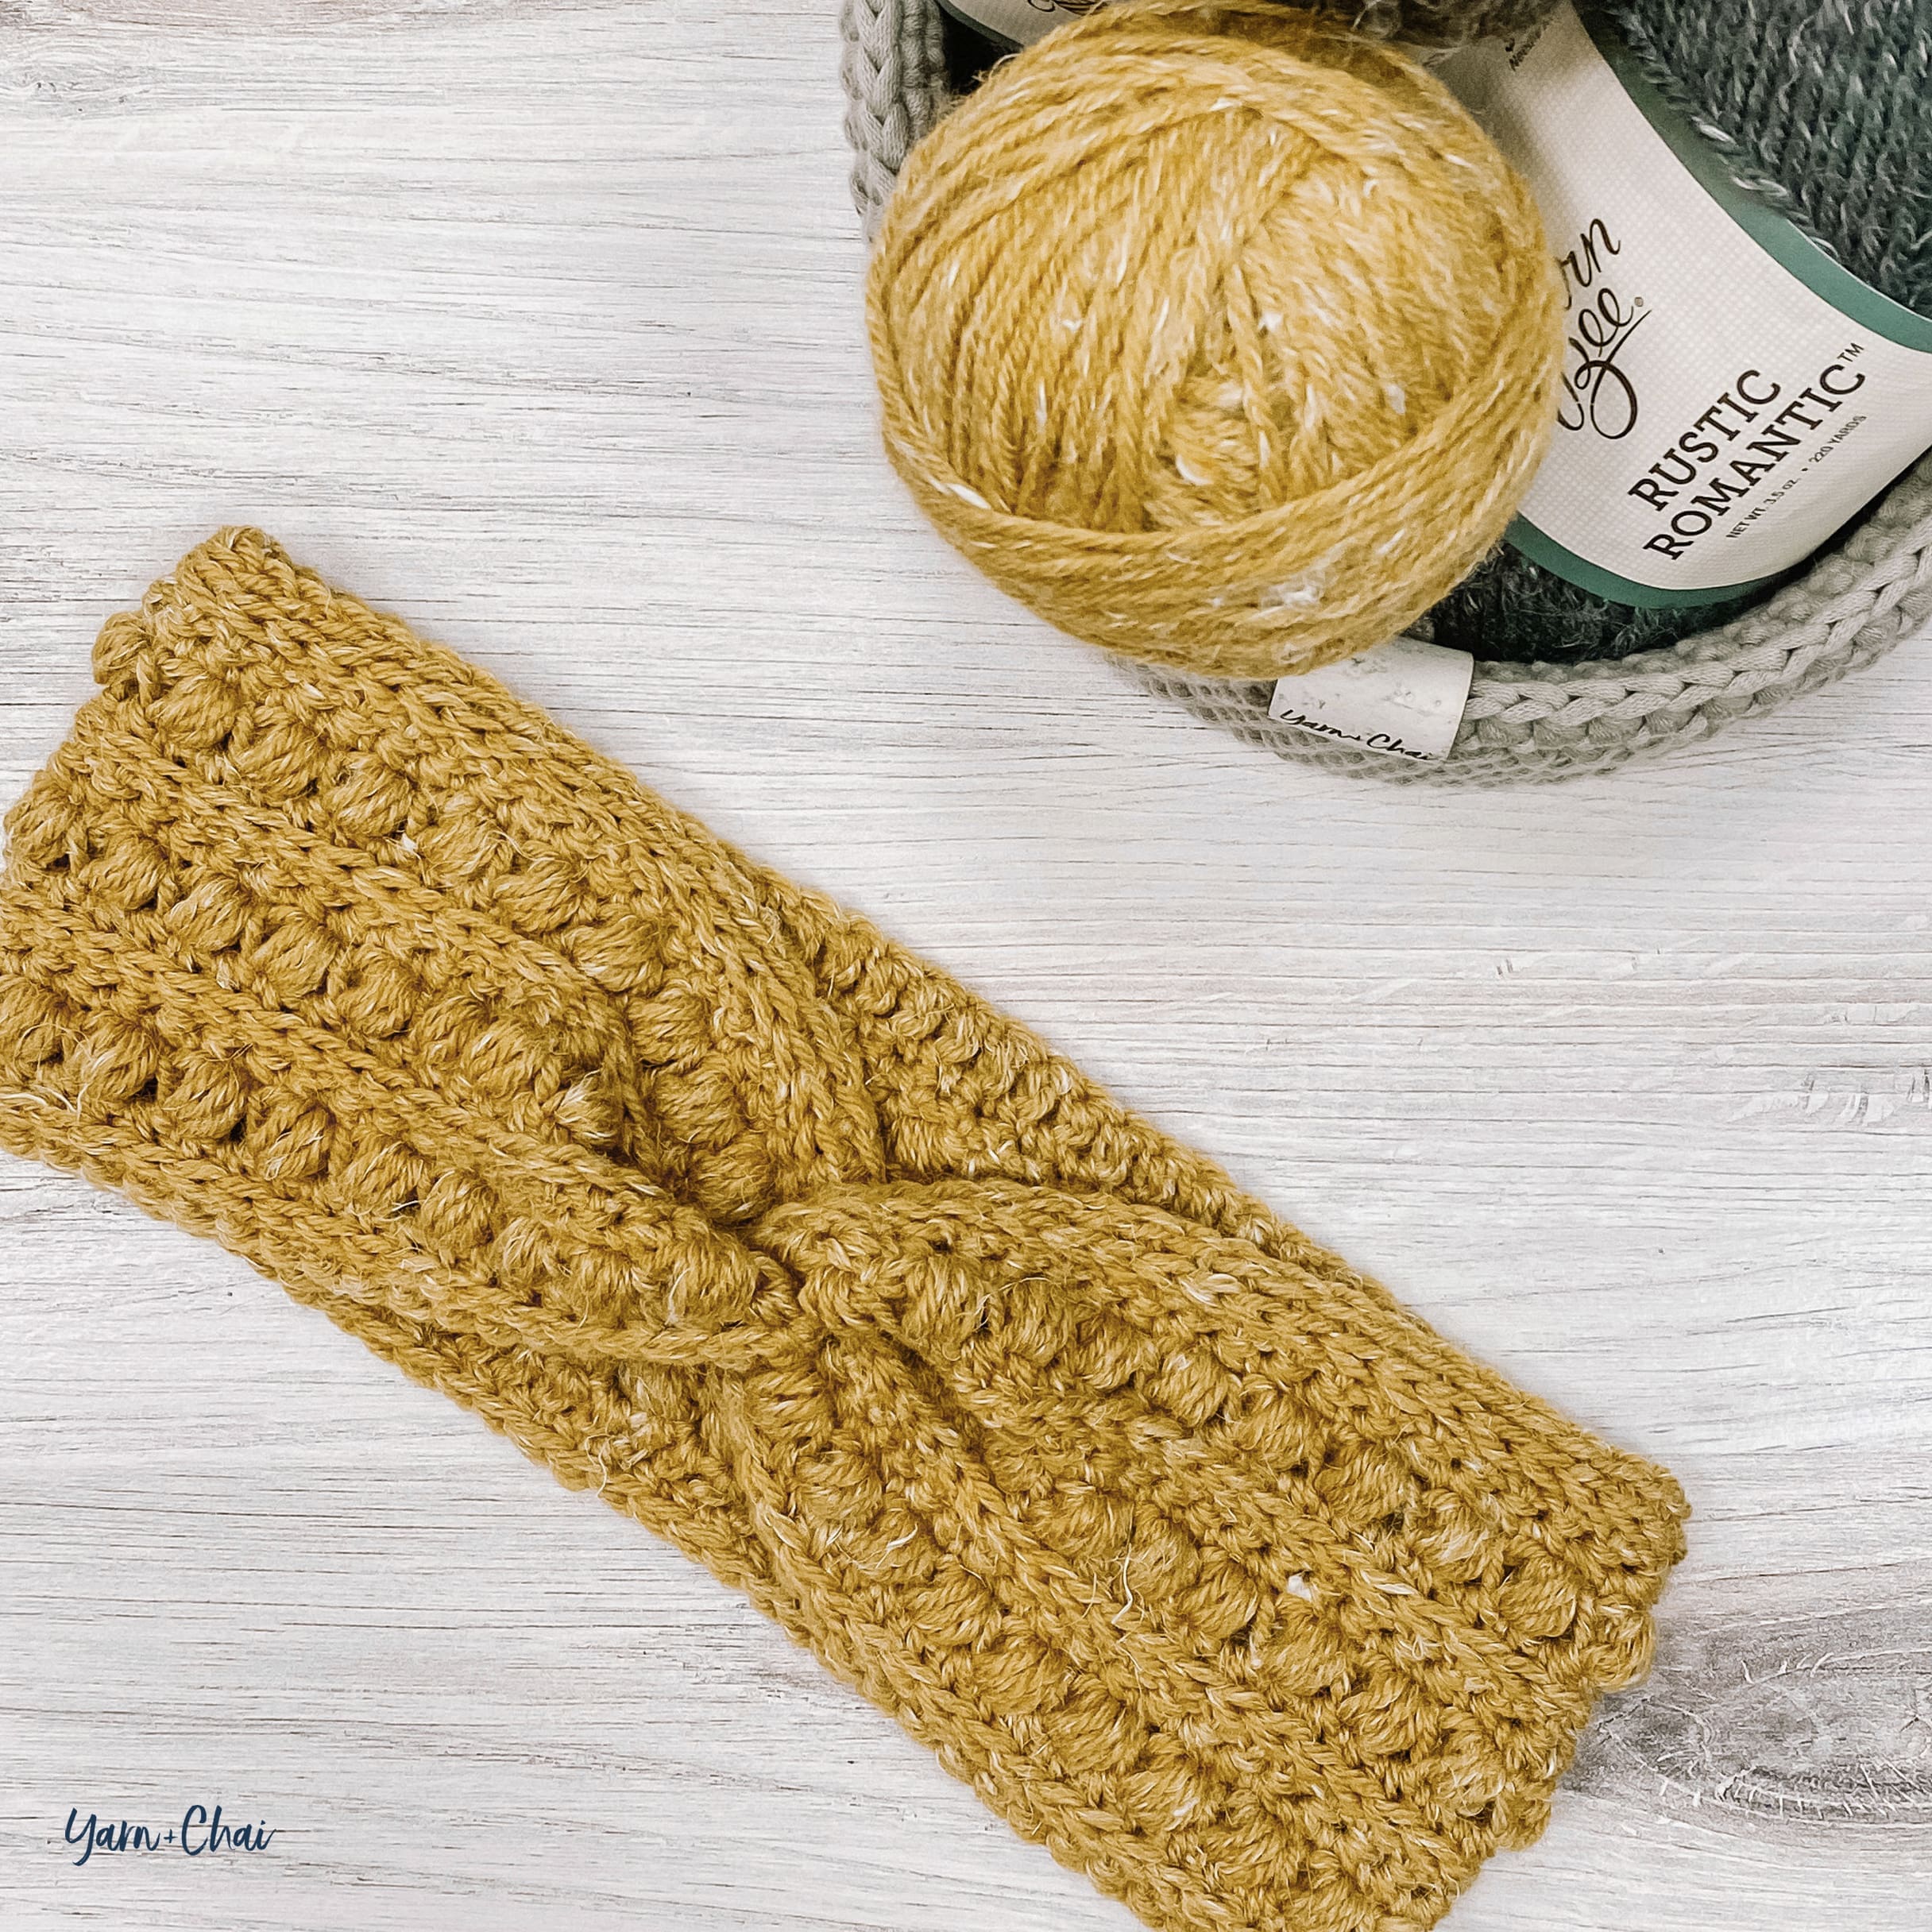
    Malia is making a quick reappearance this season, in the form of a cute twisted earwarmer!

    I always thought this stitch pattern would look great as a twisted earwarmer, and with the weather finally starting to cool off here, it’s time for me to start thinking about how to keep cozy! I always love a good earwarmer / headband, because it does the job with minimal fuss.

    If you need a little help with the stitches, check out the tutorial video I made during the original Malia Crochet-Along for the cowl and scarf; just use the numbers in this pattern instead of the ones called for on the video!

    Prefer a PDF?

    This pattern can be completed using the 100% free version right here on this page. However, many people prefer the convenience of a printable, ad-free PDF.

    All-Access Passholders get the ad-free version of this and all of my other blog patterns. It’s a pretty sweet deal, if I do say so myself! Learn more about it here or continuing scrolling for the free version.

    MALIA TWISTED EARWARMER

    View on Ravelry

    Difficulty: Easy

    Finished Size: 20″ long (before seaming) x 3.75″ wide

    Hook: I (5.50 mm) or whichever hook is needed to obtain correct gauge

    Yarn: 100 yards of a #4 aran weight. I used Yarn Bee’s Rustic Romantic in “Okie Wheat” for my sample.

    Gauge: To ensure the best results, the gauge check is a swatch taken straight from the pattern. Upon completion, you should have a 4” square. If yours is larger, consider using a smaller hook or a thinner #4 yarn. If yours is smaller, consider using a larger hook.

    Pattern for Gauge:
    CH17.
    Row 1: SC in 2nd CH from hook and in each remaining CH. (16)
    Row 2: CH1, turn. SC in first ST. (SK next ST, LBS in next ST) 7 times. SC in final ST. (16)
    Row 3: CH1, turn. HDC in each ST across. (16)
    Row 4: CH1, turn. SC in first ST. SC in 3rd loop of each of the next 14 STS. SC in final ST. (16)
    Row 5: CH1, turn. SC in each ST across. (16)
    Row 6: CH1, turn. SC in first ST. (LBS in next ST, SK next ST) 7 times. SC in final ST. (16)
    Row 7: CH1, turn. HDC in each ST across. (16)
    Row 8: CH1, turn. SC in first ST. SC in 3rd loop of each of the next 14 STS. SC in final ST. (16)
    Row 9: CH1, turn. SC in each ST across. (16)
    Rows 10-16: Repeat Rows 2-8. (16)

    Terms and Abbreviations:
    ST/STS (stitch/stitches)
    SL ST (slip stitch)
    SK (skip)
    CH (chain)
    SC (single crochet)
    HDC (half double crochet)
    LBS (large bean stitch – see “Special Stitches”)
    BLO (back loop only)
    3rd LOOP (work stitch into 3rd loop only – see “Special Stitches”)

    Special Stitches:

    Large Bean Stitch (LBS)
    Insert hook into stitch, yarn over and pull through (2 loops on hook). Yarn over, insert hook into same stitch, yarn over and pull through (4 loops on hook). Yarn over, insert hook into same stitch, yarn over and pull through (6 loops on hook). Yarn over, insert hook into same stitch, yarn over and pull through (8 loops on hook). Yarn over and pull through all 8 loops. Chain 1 to close the stitch. (Because this stitch creates two sets of loops – one when creating the bean, and one when closing the stitch – each completed Large Bean Stitch will count for two stitches in the row or round’s final stitch count.)

    3rd Loop Only
    Half double crochet stitches have a 3rd loop that we utilize in this pattern. When working in turned rows, as in this pattern, the 3rd loop can be found just below the front loop on the side of the work that is facing you. When instructed to work in “3rd loop only”, insert your hook into this special loop. This creates a delicate braided look on the opposite side of the pattern.

    Notes:
    (1) This pattern is written in American Standard Terms.
    (2) CH1s at the beginning of rows do not count as a stitch in the final stitch count.
    (3) A video tutorial for the stitch pattern is available up in the post, or by clicking here.
    (4) To make earwarmer larger or smaller, add or subtract an even number of stitches from the starting row or chain. For reference, if you met gauge, 4 stitches = 1″.

    INSTRUCTIONS

    To begin: CH79.

    Row 1: HDC in 2nd CH from hook and in each remaining CH. (78)

    Row 2: CH1, turn. SC in first ST. SC in 3rd loop of each of the next 76 STS. SC in final ST. (78)

    Row 3: CH1, turn. SC in each ST across. (78)

    Row 4: CH1, turn. SC in first ST. (SK next ST, LBS in next ST) 38 times. SC in final ST. (78)

    Row 5: CH1, turn. HDC in each ST across. (78)

    Row 6: CH1, turn. SC in first ST. SC in 3rd loop of each of the next 76 STS. SC in final ST. (78)

    Row 7: CH1, turn. SC in each ST across. (78)

    Row 8: CH1, turn. SC in first ST. (LBS in next ST, SK next ST) 38 times. SC in final ST. (78)

    Row 9: CH1, turn. HDC in each ST across. (78)

    Row 10: CH1, turn. SC in first ST. SC in 3rd loop of each of the next 76 STS. SC in final ST. (78)

    Row 11: CH1, turn. SC in each ST across. (78)

    Row 12: CH1, turn. SC in first ST. (SK next ST, LBS in next ST) 38 times. SC in final ST. (78)

    Row 13: CH1, turn. HDC in each ST across. (78)

    Row 14: CH1, turn. SC in first ST. SC in 3rd loop of each of the next 76 STS. SC in final ST. (78)

    Fasten off, leaving a long tail for seaming. Weave in starting tail.

    Adding the Twist

    Follow the instructions below to seam your earwarmer with a twist. Use the image below to guide you. (They are actually from my Simple Twisted Earwarmer pattern, but the technique is the same.)

    1. Thread the long finishing tail through your yarn needle and gently set it aside. Lay ear warmer flat, wrong side up, then gather the edges and layer them together as shown.

    2. Thread the yarn needle across the edges, being sure to grab yarn from all four layers.

    3. Continue to weave the yarn needle back and forth across the surface of the edges, being sure to grab yarn from all four layers each time.

    4. Weave in the tail, then turn earwarmer right side out.

    Done! If you’re sharing on social media, be sure to tag me @yarnandchai.design. Hope you enjoyed it!

  • Simple Twisted Earwarmer

    Simple Twisted Earwarmer

    There are so many reasons I love earwarmers. I love wearing them on days when I want my hair up; but beyond that, they’re such a quick, easy crochet project! This one is particularly mindless because it’s simply rows of half double crochet in back loops only, and finished with a beautiful twist that’s much easier than it looks.

    And, if you’re trying to build a craft fair inventory, earwarmers can be a great addition! (Tip: choose just a handful of styles, and work them up in several modern colors. They’re sure to sell!)

    But whether you’re selling, making Christmas gifts, or just making yourself something to feel beautiful in, this pattern is for you.

    Video Tutorial

    You can follow along with me with this tutorial video, regardless of what size you are making! I put the pattern instructions right on screen so you can relax and go at your own pace. Be sure to subscribe, too!

    Prefer a PDF?

    This pattern can be completed using the 100% free version right here on this page. However, many people prefer the convenience of a printable, ad-free PDF.

    All-Access Passholders get the ad-free version of this and all of my other blog patterns. It’s a pretty sweet deal, if I do say so myself! Learn more about it here or continuing scrolling for the free version.

    Simple Twisted Earwarmer

    Difficulty: Beginner/Easy

    Finished Sizes: 17″ x 3.5″ (toddler), 18″ x 4″ (child), 20″ x 4.5″ (teen/adult small), 21″ x 4.5″ (adult large)

    Hook: H (5.0 mm) or whichever hook is needed to obtain correct gauge

    Yarn: Cascade Longwood Sport, a #3 weight yarn, in the following amounts: 80 yds (toddler), 90 yds (child), 110 yds (teen/adult small), 115 yds (adult large). Color used in sample is “Oatmeal”.

    Gauge: 16 HDC (worked in BLO) x 12.5 rows = 4″ square

    You’ll also need: yarn needle

    Terms and Abbreviations:
    ST/STS (stitch/stitches)
    CH (chain)
    HDC (half double crochet)
    BLO (back loop only)

    Notes:
    (1) This pattern is written in American Standard Terms.
    (2) CH1s at the beginning of rows do not count as a stitch in the final stitch count.
    (3) To resize earwarmer, your starting chain can be any number.
    (4) Pattern is written for toddler size with additional sizes in brackets [child, teen/adult small, adult large]. So, for example, if it says “CH71 [75, 85, 89]”, the first number is for the toddler size, and the numbers in brackets are child, teen/adult small, and adult large instructions, respectively. If you are working from printed instructions, it helps to circle or highlight the numbers you are following before you begin.

    INSTRUCTIONS

    To begin: CH69 [73, 81, 85].

    Row 1: HDC in 2nd CH from hook and in each remaining CH. (68 [72, 80, 84])

    Rows 2-12 [2-13, 2-14, 2-14]: CH1, turn. HDC in first ST. HDC in BLO of each of the next 66 [70, 78, 82] STS; 1 ST remains. HDC in both loops of final ST. (68 [72, 80, 84])

    Fasten off, leaving a tail for seaming. Weave in starting tail only.

    Seaming with a Twist

    1. Thread the long finishing tail through your yarn needle and gently set it aside. Lay ear warmer flat, then gather the edges and layer them together as shown.

    2. Thread the yarn needle across the edges, being sure to grab yarn from all four layers.

    3. Continue to weave the yarn needle back and forth across the surface of the edges, being sure to grab yarn from all four layers each time.

    4. Weave in the tail, then turn earwarmer right side out.

    Done! If you’re sharing on social media, be sure to hashtag #simpletwistedearwarmer and tag me @yarnandchai.design. Stay warm out there!

  • Hope Earwarmer

    Hope Earwarmer

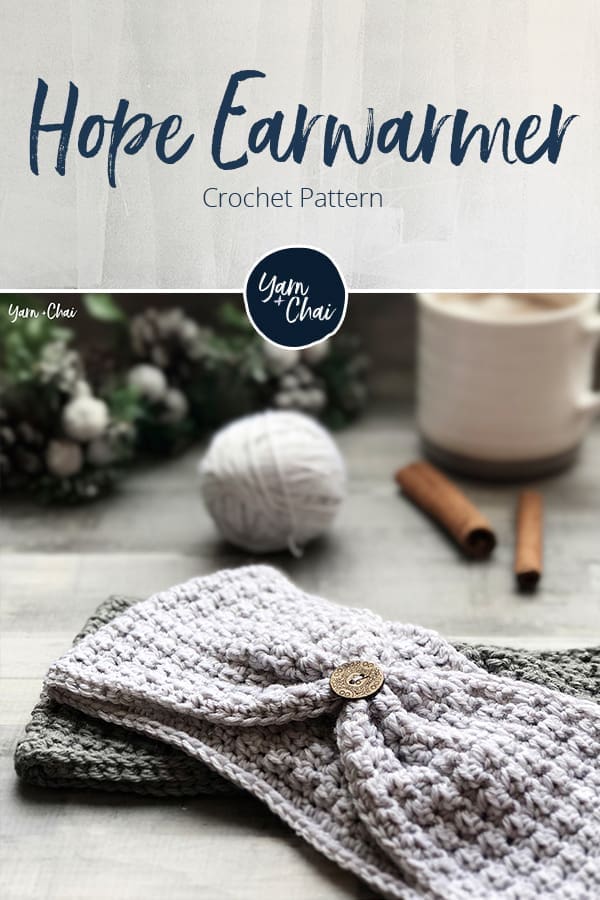
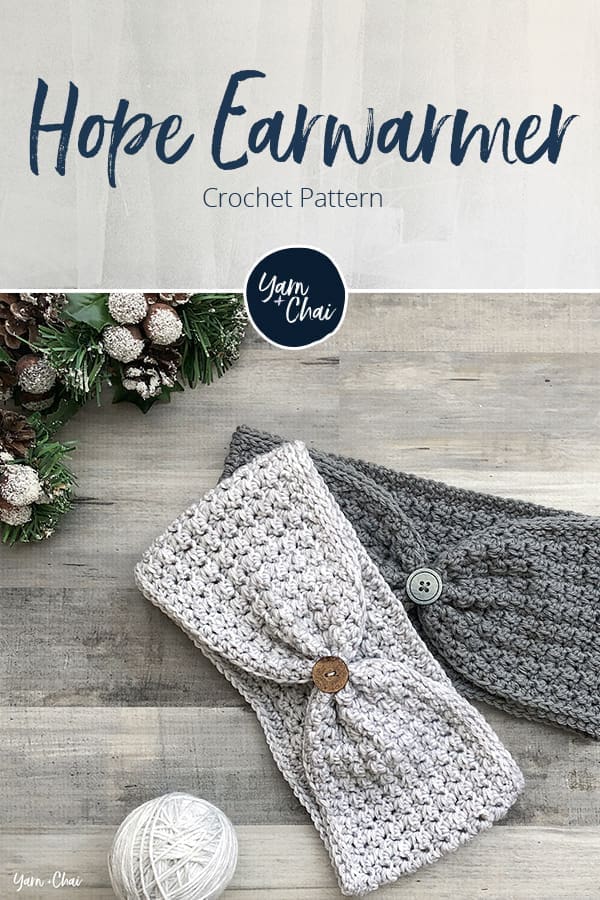
    When the weather starts to get cold here in Michigan, one of my favorite accessories to help beat the chill is an earwarmer. I love that I can still wear my hair piled up all messy on the top of my head — or, if it’s a good hair day, down and wavy — because a cozy earwarmer will look great either way.

    This earwarmer is easy and quick. Don’t let the #3 DK weight yarn fool you; it will work up fast, and still feel light on your head. The seam is conveniently hidden underneath the button, and although I am totally ok with a necessary seam, I always get excited when I find a good hiding place for it!

    Visual Learner?

    You can follow along with me with this tutorial video, regardless of what size you are making! I put the pattern instructions right on screen so you can relax and go at your own pace. Be sure to subscribe, too!

    Prefer a PDF?

    This pattern can be completed using the 100% free version right here on this page. However, many people prefer the convenience of a printable, ad-free PDF.

    All-Access Passholders get the ad-free version of this and all of my other blog patterns. It’s a pretty sweet deal, if I do say so myself! Learn more about it here or continuing scrolling for the free version.

    Hope Earwarmer

    View on Ravelry

    Difficulty: Easy

    Finished Sizes: 17″ x 3.5″ (toddler), 18″ x 4″ (child), 20″ x 4.5″ (teen), 21″ x 4.5″ (adult)

    Hook: H (5.0 mm) or whichever hook is needed to obtain correct gauge

    Yarn: Yarn Bee Sweet Delight, a #3 weight yarn, in the following amounts: 80 yds (toddler), 95 yds (child), 115 yds (teen), 120 yds (adult). Colors used in samples are Toy Elephant and Toy Elephant Marled.

    Gauge: 17 HDC x 12 rows = 4″ square

    You’ll also need: 7/8″ button, and a yarn needle that can fit through it

    Terms and Abbreviations:
    ST/STS (stitch/stitches)
    SL ST (slip stitch)
    SK (skip)
    CH (chain)
    SC (single crochet)
    HDC (half double crochet)
    SC+HDC (complete a full single crochet and a full half double crochet in the same stitch)
    3rd LOOP (work stitch into 3rd loop only – see “Special Stitch”)

    Special Stitch:

    3rd Loop Only
    Half double crochet stitches have a 3rd loop that we utilize in this pattern. When working in turned rounds, as in this pattern, the 3rd loop can be found just below the front loop on the side of the work that is facing you. When instructed to work in “3rd loop only”, insert your hook into this special loop. This creates a delicate braided look on the opposite side of the pattern.

    Notes:
    (1) This pattern is written in American Standard Terms.
    (2) CH1s at the beginning of rounds do not count as a stitch in the final stitch count.
    (3) To resize earwarmer, your starting chain can be any odd number.
    (4) Pattern is written for toddler size with additional sizes in brackets [child, teen, adult]. So, for example, if it says “CH71 [75, 85, 89]”, the first number is for the toddler size, and the numbers in brackets are child, teen, and adult instructions, respectively. If you are working from printed instructions, it helps to circle or highlight the numbers you are following before you begin.
    (5) Knowing where to place your first stitch can be tricky when working in joined rounds. Usually, it doesn’t matter as long as you’re consistent, but for this pattern, it does matter… especially from Round 4 on! So, here is an image to help you identify where to put your first stitch. Because Round 4 instructs you to skip the first stitch, you will put your SC+HDC combo in the stitch marked as the 2nd stitch (which is also easy to find thanks to the spaces created by the SC+HDC combos from Round 3).

    INSTRUCTIONS

    To begin: CH71 [75, 85, 89].

    Round 1: HDC in 2nd CH from hook and in each remaining CH. Bring ends together, without twisting, and join to the top of the first ST with a SL ST. (70 [74, 84, 88])

    Round 2: CH1, turn. SC in 3rd loop of each ST around. Join to the top of the first ST with a SL ST. (70 [74, 84, 88])

    Rounds 3-14 [3-16, 3-18, 3-18]: CH1, turn. SK first ST, SC+HDC in next ST. (SK next ST, SC+HDC in next ST) around. Join to the top of the first ST with a SL ST. (70 [74, 84, 88])

    Round 15 [17, 19, 19]: CH1, turn. HDC in each ST around. Join to the top of the first ST with a SL ST. (70 [74, 84, 88])

    Round 16 [18, 20, 20]: CH1, turn. SC in 3rd loop of each ST around. Join to the top of the first ST with a SL ST. (70 [74, 84, 88])

    Fasten off, leaving a long tail for cinching. Use yarn needle and starting tail to sew the small gap between the first and last stitches of Round 1 closed, then weave in that tail only.

    Cinching

    1. Thread the long finishing tail through your yarn needle and gently set it aside. Gather the seamed section of the headband, and fold in half so that the fold is facing you.

    2. Holding on to the fold with one hand, use your other hand to pinch the upper half in half again. The top edge of the earwarmer should be facing down. Grasp the fold together with the first fold, then repeat with the bottom section. When you’re finished, you should be pinching three folds together, with both the top and bottom edges of the earwarmer facing down.

    3. Run your yarn needle through all three sections of gathered material. The closer you get to the surface, the better your cinch will look; so I run mine right under just a couple strands of each fold.

    4. Wrap the yarn around the underside of the cinch, then through the sections again. Do this a few times to secure the cinch, then thread the needle up through the 1st hole of the button and back down through the 2nd hole, position it on the cinch, and wrap yarn around to the underside to tie off. (If your button has four holes, complete the first two, wrap yarn around the bottom, then come back and complete the last two before tying off.) Weave in the tail.

    Done! If you’re sharing on social media, be sure to hashtag #hopeearwarmer and tag me @yarnandchai.design. Stay warm out there!

  • Malia Earwarmer

    Malia Earwarmer

     This pattern is part of the Fall 2017 Malia CAL (Crochet-Along). To view the other patterns in this collection (including a beanie, slouch, cowl and infinity scarf), please visit the Malia CAL Homepage.

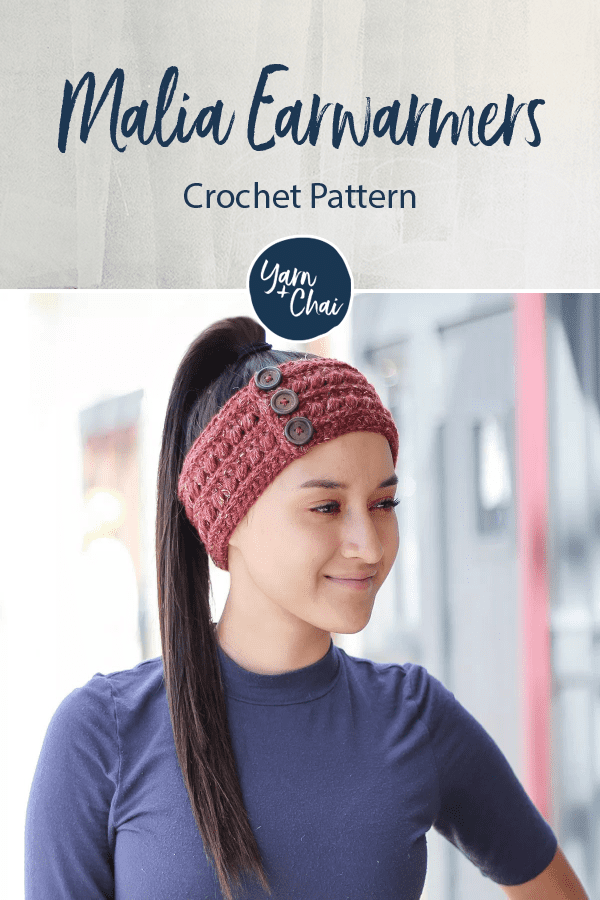
    When you want to wear your hair up, but you still want to keep your ears warm, it’s time to grab an earwarmer! This quick pattern is one of the simplest of the Malia collection and you’ll be able to crochet it up in no time.

    If you need a little help with the stitches, check out the tutorial video I made for the cowl and scarf; just use the numbers in this pattern instead of the ones called for on the video! Or, scroll down to find the written pattern.

    Free Printable Tags

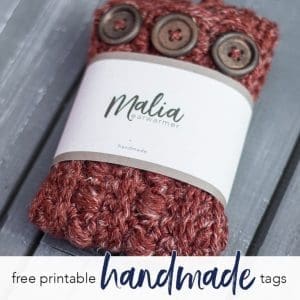
    I made some cute printable tags for this pattern that you are welcome to use! If you’re selling or gifting this earwarmer, a tag or wrap just ups the professionalism, in my opinion. I included a wraparound label (shown in the photo) as well as a smaller tag that can be attached to a piece of decorative string wrapped around your finished product, by punching a hole through the corner and threading the string through before tying a bow to secure. Print on cardstock for best results!

    Prefer a PDF?

    This pattern can be completed using the 100% free version right here on this page. However, many people prefer the convenience of a printable, ad-free PDF.

    All-Access Passholders get the ad-free version of this and all of my other blog patterns. It’s a pretty sweet deal, if I do say so myself! Learn more about it here or continuing scrolling for the free version.

    MALIA EARWARMER

    Difficulty: Easy

    Finished Size: 20″ long (before seaming) x 3″ tall

    Hook: I (5.50 mm) or whichever hook is needed to obtain correct gauge

    Yarn: 80 yards of #4 aran weight. Yarn used in sample photos is Yarn Bee’s Rustic Romantic in “Red Roads.”

    Gauge: To ensure the best results, the gauge check is a swatch taken straight from the pattern. Upon completion, you should have a 4” square. If yours is larger, consider using a smaller hook or a thinner #4 yarn. If yours is smaller, consider using a larger hook.

    Pattern for Gauge:
    CH17.
    Row 1: SC in 2nd CH from hook and in each remaining CH. (16)
    Row 2: CH1, turn. SC in first ST. (SK next ST, LBS in next ST) 7 times. SC in final ST. (16)
    Row 3: CH1, turn. HDC in each ST across. (16)
    Row 4: CH1, turn. SC in first ST. SC in 3rd loop of each of the next 14 STS. SC in final ST. (16)
    Row 5: CH1, turn. SC in each ST across. (16)
    Row 6: CH1, turn. SC in first ST. (LBS in next ST, SK next ST) 7 times. SC in final ST. (16)
    Row 7: CH1, turn. HDC in each ST across. (16)
    Row 8: CH1, turn. SC in first ST. SC in 3rd loop of each of the next 14 STS. SC in final ST. (16)
    Row 9: CH1, turn. SC in each ST across. (16)
    Rows 10-16: Repeat Rows 2-8. (16)

    You’ll also need: Yarn needle, 3 buttons (1″ – 1-1/8″)

    Terms and Abbreviations:
    FHDC 
    (foundation half double crochet – see “Special Stitches”)
    ST/STS
     (stitch/stitches)
    SL ST (slip stitch)
    SK (skip)
    CH (chain)
    SC (single crochet)
    HDC (half double crochet)
    LBS (large bean stitch – see “Special Stitches”)
    BLO (back loop only)
    3rd LOOP (work stitch into 3rd loop only – see “Special Stitches”)

    Special Stitches:

    Foundation Half Double Crochet (FHDC)
    This is the recommended way of beginning the pattern and is better shown than explained, so please watch the included tutorial video as a guide. There is also an optional classic chain start noted in the pattern, if you would like to do that instead.

    Large Bean Stitch (LBS)
    Insert hook into stitch, yarn over and pull through (2 loops on hook). Yarn over, insert hook into same stitch, yarn over and pull through (4 loops on hook). Yarn over, insert hook into same stitch, yarn over and pull through (6 loops on hook). Yarn over, insert hook into same stitch, yarn over and pull through (8 loops on hook). Yarn over and pull through all 8 loops. Chain 1 to close the stitch. (Because this stitch creates two sets of loops – one when creating the bean, and one when closing the stitch – each completed Large Bean Stitch will count for two stitches in the row or round’s final stitch count.)

    3rd Loop Only
    Half double crochet stitches have a 3rd loop that we utilize in this pattern. When working in turned rows, as in this pattern, the 3rd loop can be found just below the front loop on the side of the work that is facing you. When instructed to work in “3rd loop only”, insert your hook into this special loop. This creates a delicate braided look on the opposite side of the pattern.

    Notes:
    (1) This pattern is written in American Standard Terms.
    (2) CH1s at the beginning of rows do not count as a stitch in the final stitch count.
    (3) A video tutorial for the stitch pattern is available up in the post, or by clicking here.
    (4) To make earwarmer larger or smaller, add or subtract an even number of stitches from the starting row or chain. For reference, if you met gauge, 4 stitches = 1″.

    INSTRUCTIONS

    Row 1: FHDC* 78. (*Alternate start: CH79, HDC in 2nd CH from hook and in each remaining CH) (78)

    Row 2: CH1, turn. SC in first ST. SC in 3rd loop of each of the next 76 STS. SC in final ST. (78)

    Row 3: CH1, turn. SC in each ST across. (78)

    Row 4: CH1, turn. SC in first ST. (SK next ST, LBS in next ST) 38 times. SC in final ST. (78)

    Row 5: CH1, turn. HDC in each ST across. (78)

    Row 6: CH1, turn. SC in first ST. SC in 3rd loop of each of the next 76 STS. SC in final ST. (78)

    Row 7: CH1, turn. SC in each ST across. (78)

    Row 8: CH1, turn. SC in first ST. (LBS in next ST, SK next ST) 38 times. SC in final ST. (78)

    Row 9: CH1, turn. HDC in each ST across. (78)

    Row 10: CH1, turn. SC in first ST. SC in 3rd loop of each of the next 76 STS. SC in final ST. (78)

    Edging: CH1, SC in same ST to round corner. Working down the short edge of the earwarmer, SC in each row (10). Ch1 to round corner. SC in each ST across long edge of earwarmer. CH1 to round corner. SC in each row of next short edge. CH1 to round corner. SC in each ST across remaining long edge. Ch1. Join with a SL ST to the first SC of the edging. Fasten off and weave in ends.

    Buttons: Overlap one short edge over the other by about 1″. Pin in place if needed. Attach buttons at top, bottom, and center, sewing through both layers to hold earwarmer together.

    Done! If you’re sharing on social media, be sure to hashtag #maliacaland #maliaearwarmer and tag me @littlemonkeyscrochet. Hope you enjoyed it!

  • Easy Herringbone Earwarmer

    Easy Herringbone Earwarmer

    Ready for a quick project that doesn’t use lots of yarn, is easy enough for a confident beginner, and will make a great Christmas present?

    The Easy Herringbone Earwarmer is a simple fall accessory, perfect for those autumn nights when the air is getting crisp. Throw your hair up in a messy bun or wear it down; either way, the Easy Herringbone Earwarmer will be a perfect addition. (And it goes great with my last pattern release, the Herringbone Buttoned Cowl!)

    The Yarn

    For this pattern, I used Longwood Sport from Cascade Yarns. Longwood Sport is a #3 light, 100% super wash extra fine merino wool. It is unbelievably soft and has perfect stitch definition. It’s my favorite yarn of anything I’ve ever tried; a little pricier than what you find in the big stores, but soooo worth it, especially for special projects!

    Prefer a PDF?

    This pattern can be completed using the 100% free version right here on this page. However, many people prefer the convenience of a printable, ad-free PDF.

    All-Access Passholders get the ad-free version of this and all of my other blog patterns. It’s a pretty sweet deal, if I do say so myself! Learn more about it here or continuing scrolling for the free version.

    HERRINGBONE EARWARMER

    Difficulty: Easy/Beginner

    Finished Size: 19.5″ around (when buttoned) x 3.25″ wide

    Hook: H (5.00mm)

    Yarn: About 80 yards of Longwood Sport from Cascade Yarns. (Longwood Sport is a #3 light yarn.)

    Gauge: 4 rows of 8 HHDC = 2″ (see “Special Stitch” below for explanation of HHDC)

    You’ll also need: Yarn needle, 1″ button, sewing needle, and thread to match yarn color.

    Abbreviations Used:
    ST/STS
     (stitches)
    SL ST (slip stitch)
    SK (skip)
    CH (chain)
    SC (single crochet)
    HHDC (herringbone half double crochet; see “special stitch” below)
    SC2TOG (single crochet two together)

    Special Stitch:
    HHDC – Herringbone Half Double Crochet. Here’s how you do it:

    HHDC: Yarn over, insert hook into stitch. Yarn over, pull loop through stitch AND through first loop on hook (this is similar to a slip stitch motion). Two loops remain on hook. Yarn over and pull through both loops.

    (If you need additional help, Moogly has an excellent video tutorial here. Please note that while her video considers the CH2 at the beginning of rows as a stitch, the pattern below does not.)

    Notes:
    (1) This pattern is written in American Standard Terms.
    (2) CH1 at the beginning of rows does not count as a stitch.
    (3) To adjust for different sizes: All you need to do to make the headband smaller or larger is subtract from or add to your starting chain. There are 4 stitches in an inch, so if – for instance – you wanted a headband that was 17.5″ long instead of 19.5″ long, you would start with 8 fewer chains.
    – – – – – – – – – – – – – – – – – – – – – – – –

    THE PATTERN

    To begin: CH66.

    Row 1: HHDC in 2nd CH from hook and in each CH across. (65)

    Rows 2-11: CH1, turn. HHDC in each ST across. (65)

    We are now moving on to the first side section of the earwarmer.

    Row 12: CH1, do not turn. SC in same ST, and working down the short end of the piece, SC in each row (from rows 2-11) across, for a total of 11 STS. (11)

    Row 13: CH1, turn. SC2TOG, SC in each of the next 7 STS, SC2TOG. (9)

    Rows 14-15: CH1, turn. SC in each ST across. (9)

    Row 16: CH1, turn. SC2TOG, SC in each of the next 5 STS, SC2TOG. (7)

    Rows 17-18: CH1, turn. SC in each ST across. (7)

    Row 19: CH1, turn. SC2TOG, SC in each of the next 3 STS, SC2TOG. (5)

    Row 20: CH1, turn. SC in each ST across. (5)

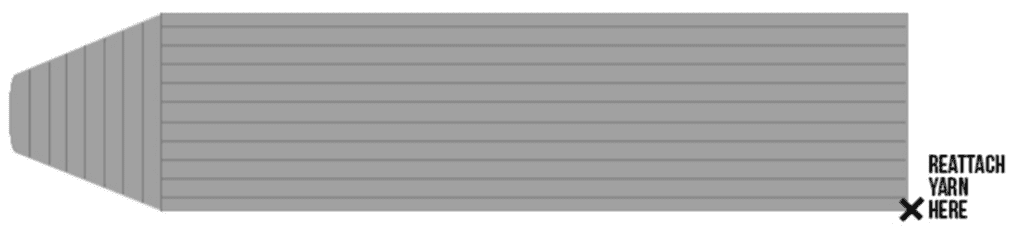
    Fasten off yarn and weave in ends. Next, we’re going to add the other side section. Reattach yarn on opposite end of the piece, starting at the right side.

    Row 21: CH1, SC in same ST. Working down the short end of the piece, SC in each row (from rows 2-11) across, for a total of 11 STS. (11)

    Row 22: CH1, turn. SC2TOG, SC in each of the next 7 STS, SC2TOG. (9)

    Rows 23-24: CH1, turn. SC in each ST across. (9)

    Row 25: CH1, turn. SC2TOG, SC in each of the next 5 STS, SC2TOG. (7)

    Row 26: CH1, turn. SC in each ST across. (7)

    Row 27: CH1, turn. SC in each of the first 2 STS. CH3, SK 3 STS. SC in each of the remaining 2 STS. (4, + CH3)

    Row 28: CH1, turn. SC2TOG. 3SC in the CH3 space from previous row. SC2TOG. (5)

    Row 29: CH1, turn. SC in each ST across. (5)

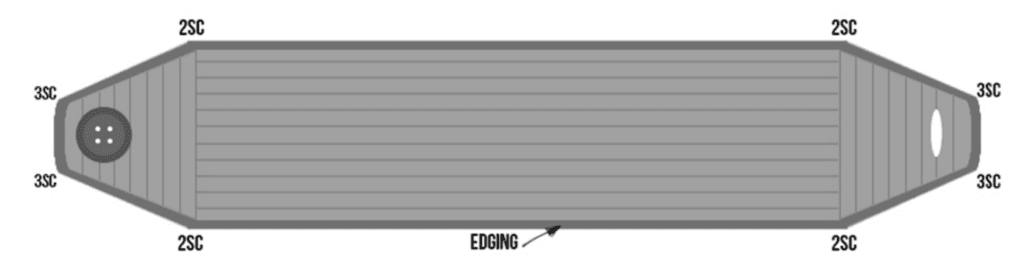
    Edging: CH1, do not turn. SC evenly around the entire piece, putting 3SC in each end corner, and 2SC in each slight corner where the HHDC rows meet the SC rows. (Use the diagram below for help with corners.) Join with a SL ST to the first SC.

    Fasten off and weave in all ends.

    Button: Sew your button to the end with no buttonhole.