If you’re looking for a fast one-skein project, you’ve come to the right place, because day 3 of my 12 Days of Christmas is something you can create in practically no time at all!
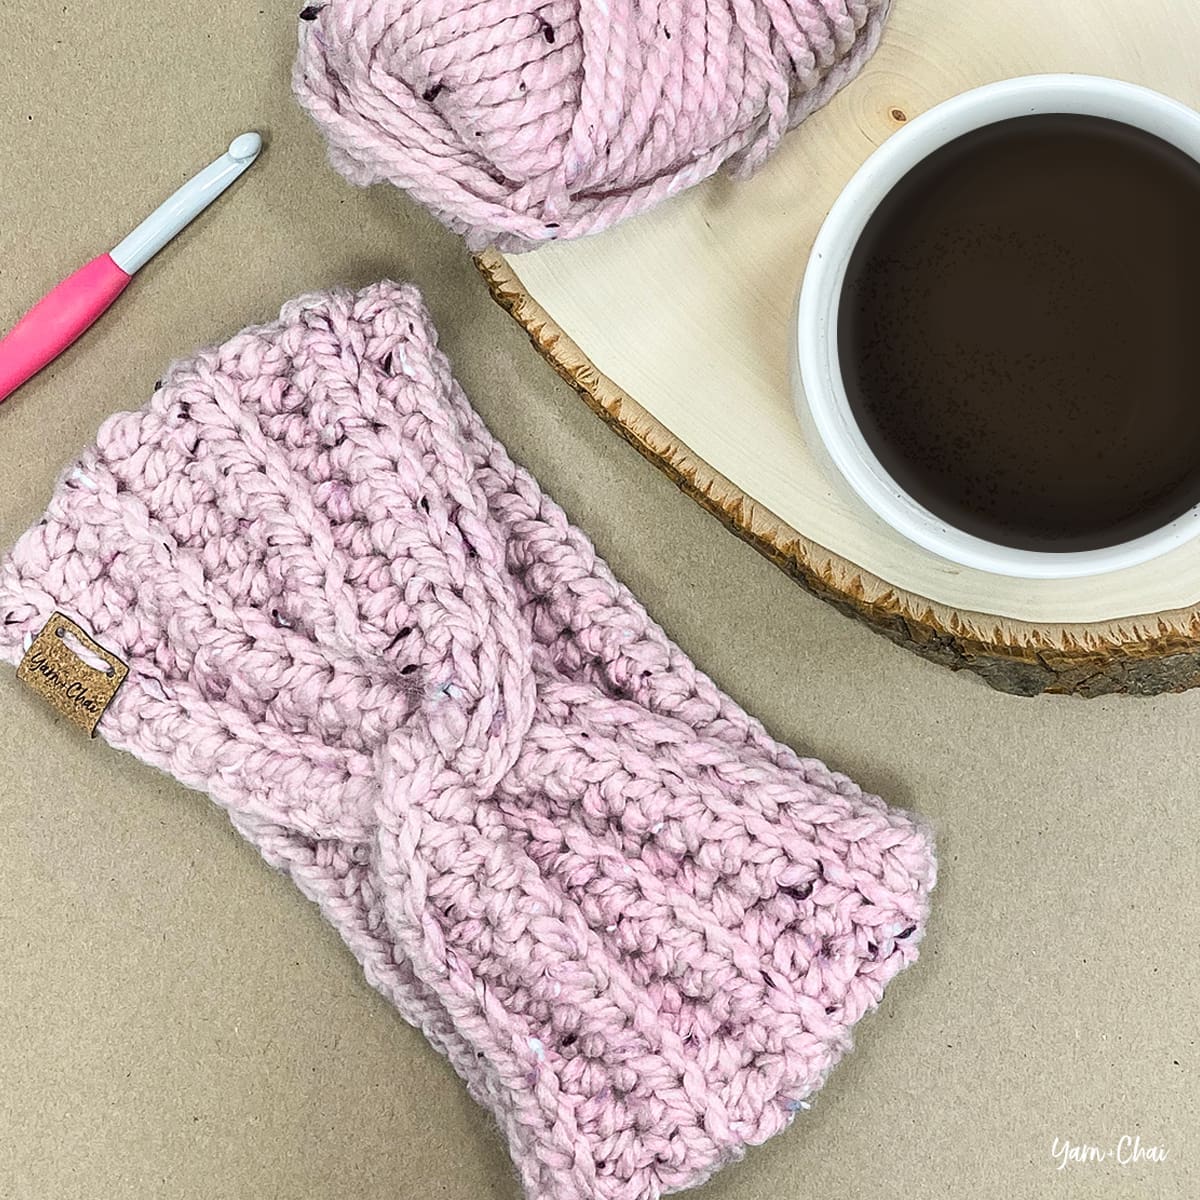
Last Christmas, I needed to come up with gifts for my three nieces, who are all young adults. It was coming down to the wire — I’m talking way too late to order from Amazon — and I knew the quickest option would be to look at my yarn stash and come up with a trendy and fast pattern. I grabbed a skein of bulky #5 yarn and got to work on a chunky version of my Simple Twisted Earwarmer. I was so happy when the end result looked cute and cozy… and it only took me about 30 minutes from start to finish!
I wrote out the pattern below in case you’re in need of a speedy project for yourself, for a gift, or even for a holiday craft fair.
Prefer a PDF?
This pattern can be completed using the 100% free version right here on this page. However, many people prefer the convenience of a printable, ad-free PDF.
All-Access Passholders get the ad-free version of this and all of my other blog patterns. It’s a pretty sweet deal, if I do say so myself! Learn more about it here or continuing scrolling for the free version.
Finished Sizes: 17″ x 3.5″ (toddler), 18″ x 4″ (child), 20″ x 4.5″ (teen/adult small), 21″ x 4.5″ (adult large)
Hook: L (8mm) or whichever hook is needed to obtain correct gauge
Yarn: I used Loops & Threads Charisma, a soft, acrylic #5 weight yarn. (Loops & Threads is a Michael’s brand.) You’ll need about 30 yards (toddler), 45 yards (child), 60 yards (teen / adult small), or 65 yards (adult large). My samples were worked in colorways White Tweed, Cloud, and Blush Tweed. (If you order this yarn online, note that the Tweed version of Charisma has a separate listing!)
Notes: (1) CH1s at the beginning of rows do not count as a stitch in the final stitch count. (2) If you’re a visual learner, you can follow my video tutorial for the Simple Twisted Earwarmer. That pattern uses a #4 weight yarn, but you can substitute the starting chain and stitch count from this pattern and still follow along. (3) To change the length of your earwarmer, add or subtract any number from your starting chain. To change the width, add or subtract from the total number of rows. There is no stitch multiple to worry about. (4) Pattern is written for toddler size with additional sizes in parentheses (child, teen/adult small, adult large).
INSTRUCTIONS
Tobegin: CH39 (41, 46, 48).
Row 1: HDC in 2nd CH from hook and in each remaining CH. Stitch count: 38 (40, 45, 47)
Rows 2-6 (2-7, 2-8, 2-8): CH1, turn. HDC in first ST. HDC in BLO across until 1 ST remains. HDC in final ST. Stitch count: 38 (40, 45, 47)
Fasten off, leaving a 12″ tail for seaming. Weave in starting tail.
Adding the Twist
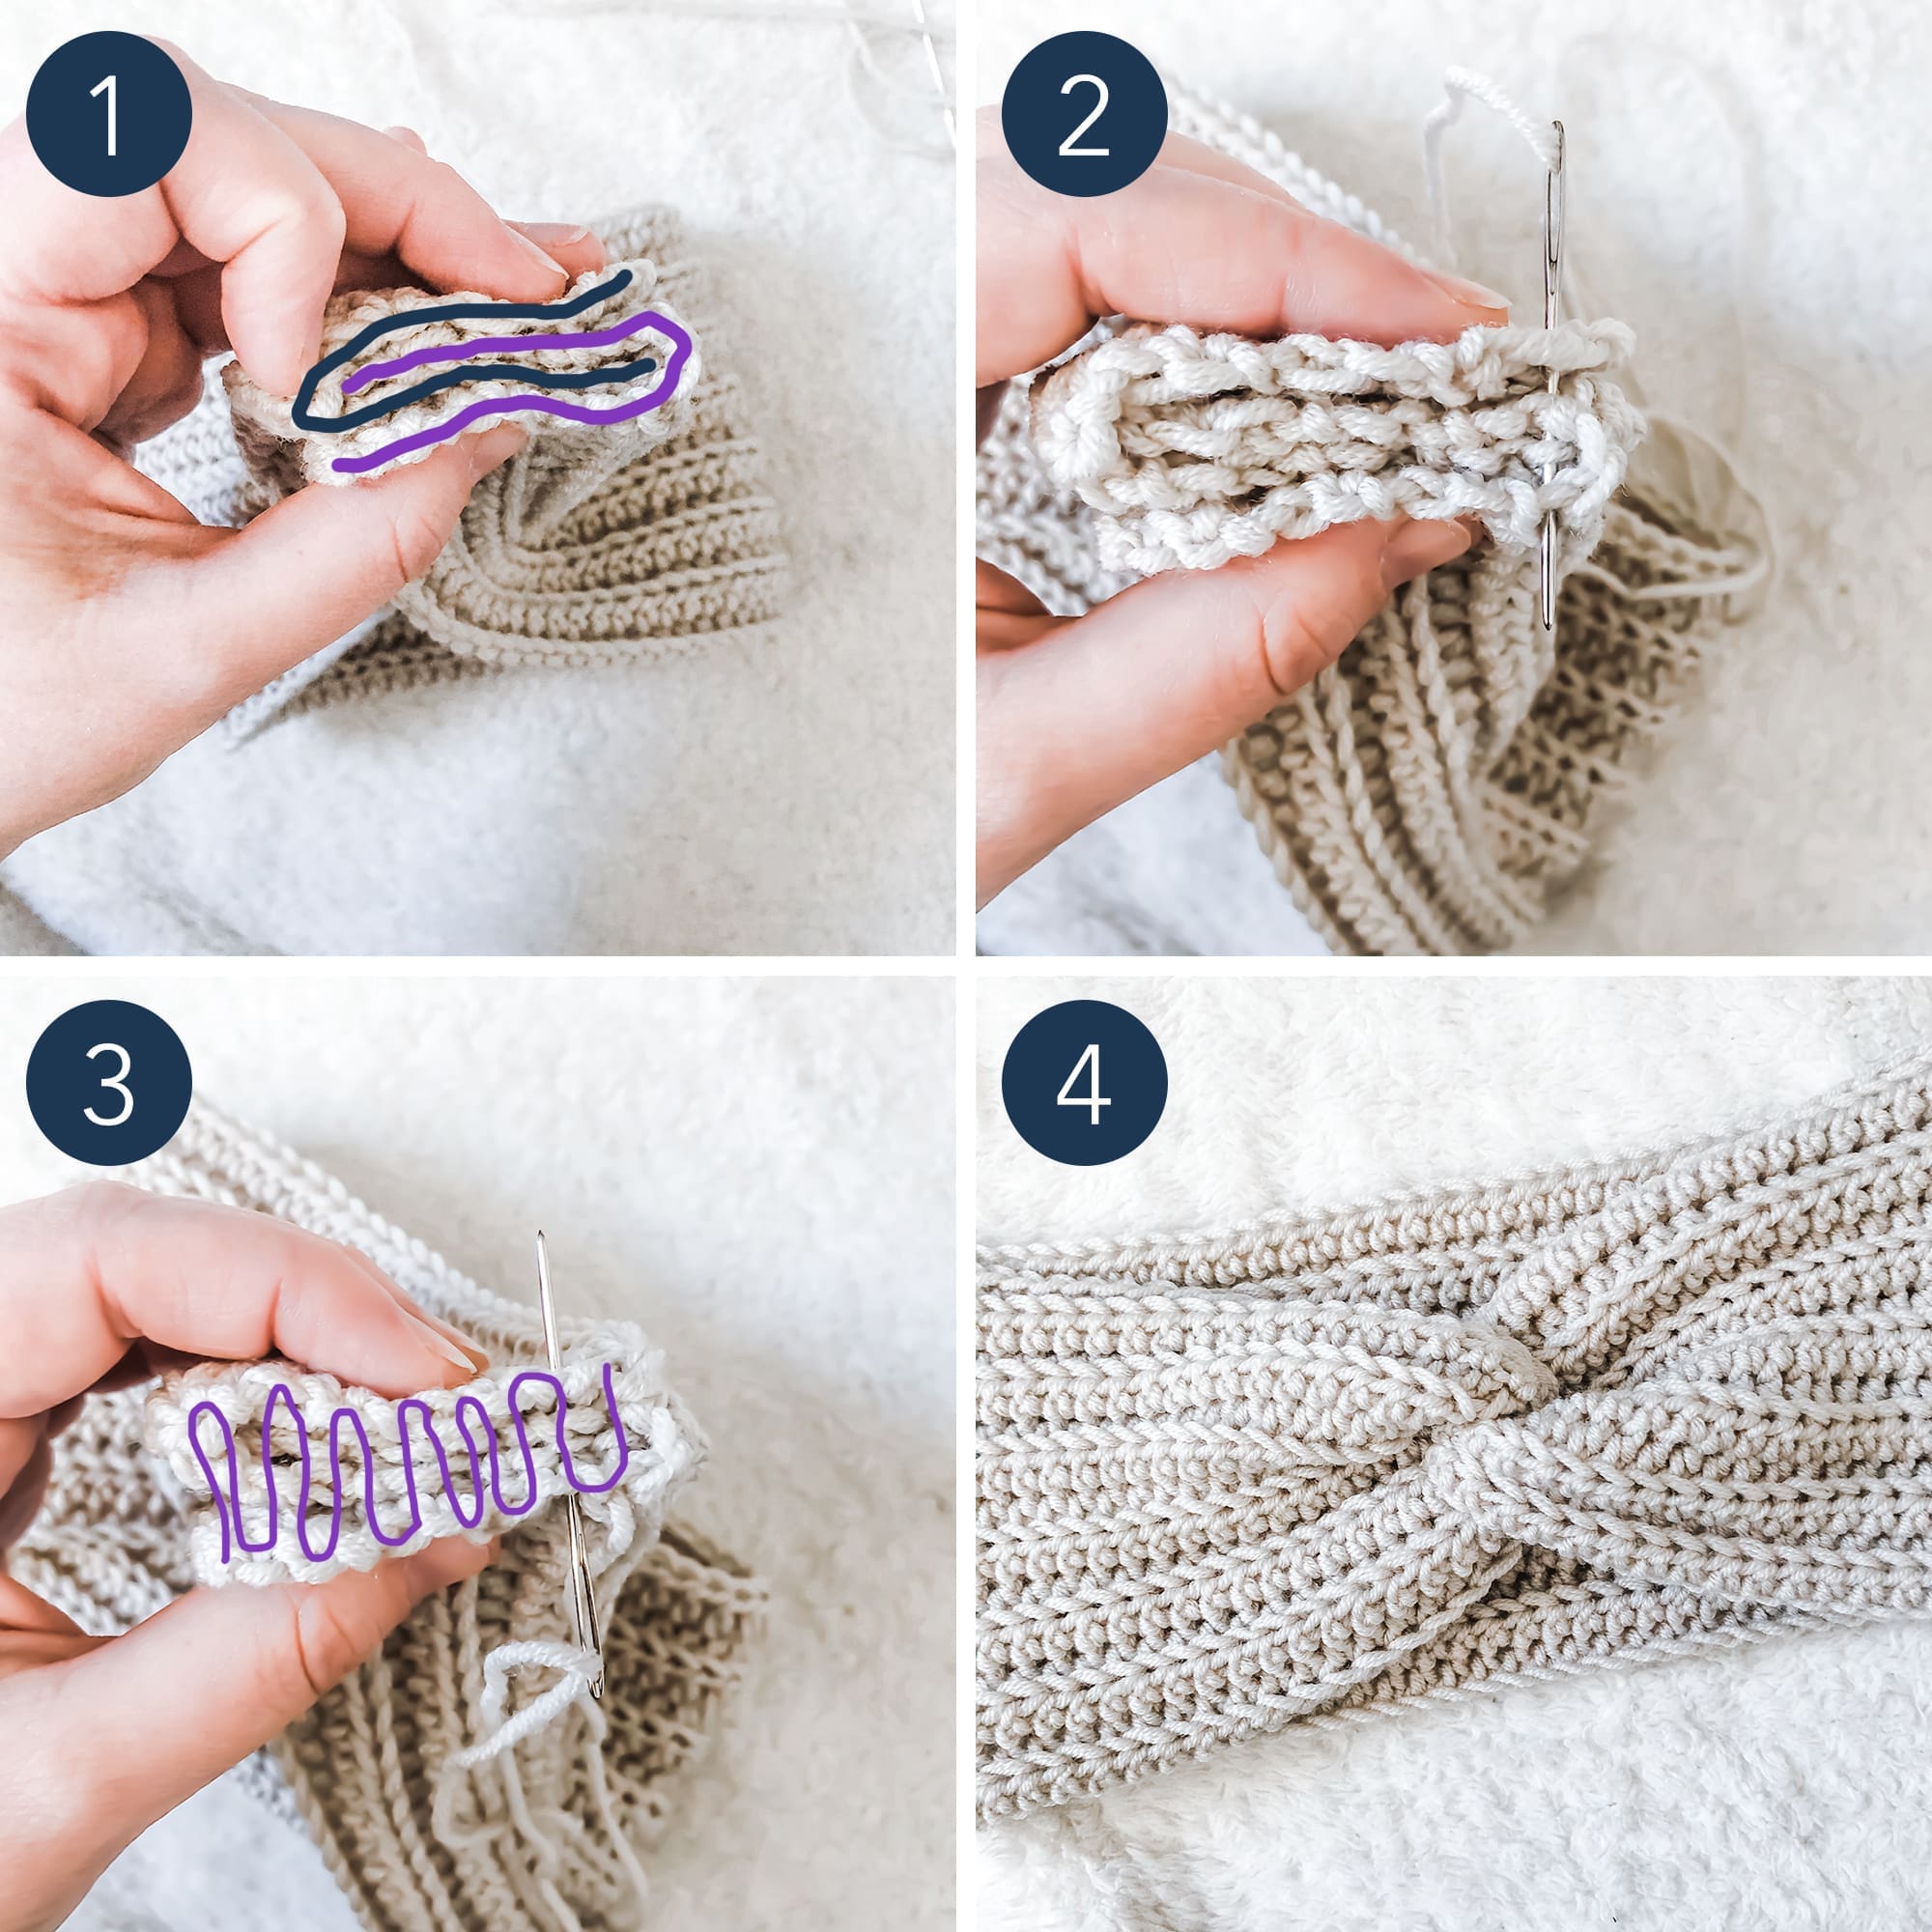
Follow the instructions below to seam your earwarmer with a twist. Use the image below to guide you. (They are actually from my Simple Twisted Earwarmer pattern, but the technique is the same.)
1. Thread the long finishing tail through your yarn needle and gently set it aside. Lay ear warmer flat, then gather the edges and layer them together as shown, making sure that the corner with the finishing tail is at either the top or the bottom (not one of the layers in the middle).
2. Thread the yarn needle across the edges, being sure to grab yarn from all four layers.
3. Continue to weave the yarn needle back and forth across the surface of the edges, being sure to grab yarn from all four layers each time.
4. Weave in the tail, then turn earwarmer right side out.
Done! If you’re sharing on social media, be sure to tag me @yarnandchai.design so I can see your beautiful work!
This pattern is originally part of my 12 Days of Christmas! Click here to return to the 12 Days of Christmas homepage.
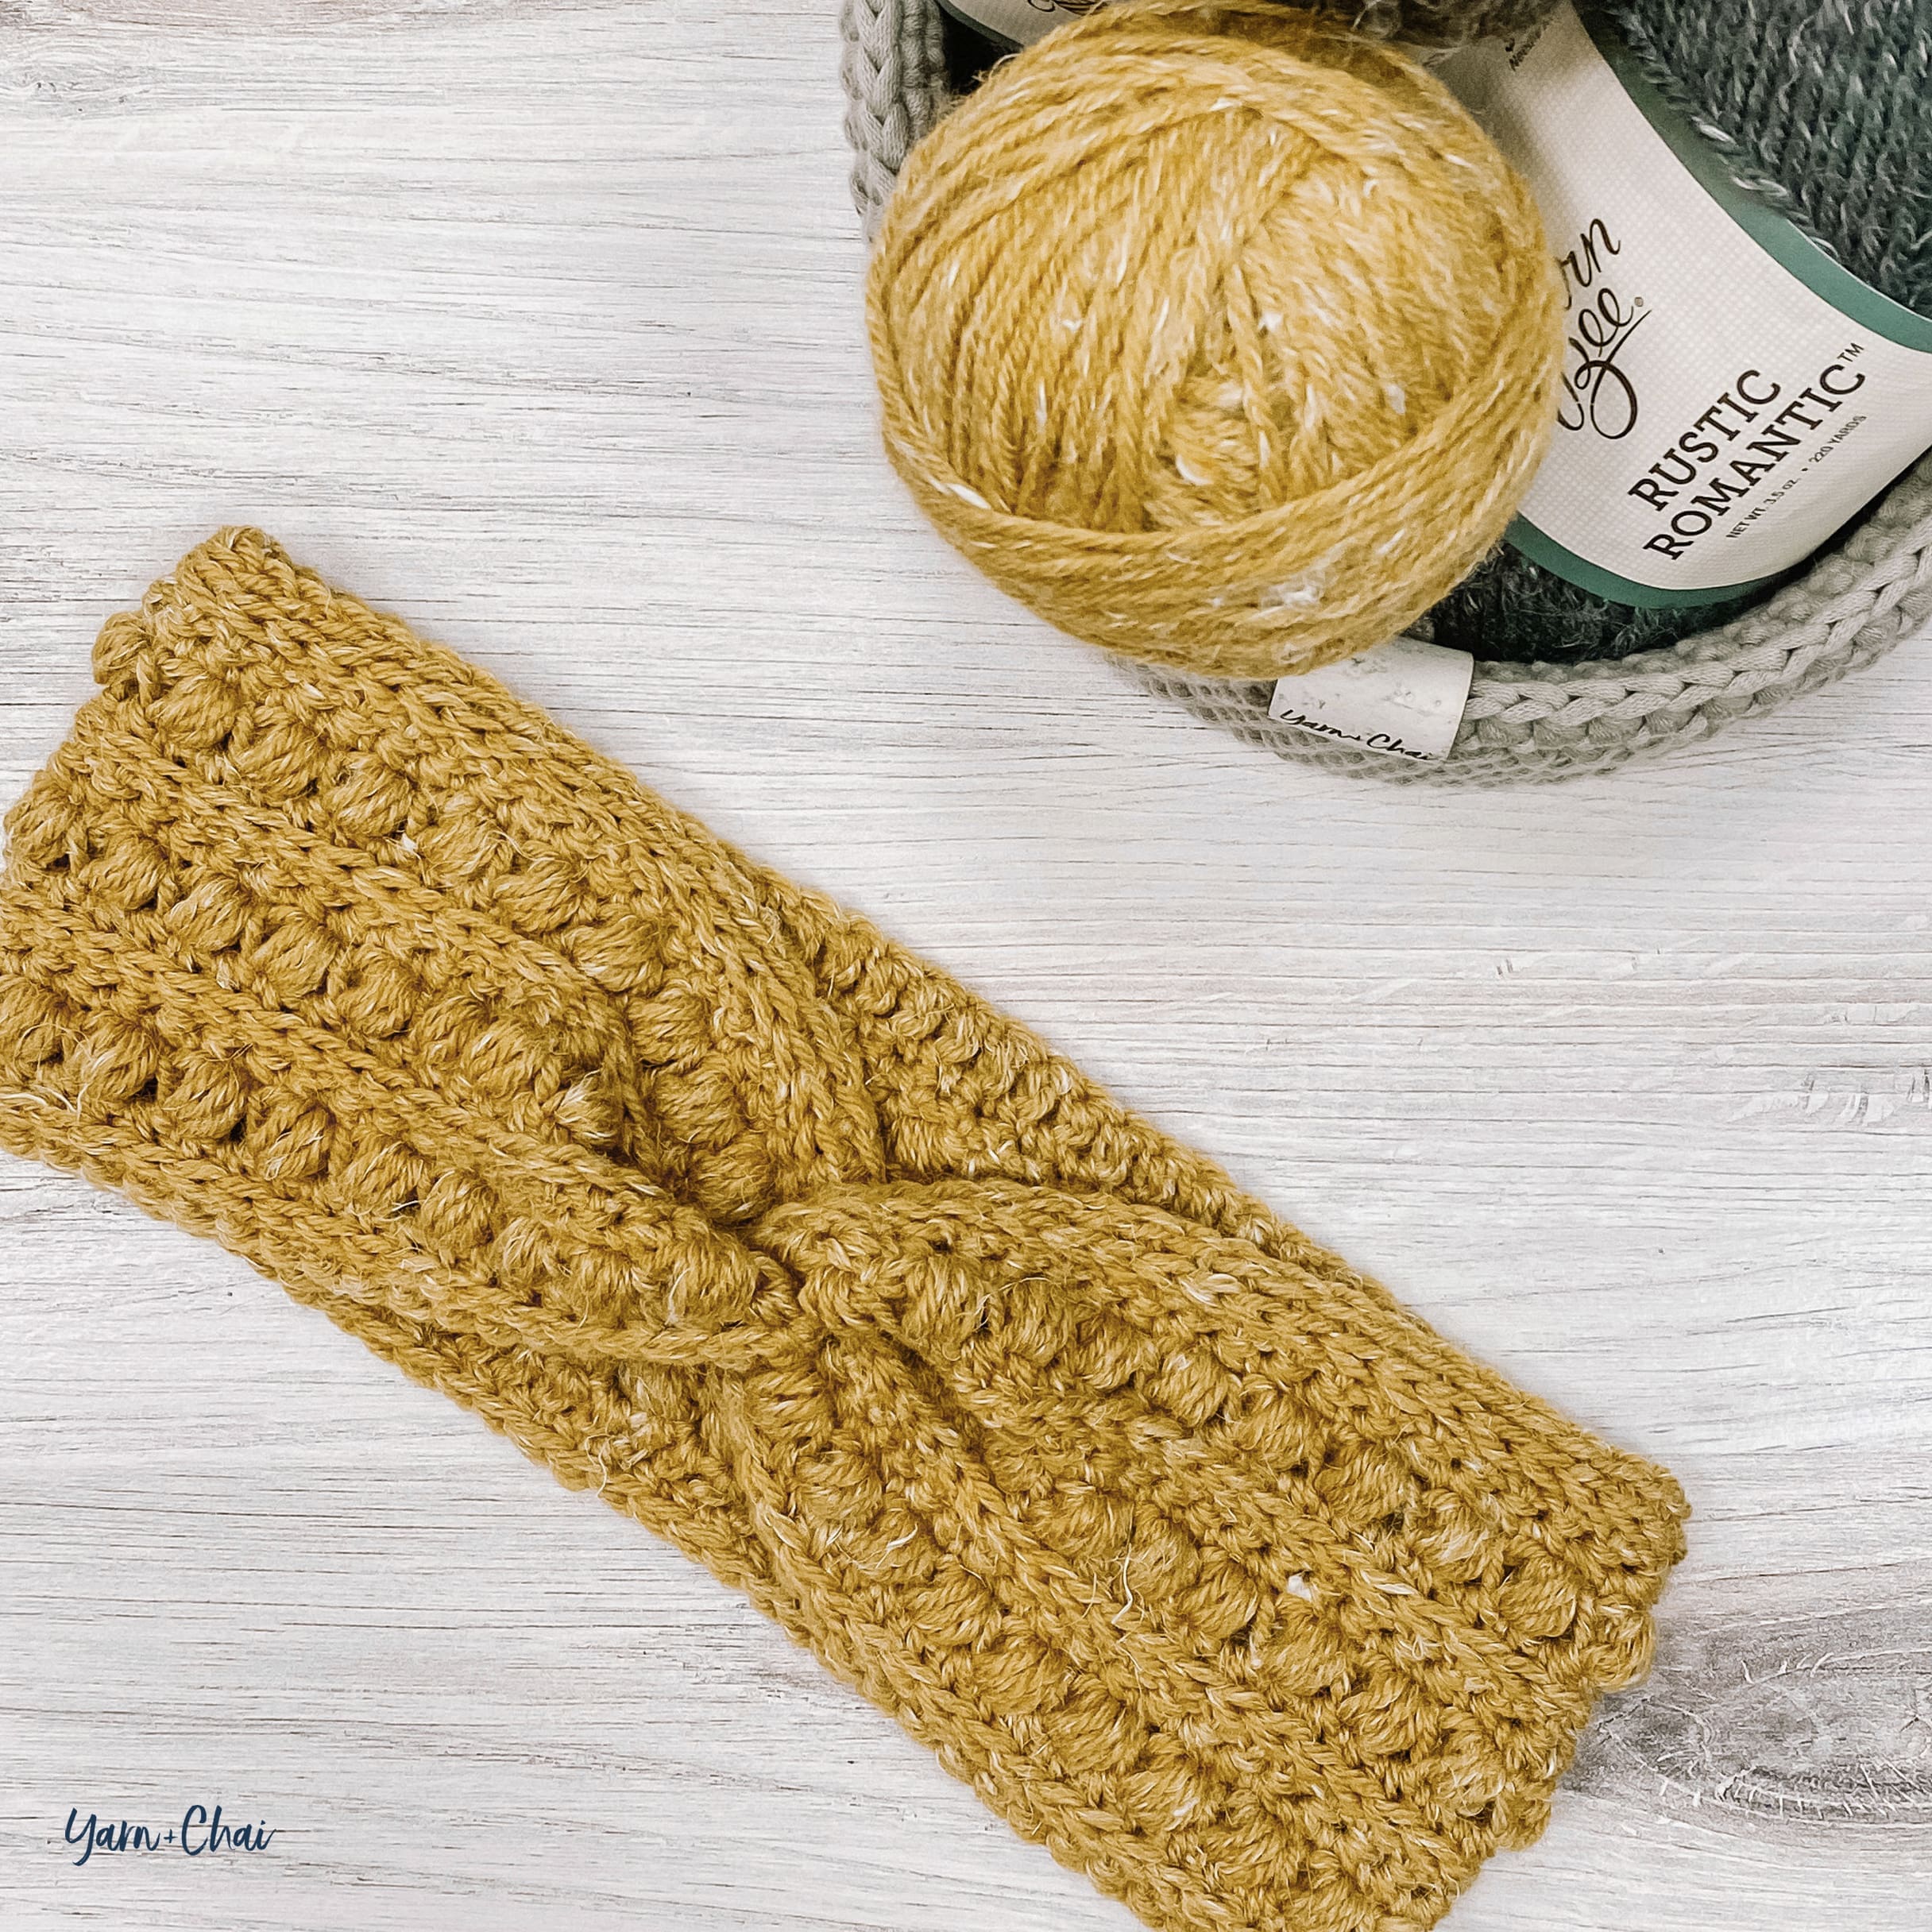
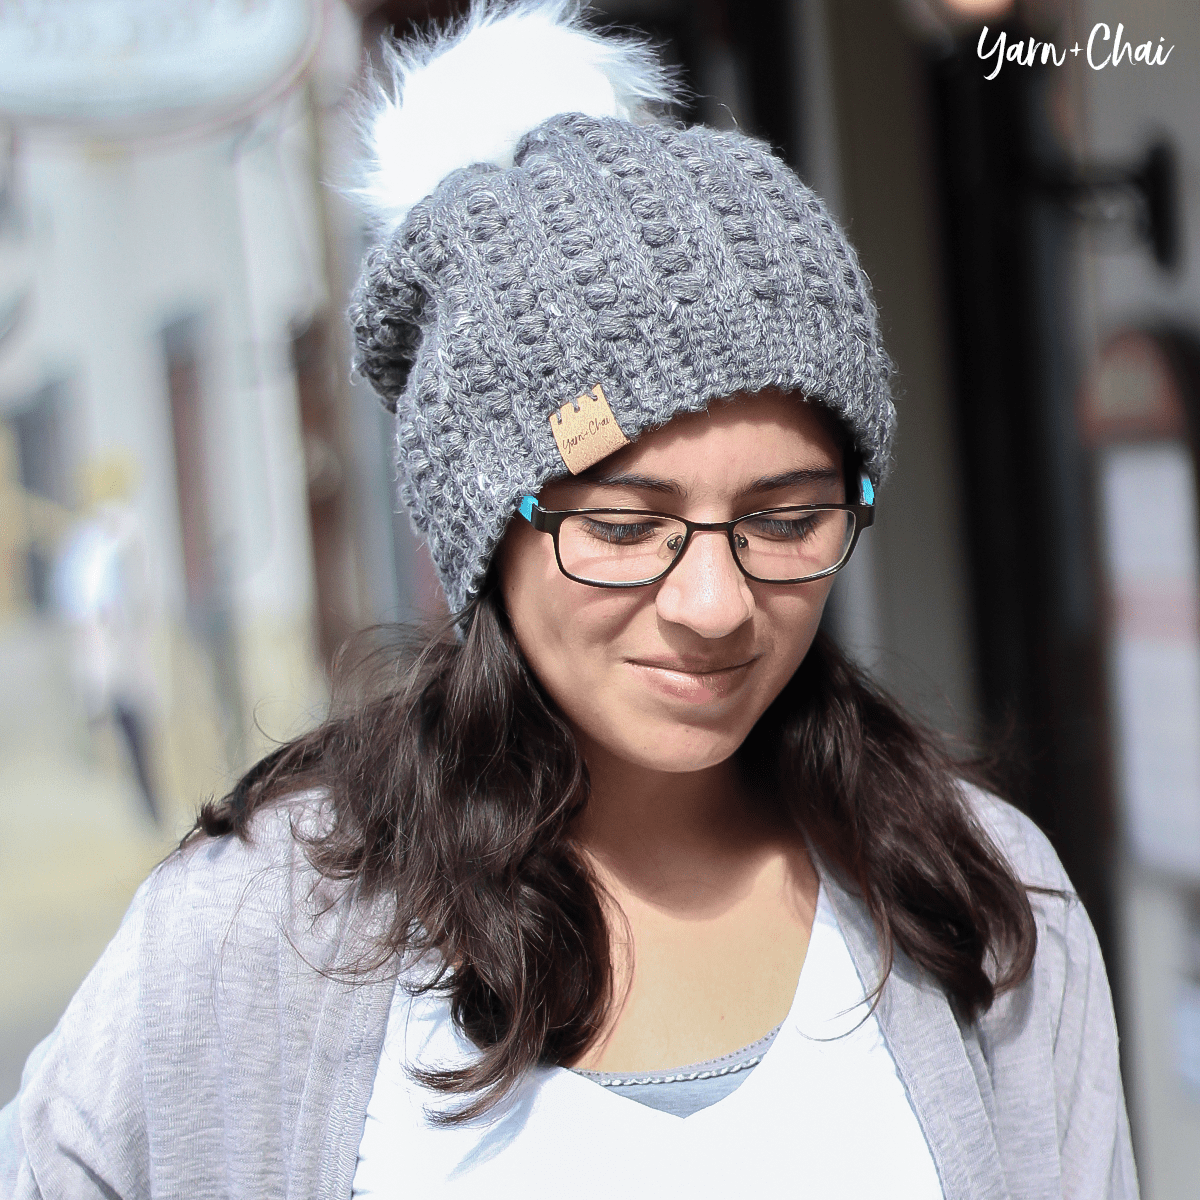
Malia is making a quick reappearance this season, in the form of a cute twisted earwarmer!
I always thought this stitch pattern would look great as a twisted earwarmer, and with the weather finally starting to cool off here, it’s time for me to start thinking about how to keep cozy! I always love a good earwarmer / headband, because it does the job with minimal fuss.
If you need a little help with the stitches, check out the tutorial video I made during the original Malia Crochet-Along for the cowl and scarf; just use the numbers in this pattern instead of the ones called for on the video!
Prefer a PDF?
This pattern can be completed using the 100% free version right here on this page. However, many people prefer the convenience of a printable, ad-free PDF.
All-Access Passholders get the ad-free version of this and all of my other blog patterns. It’s a pretty sweet deal, if I do say so myself! Learn more about it here or continuing scrolling for the free version.
Finished Size: 20″ long (before seaming) x 3.75″ wide
Hook: I (5.50 mm) or whichever hook is needed to obtain correct gauge
Yarn: 100 yards of a #4 aran weight. I used Yarn Bee’s Rustic Romantic in “Okie Wheat” for my sample.
Gauge: To ensure the best results, the gauge check is a swatch taken straight from the pattern. Upon completion, you should have a 4” square. If yours is larger, consider using a smaller hook or a thinner #4 yarn. If yours is smaller, consider using a larger hook.
Pattern for Gauge:
CH17. Row 1: SC in 2nd CH from hook and in each remaining CH. (16) Row 2: CH1, turn. SC in first ST. (SK next ST, LBS in next ST) 7 times. SC in final ST. (16) Row 3: CH1, turn. HDC in each ST across. (16) Row 4: CH1, turn. SC in first ST. SC in 3rd loop of each of the next 14 STS. SC in final ST. (16) Row 5: CH1, turn. SC in each ST across. (16) Row 6: CH1, turn. SC in first ST. (LBS in next ST, SK next ST) 7 times. SC in final ST. (16) Row 7: CH1, turn. HDC in each ST across. (16) Row 8: CH1, turn. SC in first ST. SC in 3rd loop of each of the next 14 STS. SC in final ST. (16) Row 9: CH1, turn. SC in each ST across. (16) Rows 10-16: Repeat Rows 2-8. (16)
Terms and Abbreviations: ST/STS (stitch/stitches) SL ST (slip stitch) SK (skip) CH (chain) SC (single crochet) HDC (half double crochet) LBS (large bean stitch – see “Special Stitches”) BLO (back loop only) 3rd LOOP (work stitch into 3rd loop only – see “Special Stitches”)
Special Stitches:
Large Bean Stitch (LBS) Insert hook into stitch, yarn over and pull through (2 loops on hook). Yarn over, insert hook into same stitch, yarn over and pull through (4 loops on hook). Yarn over, insert hook into same stitch, yarn over and pull through (6 loops on hook). Yarn over, insert hook into same stitch, yarn over and pull through (8 loops on hook). Yarn over and pull through all 8 loops. Chain 1 to close the stitch. (Because this stitch creates two sets of loops – one when creating the bean, and one when closing the stitch – each completed Large Bean Stitch will count for two stitches in the row or round’s final stitch count.)
3rd Loop Only Half double crochet stitches have a 3rd loop that we utilize in this pattern. When working in turned rows, as in this pattern, the 3rd loop can be found just below the front loop on the side of the work that is facing you. When instructed to work in “3rd loop only”, insert your hook into this special loop. This creates a delicate braided look on the opposite side of the pattern.
Notes: (1) This pattern is written in American Standard Terms.
(2) CH1s at the beginning of rows do not count as a stitch in the final stitch count.
(3) A video tutorial for the stitch pattern is available up in the post, or by clicking here.
(4) To make earwarmer larger or smaller, add or subtract an even number of stitches from the starting row or chain. For reference, if you met gauge, 4 stitches = 1″.
INSTRUCTIONS
Tobegin: CH79.
Row 1: HDC in 2nd CH from hook and in each remaining CH. (78)
Row 2: CH1, turn. SC in first ST. SC in 3rd loop of each of the next 76 STS. SC in final ST. (78)
Row 3: CH1, turn. SC in each ST across. (78)
Row 4: CH1, turn. SC in first ST. (SK next ST, LBS in next ST) 38 times. SC in final ST. (78)
Row 5: CH1, turn. HDC in each ST across. (78)
Row 6: CH1, turn. SC in first ST. SC in 3rd loop of each of the next 76 STS. SC in final ST. (78)
Row 7: CH1, turn. SC in each ST across. (78)
Row 8: CH1, turn. SC in first ST. (LBS in next ST, SK next ST) 38 times. SC in final ST. (78)
Row 9: CH1, turn. HDC in each ST across. (78)
Row 10: CH1, turn. SC in first ST. SC in 3rd loop of each of the next 76 STS. SC in final ST. (78)
Row 11: CH1, turn. SC in each ST across. (78)
Row 12: CH1, turn. SC in first ST. (SK next ST, LBS in next ST) 38 times. SC in final ST. (78)
Row 13: CH1, turn. HDC in each ST across. (78)
Row 14: CH1, turn. SC in first ST. SC in 3rd loop of each of the next 76 STS. SC in final ST. (78)
Fasten off, leaving a long tail for seaming. Weave in starting tail.
Adding the Twist
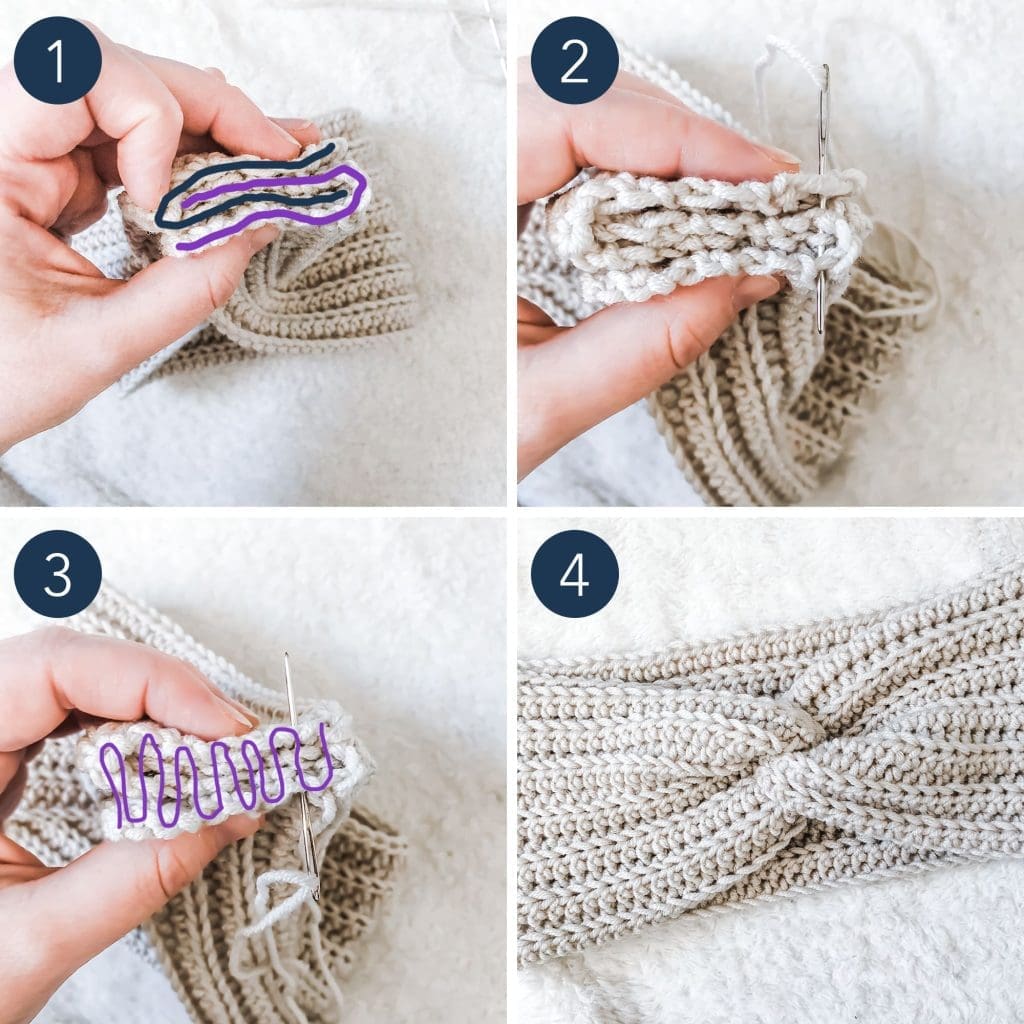
Follow the instructions below to seam your earwarmer with a twist. Use the image below to guide you. (They are actually from my Simple Twisted Earwarmer pattern, but the technique is the same.)
1. Thread the long finishing tail through your yarn needle and gently set it aside. Lay ear warmer flat, wrong side up, then gather the edges and layer them together as shown.
2. Thread the yarn needle across the edges, being sure to grab yarn from all four layers.
3. Continue to weave the yarn needle back and forth across the surface of the edges, being sure to grab yarn from all four layers each time.
4. Weave in the tail, then turn earwarmer right side out.
Done! If you’re sharing on social media, be sure to tag me @yarnandchai.design. Hope you enjoyed it!
There are so many reasons I love earwarmers. I love wearing them on days when I want my hair up; but beyond that, they’re such a quick, easy crochet project! This one is particularly mindless because it’s simply rows of half double crochet in back loops only, and finished with a beautiful twist that’s much easier than it looks.
And, if you’re trying to build a craft fair inventory, earwarmers can be a great addition! (Tip: choose just a handful of styles, and work them up in several modern colors. They’re sure to sell!)
But whether you’re selling, making Christmas gifts, or just making yourself something to feel beautiful in, this pattern is for you.
Video Tutorial
You can follow along with me with this tutorial video, regardless of what size you are making! I put the pattern instructions right on screen so you can relax and go at your own pace. Be sure to subscribe, too!
Prefer a PDF?
This pattern can be completed using the 100% free version right here on this page. However, many people prefer the convenience of a printable, ad-free PDF.
All-Access Passholders get the ad-free version of this and all of my other blog patterns. It’s a pretty sweet deal, if I do say so myself! Learn more about it here or continuing scrolling for the free version.
Simple Twisted Earwarmer
Difficulty: Beginner/Easy
Finished Sizes: 17″ x 3.5″ (toddler), 18″ x 4″ (child), 20″ x 4.5″ (teen/adult small), 21″ x 4.5″ (adult large)
Hook: H (5.0 mm) or whichever hook is needed to obtain correct gauge
Yarn: Cascade Longwood Sport, a #3 weight yarn, in the following amounts: 80 yds (toddler), 90 yds (child), 110 yds (teen/adult small), 115 yds (adult large). Color used in sample is “Oatmeal”.
Gauge: 16 HDC (worked in BLO) x 12.5 rows = 4″ square
Notes: (1) This pattern is written in American Standard Terms.
(2) CH1s at the beginning of rows do not count as a stitch in the final stitch count.
(3) To resize earwarmer, your starting chain can be any number.
(4) Pattern is written for toddler size with additional sizes in brackets [child, teen/adult small, adult large]. So, for example, if it says “CH71 [75, 85, 89]”, the first number is for the toddler size, and the numbers in brackets are child, teen/adult small, and adult large instructions, respectively. If you are working from printed instructions, it helps to circle or highlight the numbers you are following before you begin.
INSTRUCTIONS
To begin: CH69 [73, 81, 85].
Row 1: HDC in 2nd CH from hook and in each remaining CH. (68 [72, 80, 84])
Rows 2-12 [2-13, 2-14, 2-14]: CH1, turn. HDC in first ST. HDC in BLO of each of the next 66 [70, 78, 82] STS; 1 ST remains. HDC in both loops of final ST. (68 [72, 80, 84])
Fasten off, leaving a tail for seaming. Weave in starting tail only.
Seaming with a Twist
1. Thread the long finishing tail through your yarn needle and gently set it aside. Lay ear warmer flat, then gather the edges and layer them together as shown.
2. Thread the yarn needle across the edges, being sure to grab yarn from all four layers.
3. Continue to weave the yarn needle back and forth across the surface of the edges, being sure to grab yarn from all four layers each time.
4. Weave in the tail, then turn earwarmer right side out.
Done! If you’re sharing on social media, be sure to hashtag #simpletwistedearwarmer and tag me @yarnandchai.design. Stay warm out there!
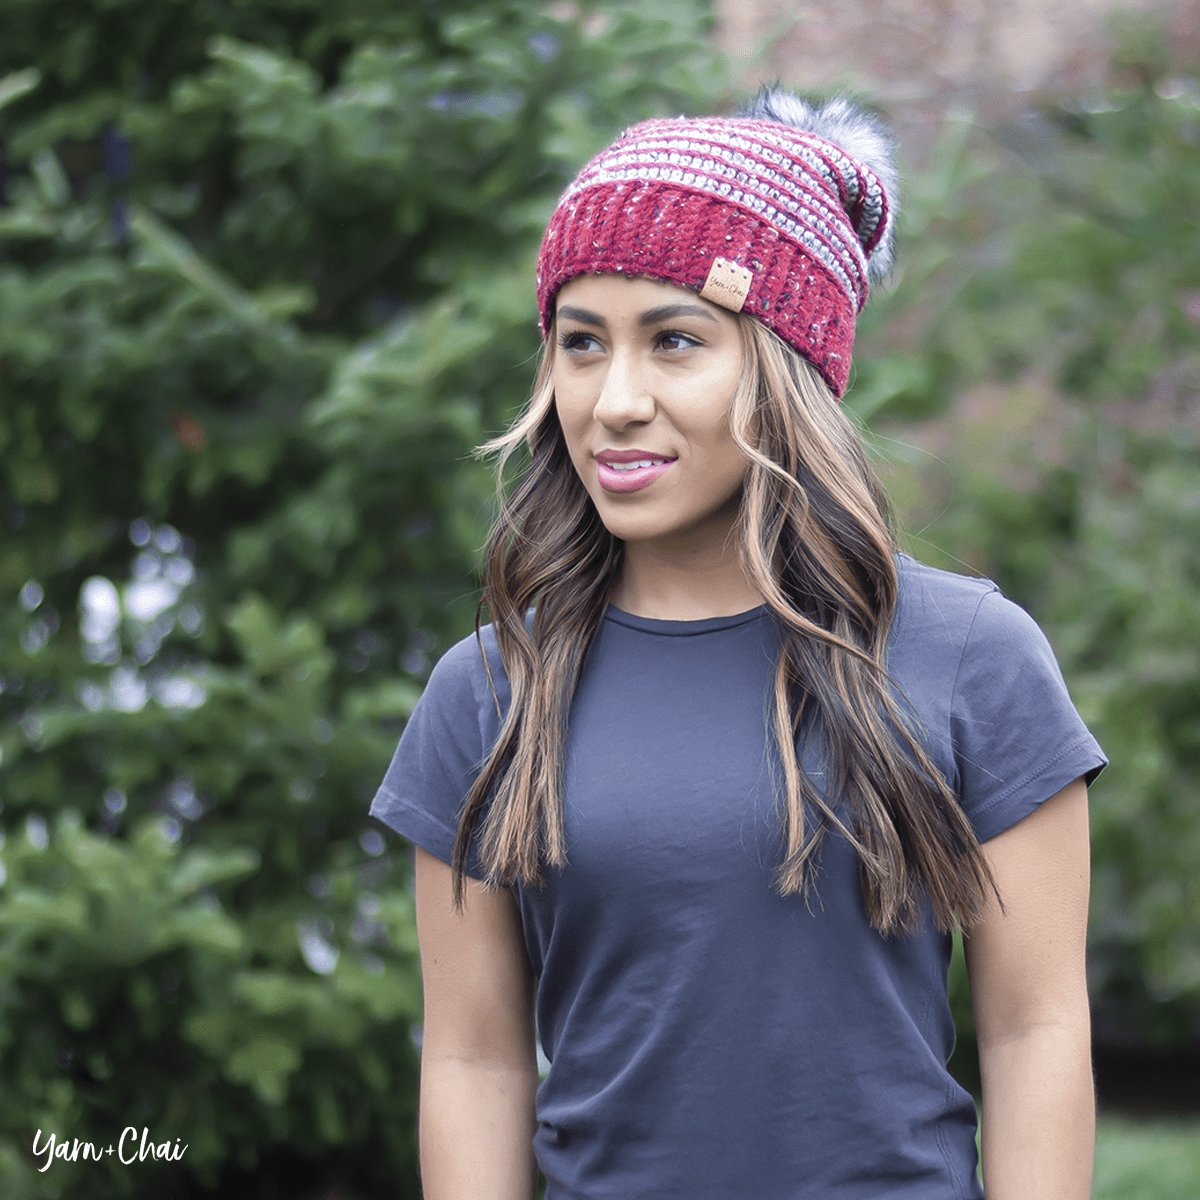
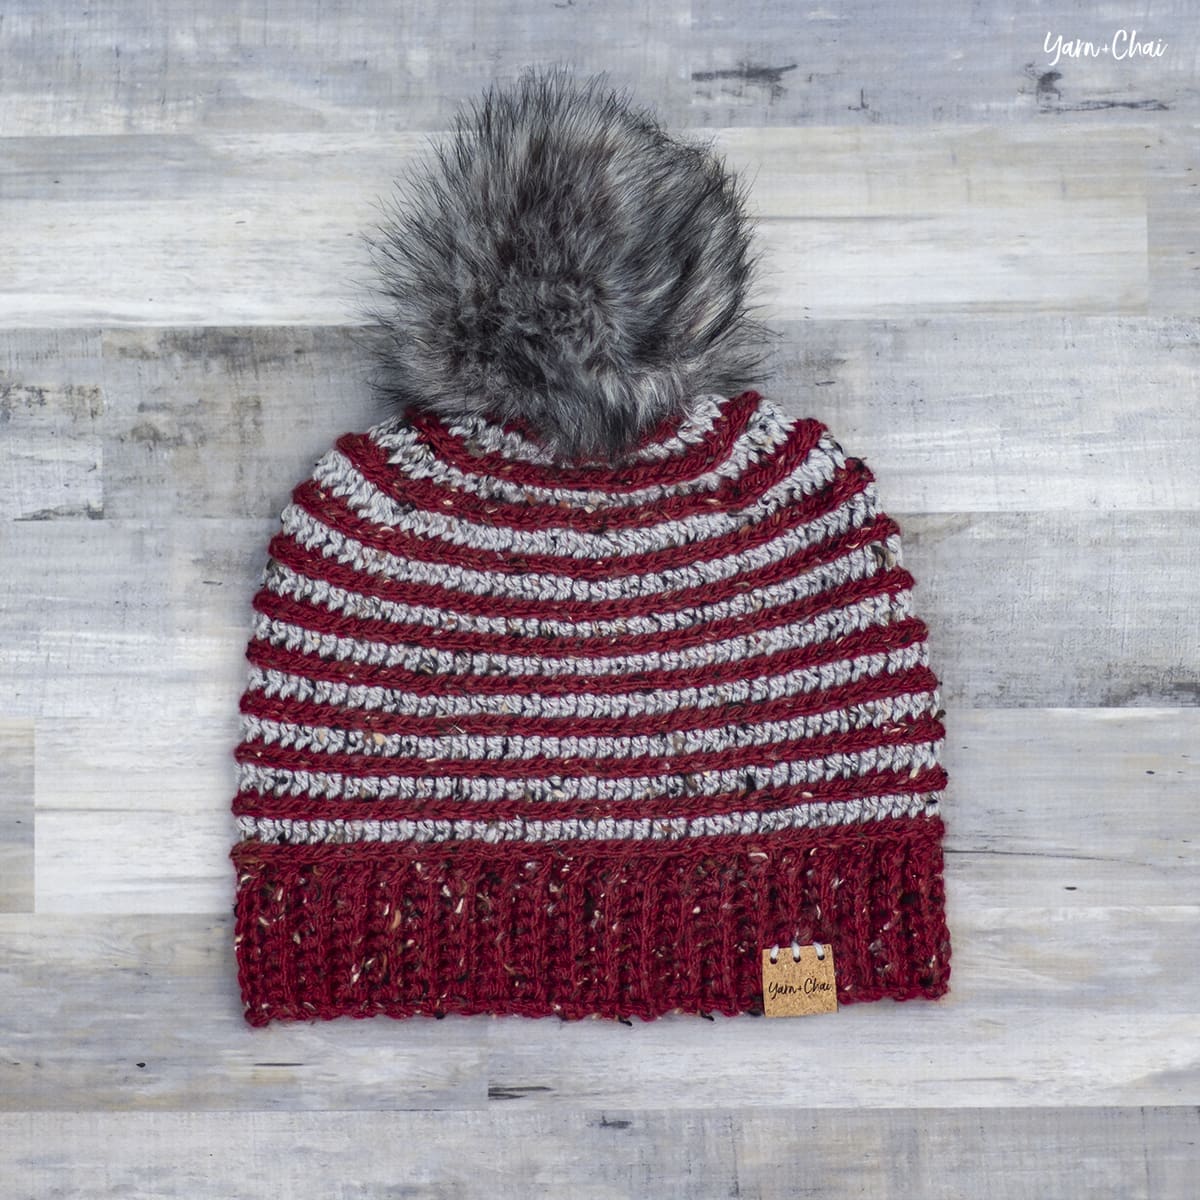
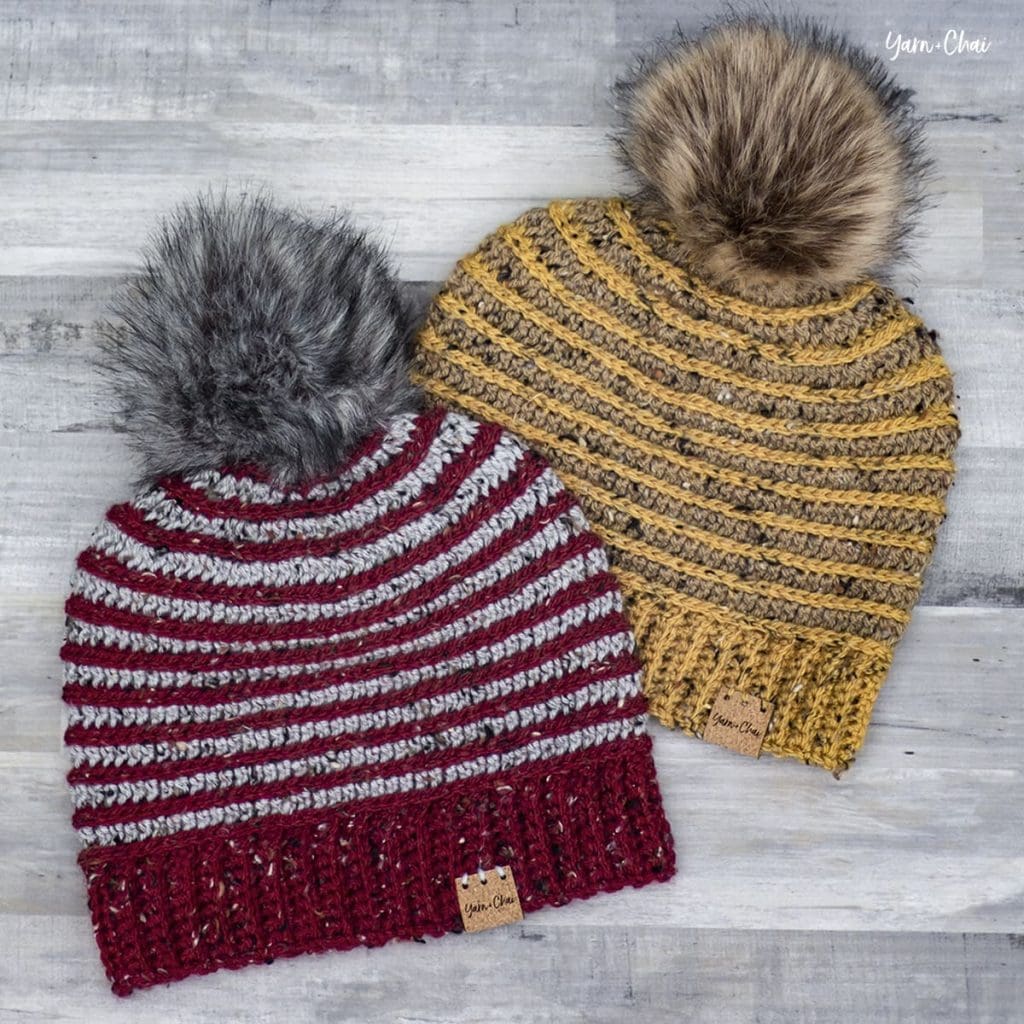
A good slouchy beanie is a staple in any cozy cold weather wardrobe. And I don’t know about you, but I am so ready for a little cold weather!
The snow can hold off for a while as far as I’m concerned, but bring on the crisp fall air and the fireplaces and apple cider and changing leaves. Fall in Michigan is short-lived but absolutely stunning!
To complete the set, I made matching cowl. Click here to view the pattern for the Cabin Fever Cowl!
About the Yarn
For this pattern set, I used a yarn that I acquired during our family vacation to the Great Smoky Mountains this summer. I have always wanted to visit an A.C. Moore store, but I live several hours from the nearest one… so when our road trip took us right through Cincinnati, we made a quick stop – literally, I basically ran to the yarn aisle and went straight for Stitch Studio By Nicole’s Earthtone, grabbed a bunch of them, and hurried up to checkout. (When you have a travel-weary toddler waiting for you in the van, you don’t get to take your time!)
I’ve seen several of you using Earthtone for my patterns throughout the years, and always wanted to get my hands on some. I absolutely love it. It’s soft and the colors are rich and beautiful and the tweediness adds so much character. A good tweed gives acrylic projects a much more natural look, and it’s also very forgiving. I can hardly even tell where my seam is from the outside!
(Edited 10/20/20 to add: This yarn is now discontinued. There are so many beautiful aran weight yarns available in stores, though, so no worries… just use your favorite one!)
VIDEO TUTORIAL
I’ve put together a step-by-step video tutorial for you visual learners! The instructions for the pattern are written right on the screen, so you can follow along visually while also developing your pattern-reading skills. It’s a feature I’ve gotten lots of compliments for on my videos, so it’s definitely worth the extra effort it takes to include it!
ABOUT THOSE CUTE LEATHER TAGS
Those adorable tags on my sample hats aren’t actually leather at all – they’re cork! I had mine printed by All This Wood (affiliate link). They always do a great job for me. If you purchase tags of your own through this link, you won’t pay any extra, but I’ll get a small percentage of the sale. My affiliate links are just one of the ways I am able to keep releasing free patterns, so I am always incredibly appreciative of anyone who uses them!
Prefer a PDF?
This pattern can be completed using the 100% free version right here on this page. However, many people prefer the convenience of a printable, ad-free PDF.
All-Access Passholders get the ad-free version of this and all of my other blog patterns. It’s a pretty sweet deal, if I do say so myself! Learn more about it here or continuing scrolling for the free version.
CABIN FEVER SLOUCH
Difficulty: Easy
Finished Size: 9″ tall x 9.75″ wide, when laid flat
Hook: H (5.0mm)
Yarn: Approx. 200 yards of #4 aran weight. You will need about 125 yards of COLOR A and 75 yards of COLOR B. Yarn used in sample photos is Stitch Studio By Nicole’s Earthtones, previously found at A.C. Moore stores (now discontinued).
Gauge: First 5 rounds = 4″ across
You’ll also need: Yarn needle, fur pom (optional)
Terms and Abbreviations: MC (magic circle – view tutorial here) ST/STS (stitch/stitches) SL ST (slip stitch) CH (chain) HDC (half double crochet) 3rd LOOP (work stitch into 3rd loop only – see “Special Stitch”)
Special Stitch:
3rd Loop Only Half double crochet stitches have a 3rd loop that we utilize in this pattern. When working in turned rows, as in this pattern, the 3rd loop can be found just below the front loop on the side of the work that is facing you. (When you work the band of the hat, it will be behind the back loop.) When instructed to work in “3rd loop only”, insert your hook into this special loop. This creates a delicate braided look on the opposite side of the pattern.
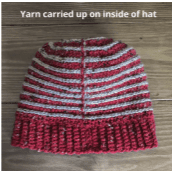
Notes: (1) This pattern is written in American Standard Terms. (2) CH1s at the beginning of rows do not count as a stitch in the final stitch count. (3) When instructed to “join”, always join with a slip stitch to the first stitch of the round. (4) Instead of fastening off at each color change, you will be carrying your yarn up the seam on the inside of the hat. Instructions for how to do this are written into the pattern.
INSTRUCTIONS
To begin: With COLOR A, make a magic circle, CH1.
Round 1: 10 HDC in MC, join. (10)
Round 2: Attach COLOR B (do not fasten off COLOR A); CH1, turn. In 3rd loops, 2 HDC in each ST around. Join, making sure working tail from COLOR A is in front of the join stitch. (20)
Round 3: Switch to COLOR A; CH1, turn. In 3rd loops throughout, 2 HDC in first ST, HDC in next ST, (2 HDC in next ST, HDC in next ST) around. Join, making sure working tail from COLOR B is behind the join stitch. (30)
From this point on, every time you join, be sure that the yarn is always carried up on the same side of the fabric.
Round 4: Switch to COLOR B; CH1, turn. In 3rd loops throughout, 2 HDC in first ST, HDC in each of the next 2 STS, (2 HDC in next ST, HDC in each of the next 2 STS) around. Join. (40)
Round 5: Switch to COLOR A; CH1, turn. In 3rd loops throughout, 2 HDC in first ST, HDC in each of the next 3 STS, (2 HDC in next ST, HDC in each of the next 3 STS) around. Join. (50)
Round 6: Switch to COLOR B; CH1, turn. In 3rd loops throughout, 2 HDC in first ST, HDC in each of the next 4 STS, (2 HDC in next ST, HDC in each of the next 4 STS) around. Join. (60)
Round 7: Switch to COLOR A; CH1, turn. In 3rd loops throughout, 2 HDC in first ST, HDC in each of the next 5 STS, (2 HDC in next ST, HDC in each of the next 5 STS) around. Join. (70)
Round 8: Switch to COLOR B; CH1, turn. In 3rd loops throughout, 2 HDC in first ST, HDC in each of the next 6 STS, (2 HDC in next ST, HDC in each of the next 6 STS) around. Join. (80)
Round 9: Switch to COLOR A; CH1, turn. In 3rd loops, HDC in each ST around. Join. (80)
Round 10: Switch to COLOR B; CH1, turn. In 3rd loops, HDC in each ST around. Join. (80)
Round 11: Switch to COLOR A; CH1, turn. In 3rd loops, HDC in each ST around. Join. (80)
Rounds 12-23: Repeat Rounds 10-11.
– – – – – –
Next we’re going to make the band of the hat, and we will be working in vertical rows, attaching it to Round 23 (the final round of the hat) with SL STS as we go.
– – – – – –
Row 1: CH9. SC in 2nd chain from hook and in each of the remaining 7 chains. SL ST into the 3rd loop (now found behind the top loops since we didn’t turn our work) of the first HDC from Round 23, the stitch on which your CH9 was built. SL ST into the 3rd loop of the next HDC from Round 23. (8, plus the two slip stitches along Round 23)
The section we just created, built on the CH9, will hereafter be referred to as the “ribbing.”
Row 2: CH1, turn. Skipping over the 2 SL STS you put in Round 23, SC in BLO of each of the first 7 STS of the ribbing. SC in both loops of the last ST. (8)
Row 3: CH1, turn. SC in 1st ST. SC in BLO of each of the remaining 7 STS of the ribbing. SL ST in 3rd loop of each of the next 2 STS of Round 23. (8, plus the 2 SL STS along Round 23)
Row 4: CH1, turn. Skipping over the 2 SL STS you put in Round 23, SC in BLO of each of the first 7 STS of the ribbing. SC in both loops of the last ST. (8)
Rows 5-80: Repeat Rows 3-4 all the way along Round 23.
Fasten off and use your tail to sew together the gap between the first and last rows of the ribbing, then weave in your ends.
– – – – – – – – – –
Done! If you’re sharing on social media, be sure to hashtag #cabinfeverslouch and tag me @yarnandchai.design. Hope you enjoyed it!
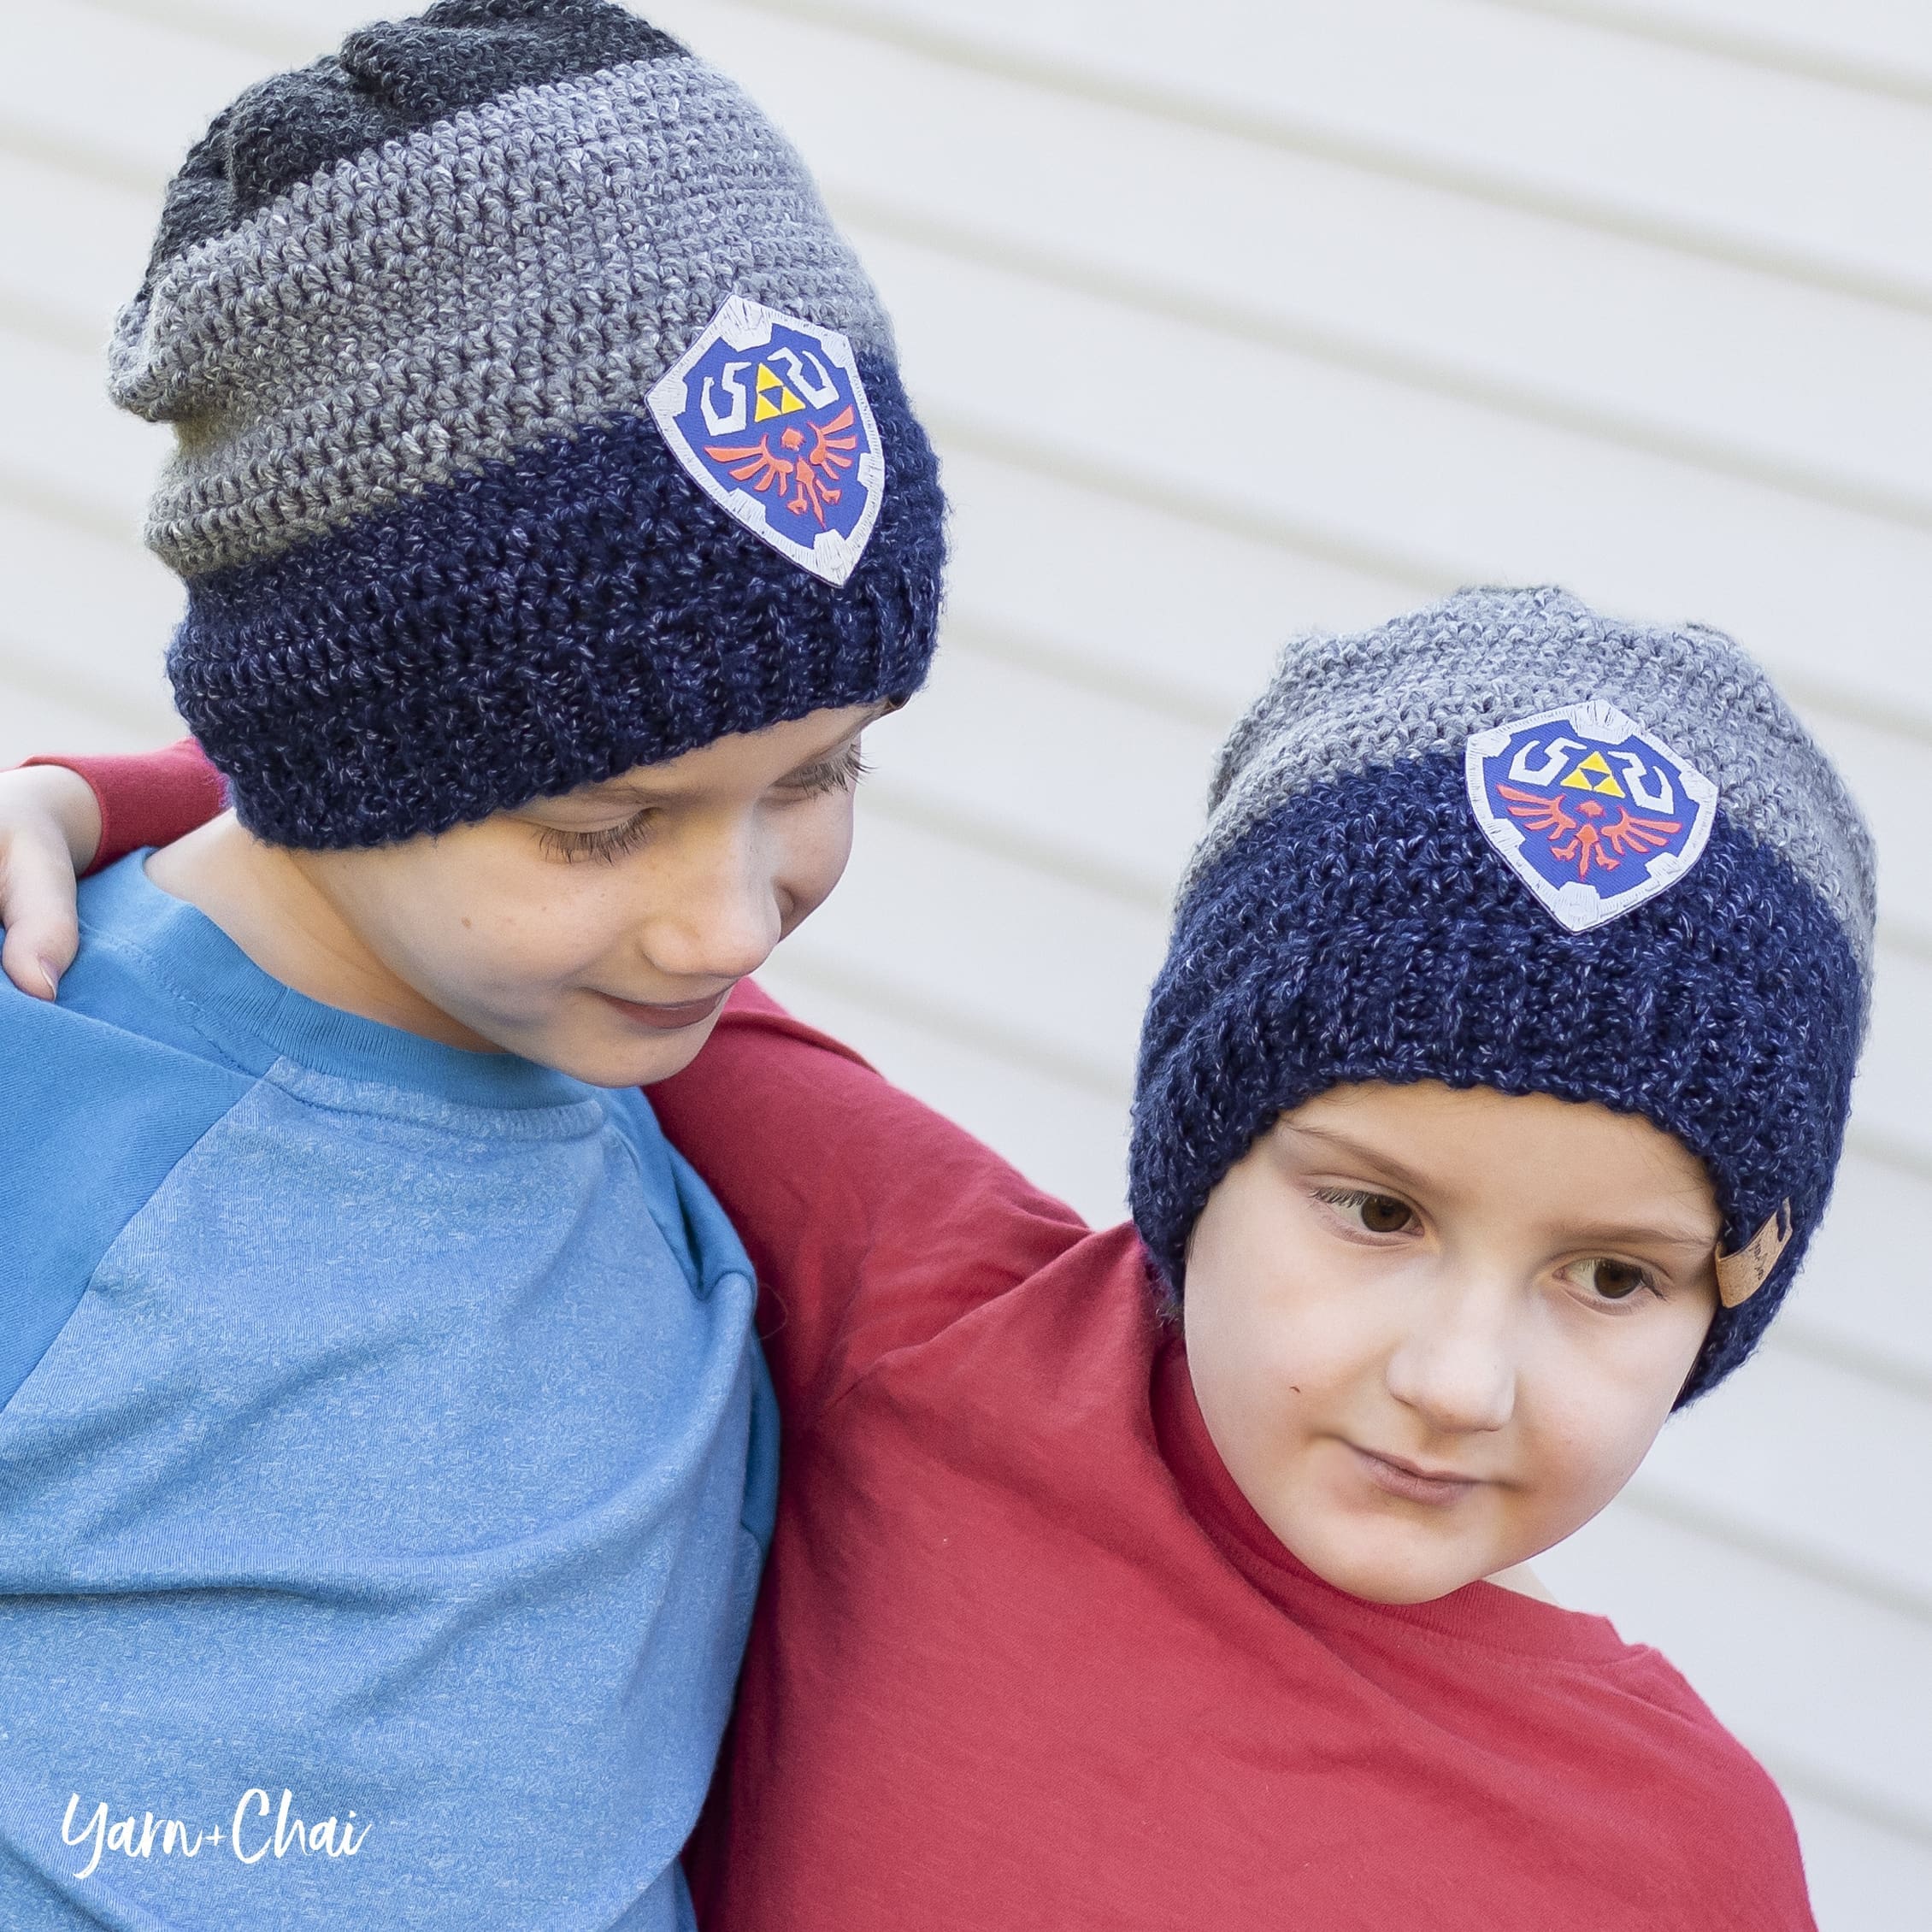
Every year, I make my boys a hat for Christmas. They’ve always been various character hats like TMNT, Lion Guard, etc., but at ages 6 and 8, we’ve transitioned out of the Disney Jr phase and into a more mature (ha!) one. Pikachu and Link have replaced Mickey Mouse and Kion, and the boys reach for their simple Walmart slouchies way more often than their Lion Guard hats. (How did they get so old?)
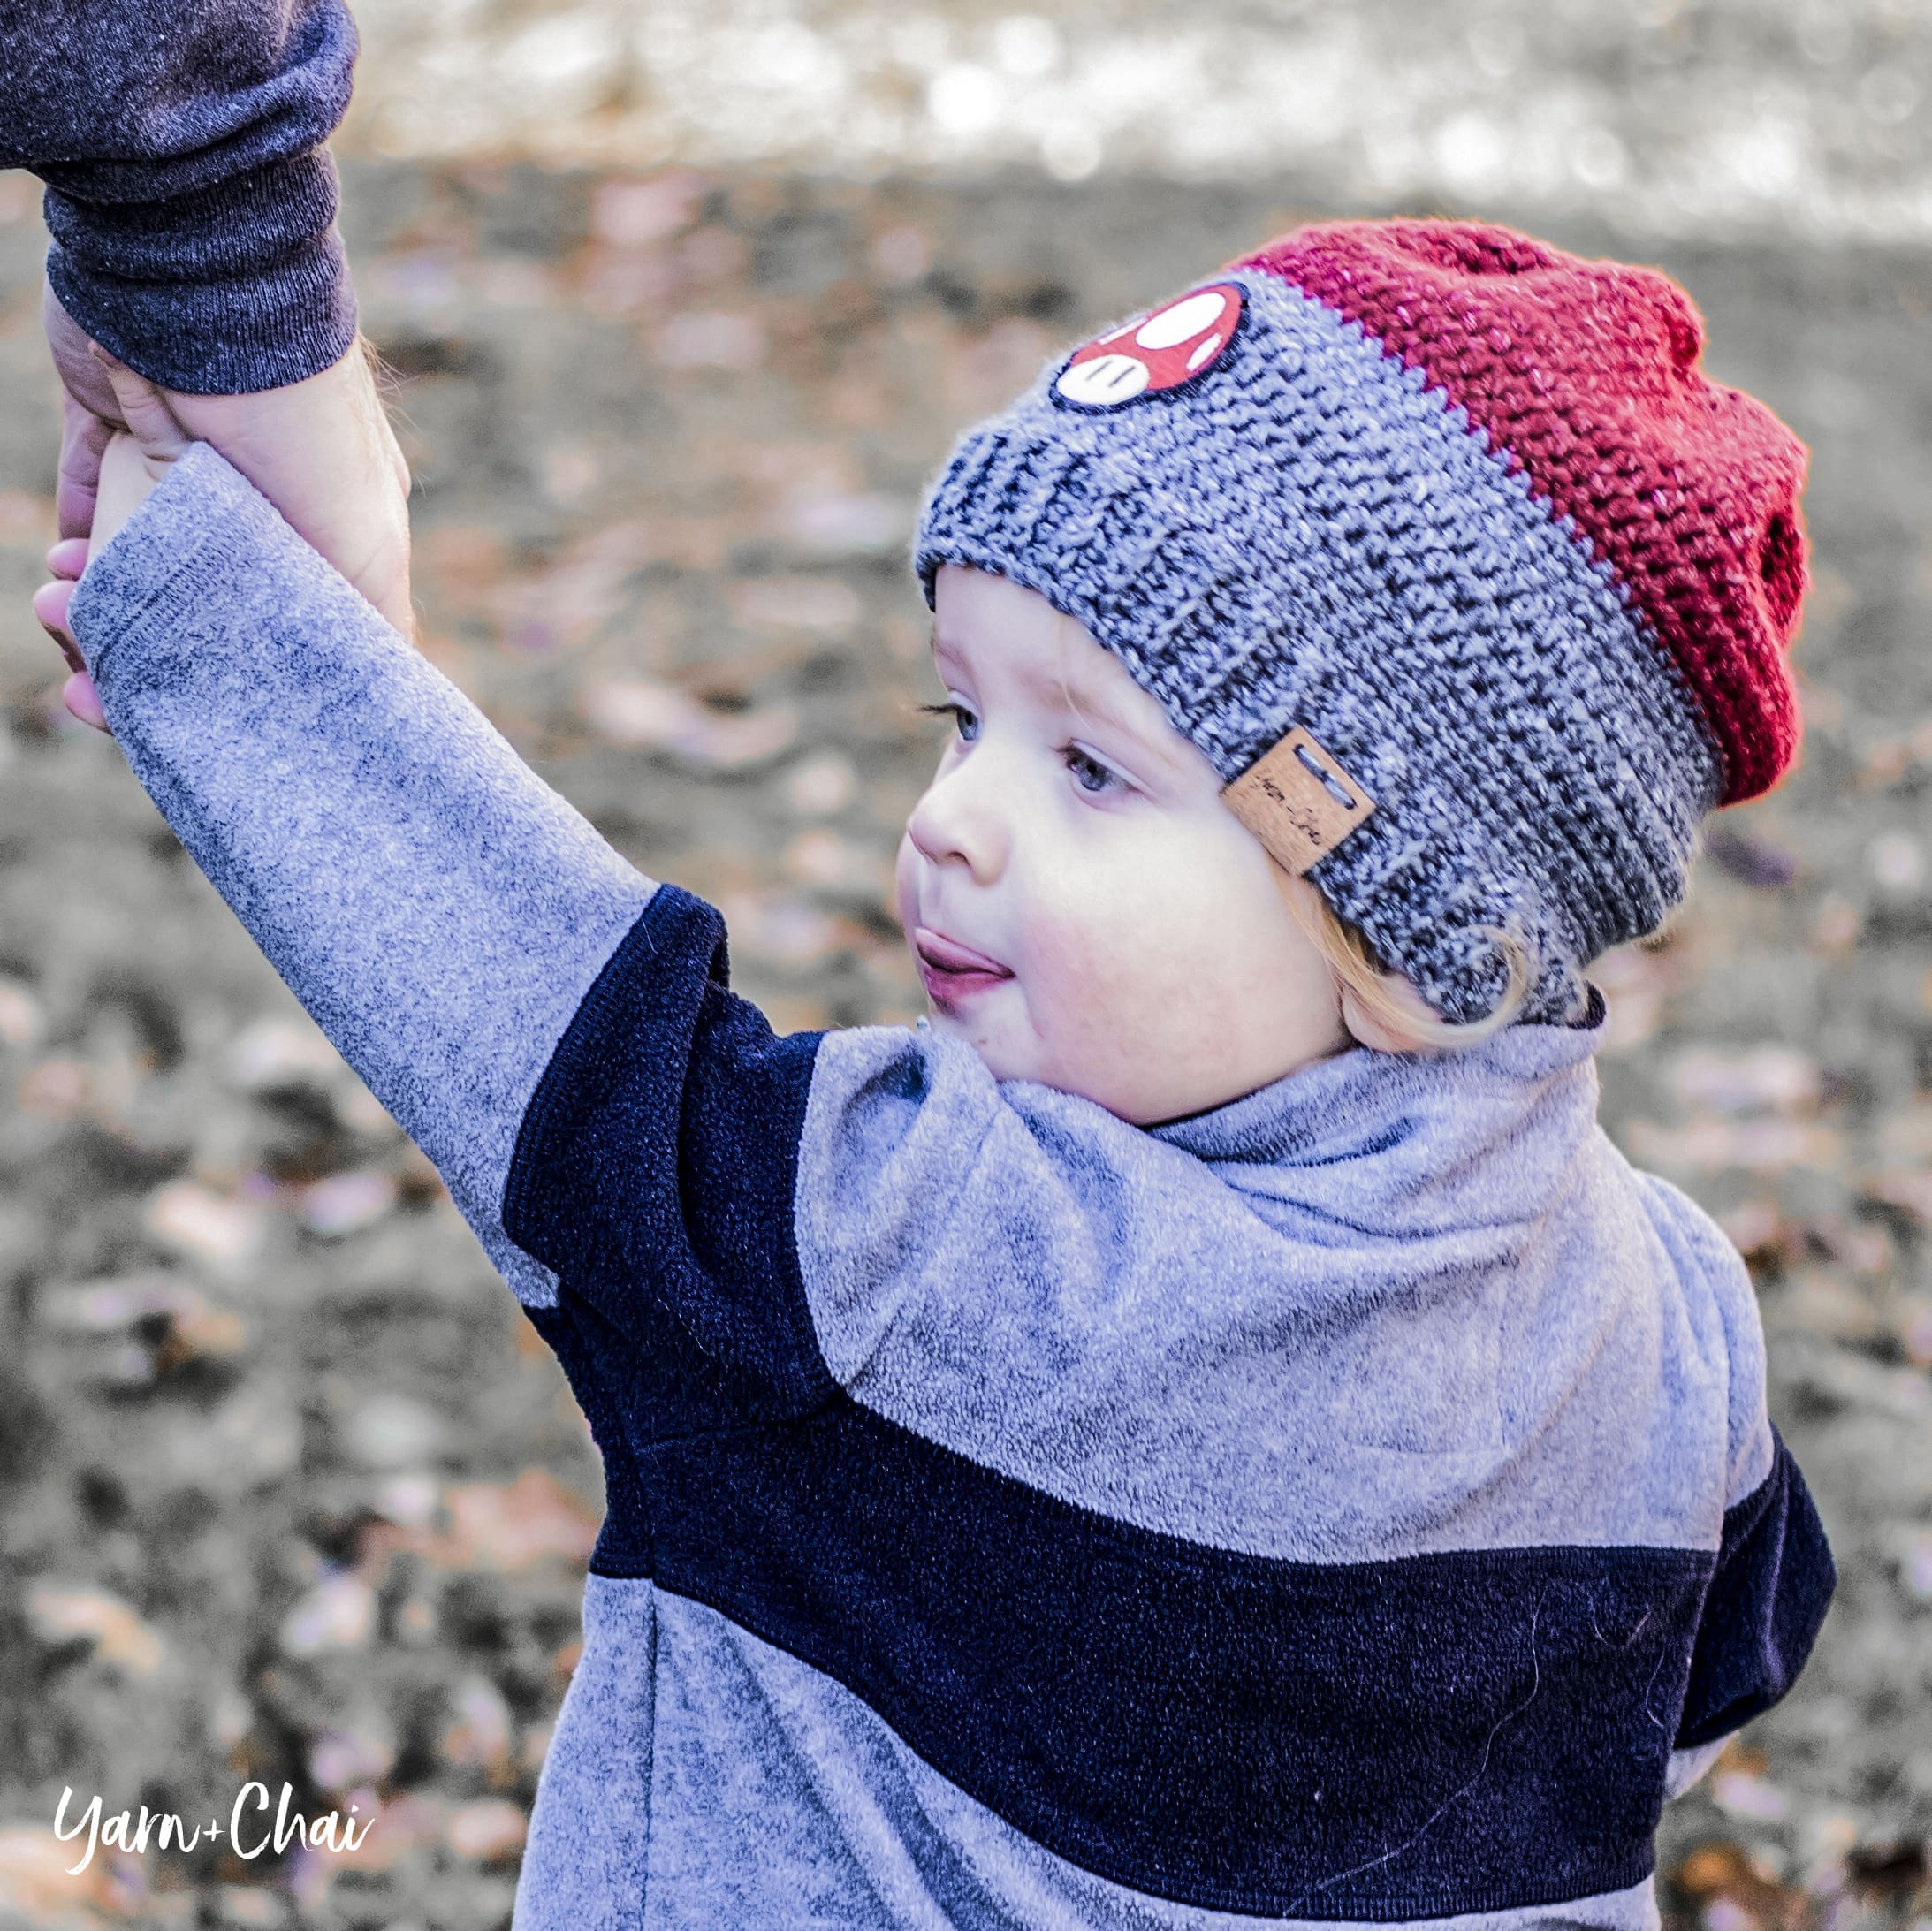
And then there’s little Henry, who doesn’t keep a hat on long enough to make a character hat worth the time or energy. Toddlers, right!?
And then there’s the husband, who has been asking me for a hat for I’m-embarrassed-to-say-how-long. Sorry, babe.
So this year, I went in a different direction and designed a pattern that would work for all of them. It has just the right amount of slouch, and uses a very guy-friendly yarn called Jeans (from Lion Brand). This yarn is soft, heathery, and just looks really good.
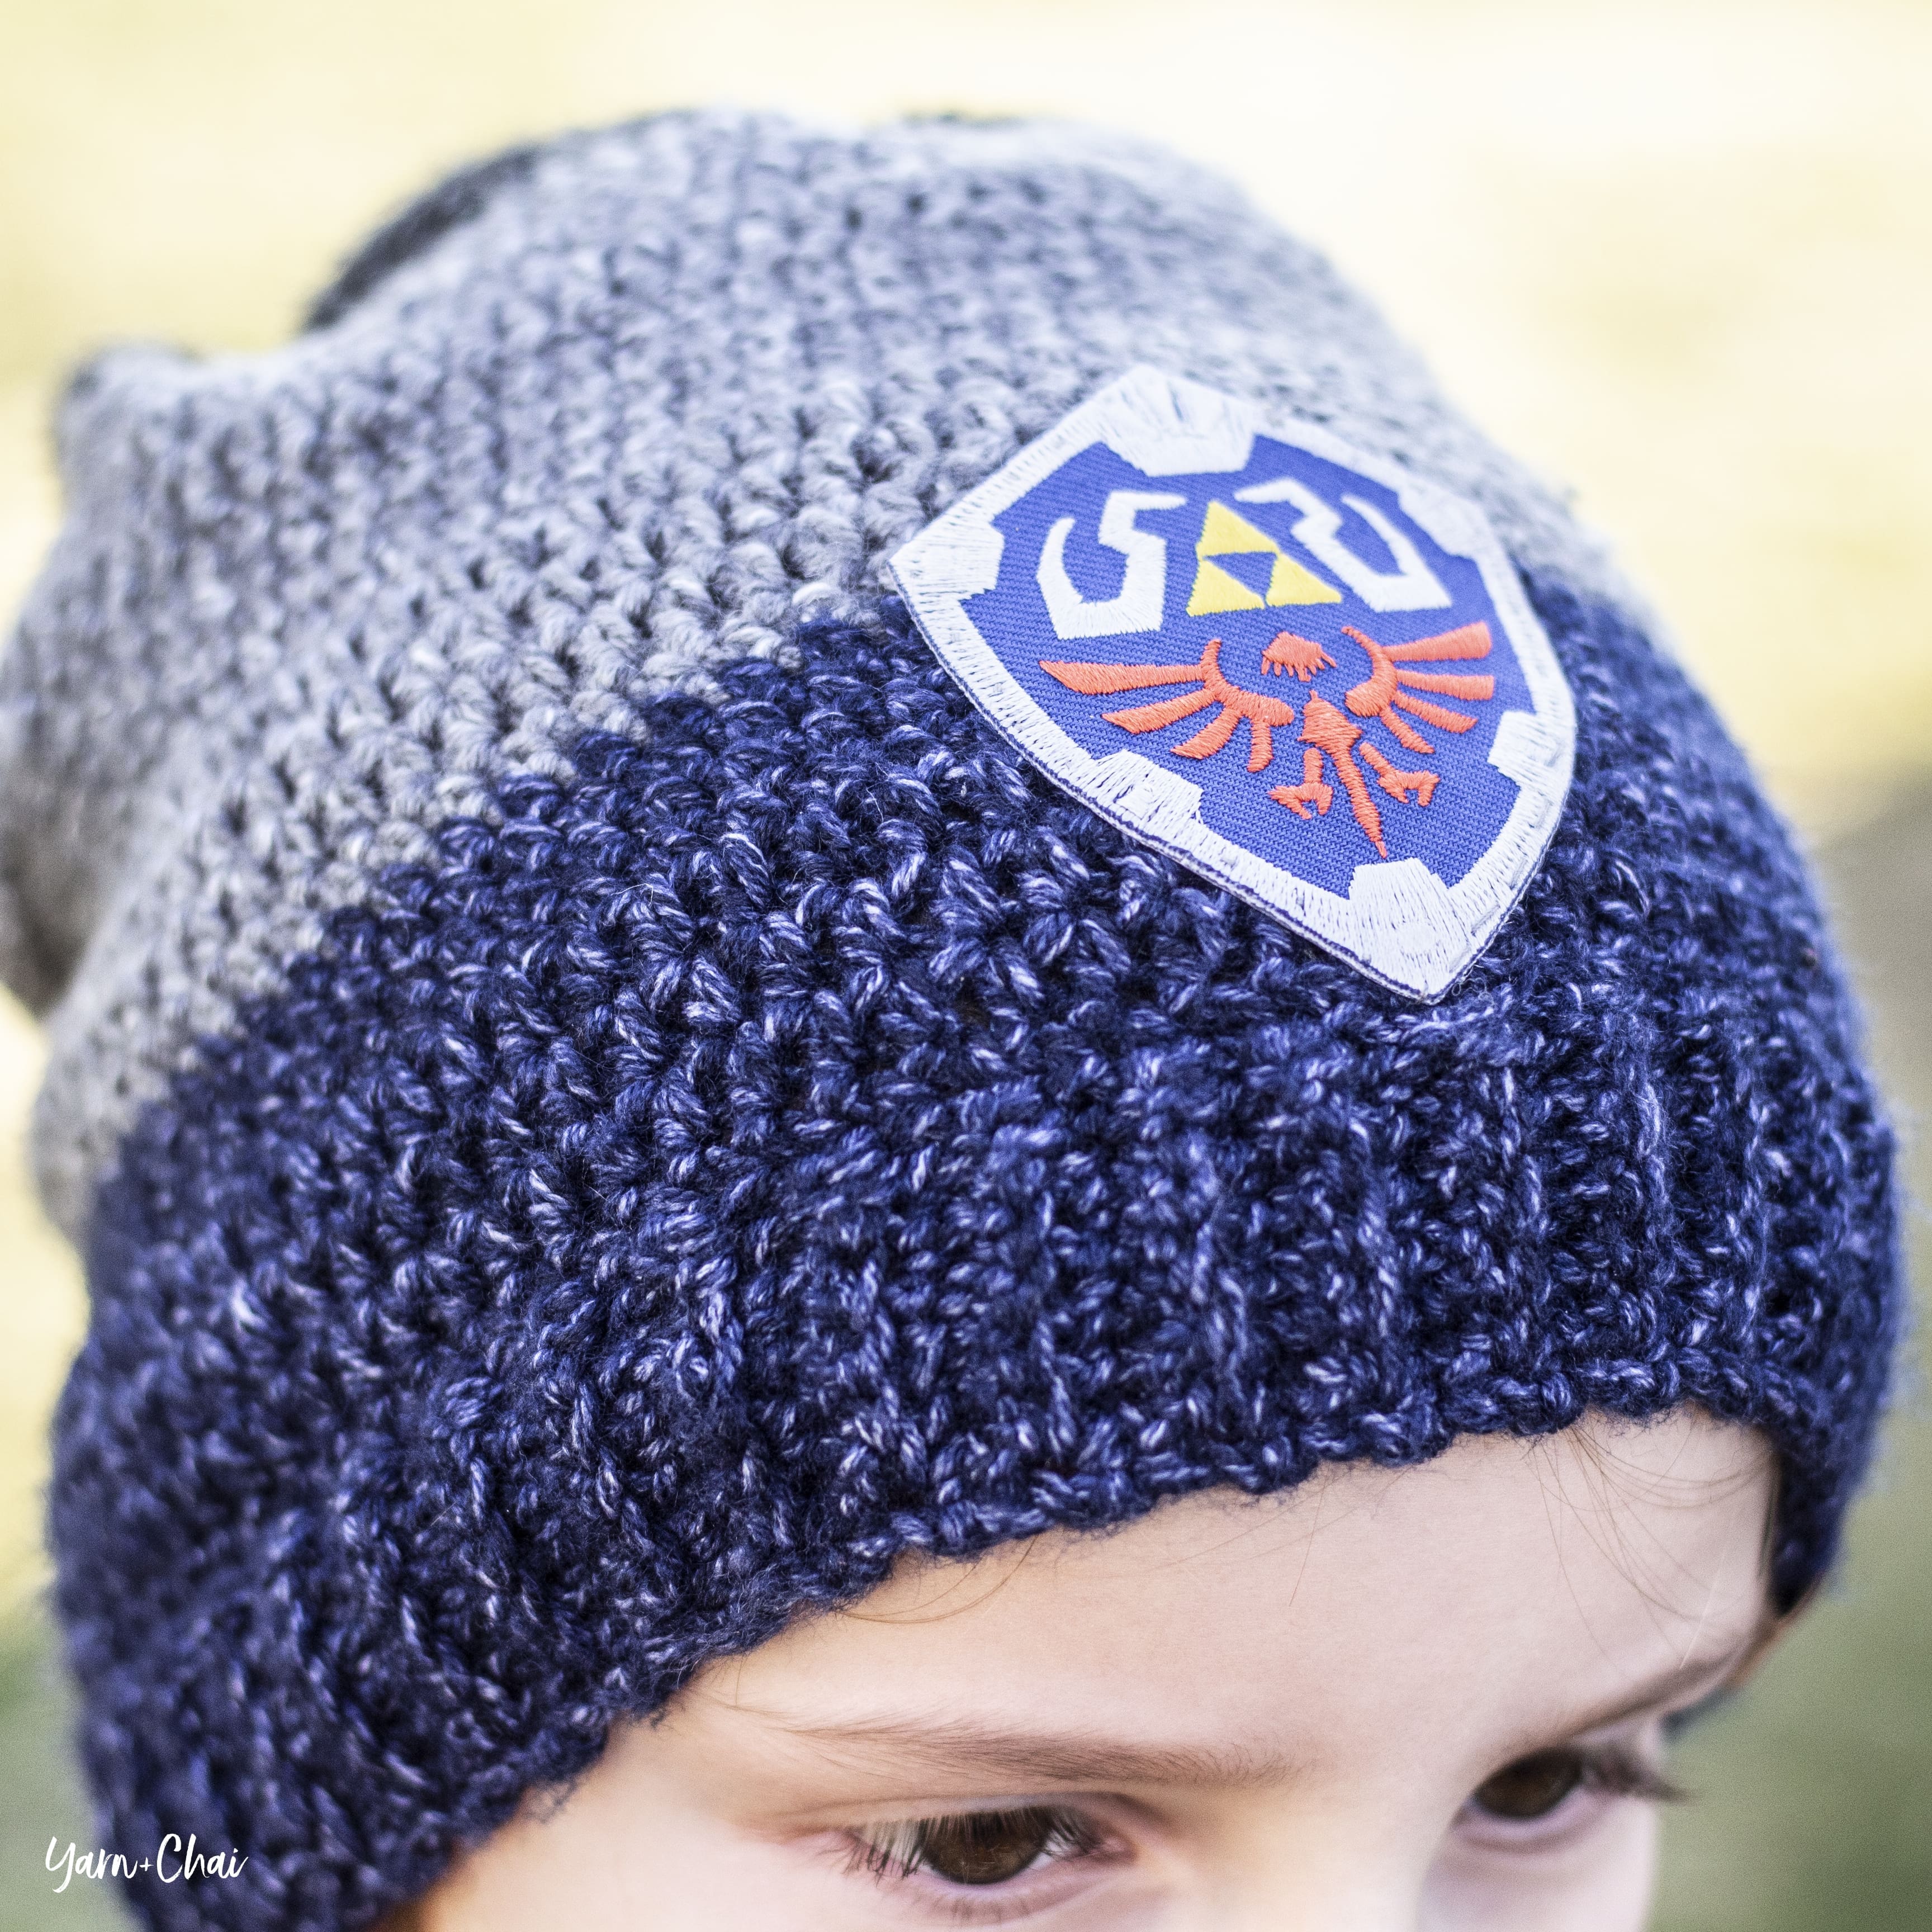
Then, I did a little searching online to find some patches for the boys’ hats. The older two are super into the Zelda video game, and I was so pumped to find these Hylian Shield patches online. (Listen to me, throwing around that video game lingo like I actually know what I’m talking about. I don’t.)
I then searched for something Mario-related for little Henry, and found this adorable mushroom patch that I knew he would recognize.
I left my husband’s hat patch-free, but of course, all four of them got Mom’s Yarn + Chai tag sewn on. Gotta represent! (I get my tags from All This Wood on Etsy.)
And for those of you that like to know name origins — I ended up naming this hat the Hyland Slouch because for a while, when my boys would refer to that Hylian Shield, I thought they were saying hy-land instead of hy-lee-an and it just stuck.
Of course, despite its name, this hat isn’t just for the guys. It would make a great girls’ hat, too! (But let’s be honest, girls get a lot more dedicated patterns than guys, right?)
Prefer a PDF?
This pattern can be completed using the 100% free version right here on this page. However, many people prefer the convenience of a printable, ad-free PDF.
All-Access Passholders get the ad-free version of this and all of my other blog patterns. It’s a pretty sweet deal, if I do say so myself! Learn more about it here or continuing scrolling for the free version.
Finished Sizes (h x w): 8″ x 8″ (toddler), 9″ x 9″ (child), 10″ x 9.5″ (teen/adult small), 10.5″ x 10″ (adult large). Width is measured at the bottom of the ribbing when the hat is laid flat, but the widest part of the hat (near the middle) will be about .5-1″ more.
Hook: J (6.0 mm) or whichever hook is needed to obtain correct gauge
Yarn: Lion Brand Jeans Yarn or similar #4 worsted weight yarn. Approximate amounts as follows: 170 yards (toddler), 210 yards (child), 240 yards (teen/adult small), 280 yards (adult large).
Gauge: 5 increase rounds of 10 HDC = 4.25″ across.
Pattern For Gauge:
Round 1: 10HDC in magic circle; join (10)
Round 2: 2HDC in each ST around; join (20)
Round 3: (2HDC in next, HDC in next) around; join (30)
Round 4: (2HDC in next, HDC in next 2) around; join (40)
Round 5: (2HDC in next, HDC in next 3) around; join (50)
Terms and Abbreviations:
Magic Circle (view my tutorial here) ST/STS (stitch/stitches) SL ST (slip stitch) SK (skip) CH (chain) SC (single crochet) YUSC (yarn under single crochet – see Special Stitches) YUHDC (yarn under half double crochet – see Special Stitches)
Special Stitches:
Yarn Under Single Crochet (YUSC) – this is the same as a regular SC, but with one simple variation. In a regular SC, you insert your hook, yarn over, draw yarn through (2 loops on hook), yarn over, draw through both loops. With a Yarn Under Single Crochet, you will insert your hook, yarn over, draw yarn through the stitch (2 loops on hook), yarn under, draw through both loops.
Yarn Under Half Double Crochet (YUHDC) – this is the same as a regular HDC, but with one simple variation. In a regular HDC, you yarn over, insert your hook, yarn over, draw yarn through (3 loops on hook), yarn over, draw through both loops. With a Yarn Under Half Double Crochet, you will yarn over, insert your hook, yarn over, draw yarn through the stitch (3 loops on hook), yarn under, draw through all three loops.
A Note About Changing Colors: To keep the written pattern simple, I have written it without including color changes (since it would be different for every size). The hat can be made all one color, with 2 or 3 colors (as in my samples), or really with any number of color changes you wish. To change colors, keep the following tips in mind:
To decide where to put your color changes, first decide how many colors you want, then take the finished height of the size you are making and divide it by the number of colors you want to use. So for instance, if I want to make a children’s hat (9″ tall) with 3 colors, I’ll divide 9 by 3 (9/3=3). I know that each color block will be about 3″, so I’ll keep a ruler handy as I work the pattern and I’ll change colors every 3″.
I feel that the cleanest color change happens between two rounds of YUSC (as opposed to YUHDC), so I always placed my color changes at that part of the pattern, wherever it fell closest to the measurements I was going for.
Additional Notes: (1) This pattern is written in American Standard Terms.
(2) Pattern is worked top-down, in a spiral. Do not join or chain unless instructed.
(3) Pattern is written for toddler size with additional sizes in brackets [child, teen/adult small, adult large]. So, for example, if it says “12 [13, 14, 15]”, the first number is for the toddler size, and the numbers in brackets are child, teen/adult small, and adult large instructions, respectively. If there is only one number, it applies regardless of which size you are making. If you are working from printed instructions, it helps to circle or highlight the numbers you are following before you begin.
INSTRUCTIONS
Note: The first few rounds will produce a VERY wavy circle. As you work further down the hat, the waves will smooth out. This is how we get that cinched look at the top.
Round 2: 2YUSC in each ST around. (24 [26, 28, 30])
Round 3: 3YUSC in each ST around. (72 [78, 84, 90])
Rounds 4-5: YUSC in each ST around. (72 [78, 84, 90])
Rounds 6-8: YUHDC in each ST around. (72 [78, 84, 90])
Rounds 9-13: YUSC in each ST around. (72 [78, 84, 90])
Rounds 14 – ?: Repeat Rounds 6-13, in order (3 rounds YUHDC, 5 rounds YUSC), until hat measures 6.5 [7.5, 8.5, 9]” tall, then continue to “Base Round” (the beginning of the ribbing section). It does not matter which repeat round you end on.
Base Round: YUSC in each ST around. Join with a SL ST to the first ST of the round. (72 [78, 84, 90])
– – – – – –
Next we’re going to make the band of the hat, and we will be working in vertical rows, attaching it to the Base Round with SL STS as we go. If you need a little extra help, click here for a video tutorial on how to add ribbing at the end of a project.
– – – – – –
CH7.
Row 1: SC in 2nd chain from hook and in each of the remaining 6 chains. SL ST into the first SC from Base Round, the stitch on which your CH7 was built. SL ST into the next SC from Base Round. (6, plus the two slip stitches along Base Round)
The section we just created, built on the CH7, will hereafter be referred to as the “ribbing.”
Row 2: CH1, turn. Skipping over the 2 SL STS you put in Base Round, SC in BLO of each of the first 5 STS of the ribbing. SC in both loops of the last ST. (6)
Row 3: CH1, turn. SC in 1st ST. SC in BLO of each of the remaining 5 STS of the ribbing. SL ST in each of the next 2 STS of Base Round. (6, plus the 2 SL STS along Base Round)
Row 4: CH1, turn. Skipping over the 2 SL STS you put in Base Round, SC in BLO of each of the first 5 STS of the ribbing. SC in both loops of the last ST. (6)
Rows 5-72 [78, 84, 90]: Repeat Rows 3-4 all the way along Base Round.
Fasten off and use your tail to sew together the gap between the first and last rows of the ribbing, then weave in your ends.
Done! If you’re sharing your finished hat on social media, be sure to hashtag #hylandmenshat and tag me @yarnandchai.design. Stay warm out there!
When the weather starts to get cold here in Michigan, one of my favorite accessories to help beat the chill is an earwarmer. I love that I can still wear my hair piled up all messy on the top of my head — or, if it’s a good hair day, down and wavy — because a cozy earwarmer will look great either way.
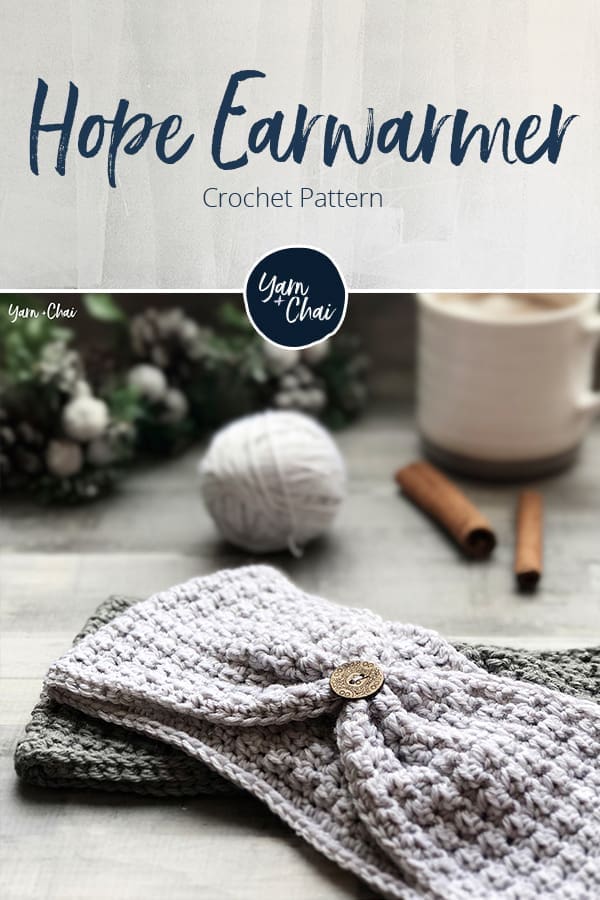
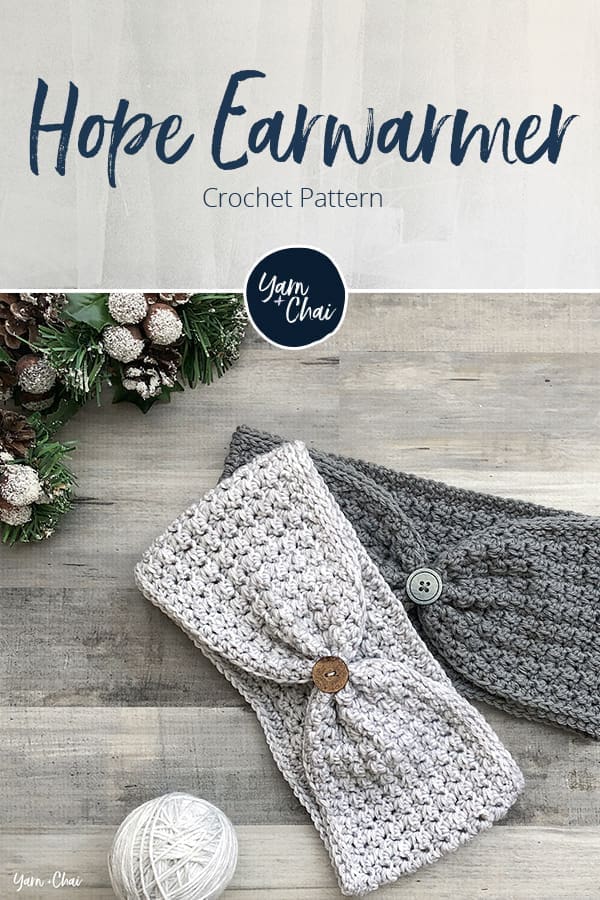
This earwarmer is easy and quick. Don’t let the #3 DK weight yarn fool you; it will work up fast, and still feel light on your head. The seam is conveniently hidden underneath the button, and although I am totally ok with a necessary seam, I always get excited when I find a good hiding place for it!
Visual Learner?
You can follow along with me with this tutorial video, regardless of what size you are making! I put the pattern instructions right on screen so you can relax and go at your own pace. Be sure to subscribe, too!
Prefer a PDF?
This pattern can be completed using the 100% free version right here on this page. However, many people prefer the convenience of a printable, ad-free PDF.
All-Access Passholders get the ad-free version of this and all of my other blog patterns. It’s a pretty sweet deal, if I do say so myself! Learn more about it here or continuing scrolling for the free version.
Finished Sizes: 17″ x 3.5″ (toddler), 18″ x 4″ (child), 20″ x 4.5″ (teen), 21″ x 4.5″ (adult)
Hook: H (5.0 mm) or whichever hook is needed to obtain correct gauge
Yarn: Yarn Bee Sweet Delight, a #3 weight yarn, in the following amounts: 80 yds (toddler), 95 yds (child), 115 yds (teen), 120 yds (adult). Colors used in samples are Toy Elephant and Toy Elephant Marled.
Gauge: 17 HDC x 12 rows = 4″ square
You’ll also need: 7/8″ button, and a yarn needle that can fit through it
Terms and Abbreviations: ST/STS (stitch/stitches) SL ST (slip stitch) SK (skip) CH (chain) SC (single crochet) HDC (half double crochet) SC+HDC (complete a full single crochet and a full half double crochet in the same stitch) 3rd LOOP (work stitch into 3rd loop only – see “Special Stitch”)
Special Stitch:
3rd Loop Only Half double crochet stitches have a 3rd loop that we utilize in this pattern. When working in turned rounds, as in this pattern, the 3rd loop can be found just below the front loop on the side of the work that is facing you. When instructed to work in “3rd loop only”, insert your hook into this special loop. This creates a delicate braided look on the opposite side of the pattern.
Notes: (1) This pattern is written in American Standard Terms.
(2) CH1s at the beginning of rounds do not count as a stitch in the final stitch count.
(3) To resize earwarmer, your starting chain can be any odd number.
(4) Pattern is written for toddler size with additional sizes in brackets [child, teen, adult]. So, for example, if it says “CH71 [75, 85, 89]”, the first number is for the toddler size, and the numbers in brackets are child, teen, and adult instructions, respectively. If you are working from printed instructions, it helps to circle or highlight the numbers you are following before you begin.
(5) Knowing where to place your first stitch can be tricky when working in joined rounds. Usually, it doesn’t matter as long as you’re consistent, but for this pattern, it does matter… especially from Round 4 on! So, here is an image to help you identify where to put your first stitch. Because Round 4 instructs you to skip the first stitch, you will put your SC+HDC combo in the stitch marked as the 2nd stitch (which is also easy to find thanks to the spaces created by the SC+HDC combos from Round 3).
INSTRUCTIONS
To begin: CH71 [75, 85, 89].
Round 1: HDC in 2nd CH from hook and in each remaining CH. Bring ends together, without twisting, and join to the top of the first ST with a SL ST. (70 [74, 84, 88])
Round 2: CH1, turn. SC in 3rd loop of each ST around. Join to the top of the first ST with a SL ST. (70 [74, 84, 88])
Rounds 3-14 [3-16, 3-18, 3-18]: CH1, turn. SK first ST, SC+HDC in next ST. (SK next ST, SC+HDC in next ST) around. Join to the top of the first ST with a SL ST. (70 [74, 84, 88])
Round 15 [17, 19, 19]: CH1, turn. HDC in each ST around. Join to the top of the first ST with a SL ST. (70 [74, 84, 88])
Round 16 [18, 20, 20]: CH1, turn. SC in 3rd loop of each ST around. Join to the top of the first ST with a SL ST. (70 [74, 84, 88])
Fasten off, leaving a long tail for cinching. Use yarn needle and starting tail to sew the small gap between the first and last stitches of Round 1 closed, then weave in that tail only.
Cinching
1. Thread the long finishing tail through your yarn needle and gently set it aside. Gather the seamed section of the headband, and fold in half so that the fold is facing you.
2. Holding on to the fold with one hand, use your other hand to pinch the upper half in half again. The top edge of the earwarmer should be facing down. Grasp the fold together with the first fold, then repeat with the bottom section. When you’re finished, you should be pinching three folds together, with both the top and bottom edges of the earwarmer facing down.
3. Run your yarn needle through all three sections of gathered material. The closer you get to the surface, the better your cinch will look; so I run mine right under just a couple strands of each fold.
4. Wrap the yarn around the underside of the cinch, then through the sections again. Do this a few times to secure the cinch, then thread the needle up through the 1st hole of the button and back down through the 2nd hole, position it on the cinch, and wrap yarn around to the underside to tie off. (If your button has four holes, complete the first two, wrap yarn around the bottom, then come back and complete the last two before tying off.) Weave in the tail.
Done! If you’re sharing on social media, be sure to hashtag #hopeearwarmer and tag me @yarnandchai.design. Stay warm out there!
This pattern is part of the Fall 2017 Malia CAL (Crochet-Along). To view the other patterns in this collection (including a beanie, slouch, cowl and infinity scarf), please visit the Malia CAL Homepage.
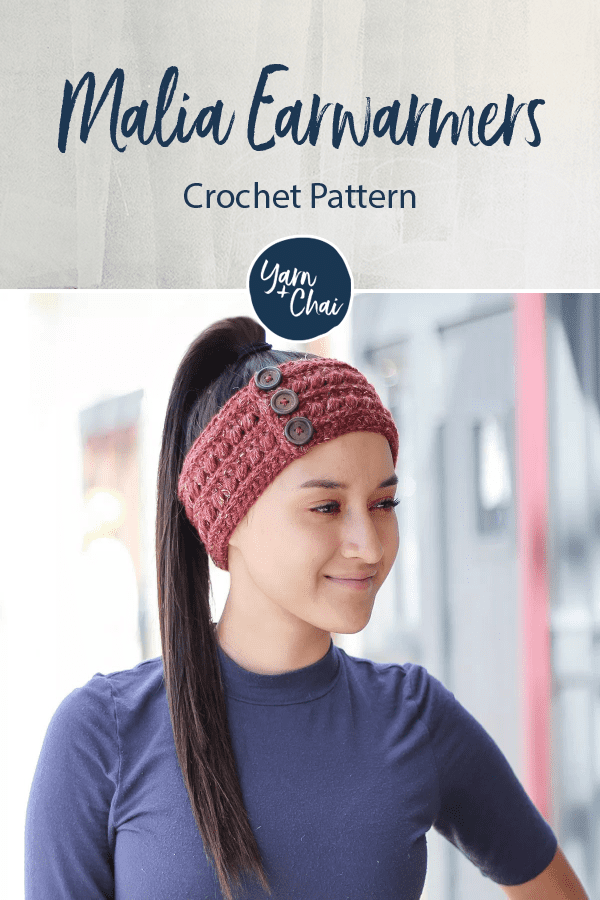
When you want to wear your hair up, but you still want to keep your ears warm, it’s time to grab an earwarmer! This quick pattern is one of the simplest of the Malia collection and you’ll be able to crochet it up in no time.
If you need a little help with the stitches, check out the tutorial video I made for the cowl and scarf; just use the numbers in this pattern instead of the ones called for on the video! Or, scroll down to find the written pattern.
Free Printable Tags
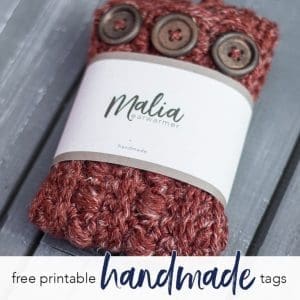
I made some cute printable tags for this pattern that you are welcome to use! If you’re selling or gifting this earwarmer, a tag or wrap just ups the professionalism, in my opinion. I included a wraparound label (shown in the photo) as well as a smaller tag that can be attached to a piece of decorative string wrapped around your finished product, by punching a hole through the corner and threading the string through before tying a bow to secure. Print on cardstock for best results!
Prefer a PDF?
This pattern can be completed using the 100% free version right here on this page. However, many people prefer the convenience of a printable, ad-free PDF.
All-Access Passholders get the ad-free version of this and all of my other blog patterns. It’s a pretty sweet deal, if I do say so myself! Learn more about it here or continuing scrolling for the free version.
MALIA EARWARMER
Difficulty: Easy
Finished Size: 20″ long (before seaming) x 3″ tall
Hook: I (5.50 mm) or whichever hook is needed to obtain correct gauge
Yarn: 80 yards of #4 aran weight. Yarn used in sample photos is Yarn Bee’s Rustic Romantic in “Red Roads.”
Gauge: To ensure the best results, the gauge check is a swatch taken straight from the pattern. Upon completion, you should have a 4” square. If yours is larger, consider using a smaller hook or a thinner #4 yarn. If yours is smaller, consider using a larger hook.
Pattern for Gauge:
CH17. Row 1: SC in 2nd CH from hook and in each remaining CH. (16) Row 2: CH1, turn. SC in first ST. (SK next ST, LBS in next ST) 7 times. SC in final ST. (16) Row 3: CH1, turn. HDC in each ST across. (16) Row 4: CH1, turn. SC in first ST. SC in 3rd loop of each of the next 14 STS. SC in final ST. (16) Row 5: CH1, turn. SC in each ST across. (16) Row 6: CH1, turn. SC in first ST. (LBS in next ST, SK next ST) 7 times. SC in final ST. (16) Row 7: CH1, turn. HDC in each ST across. (16) Row 8: CH1, turn. SC in first ST. SC in 3rd loop of each of the next 14 STS. SC in final ST. (16) Row 9: CH1, turn. SC in each ST across. (16) Rows 10-16: Repeat Rows 2-8. (16)
You’ll also need: Yarn needle, 3 buttons (1″ – 1-1/8″)
Terms and Abbreviations:
FHDC (foundation half double crochet – see “Special Stitches”)
ST/STS (stitch/stitches) SL ST (slip stitch) SK (skip) CH (chain) SC (single crochet) HDC (half double crochet) LBS (large bean stitch – see “Special Stitches”) BLO (back loop only) 3rd LOOP (work stitch into 3rd loop only – see “Special Stitches”)
Special Stitches:
Foundation Half Double Crochet (FHDC) This is the recommended way of beginning the pattern and is better shown than explained, so please watch the included tutorial video as a guide. There is also an optional classic chain start noted in the pattern, if you would like to do that instead.
Large Bean Stitch (LBS) Insert hook into stitch, yarn over and pull through (2 loops on hook). Yarn over, insert hook into same stitch, yarn over and pull through (4 loops on hook). Yarn over, insert hook into same stitch, yarn over and pull through (6 loops on hook). Yarn over, insert hook into same stitch, yarn over and pull through (8 loops on hook). Yarn over and pull through all 8 loops. Chain 1 to close the stitch. (Because this stitch creates two sets of loops – one when creating the bean, and one when closing the stitch – each completed Large Bean Stitch will count for two stitches in the row or round’s final stitch count.)
3rd Loop Only Half double crochet stitches have a 3rd loop that we utilize in this pattern. When working in turned rows, as in this pattern, the 3rd loop can be found just below the front loop on the side of the work that is facing you. When instructed to work in “3rd loop only”, insert your hook into this special loop. This creates a delicate braided look on the opposite side of the pattern.
Notes: (1) This pattern is written in American Standard Terms.
(2) CH1s at the beginning of rows do not count as a stitch in the final stitch count.
(3) A video tutorial for the stitch pattern is available up in the post, or by clicking here.
(4) To make earwarmer larger or smaller, add or subtract an even number of stitches from the starting row or chain. For reference, if you met gauge, 4 stitches = 1″.
INSTRUCTIONS
Row 1: FHDC* 78. (*Alternate start: CH79, HDC in 2nd CH from hook and in each remaining CH) (78)
Row 2: CH1, turn. SC in first ST. SC in 3rd loop of each of the next 76 STS. SC in final ST. (78)
Row 3: CH1, turn. SC in each ST across. (78)
Row 4: CH1, turn. SC in first ST. (SK next ST, LBS in next ST) 38 times. SC in final ST. (78)
Row 5: CH1, turn. HDC in each ST across. (78)
Row 6: CH1, turn. SC in first ST. SC in 3rd loop of each of the next 76 STS. SC in final ST. (78)
Row 7: CH1, turn. SC in each ST across. (78)
Row 8: CH1, turn. SC in first ST. (LBS in next ST, SK next ST) 38 times. SC in final ST. (78)
Row 9: CH1, turn. HDC in each ST across. (78)
Row 10: CH1, turn. SC in first ST. SC in 3rd loop of each of the next 76 STS. SC in final ST. (78)
Edging: CH1, SC in same ST to round corner. Working down the short edge of the earwarmer, SC in each row (10). Ch1 to round corner. SC in each ST across long edge of earwarmer. CH1 to round corner. SC in each row of next short edge. CH1 to round corner. SC in each ST across remaining long edge. Ch1. Join with a SL ST to the first SC of the edging. Fasten off and weave in ends.
Buttons: Overlap one short edge over the other by about 1″. Pin in place if needed. Attach buttons at top, bottom, and center, sewing through both layers to hold earwarmer together.
Done! If you’re sharing on social media, be sure to hashtag #maliacaland #maliaearwarmer and tag me @littlemonkeyscrochet. Hope you enjoyed it!
This pattern is part of the Fall 2017 Malia CAL (Crochet-Along). To view the other patterns in this collection (including a slouchy hat, beanie, infinity scarf, buttoned cowl and more), please visit the Malia CAL Homepage.
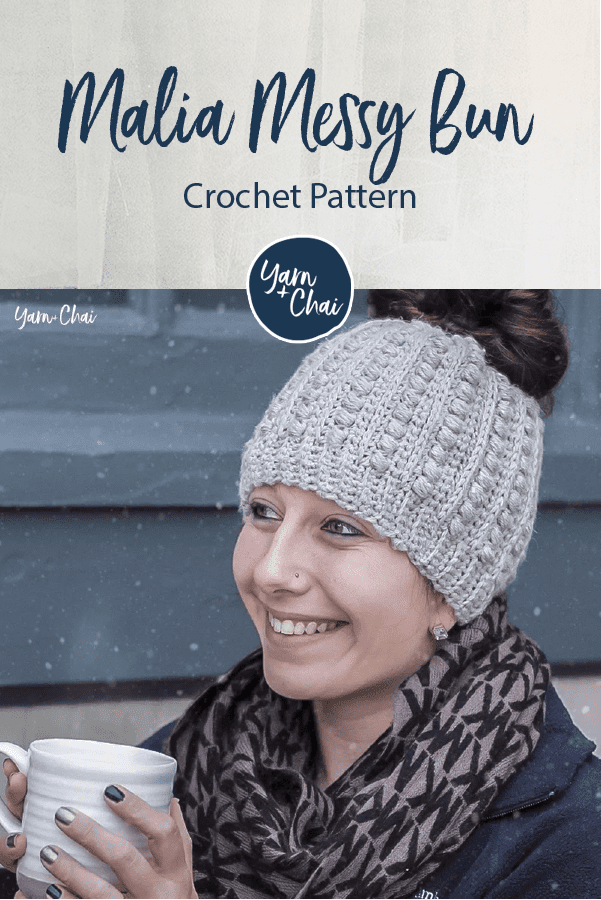
I got so many requests for a messy bun hat pattern last season. The problem was, I had already gone on a self-imposed maternity leave by the time the messy hat trend exploded!
I’ve had quite a few people ask me if I believe the messy bun hat will be popular again this season, and while I don’t think it will match the absolute CRAZY levels of viral-ness it did last year, I do think that the messy bun hat is here to stay. Why? Because it’s more than just a style trend. It’s also super practical! The concept has been around for a long time, but now that a lot more people know about it, I think it will probably become a regular part of the winter accessory lineup.
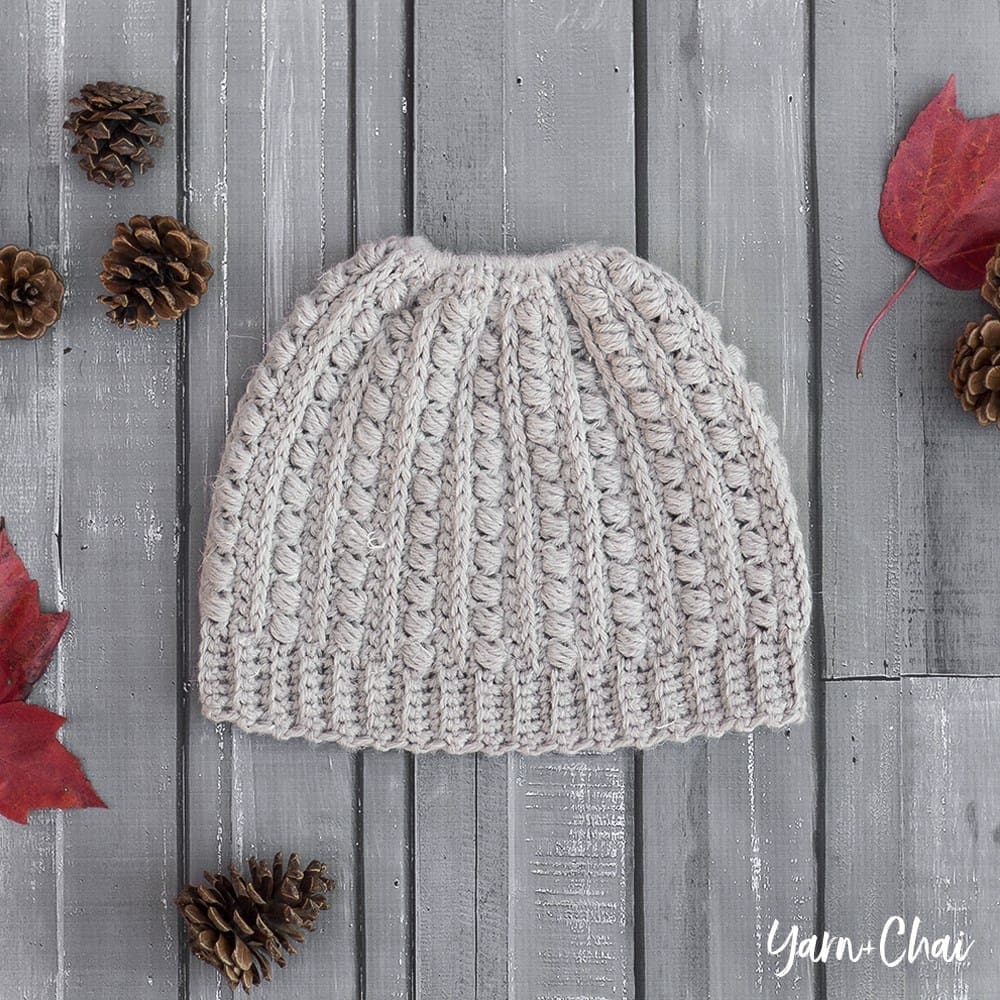
So, my first messy bun hat pattern is here! (Sorry it’s a year late.) If you’ve already made a Malia Beanie or Malia Slouch, this will be super simple for you. If you haven’t, I recommend you watch the video tutorial for those hats to get you started. The tutorial shows you step by step how to make the beanie (adult large size) but all we’re doing to convert it to a messy bun beanie is skipping straight to Round 3 and working it around a hair elastic. Everything else is the same!
Here are a few more photos. Scroll down for the free pattern!
Free Printable Tags
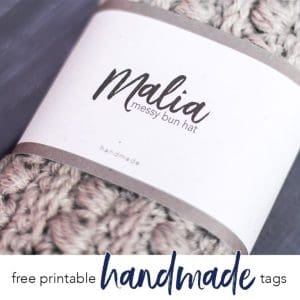
I made some cute printable tags for this pattern that you are welcome to use! If you’re selling or gifting this hat, a tag or wrap just ups the professionalism, in my opinion. I included a wraparound label (shown in the photo) as well as a smaller tag that can be attached to a piece of decorative string wrapped around your finished product, by punching a hole through the corner and threading the string through before tying a bow to secure. Print on cardstock for best results!
Prefer a PDF?
This pattern can be completed using the 100% free version right here on this page. However, many people prefer the convenience of a printable, ad-free PDF.
All-Access Passholders get the ad-free version of this and all of my other blog patterns. It’s a pretty sweet deal, if I do say so myself! Learn more about it here or continuing scrolling for the free version.
MALIA MESSY BUN HAT (2 SIZES)
Difficulty: Easyish
Finished Size: 8.25″ tall x 18.5″ around (teen / adult small), and 8.25″ tall x 20″ around (adult medium / adult large).
Yarn: #4 aran weight. Individual yardage listed under each size in the pattern. Yarn used in sample photos is Yarn Bee’s Rustic Romantic in “Faded Porch Swing.” (See Malia CAL Homepage for substitution suggestions.)
Hook: I (5.50 mm) or whichever hook is needed to obtain correct gauge
Gauge: The importance of checking your gauge for this project cannot be understated. Because of the construction of the hat, it is difficult to adjust mid-pattern if you discover it is turning out too large. Even if you typically do not complete gauge checks, I strongly encourage you to do so this time. To ensure the best results, the gauge check is a swatch taken straight from the pattern. Upon completion, you should have a 4” square. If yours is larger, consider using a smaller hook or a thinner #4 yarn. If yours is smaller, consider using a larger hook.
Pattern for Gauge:
CH17. Row 1: SC in 2nd CH from hook and in each remaining CH. (16) Row 2: CH1, turn. SC in first ST. (SK next ST, LBS in next ST) 7 times. SC in final ST. (16) Row 3: CH1, turn. HDC in each ST across. (16) Row 4: CH1, turn. SC in first ST. SC in 3rd loop of each of the next 14 STS. SC in final ST. (16) Row 5: CH1, turn. SC in each ST across. (16) Row 6: CH1, turn. SC in first ST. (LBS in next ST, SK next ST) 7 times. SC in final ST. (16) Row 7: CH1, turn. HDC in each ST across. (16) Row 8: CH1, turn. SC in first ST. SC in 3rd loop of each of the next 14 STS. SC in final ST. (16) Row 9: CH1, turn. SC in each ST across. (16) Rows 10-16: Repeat Rows 2-8. (16)
You’ll also need: Yarn needle, hair elastic
Terms and Abbreviations: MC (magic circle – view tutorial here)
ST/STS (stitch/stitches) SL ST (slip stitch) SK (skip) CH (chain) SC (single crochet) HDC (half double crochet) LBS (large bean stitch – see “Special Stitches”) BLO (back loop only) 3rd LOOP (work stitch into 3rd loop only – see “Special Stitches”)
Special Stitches: Large Bean Stitch (LBS) Insert hook into stitch, yarn over and pull through (2 loops on hook). Yarn over, insert hook into same stitch, yarn over and pull through (4 loops on hook). Yarn over, insert hook into same stitch, yarn over and pull through (6 loops on hook). Yarn over, insert hook into same stitch, yarn over and pull through (8 loops on hook). Yarn over and pull through all 8 loops. Chain 1 to close the stitch. (Because this stitch creates two sets of loops – one when creating the bean, and one when closing the stitch – each completed Large Bean Stitch will count for two stitches in the row or round’s final stitch count.)
3rd Loop Only Half double crochet stitches have a 3rd loop that we utilize in this pattern. When working in turned rows, as in this pattern, the 3rd loop can be found just below the front loop on the side of the work that is facing you. When instructed to work in “3rd loop only”, insert your hook into this special loop. This creates a delicate braided look on the opposite side of the pattern.
Notes: (1) This pattern is written in American Standard Terms.
(2) CH1s at the beginning of rounds and rows do not count as a stitch in the final stitch count.
(3) Click here to view a video tutorial for the beanie version of this pattern.
(4) Individual instructions are listed first, followed by seaming instructions at the bottom, which is the same for both sizes.
SIZE: TEEN / ADULT SMALL
Finished Size: 8.25″ tall x 18.5″ around Yarn Total: 150-160 yards
INSTRUCTIONS:
Base Round: Attach yarn to hair elastic and secure with a knot. Work 72SC around the hair elastic. Join with a SL ST to the top of the first SC. (72)
Your elastic will be VERY crowded with stitches and will be wavy. This is good! We are now switching to vertical rows, and working them one by one using the stitches we just crocheted around the elastic. The pattern refers to the stitches around the elastic as the “base round”.
Row 1: CH29. SC in 2nd CH from hook and in each remaining CH. SL ST to the base of the CH29, then SL ST to the next ST along the Base Round. (28 + 2 SL STS)
Row 2: CH1, turn. Skipping over the CH1 and the 2 SL STS along the Base Round, SC in each of the first 22 STS of the previous row. SC in BLO of each of the next 5 STS. SC in both loops of the final ST. (28)
Row 3: CH1, turn. SC in first ST. SC in BLO of each of the next 5 STS. (SK next ST, LBS in next ST) 11 times; row is complete. SL ST in each of the next 2 empty STS along the Base Round. (28 + 2 SL STS)
Row 4: CH1, turn. Skipping over the CH1 and the 2 SL STS along the Base Round, HDC in each of the first 22 STS of the previous row. SC in BLO of each of the next 5 STS. SC in both loops of the final ST. (28)
Row 5: CH1, turn. SC in first ST. SC in BLO of each of the next 5 STS. SC in 3rd loop of each of the next 22 STS; row is complete. SL ST in each of the next 2 empty STS along the Base Round. (28 + 2 SL STS)
Row 6: CH1, turn. Skipping over the CH1 and the 2 SL STS along the Base Round, SC in each of the first 22 STS of the previous row. SC in BLO of each of the next 5 STS. SC in both loops of the final ST. (28)
Row 7: CH1, turn. SC in first ST. SC in BLO of each of the next 5 STS. (LBS in next ST, SK next ST) 11 times; row is complete. SL ST in each of the next 2 empty STS along the Base Round. (28 + 2 SL STS)
Row 8: CH1, turn. Skipping over the CH1 and the 2 SL STS along the Base Round, HDC in each of the first 22 STS of the previous row. SC in BLO of each of the next 5 STS. SC in both loops of the final ST. (28)
Row 9: CH1, turn. SC in first ST. SC in BLO of each of the next 5 STS. SC in 3rd loop of each of the next 22 STS; row is complete. SL ST in each of the next 2 empty STS along the Base Round. (28 + 2 SL STS)
Rows 10-65: Repeat Rows 2-9, in order, 7 more times.
Rows 66-72: Repeat Rows 2-8.
Fasten off, leaving a long tail for sewing the seam.
SIZE: ADULT MEDIUM / LARGE
Finished Size: 8.25″ tall x 20″ around Yarn Total: 190-200 yards
INSTRUCTIONS:
Base Round: Attach yarn to hair elastic and secure with a knot. Work 84SC around the hair elastic. Join with a SL ST to the top of the first SC. (84)
Your elastic will be VERY crowded with stitches and will be wavy. This is good! We are now switching to vertical rows, and working them one by one using the stitches we just crocheted around the elastic. The pattern refers to the stitches around the elastic as the “base round”.
Row 1: CH29. SC in 2nd CH from hook and in each remaining CH. SL ST to the base of the CH29, then SL ST to the next ST along the Base Round. (28 + 2 SL STS)
Row 2: CH1, turn. Skipping over the CH1 and the 2 SL STS along the Base Round, SC in each of the first 22 STS of the previous row. SC in BLO of each of the next 5 STS. SC in both loops of the final ST. (28)
Row 3: CH1, turn. SC in first ST. SC in BLO of each of the next 5 STS. (SK next ST, LBS in next ST) 11 times; row is complete. SL ST in each of the next 2 empty STS along the Base Round. (28 + 2 SL STS)
Row 4: CH1, turn. Skipping over the CH1 and the 2 SL STS along the Base Round, HDC in each of the first 22 STS of the previous row. SC in BLO of each of the next 5 STS. SC in both loops of the final ST. (28)
Row 5: CH1, turn. SC in first ST. SC in BLO of each of the next 5 STS. SC in 3rd loop of each of the next 22 STS; row is complete. SL ST in each of the next 2 empty STS along the Base Round. (28 + 2 SL STS)
Row 6: CH1, turn. Skipping over the CH1 and the 2 SL STS along the Base Round, SC in each of the first 22 STS of the previous row. SC in BLO of each of the next 5 STS. SC in both loops of the final ST. (28)
Row 7: CH1, turn. SC in first ST. SC in BLO of each of the next 5 STS. (LBS in next ST, SK next ST) 11 times; row is complete. SL ST in each of the next 2 empty STS along the Base Round. (28 + 2 SL STS)
Row 8: CH1, turn. Skipping over the CH1 and the 2 SL STS along the Base Round, HDC in each of the first 22 STS of the previous row. SC in BLO of each of the next 5 STS. SC in both loops of the final ST. (28)
Row 9: CH1, turn. SC in first ST. SC in BLO of each of the next 5 STS. SC in 3rd loop of each of the next 22 STS; row is complete. SL ST in each of the next 2 empty STS along the Base Round. (28 + 2 SL STS)
Rows 10-81: Repeat Rows 2-9, in order, 9 more times.
Rows 82-84: Repeat Rows 2-4.
Fasten off, leaving a long tail for sewing the seam.
SEAMING
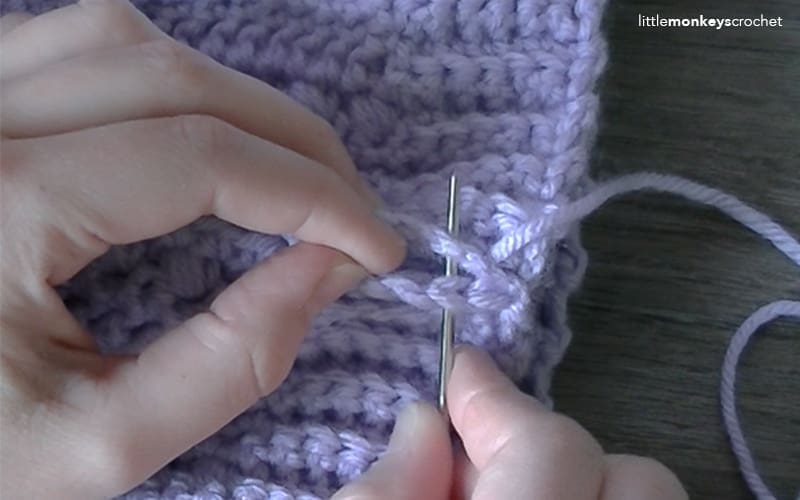
Turn hat inside out. Thread your yarn needle onto the long finishing tail and sew the first 6 stitches (the ribbed band) together, stitch by stitch. The following photo is a screenshot from the video tutorial:
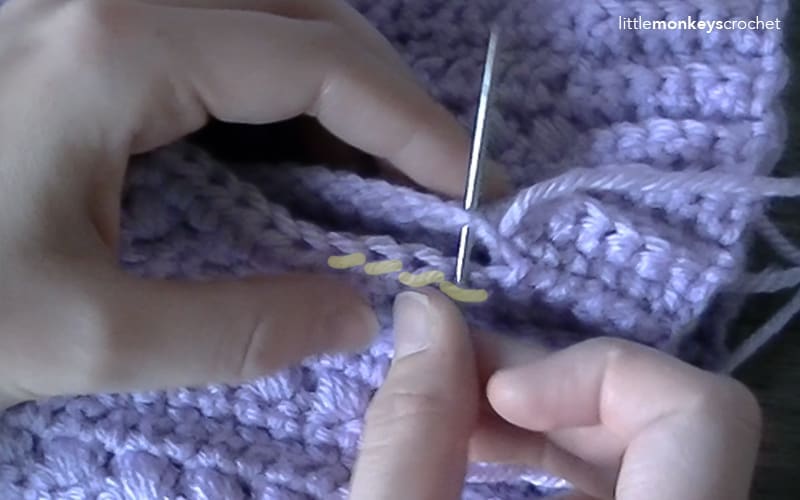
Once you finish with the ribbed section, sew the rest of the seam up, stitch by stitch, putting your needle through the 3rd loop only of the final row of HDCs and across to the corresponding stitch on the other side of the seam. This will ensure that the seam creates a row of visible top loops to match the other 3rd loop rows around the hat. The following photo is a screenshot from the video tutorial, with the 3rd loops highlighted:
Fasten off and weave in your ends.
Done! If you’re sharing on social media, be sure to hashtag #maliacaland #maliamessybunhat, and tag me @yarnandchai.design. Hope you enjoyed it!
This pattern is part of the Fall 2017 Malia CAL (Crochet-Along). To view the other patterns in this collection (including an adult beanie, slouchy hat, infinity scarf, and buttoned cowl), please visit the Malia CAL Homepage.
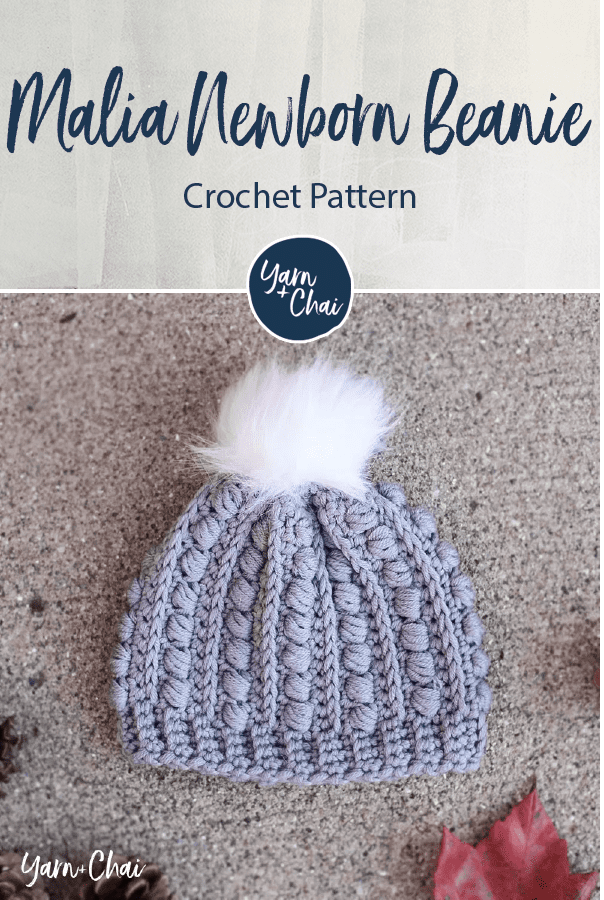
Is there anything cuter than a little newborn beanie? Every time I make one, I think to myself, were my boys’ heads really this small once? (Actually, probably not. My kids all had big heads!)
Unlike the rest of the Malia Crochet-Along Patterns, which used Yarn Bee’s Rustic Romantic yarn, for this pattern I used Cascade Longwood which is one of my all-time favorite yarns. The Rustic Romantic is gorgeous but it has hemp in it, and that makes it not quite soft enough for a newborn head. Longwood on the other hand is smooth and soft and has beautiful stitch definition, and it washes up great. I made my son’s baby blanket from it and it is holding up beautifully!
There is endless debate about whether or not pom poms (or buttons, or ribbons) should be used on a baby’s hat. My thought is, a newborn should never be left unattended ever, unless she is in the safety of her crib, and she wouldn’t be wearing a winter beanie during nap time, anyway! I don’t even leave hats on my babies in their car seats, because hell hath no fury like that of a baby who has just pulled his hat over his eyes and is out of reach of his driving mama. Of course, it’s up to you whether you are comfortable attaching a pom pom to this hat, and I think it’s pretty adorable either way.
This hat uses my special faux-cinched, top-down, vertical method – meaning you begin the hat in rounds, then switch to vertical rows, and you end up with a beautiful vertical design without having to sew it shut at the end. This method produces a nice even cinch at the top. At first the method might seem confusing, but many who have tried it have ended up falling in love with it! There is a video tutorial for the adult version of this beanie that may help you as you start the hat. Your numbers will be different, but the construction is the same.
Free Printable Tags
I made some cute printable tags for this pattern that you are welcome to use! If you’re selling or gifting this hat, a tag or wrap just ups the professionalism, in my opinion. I included a wraparound label as well as a smaller tag (shown in photo below) that can be attached to a piece of decorative string wrapped around your finished product, by punching a hole through the corner and threading the string through before tying a bow to secure. Print on cardstock for best results!
Prefer a PDF?
This pattern can be completed using the 100% free version right here on this page. However, many people prefer the convenience of a printable, ad-free PDF.
All-Access Passholders get the ad-free version of this and all of my other blog patterns. It’s a pretty sweet deal, if I do say so myself! Learn more about it here or continuing scrolling for the free version.
MALIA NEWBORN BEANIE
Difficulty: Easyish
Finished Size: 5″ tall x 12″ circumference (will fit a 0-3 month old baby with an average 13-15″ head)
Yarn: 80 yards of #4 aran weight. Yarn used in sample photos is Cascade Longwood.
Hook: I (5.50 mm) or whichever hook is needed to obtain correct gauge
Gauge: The importance of checking your gauge for this project cannot be understated. Because of the construction of the hat, it is difficult to adjust mid-pattern if you discover it is turning out too large. Even if you typically do not complete gauge checks, I strongly encourage you to do so this time. To ensure the best results, the gauge check is a swatch taken straight from the pattern. Upon completion, you should have a 4” square. If yours is larger, consider using a smaller hook or a thinner #4 yarn. If yours is smaller, consider using a larger hook.
Pattern for Gauge:
CH17. Row 1: SC in 2nd CH from hook and in each remaining CH. (16) Row 2: CH1, turn. SC in first ST. (SK next ST, LBS in next ST) 7 times. SC in final ST. (16) Row 3: CH1, turn. HDC in each ST across. (16) Row 4: CH1, turn. SC in first ST. SC in 3rd loop of each of the next 14 STS. SC in final ST. (16) Row 5: CH1, turn. SC in each ST across. (16) Row 6: CH1, turn. SC in first ST. (LBS in next ST, SK next ST) 7 times. SC in final ST. (16) Row 7: CH1, turn. HDC in each ST across. (16) Row 8: CH1, turn. SC in first ST. SC in 3rd loop of each of the next 14 STS. SC in final ST. (16) Row 9: CH1, turn. SC in each ST across. (16) Rows 10-16: Repeat Rows 2-8. (16)
You’ll also need: Yarn needle, optional small faux fur pom pom
Terms and Abbreviations: MC (magic circle – view tutorial here)
ST/STS (stitch/stitches) SL ST (slip stitch) SK (skip) CH (chain) SC (single crochet) HDC (half double crochet) LBS (large bean stitch – see “Special Stitches”) BLO (back loop only) 3rd LOOP (work stitch into 3rd loop only – see “Special Stitches”)
Special Stitches: Large Bean Stitch (LBS) Insert hook into stitch, yarn over and pull through (2 loops on hook). Yarn over, insert hook into same stitch, yarn over and pull through (4 loops on hook). Yarn over, insert hook into same stitch, yarn over and pull through (6 loops on hook). Yarn over, insert hook into same stitch, yarn over and pull through (8 loops on hook). Yarn over and pull through all 8 loops. Chain 1 to close the stitch. (Because this stitch creates two sets of loops – one when creating the bean, and one when closing the stitch – each completed Large Bean Stitch will count for two stitches in the row or round’s final stitch count.)
3rd Loop Only Half double crochet stitches have a 3rd loop that we utilize in this pattern. When working in turned rows, as in this pattern, the 3rd loop can be found just below the front loop on the side of the work that is facing you. When instructed to work in “3rd loop only”, insert your hook into this special loop. This creates a delicate braided look on the opposite side of the pattern.
Notes: (1) This pattern is written in American Standard Terms.
(2) CH1s at the beginning of rounds and rows do not count as a stitch in the final stitch count.
(3) Click here to view a video tutorial for the adult version of this pattern.
INSTRUCTIONS
To Begin: Make a magic circle; CH1.
Round 1: 8SC in MC, join with a SL ST to the top of the first SC. (8)
Round 2: CH1. 2SC in each ST around, join with a SL ST to the top of the first SC. (16)
Round 3: CH1. 3SC in each ST around, join with a SL ST to the top of the first SC. (48)
At this point you should have a very wavy circle. We are now switching to vertical rows, and working them one by one using the stitches from Round 3.
Row 1: CH19, turn. SC in 2nd CH from hook and in each remaining CH; row is complete. Being sure that the wrong side of the circle is facing you (because we turned), SL ST to the base of the CH19, then SL ST to the next ST along Round 3. (18 + 2 SL STS)
Row 2: CH1, turn. Skipping over the CH1 and the 2 SL STS along Round 3, SC in each of the first 14 STS of the previous row. SC in BLO of each of the next 3 STS. SC in both loops of the final ST. (18)
Row 3: CH1, turn. SC in first ST. SC in BLO of each of the next 3 STS. (SK next ST, LBS in next ST) 7 times; row is complete. SL ST in each of the next 2 STS along Round 3. (18 + 2 SL STS)
Row 4: CH1, turn. HDC in each of the first 14 STS. SC in BLO of each of the next 3 STS. SC in both loops of the final ST. (18)
Row 5: CH1, turn. SC in first ST. SC in BLO of each of the next 3 STS. SC in 3rd loop of each of the next 14 STS; row is complete. SL ST in each of the next 2 STS along Round 3. (18 + 2 SL STS)
Row 6: CH1, turn. Skipping over the CH1 and the 2 SL STS along Round 3, SC in each of the first 14 STS of the previous row. SC in BLO of each of the next 3 STS. SC in both loops of the final ST. (18)
Row 7: CH1, turn. SC in first ST. SC in BLO of each of the next 3 STS. (LBS in next ST, SK next ST) 7 times; row is complete. SL ST in each of the next 2 STS along Round 3. (18 + 2 SL STS)
Row 8: CH1, turn. HDC in each of the first 14 STS. SC in BLO of each of the next 3 STS. SC in both loops of the final ST. (18)
Row 9: CH1, turn. SC in first ST. SC in BLO of each of the next 3 STS. SC in 3rd loop of each of the next 14 STS; row is complete. SL ST in each of the next 2 STS along Round 3. (18 + 2 SL STS)
Rows 10-41: Repeat Rows 2-9, in order, 4 more times.
Rows 42-48: Repeat Rows 2-8.
Fasten off, leaving a long tail for sewing the seam.
SEAMING
Turn hat inside out. Close up the magic circle and weave in that end only. Then, thread your yarn needle onto the long finishing tail and sew the first 4 stitches (the ribbed band) together, stitch by stitch. The following photo is a screenshot from the adult version’s video tutorial:
Once you finish with the ribbed section, sew the rest of the seam up, stitch by stitch, putting your needle through the 3rd loop of the final row of HDCs and across to the corresponding stitch on the other side of the seam. This will ensure that the seam creates a row of visible top loops to match the other 3rd loop rows around the hat. The following photo is a screenshot from the adult version’s video tutorial, with the 3rd loops highlighted:
Weave in your tail and cut off the excess. Attach a pom pom (optional.)
Done! If you’re sharing on social media, be sure to hashtag #maliacaland #malianewbornbeanie, and tag me @littlemonkeyscrochet. Hope you enjoyed it!
This pattern is part of the Fall 2017 Malia CAL (Crochet-Along). To view the other patterns in this collection (including a beanie, infinity scarf, and buttoned cowl), please visit the Malia CAL Homepage.
The second pattern in the Malia CAL is a slouchy version of the Malia Beanie! As with the beanie, I used a unique blend of the top-down method and the vertical method for constructing this hat, resulting in what I think is the best of both worlds – a cute vertical design and a secure cinched top. It’s a little confusing to explain, but I’ve made a video tutorial for both patterns in case you need a little help! The video tutorial follows the large pattern size, but all you need to do differently for the smaller size is follow the first 3 rounds from the “Teen / Adult Small” pattern and then continue on with the video instructions.
Free Printable Tags
I made some cute printable tags for this pattern that you are welcome to use! If you’re selling or gifting this hat, a tag or wrap just ups the professionalism, in my opinion. I included a wraparound label as well as a smaller tag (shown in the photo) that can be attached to a piece of decorative string wrapped around your finished product, by punching a hole through the corner and threading the string through before tying a bow to secure. Print on cardstock for best results!
Prefer a PDF?
This pattern can be completed using the 100% free version right here on this page. However, many people prefer the convenience of a printable, ad-free PDF.
All-Access Passholders get the ad-free version of this and all of my other blog patterns. It’s a pretty sweet deal, if I do say so myself! Learn more about it here or continuing scrolling for the free version.
MALIA SLOUCH (2 SIZES)
Difficulty: Easyish
Finished Size: 9.5″ tall x 18.5″ around (teen / adult small), and 9.5″ tall x 20″ around (adult medium / adult large)
Hook: I (5.50 mm) or whichever hook is needed to obtain correct gauge
Yarn: #4 aran weight. Individual yardage listed under each size in the pattern. Yarn used in sample photos is Yarn Bee’s Rustic Romantic in “Antique Iron.” (See Malia CAL Homepage for substitution suggestions.)
Gauge: The importance of checking your gauge for this project cannot be understated. Because of the construction of the hat, it is difficult to adjust mid-pattern if you discover it is turning out too large. Even if you typically do not complete gauge checks, I strongly encourage you to do so this time. To ensure the best results, the gauge check is a swatch taken straight from the pattern. Upon completion, you should have a 4” square. If yours is larger, consider using a smaller hook or a thinner #4 yarn. If yours is smaller, consider using a larger hook.
Pattern for Gauge:
CH17. Row 1: SC in 2nd CH from hook and in each remaining CH. (16) Row 2: CH1, turn. SC in first ST. (SK next ST, LBS in next ST) 7 times. SC in final ST. (16) Row 3: CH1, turn. HDC in each ST across. (16) Row 4: CH1, turn. SC in first ST. SC in 3rd loop of each of the next 14 STS. SC in final ST. (16) Row 5: CH1, turn. SC in each ST across. (16) Row 6: CH1, turn. SC in first ST. (LBS in next ST, SK next ST) 7 times. SC in final ST. (16) Row 7: CH1, turn. HDC in each ST across. (16) Row 8: CH1, turn. SC in first ST. SC in 3rd loop of each of the next 14 STS. SC in final ST. (16) Row 9: CH1, turn. SC in each ST across. (16) Rows 10-16: Repeat Rows 2-8. (16)
You’ll also need: Yarn needle, optional faux fur pom pom
Terms and Abbreviations: MC (magic circle – view tutorial here)
ST/STS (stitch/stitches) SL ST (slip stitch) SK (skip) CH (chain) SC (single crochet) HDC (half double crochet) LBS (large bean stitch – see “Special Stitches”) BLO (back loop only) 3rd LOOP (work stitch into 3rd loop only – see “Special Stitches”) …..
Special Stitches: Large Bean Stitch (LBS) Insert hook into stitch, yarn over and pull through (2 loops on hook). Yarn over, insert hook into same stitch, yarn over and pull through (4 loops on hook). Yarn over, insert hook into same stitch, yarn over and pull through (6 loops on hook). Yarn over, insert hook into same stitch, yarn over and pull through (8 loops on hook). Yarn over and pull through all 8 loops. Chain 1 to close the stitch. (Because this stitch creates two sets of loops – one when creating the bean, and one when closing the stitch – each completed Large Bean Stitch will count for two stitches in the row or round’s final stitch count.)
3rd Loop Only Half double crochet stitches have a 3rd loop that we utilize in this pattern. When working in turned rows, as in this pattern, the 3rd loop can be found just below the front loop on the side of the work that is facing you. When instructed to work in “3rd loop only”, insert your hook into this special loop. This creates a delicate braided look on the opposite side of the pattern.
Notes: (1) This pattern is written in American Standard Terms.
(2) CH1s at the beginning of rounds and rows do not count as a stitch in the final stitch count.
(3) Click here to view a video tutorial.
(4) Individual instructions are listed first, followed by seaming instructions at the bottom, which is the same for both sizes.
SIZE: TEEN / ADULT SMALL
Finished Size: 9.5″ tall x 18.5″ around Yarn Total: 240-260 yards
To Begin: Make a magic circle; CH1.
Round 1: 12SC in MC, join with a SL ST to the top of the first SC. (12)
Round 2: CH1. 2SC in each ST around, join with a SL ST to the top of the first SC. (24)
Round 3: CH1. 3SC in each ST around, join with a SL ST to the top of the first SC. (72)
At this point you should have a very wavy circle. We are now switching to vertical rows, and working them one by one using the stitches from Round 3.
Row 1: CH35, turn. SC in 2nd CH from hook and in each remaining CH; row is complete. Being sure that the wrong side of the circle is facing you (because we turned), SL ST to the base of the CH35, then SL ST to the next ST along Round 3. (34 + 2 SL STS)
Row 2: CH1, turn. Skipping over the CH1 and the 2 SL STS along Round 3, SC in each of the first 28 STS of the previous row. SC in BLO of each of the next 5 STS. SC in both loops of the final ST. (34)
Row 3: CH1, turn. SC in first ST. SC in BLO of each of the next 5 STS. (SK next ST, LBS in next ST) 14 times; row is complete. SL ST in each of the next 2 STS along Round 3. (34 + 2 SL STS)
Row 4: CH1, turn. HDC in each of the first 28 STS. SC in BLO of each of the next 5 STS. SC in both loops of the final ST. (34)
Row 5: CH1, turn. SC in first ST. SC in BLO of each of the next 5 STS. SC in 3rd loop of each of the next 28 STS; row is complete. SL ST in each of the next 2 STS along Round 3. (34 + 2 SL STS)
Row 6: CH1, turn. Skipping over the CH1 and the 2 SL STS along Round 3, SC in each of the first 28 STS of the previous row. SC in BLO of each of the next 5 STS. SC in both loops of the final ST. (34)
Row 7: CH1, turn. SC in first ST. SC in BLO of each of the next 5 STS. (LBS in next ST, SK next ST) 14 times; row is complete. SL ST in each of the next 2 STS along Round 3. (34 + 2 SL STS)
Row 8: CH1, turn. HDC in each of the first 28 STS. SC in BLO of each of the next 5 STS. SC in both loops of the final ST. (34)
Row 9: CH1, turn. SC in first ST. SC in BLO of each of the next 5 STS. SC in 3rd loop of each of the next 28 STS; row is complete. SL ST in each of the next 2 STS along Round 3. (34 + 2 SL STS)
Rows 10-65: Repeat Rows 2-9, in order, 7 more times.
Rows 66-72: Repeat Rows 2-8.
Fasten off, leaving a long tail for sewing the seam.
SIZE: ADULT MEDIUM / LARGE
Finished Size: 9.5″ tall x 20″ around Yarn Total: 260-275 yards
To Begin: Make a magic circle; CH1.
Round 1: 14SC in MC, join with a SL ST to the top of the first SC. (14)
Round 2: CH1. 2SC in each ST around, join with a SL ST to the top of the first SC. (28)
Round 3: CH1. 3SC in each ST around, join with a SL ST to the top of the first SC. (84)
At this point you should have a very wavy circle. We are now switching to vertical rows, and working them one by one using the stitches from Round 3.
Row 1: CH35, turn. SC in 2nd CH from hook and in each remaining CH; row is complete. Being sure that the wrong side of the circle is facing you (because we turned), SL ST to the base of the CH35, then SL ST to the next ST along Round 3. (34 + 2 SL STS)
Row 2: CH1, turn. Skipping over the CH1 and the 2 SL STS along Round 3, SC in each of the first 28 STS of the previous row. SC in BLO of each of the next 5 STS. SC in both loops of the final ST. (34)
Row 3: CH1, turn. SC in first ST. SC in BLO of each of the next 5 STS. (SK next ST, LBS in next ST) 14 times; row is complete. SL ST in each of the next 2 STS along Round 3. (34 + 2 SL STS)
Row 4: CH1, turn. HDC in each of the first 28 STS. SC in BLO of each of the next 5 STS. SC in both loops of the final ST. (34)
Row 5: CH1, turn. SC in first ST. SC in BLO of each of the next 5 STS. SC in 3rd loop of each of the next 28 STS; row is complete. SL ST in each of the next 2 STS along Round 3. (34 + 2 SL STS)
Row 6: CH1, turn. Skipping over the CH1 and the 2 SL STS along Round 3, SC in each of the first 28 STS of the previous row. SC in BLO of each of the next 5 STS. SC in both loops of the final ST. (34)
Row 7: CH1, turn. SC in first ST. SC in BLO of each of the next 5 STS. (LBS in next ST, SK next ST) 14 times; row is complete. SL ST in each of the next 2 STS along Round 3. (34 + 2 SL STS)
Row 8: CH1, turn. HDC in each of the first 28 STS. SC in BLO of each of the next 5 STS. SC in both loops of the final ST. (34)
Row 9: CH1, turn. SC in first ST. SC in BLO of each of the next 5 STS. SC in 3rd loop of each of the next 28 STS; row is complete. SL ST in each of the next 2 STS along Round 3. (34 + 2 SL STS)
Rows 10-81: Repeat Rows 2-9, in order, 9 more times
Rows 82-84: Repeat Rows 2-4
Fasten off, leaving a long tail for sewing the seam.
SEAMING
Turn hat inside out. Close up the magic circle and weave in that end only. Then, thread your yarn needle onto the long finishing tail and sew the first 6 stitches (the ribbed band) together, stitch by stitch. You can find more details on that step in the video tutorial:
Once you finish with the ribbed section, sew the rest of the seam up, stitch by stitch, putting your needle through the 3rd loop of the final row of HDCs and across to the corresponding stitch on the other side of the seam. This will ensure that the seam creates a row of visible top loops to match the other 3rd loop rows around the hat. You can find more details on that step in the video tutorial:
Weave in your tail and cut off the excess. Attach a pom pom (optional.)
Done! If you’re sharing on social media, be sure to hashtag #maliacaland #maliaslouch, and tag me @littlemonkeyscrochet. Hope you enjoyed it!
Get the Mosaic Basket Pattern for FREE!
Sign up for the Yarn + Chai email newsletter and receive the Mosaic Basket Pattern in ad-free PDF format for FREE!