Category: Hats + Headwear

  • Malia Beanie (2 Sizes)

    Malia Beanie (2 Sizes)

    This pattern is part of the Fall 2017 Malia CAL (Crochet-Along). To view the other patterns in this collection (including a slouchy hat, infinity scarf, and buttoned cowl), please visit the Malia CAL Homepage.

    Winter is coming, and that means… hat season! I love hat season, especially on school mornings, because between getting the kindergartener and the first grader ready for school and feeding and dressing the baby, I never have time to do much more than throw my hair up in a pony tail. (Yes, I could wake up earlier, but I value my sleep.) But when it’s cold enough to switch out the hair tie for a hat, a pretty winter beanie adds a little cuteness to the hot mess look, amiright?

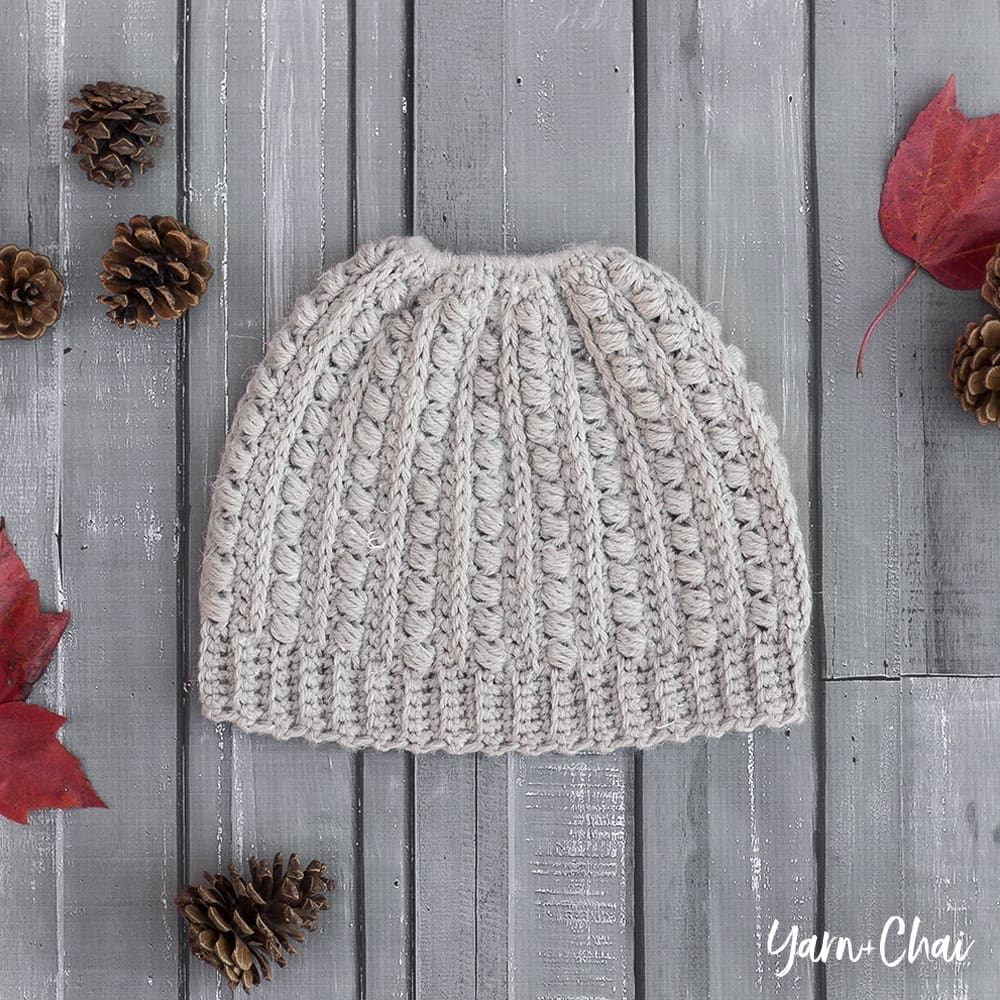
    I experimented with this design quite a bit because I knew I wanted it to be worked vertically to achieve the design I had in my head, but honestly, I’m not a huge fan of the work-flat-and-sew-to-cinch method. I’ve used it in a handful of my patterns because it’s the only way I knew how to achieve the vertical design, but sometimes I feel like I can’t close the top securely enough and the cinch often looks a bit unbalanced. So after some thinking, I thought up another method (which I’m sure has been done before by others) to combine my favorite top-down method with a vertical design and I’m really happy with how it turned out. It’s a little confusing to explain, but I’ve made a video tutorial for this pattern in case you need a little help! The video tutorial follows the large pattern size, but all you need to do differently for the smaller size is follow the first 3 rounds from the “Teen / Adult Small” pattern and then continue on with the video instructions.

    Free Printable Tags

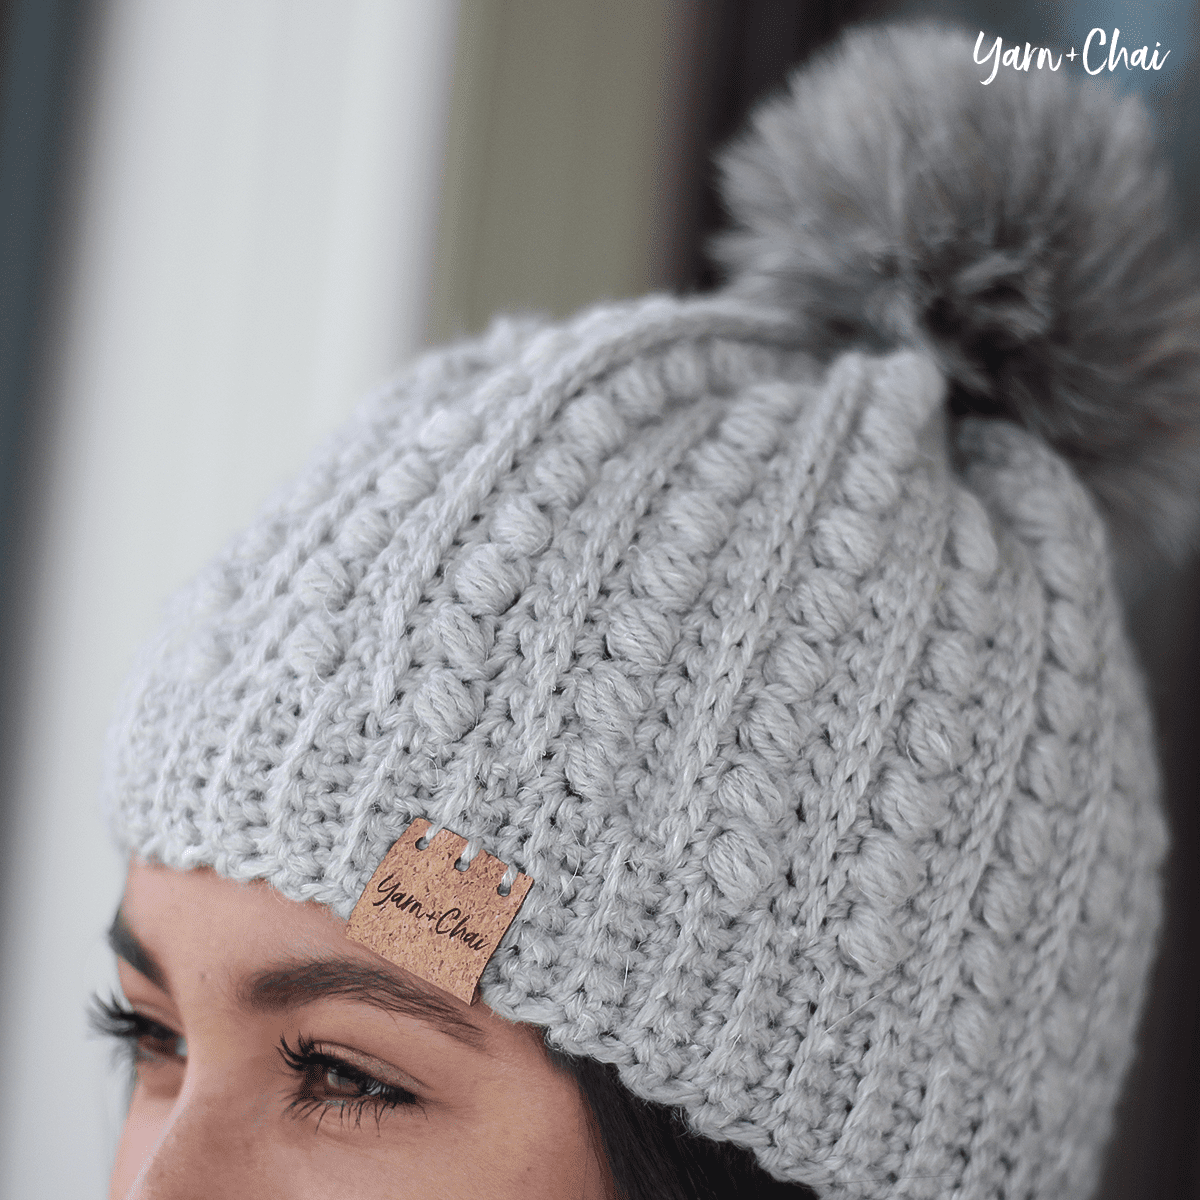
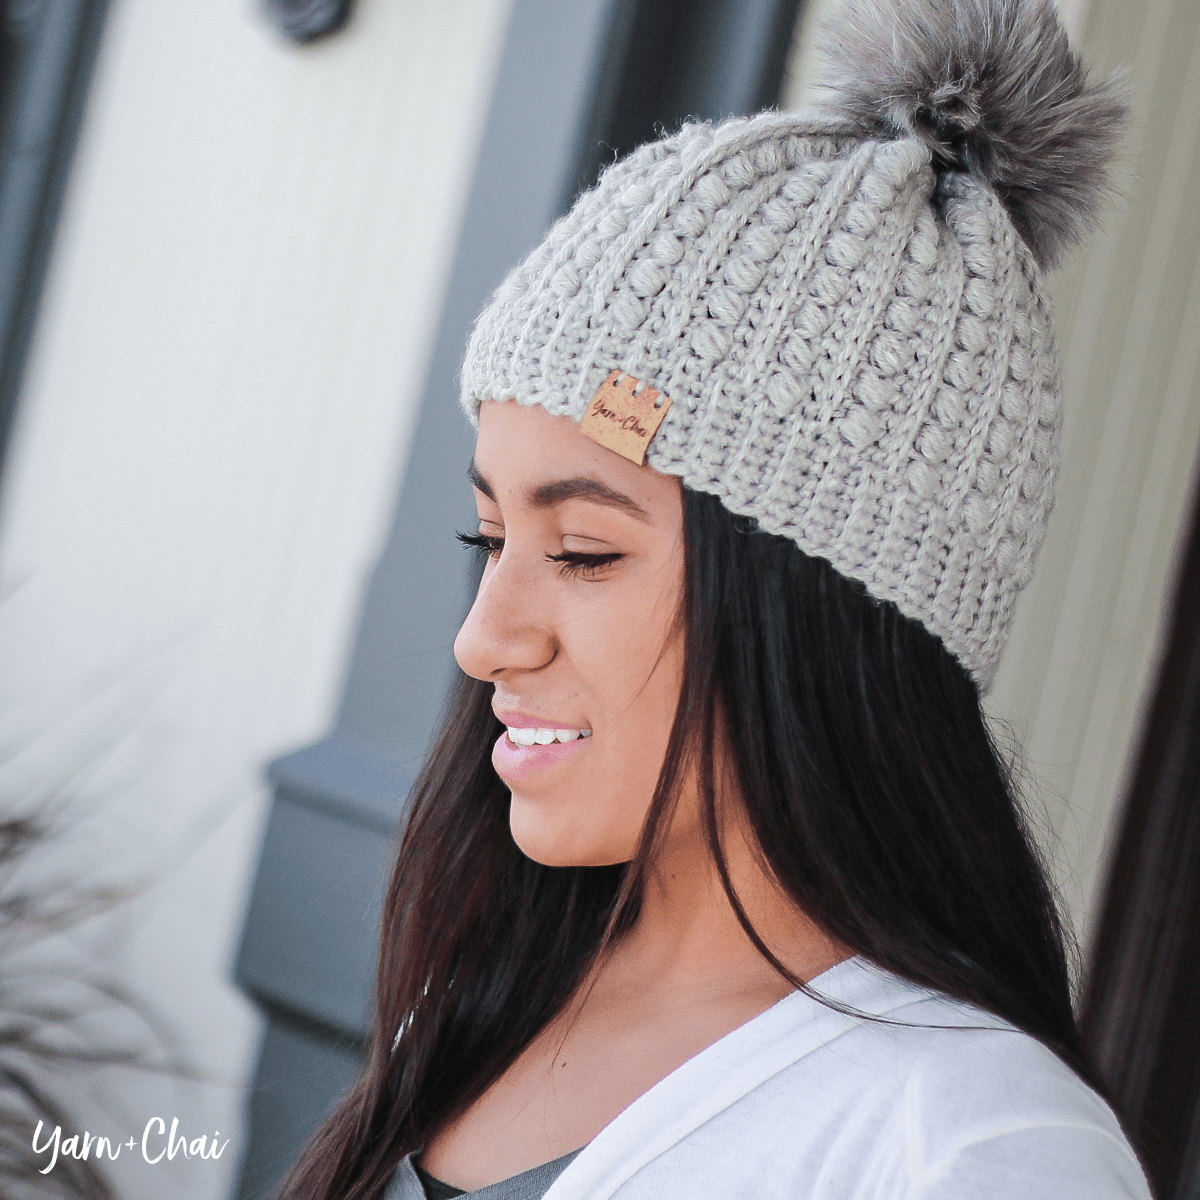
    I made some cute printable tags for this pattern that you are welcome to use! If you’re selling or gifting this hat, a tag or wrap just ups the professionalism, in my opinion. I included a wraparound label (shown in the photo) as well as a smaller tag that can be attached to a piece of decorative string wrapped around your finished product, by punching a hole through the corner and threading the string through before tying a bow to secure. Print on cardstock for best results!

    Prefer a PDF?

    This pattern can be completed using the 100% free version right here on this page. However, many people prefer the convenience of a printable, ad-free PDF.

    All-Access Passholders get the ad-free version of this and all of my other blog patterns. It’s a pretty sweet deal, if I do say so myself! Learn more about it here or continuing scrolling for the free version.

    MALIA BEANIE (2 SIZES)

    Difficulty: Easyish

    Finished Size: 8.25″ tall x 18.5″ around (teen / adult small), and 8.25″ tall x 20″ around (adult medium / adult large)

    Yarn: #4 aran weight. Individual yardage listed under each size in the pattern. Yarn used in sample photos is Yarn Bee’s Rustic Romantic in “Faded Porch Swing.”  (See Malia CAL Homepage for substitution suggestions.)

    Hook: I (5.50 mm) or whichever hook is needed to obtain correct gauge

    Gauge: The importance of checking your gauge for this project cannot be understated. Because of the construction of the hat, it is difficult to adjust mid-pattern if you discover it is turning out too large. Even if you typically do not complete gauge checks, I strongly encourage you to do so this time. To ensure the best results, the gauge check is a swatch taken straight from the pattern. Upon completion, you should have a 4” square. If yours is larger, consider using a smaller hook or a thinner #4 yarn. If yours is smaller, consider using a larger hook.

    Pattern for Gauge:
    CH17.
    Row 1: SC in 2nd CH from hook and in each remaining CH. (16)
    Row 2: CH1, turn. SC in first ST. (SK next ST, LBS in next ST) 7 times. SC in final ST. (16)
    Row 3: CH1, turn. HDC in each ST across. (16)
    Row 4: CH1, turn. SC in first ST. SC in 3rd loop of each of the next 14 STS. SC in final ST. (16)
    Row 5: CH1, turn. SC in each ST across. (16)
    Row 6: CH1, turn. SC in first ST. (LBS in next ST, SK next ST) 7 times. SC in final ST. (16)
    Row 7: CH1, turn. HDC in each ST across. (16)
    Row 8: CH1, turn. SC in first ST. SC in 3rd loop of each of the next 14 STS. SC in final ST. (16)
    Row 9: CH1, turn. SC in each ST across. (16)
    Rows 10-16: Repeat Rows 2-8. (16)

    You’ll also need: Yarn needle, optional faux fur pom pom

    Terms and Abbreviations:
    MC (magic circle – view tutorial here)
    ST/STS
     (stitch/stitches)
    SL ST (slip stitch)
    SK (skip)
    CH (chain)
    SC (single crochet)
    HDC (half double crochet)
    LBS (large bean stitch – see “Special Stitches”)
    BLO (back loop only)
    3rd LOOP (work stitch into 3rd loop only – see “Special Stitches”)

    Special Stitches:
    Large Bean Stitch (LBS)
    Insert hook into stitch, yarn over and pull through (2 loops on hook). Yarn over, insert hook into same stitch, yarn over and pull through (4 loops on hook). Yarn over, insert hook into same stitch, yarn over and pull through (6 loops on hook). Yarn over, insert hook into same stitch, yarn over and pull through (8 loops on hook). Yarn over and pull through all 8 loops. Chain 1 to close the stitch. (Because this stitch creates two sets of loops – one when creating the bean, and one when closing the stitch – each completed Large Bean Stitch will count for two stitches in the row or round’s final stitch count.)

    3rd Loop Only
    Half double crochet stitches have a 3rd loop that we utilize in this pattern. When working in turned rows, as in this pattern, the 3rd loop can be found just below the front loop on the side of the work that is facing you. When instructed to work in “3rd loop only”, insert your hook into this special loop. This creates a delicate braided look on the opposite side of the pattern.

    Notes:
    (1) This pattern is written in American Standard Terms.
    (2) CH1s at the beginning of rounds and rows do not count as a stitch in the final stitch count.
    (3) Click here to view a video tutorial for this pattern.
    (4) Individual instructions are listed first, followed by seaming instructions at the bottom, which is the same for both sizes.

    SIZE: TEEN / ADULT SMALL

    Finished Size: 8.25″ tall x 18.5″ around
    Yarn Total: 160-175 yards

    To Begin: Make a magic circle; CH1.

    Round 1: 12SC in MC, join with a SL ST to the top of the first SC. (12)

    Round 2: CH1. 2SC in each ST around, join with a SL ST to the top of the first SC. (24)

    Round 3: CH1. 3SC in each ST around, join with a SL ST to the top of the first SC. (72)

    At this point you should have a very wavy circle. We are now switching to vertical rows, and working them one by one using the stitches from Round 3.

    Row 1: CH29, turn. SC in 2nd CH from hook and in each remaining CH; row is complete. Being sure that the wrong side of the circle is facing you (because we turned), SL ST to the base of the CH29, then SL ST to the next ST along Round 3. (28 + 2 SL STS)

    Row 2: CH1, turn. Skipping over the CH1 and the 2 SL STS along Round 3, SC in each of the first 22 STS of the previous row. SC in BLO of each of the next 5 STS. SC in both loops of the final ST. (28)

    Row 3: CH1, turn. SC in first ST. SC in BLO of each of the next 5 STS. (SK next ST, LBS in next ST) 11 times; row is complete. SL ST in each of the next 2 STS along Round 3. (28 + 2 SL STS)

    Row 4: CH1, turn. HDC in each of the first 22 STS. SC in BLO of each of the next 5 STS. SC in both loops of the final ST. (28)

    Row 5: CH1, turn. SC in first ST. SC in BLO of each of the next 5 STS. SC in 3rd loop of each of the next 22 STS; row is complete. SL ST in each of the next 2 STS along Round 3. (28 + 2 SL STS)

    Row 6: CH1, turn. Skipping over the CH1 and the 2 SL STS along Round 3, SC in each of the first 22 STS of the previous row. SC in BLO of each of the next 5 STS. SC in both loops of the final ST. (28)

    Row 7: CH1, turn. SC in first ST. SC in BLO of each of the next 5 STS. (LBS in next ST, SK next ST) 11 times; row is complete. SL ST in each of the next 2 STS along Round 3. (28 + 2 SL STS)

    Row 8: CH1, turn. HDC in each of the first 22 STS. SC in BLO of each of the next 5 STS. SC in both loops of the final ST. (28)

    Row 9: CH1, turn. SC in first ST. SC in BLO of each of the next 5 STS. SC in 3rd loop of each of the next 22 STS; row is complete. SL ST in each of the next 2 STS along Round 3. (28 + 2 SL STS)

    Rows 10-65: Repeat Rows 2-9, in order, 7 more times.

    Rows 66-72: Repeat Rows 2-8.

    Fasten off, leaving a long tail for sewing the seam.

    SIZE: ADULT MEDIUM / LARGE

    Finished Size: 8.25″ tall x 20″ around
    Yarn Total: 190-210 yards
    Note: This size was originally published as the only available.

    To Begin: Make a magic circle; CH1.

    Round 1: 14SC in MC, join with a SL ST to the top of the first SC. (14)

    Round 2: CH1. 2SC in each ST around, join with a SL ST to the top of the first SC. (28)

    Round 3: CH1. 3SC in each ST around, join with a SL ST to the top of the first SC. (84)

    At this point you should have a very wavy circle. We are now switching to vertical rows, and working them one by one using the stitches from Round 3.

    Row 1: CH29, turn. SC in 2nd CH from hook and in each remaining CH; row is complete. Being sure that the wrong side of the circle is facing you (because we turned), SL ST to the base of the CH29, then SL ST to the next ST along Round 3. (28 + 2 SL STS)

    Row 2: CH1, turn. Skipping over the CH1 and the 2 SL STS along Round 3, SC in each of the first 22 STS of the previous row. SC in BLO of each of the next 5 STS. SC in both loops of the final ST. (28)

    Row 3: CH1, turn. SC in first ST. SC in BLO of each of the next 5 STS. (SK next ST, LBS in next ST) 11 times; row is complete. SL ST in each of the next 2 STS along Round 3. (28 + 2 SL STS)

    Row 4: CH1, turn. HDC in each of the first 22 STS. SC in BLO of each of the next 5 STS. SC in both loops of the final ST. (28)

    Row 5: CH1, turn. SC in first ST. SC in BLO of each of the next 5 STS. SC in 3rd loop of each of the next 22 STS; row is complete. SL ST in each of the next 2 STS along Round 3. (28 + 2 SL STS)

    Row 6: CH1, turn. Skipping over the CH1 and the 2 SL STS along Round 3, SC in each of the first 22 STS of the previous row. SC in BLO of each of the next 5 STS. SC in both loops of the final ST. (28)

    Row 7: CH1, turn. SC in first ST. SC in BLO of each of the next 5 STS. (LBS in next ST, SK next ST) 11 times; row is complete. SL ST in each of the next 2 STS along Round 3. (28 + 2 SL STS)

    Row 8: CH1, turn. HDC in each of the first 22 STS. SC in BLO of each of the next 5 STS. SC in both loops of the final ST. (28)

    Row 9: CH1, turn. SC in first ST. SC in BLO of each of the next 5 STS. SC in 3rd loop of each of the next 22 STS; row is complete. SL ST in each of the next 2 STS along Round 3. (28 + 2 SL STS)

    Rows 10-81: Repeat Rows 2-9, in order, 9 more times

    Rows 82-84: Repeat Rows 2-4

    Fasten off, leaving a long tail for sewing the seam.

    SEAMING

    Turn hat inside out. Close up the magic circle and weave in that end only. Then, thread your yarn needle onto the long finishing tail and sew the first 6 stitches (the ribbed band) together, stitch by stitch. The following photo is a screenshot from the video tutorial:

    Once you finish with the ribbed section, sew the rest of the seam up, stitch by stitch, putting your needle through the 3rd loop of the final row of HDCs and across to the corresponding stitch on the other side of the seam. This will ensure that the seam creates a row of visible top loops to match the other 3rd loop rows around the hat. The following photo is a screenshot from the video tutorial, with the 3rd loops highlighted:

    Weave in your tail and cut off the excess. Attach a pom pom (optional.)

    Done! If you’re sharing on social media, be sure to hashtag #maliacaland #maliabeanie, and tag me @littlemonkeyscrochet. Hope you enjoyed it!
  • Landon Slouch and Scarf (Adult and Child Sizes)

    Landon Slouch and Scarf (Adult and Child Sizes)

    Thank you to Lion Brand Yarn for providing the yarn for this sample.

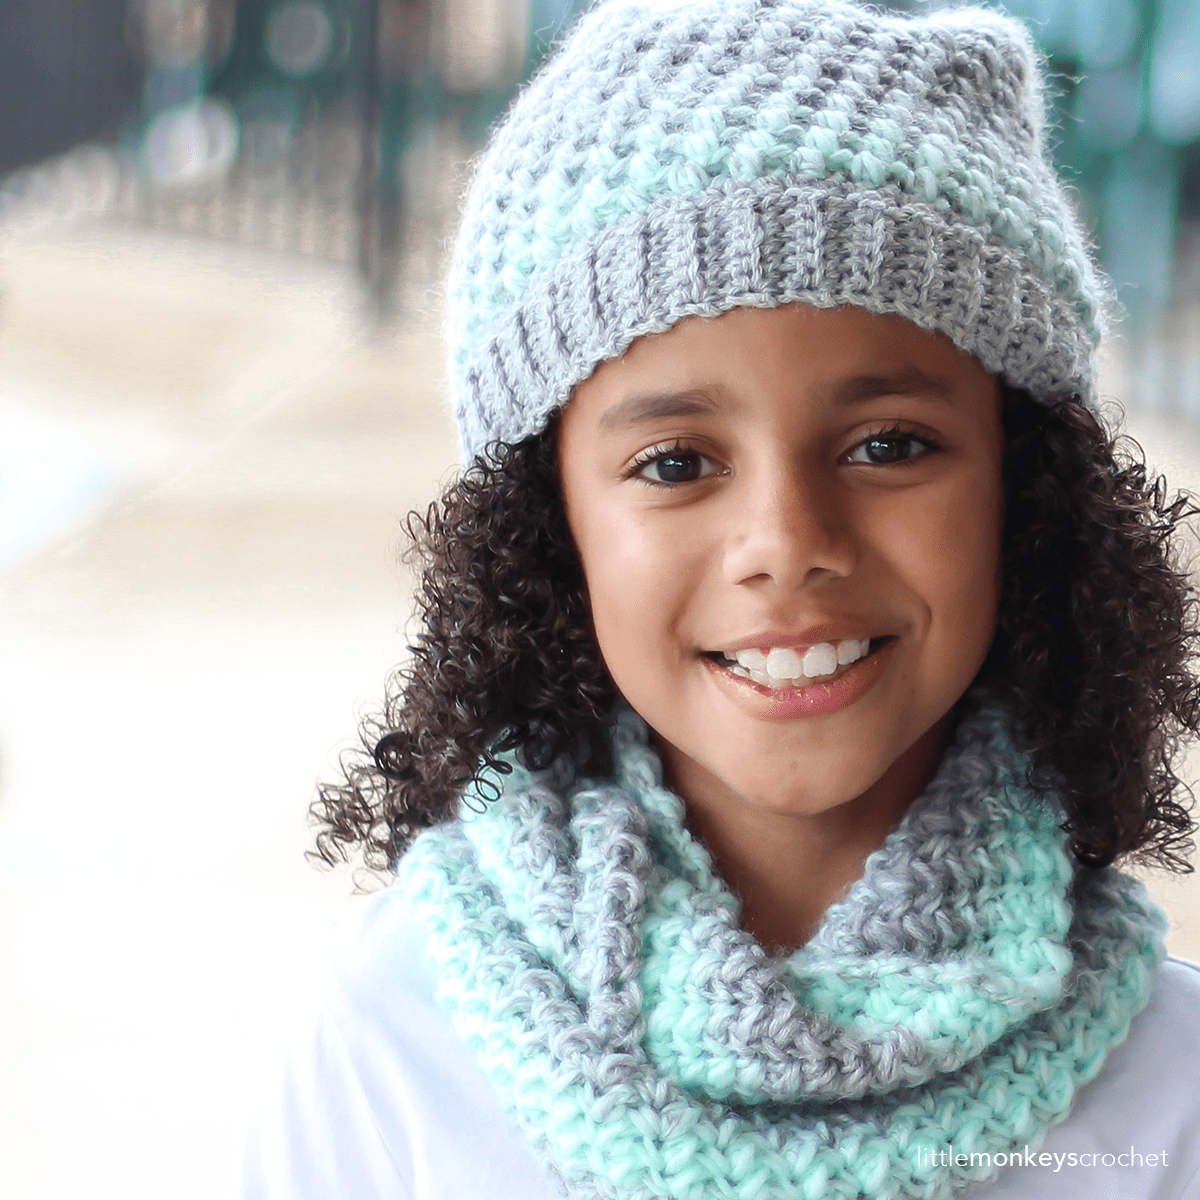
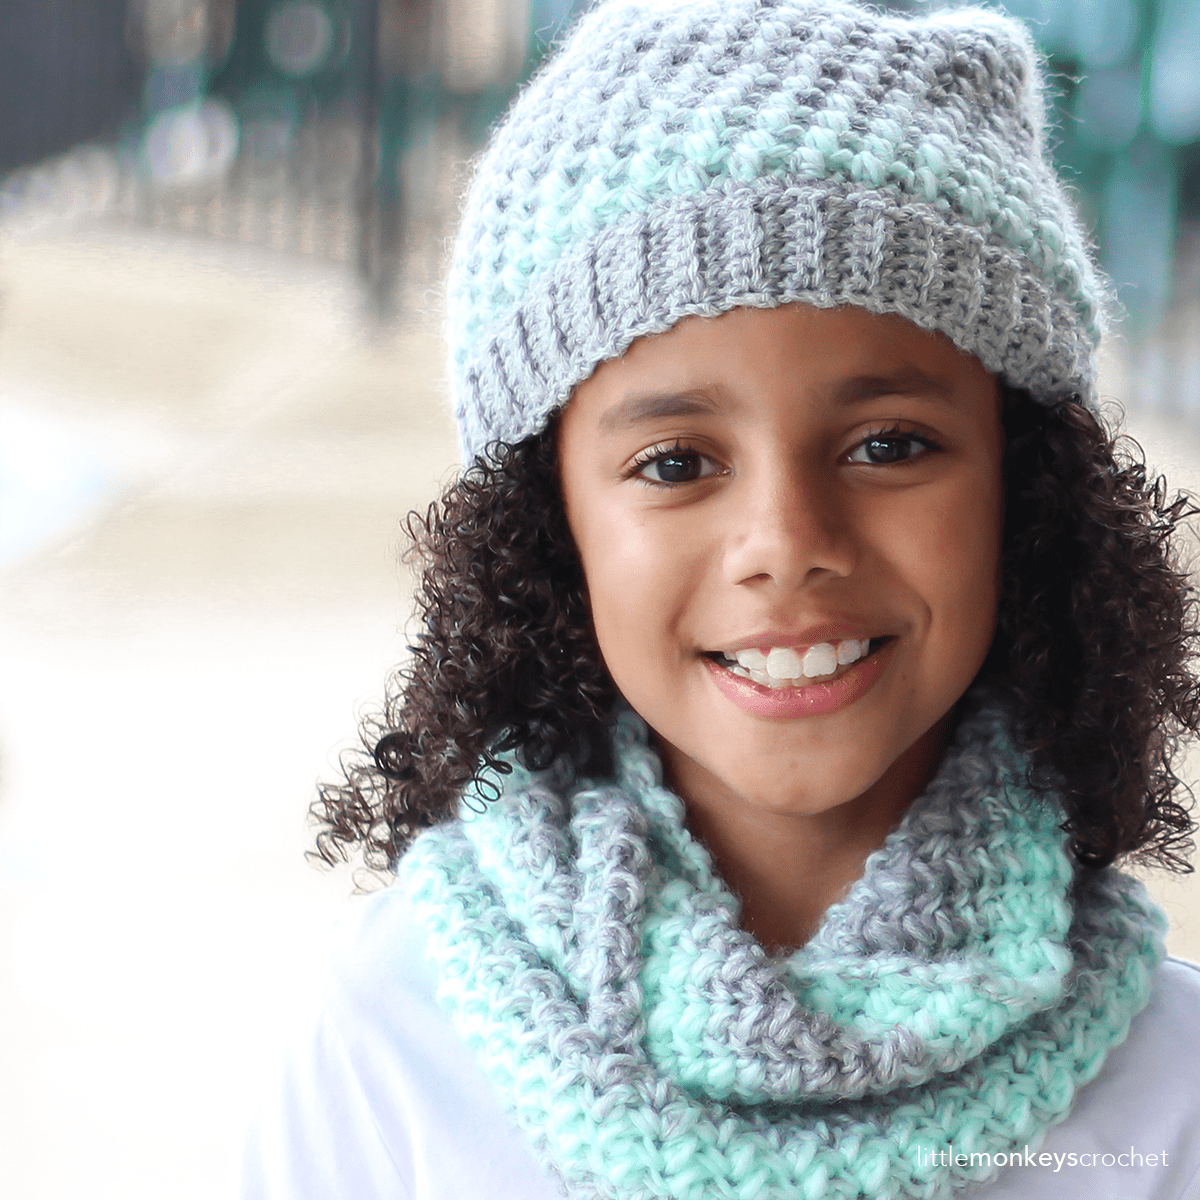
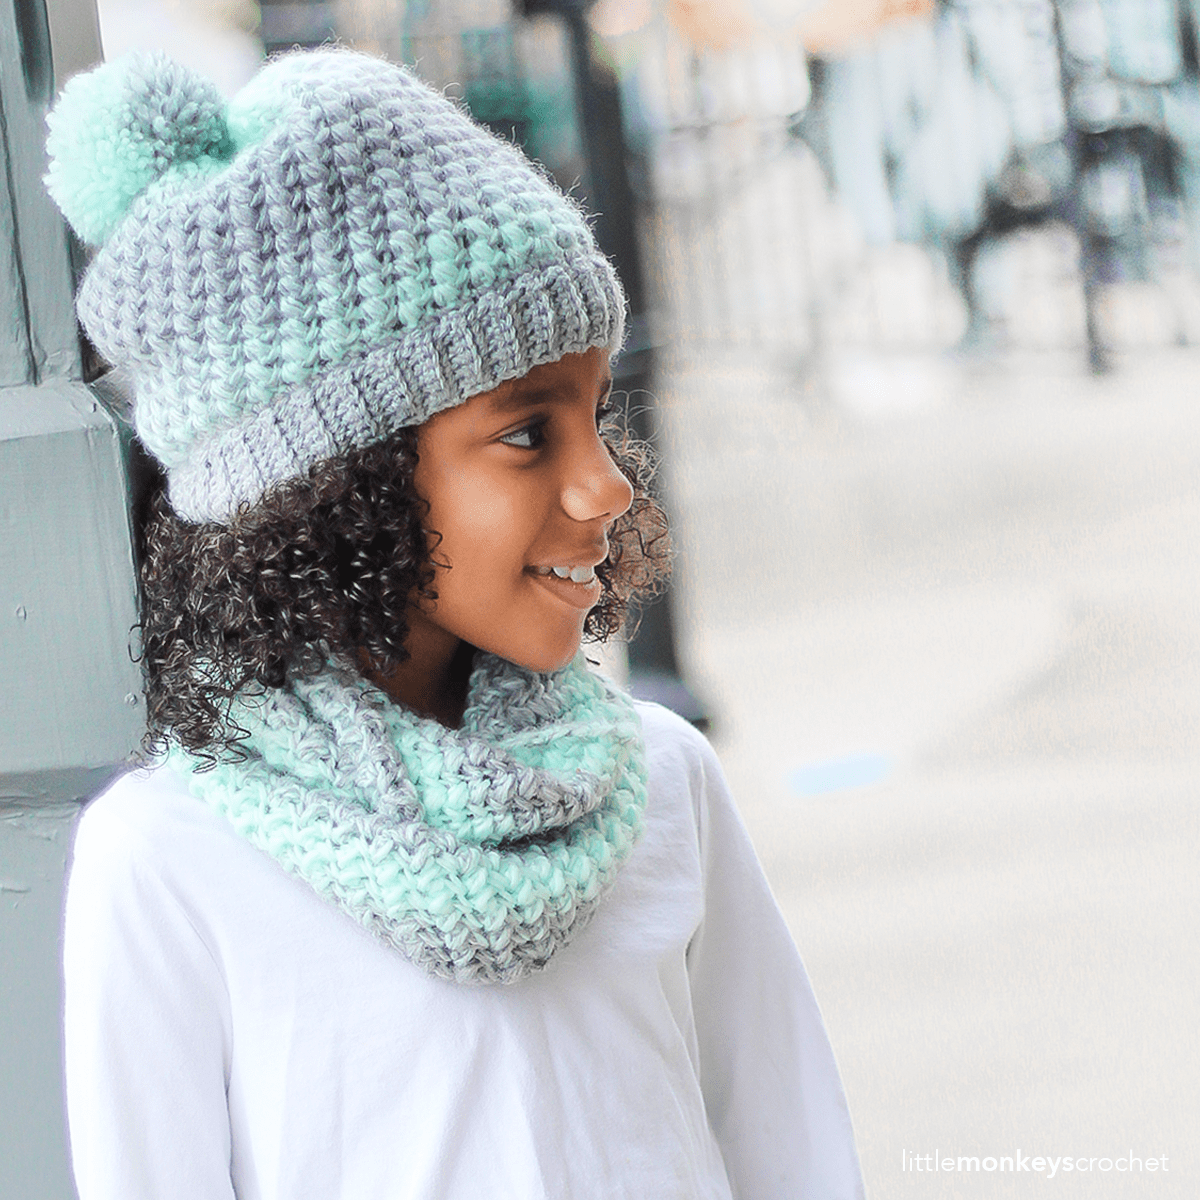
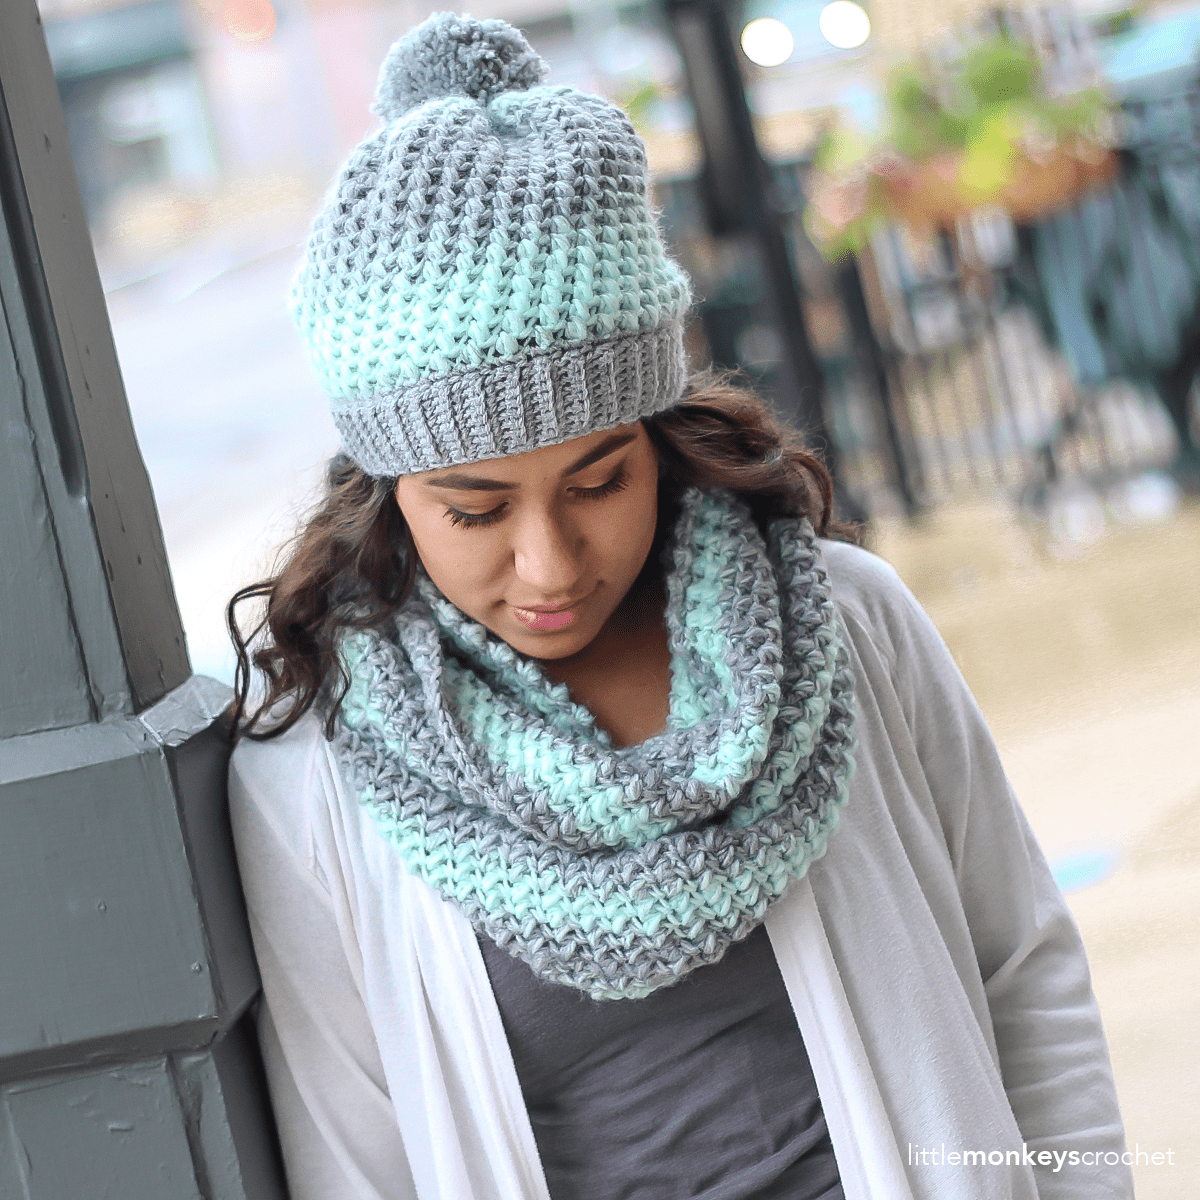
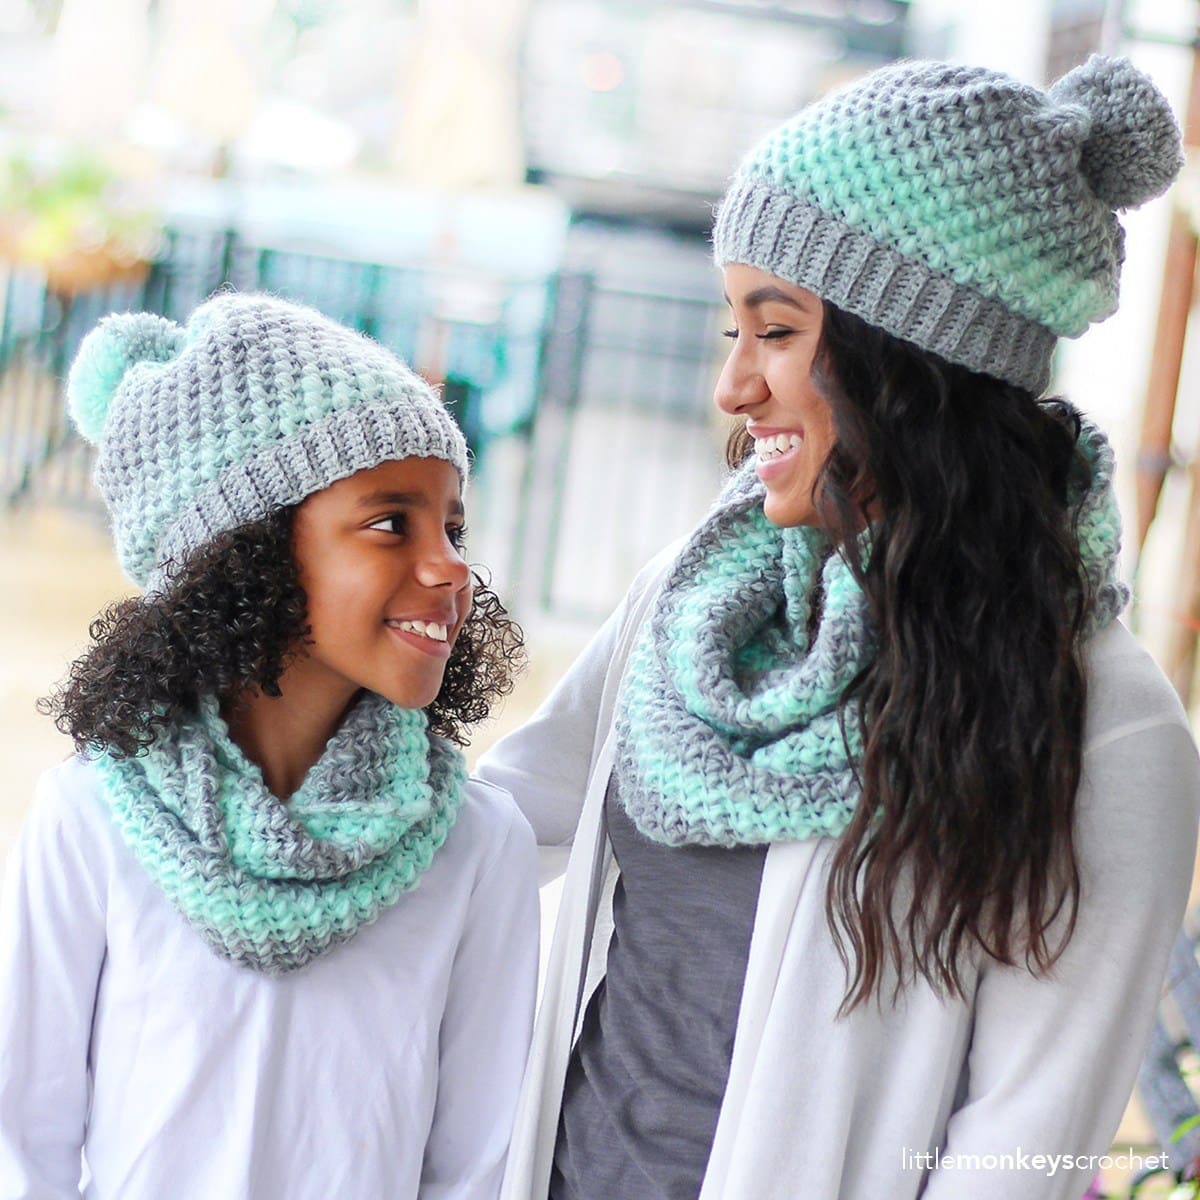
    Have you used Lion Brand’s Scarfie yarn yet? It is sooo soft and fluffy. My first experience with it was when I designed the Macchiato Slouch and I always knew I’d come back to it again someday. Now there are even more combos to choose from then there were back then, and I am just obsessed with this Mint & Silver! I paired it with Wool-Ease Gray Heather (for the band of the hat, because I wanted to make sure the entire band was one solid color) and it was a perfect match.

    I designed this set as a part of Lion Brand’s “12 Days of Christmas” promotion, and knew you guys would be excited to have it available in both adult and child sizes. You can even grab the kit on lionbrand.com, which comes with the pattern and enough yarn to make two sets – one for you and one for your mini-me!

    The hat is made up mostly of mini bean stitches, which I love because they give basically the same look as a regular bean stitch but use less yarn.

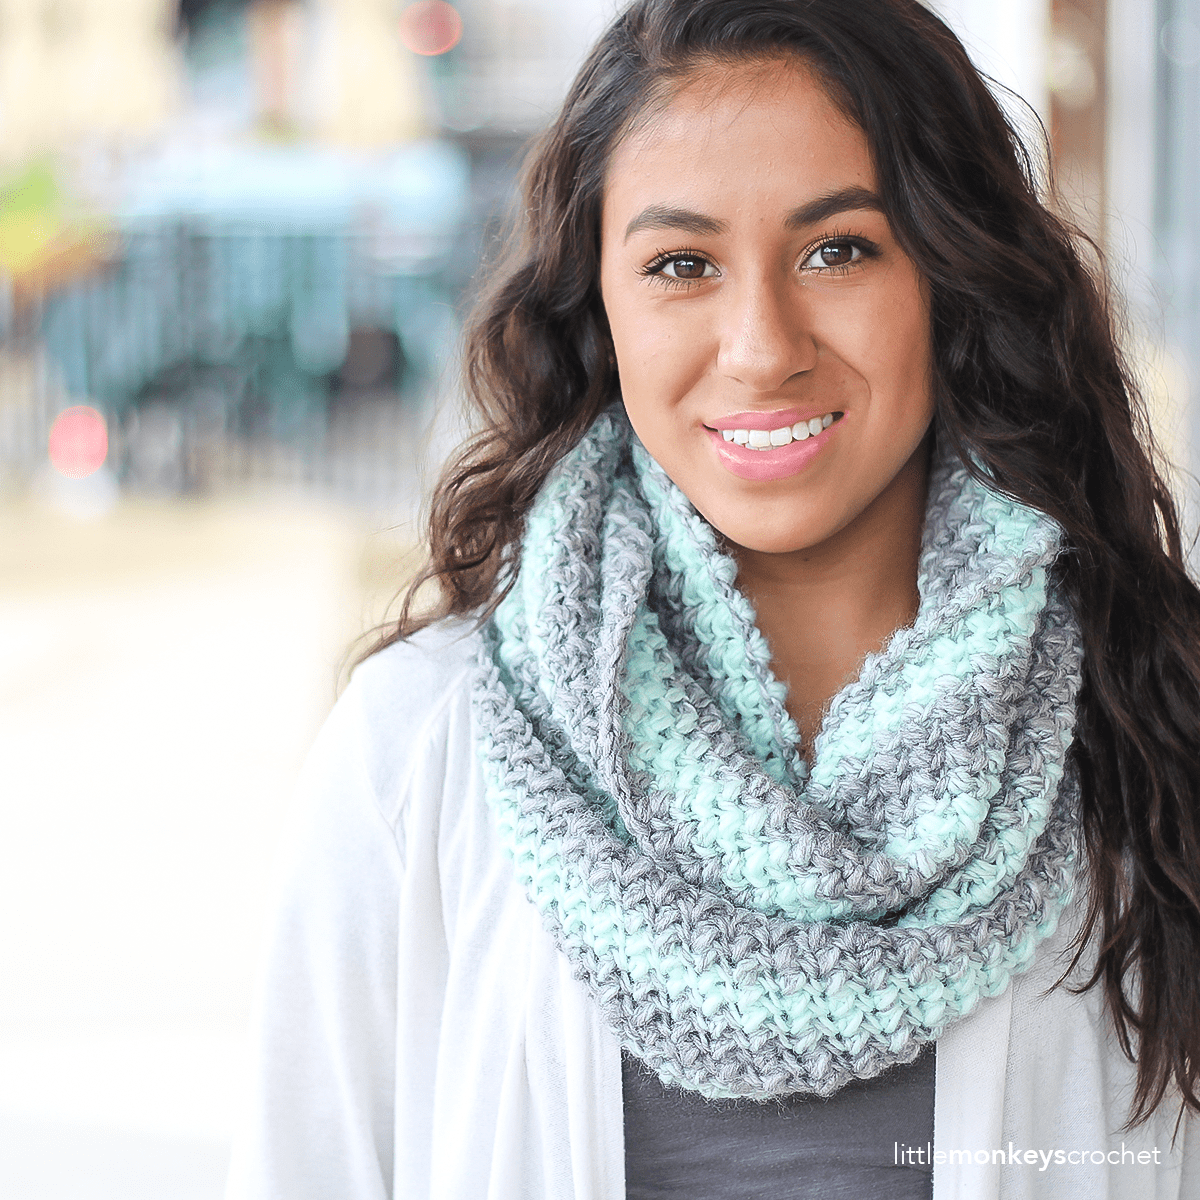
    The finished products are so fluffy and soft! I love fluffy accessories. Besides the obvious fact that they are soft on your skin, they also tend to lay really nicely. This infinity scarf was so easy to style on my model because of its light, airy feel.

    Can I also give a shoutout to my models? Because seriously, they rocked this shoot. You’d never know they had just met, like, two and a half minutes before this photo. 🙂

    Prefer a PDF?

    This pattern can be completed using the 100% free version right here on this page. However, many people prefer the convenience of a printable, ad-free PDF.

    All-Access Passholders get the ad-free version of this and all of my other blog patterns. It’s a pretty sweet deal, if I do say so myself! Learn more about it here or continuing scrolling for the free version.

    LANDON SLOUCH AND SCARF (ADULT AND CHILD SIZES)

    Difficulty: Easy

    Hooks: K (6.5mm) and H (5.0mm)

    Yarn:
    3 skeins of Lion Brand Scarfie in “Mint/Silver” (#826-217)
    1 skein of Lion Brand Wool-Ease in “Grey Heather” (#620-151)

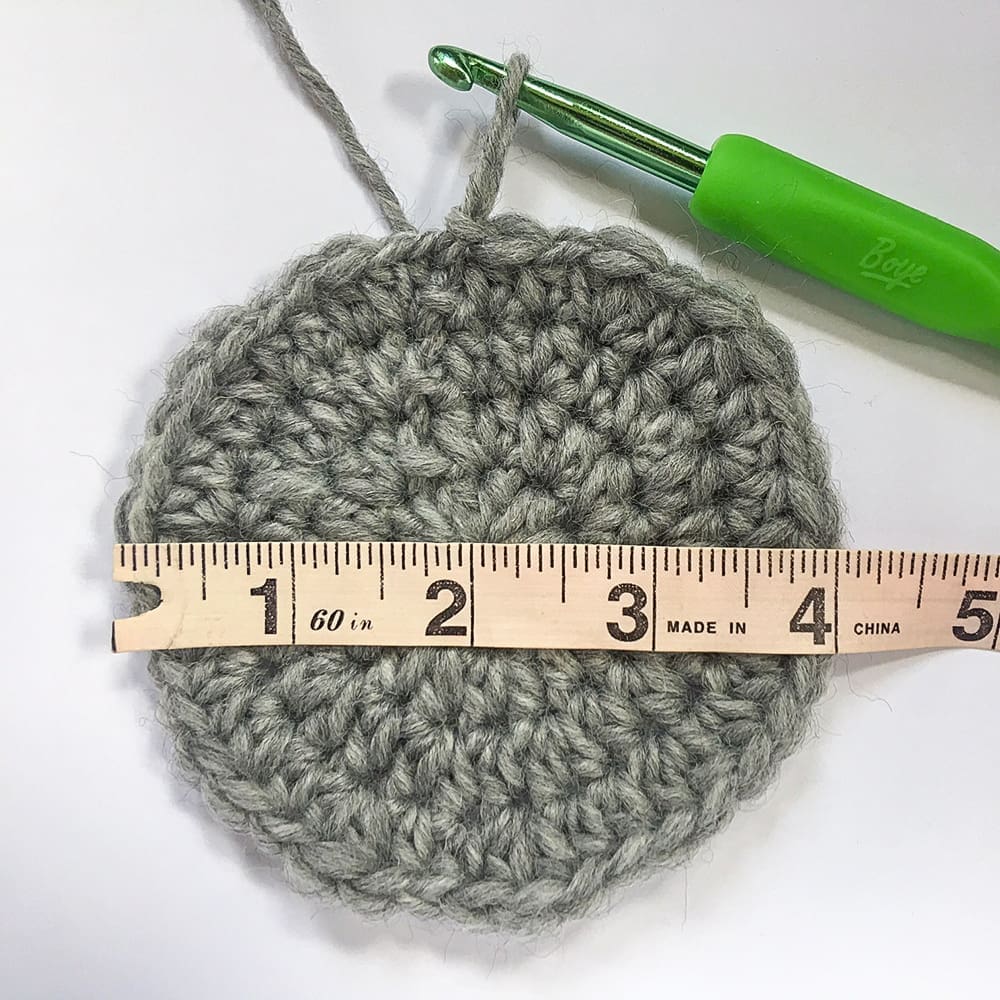
    Gauge: With larger hook and Scarfie yarn, 4 increase rounds of HDC = 4” diameter. (Begin first round with 10 HDC in a magic circle, then increase each round for a total of 4 rounds.) Use whatever hook size you need to obtain the correct gauge. This guage can be used for all 4 patterns.

    You’ll Also Need: Yarn needle, scissors, pom maker (optional)

    Abbreviations Used:
    MC
    (magic circle – tutorial here)
       ST/STS (stitch/stitches)
       SL ST (slip stitch)
       SK (skip)
       CH (chain)
       SC (single crochet)
       BLO (back loop only)
       MBS (mini bean stitch – see “Special Stitch”)

    Special Stitch – Mini Bean Stitch (MBS):
    Insert hook into stitch, yarn over, pull through (2 loops on hook), yarn over, insert hook into same stitch, yarn over, pull through (4 loops on hook), yarn over, pull through all 4 loops, chain 1 to close stitch. (Because this stitch creates two sets of top loops, it counts as 2 stitches in final round counts.)

    Notes:
    (1) Patterns are written in American Standard terms.
    (2) Any CH1s at the beginning of rounds do not count as stitches.
    (3) All patterns are designed in a continuous spiral for a seamless finished look. Do not join, chain up or turn unless instructed.
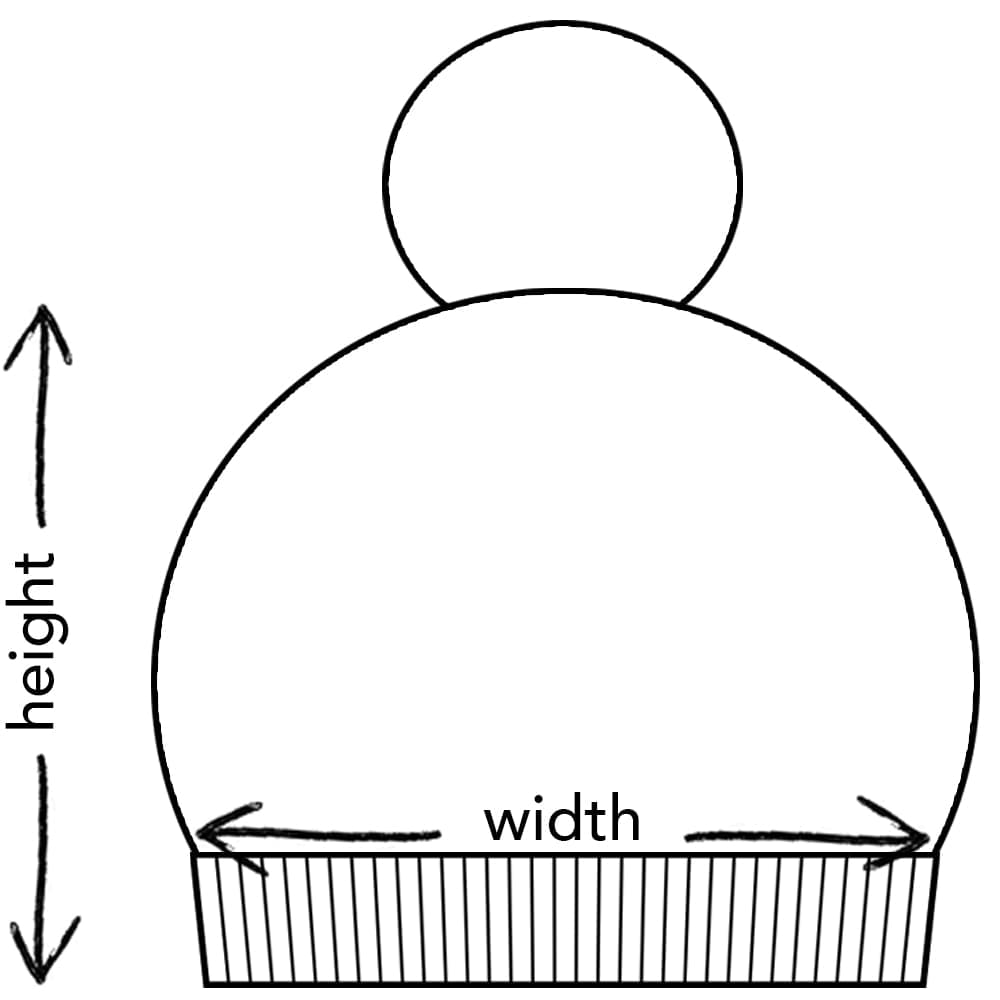
    (4) For the finished measurements of the hats, height is measured from the bottom of the band to the top of the body, pom not included. Width is measured across the bottom of the body of the hat, at the point where the body and the band meet. (Band of hat is smaller but will stretch to fit.)
    (5) The poms on the hats are optional. You will have more than enough yarn left over to make two poms in either Scarfie (shown on the child-size sample) or Wool-Ease (shown on the adult-size sample).
    (6) Due to the nature of the ombre yarn used, no two hats or scarves will look the same.

    – – – – – – – – – –

    LANDON SLOUCH HAT (TEEN / ADULT SMALL)

    Finished Size: 9” tall x 10” wide
    Yarn:
    Lion Brand Scarfie (130 yards) and Wool-Ease (45 yards)

    With larger hook and Scarfie yarn,
    Round 1: 10 HDC in MC. (10)

    Round 2: 2 HDC in each ST around. (20)

    Round 3: 2 HDC in each ST around. (40)

    Round 4: (2 HDC in each of the next 7 STS, HDC in next ST, 2 HDC in each of the next 7 STS, HDC in next ST, 2 HDC in each of the next 3 STS, HDC in next ST) 2 times. (74)

    Rounds 5-20: (MBS in next ST, SK next ST) around. (74)

    Round 21: (MBS in next ST, SK next ST) around. Join with a SL ST to the top of the first ST of the round. (74)

    Switch to smaller hook and Wool-Ease yarn. Fasten off Scarfie yarn.

    Round 22: CH1. SC in each ST around. Join with a SL ST to the top of the first ST of the round. (74)

    – – – – – –

    Next we’re going to make the band of the hat, and we will be working in vertical rows, attaching it to Round 22 (the final round of the hat) with SL STS as we go. If you need a little extra help, click here for a video tutorial on how to add ribbing at the end of a project.

    – – – – – –

    CH9.
    Row 1:
    SC in 2nd chain from hook and in each of the remaining 7 chains. SL ST into the first SC from Round 22, the stitch on which your CH9 was built. SL ST into the next SC from Round 22. (8, plus the two slip stitches along Round 22)

    The section we just created, built on the CH9, will hereafter be referred to as the “ribbing.”

    Row 2: CH1, turn. Skipping over the 2 SL STS you put in Round 22, SC in BLO of each of the first 7 STS of the ribbing. SC in both loops of the last ST. (8)

    Row 3: CH1, turn. SC in 1st ST. SC in BLO of each of the remaining 7 STS of the ribbing. SL ST in each of the next 2 STS of Round 22. (8, plus the 2 SL STS along Round 22)

    Row 4: CH1, turn. Skipping over the 2 SL STS you put in Round 22, SC in BLO of each of the first 7 STS of the ribbing. SC in both loops of the last ST. (8)

    Rows 5-74: Repeat Rows 3-4 all the way along Round 22.

    Fasten off and use your tail to sew together the gap between the first and last rows of the ribbing, then weave in your ends.

    Optional: Use a large Clover Pom Maker to make a pom pom (or make one by hand) and attach it to the top of the hat.

    LANDON SLOUCH HAT (CHILD)

    Finished Size: 8.5” tall x 9” wide
    Yarn:
    Lion Brand Scarfie (105 yards) and Wool-Ease (30 yards)

    With larger hook and Scarfie yarn,
    Round 1:
    10 HDC in MC. (10)

    Round 2: 2 HDC in each ST around. (20)

    Round 3: 2 HDC in each ST around. (40)

    Round 4: 2 HDC in each of the next 2 STS, HDC in each of the next 2 STS. (2 HDC in each of the next 3 STS, HDC in next ST) 4 times. 2 HDC in each of the next 2 STS, HDC in each of the next 2 STS. (2 HDC in each of the next 3 STS, HDC in next ST) 4 times. (68)

    Rounds 5-19: (MBS in next ST, SK next ST) around. (68)

    Round 20: (MBS in next ST, SK next ST) around. Join with a SL ST to the top of the first ST of the round. (68)

    Switch to smaller hook and Wool-Ease yarn. Fasten off Scarfie yarn.

    Round 21: CH1. SC in each ST around. Join with a SL ST to the top of the first ST of the round. (68)

    – – – – – –

    Next we’re going to make the band of the hat, and we will be working in vertical rows, attaching it to Round 21 (the final round of the hat) with SL STS as we go. If you need a little extra help, click here for a video tutorial on how to add ribbing at the end of a project.

    – – – – – –

    CH7.
    Row 1:
    SC in 2nd chain from hook and in each of the remaining 5 chains. SL ST into the first SC from Round 21, the stitch on which your CH7 was built. SL ST into the next SC from Round 21. (6, plus the two slip stitches along Round 21)

    The section we just created, built on the CH7, will hereafter be referred to as the “ribbing.”

    Row 2: CH1, turn. Skipping over the 2 SL STS you put in Round 21, SC in BLO of each of the first 5 STS of the ribbing. SC in both loops of the last ST. (6)

    Row 3: CH1, turn. SC in 1st ST. SC in BLO of each of the remaining 5 STS of the ribbing. SL ST in each of the next 2 STS of Round 21. (6, plus the 2 SL STS along Round 21)

    Row 4: CH1, turn. Skipping over the 2 SL STS you put in Round 21, SC in BLO of each of the first 5 STS of the ribbing. SC in both loops of the last ST. (6)

    Rows 5-68: Repeat Rows 3-4 all the way along Round 21.

    Fasten off and use your tail to sew together the gap between the first and last rows of the ribbing, then weave in your ends.

    Optional: Use a large Clover Pom Maker to make a pom pom (or make one by hand) and attach it to the top of the hat.

    LANDON SCARF (TEEN / ADULT SMALL)

    Finished Size: 6.5” wide x 60” around
    Yarn:
    Lion Brand Scarfie (310 yards)
    Notes:
    (1) For this pattern, use the larger of the two hooks (6.5mm, or whichever one you used to complete your gauge swatch).
    (2) Working into the back bump of the starting chain during Round 1 will help to keep the scarf from curling. It is a bit slower than working into one of the top loops, but worth it in the end.

    To Begin: CH192. Join with a SL ST, being careful not to twist the chain. (192)

    Round 1: CH1. Working in the back bumps of the starting chain, MBS in first ST, SK next ST. (MBS in next ST, SK next ST) around. (192)

    Rounds 2-18: (MBS in next ST, SK next ST) around. (192)

    Round 19: (MBS in next ST, SK next ST) around. SL ST into the first ST of the round. (192)

    Fasten off and weave in all ends.

    LANDON SCARF (CHILD)

    Finished Size: 5” wide x 46” around
    Yarn:
    Lion Brand Scarfie (180 yards)
    Notes:

    (1) For this pattern, use the larger of the two hooks (6.5mm, or whichever one you used to complete your gauge swatch).
    (2) Working into the back bump of the starting chain during Round 1 will help to keep the scarf from curling. It is a bit slower than working into one of the top loops, but worth it in the end.

    To Begin: CH 148. Join with a SL ST, being careful not to twist the chain. (148)

    Round 1: CH1. Working in the back bumps of the starting chain, MBS in first ST, SK next ST. (MBS in next ST, SK next ST) around. (148)

    Rounds 2-13: (MBS in next ST, SK next ST) around. (148)

    Round 14: (MBS in next ST, SK next ST) around. SL ST into the first ST of the round. (148)

    Fasten off and weave in all ends.

    Done! If you’re sharing on social media, be sure to hashtag #landonslouch and #landonscarf, and tag me @yarnandchai. Hope you enjoyed it!

  • Barista Slouch Hat

    Barista Slouch Hat

    Thank you to Lion Brand Yarn for providing the yarn for this sample.

    It’s official… the Fall ’17/Winter ’18 season has begun and I am sooooooooo excited! Granted I’m a little behind on life being that I spent my summer cuddling an adorable little baby boy instead of prepping my upcoming collection, but whatev. I’m ready to dive in now, and let’s all hope and pray that Henry will start taking longer naps so I can get some things done.

    I’m debuting the season with a hat pattern that I just love. This season I’m experimenting with different shapes of slouch, and this pattern has a rounder, more “droopy” look to it than my patterns from previous seasons. It’s worked from the top-down but uses the faux-cinched method I tend to favor, but amped up a bit. We’re cramming so many stitches into those first few rounds that you might be thinking “yeah right, Rebecca” as you’re getting started, but trust me, just get through those first rounds and it will get easier and the finished look will be so worth it.

    For this pattern I used Lion Brand Yarn’s Vanna’s Style, a #3 weight (not to be confused with Vanna’s Choice, which is a #4 aran). It has beautiful stitch definition and drape which is perfect for this hat.

    My model is rocking this hat with her natural waves, but it would also look gorgeous over cascading curls or even a loose braid.

    Prefer a PDF?

    This pattern can be completed using the 100% free version right here on this page. However, many people prefer the convenience of a printable, ad-free PDF.

    All-Access Passholders get the ad-free version of this and all of my other blog patterns. It’s a pretty sweet deal, if I do say so myself! Learn more about it here or continuing scrolling for the free version.

    BARISTA SLOUCH HAT

    add-to-ravelry-favorites

    Difficulty: Easyish

    Finished Size: 9.5″ tall x 9″ wide at bottom of hat (when laid flat) and 14″ wide at widest point (when laid flat).

    Hook: G (4.0 mm)

    Yarn: Approximately 290 yards of Vanna’s Style, a #3 light weight yarn by Lion Brand. Sample shown in “Silver”.

    Gauge: 6 increase rounds (beginning with 10 HDC) = 3.75″.

    Pattern for Gauge:
    Round 1: 10HDC in MC; join. (10)
    Round 2: CH1, 2HDC in each ST around, join. (20)
    Round 3: CH1, (2HDC, HDC) around, join. (30)
    Round 4: CH1, (2HDC, HDC, HDC) around, join. (40)
    Round 5: CH1, (2HDC, HDC, HDC, HDC) around, join. (50)
    Round 6: CH1, (2HDC, HDC, HDC, HDC, HDC) around, join. (60)

    You’ll also need: Yarn needle, stitch marker

    Abbreviations Used:
       MC (magic circle – view tutorial here)
    ST/STS
     (stitch/stitches)
    SL ST (slip stitch)
    SK (skip)
    CH (chain)
    SC (single crochet)
    BLO (back loop only)
    MBS (mini bean stitch – see “Special Stitch”)

    Special Stitch – Mini Bean Stitch (MBS): Insert hook into stitch, yarn over, pull through (2 loops on hook), yarn over, insert hook into same stitch, yarn over, pull through (4 loops on hook), yarn over, pull through all 4 loops, chain 1 to close stitch. (Please note that this CH1 does count as a stitch in the final stitch counts of each round; so each MBS you complete will count for 2 stitches.)

    Notes:
    (1) This pattern is written in American Standard Terms.
    (2) Pattern is worked in a continuous, seamless round until the band. Use a stitch marker to mark the beginning of rounds and do not join or turn unless instructed to do so.
    (3) Any CH1s at the beginning of rounds do not count as stitches and are not included in the stitch count.
    (4) Because of the “chain 1 to close stitch” at the end of the instructions for the MBS, each MBS will count as 2 stitches in the final stitch counts for each round – one for the bean, and one for the CH1.)

    – – – – – – – – – – – – – – – – – – – – – – – –

    THE PATTERN

    To begin: Make a magic circle; CH1 (does not count as a stitch).

    Round 1: 16 HDC in MC. (16)

    Round 2: 2 HDC in each ST around. (32)

    Round 3: 2 HDC in each ST around. (64)

    Round 4: MBS in each ST around. (128)

    Rounds 5-32: (MBS in next ST, SK next ST) around. (128)

    Round 33: (MBS in next ST, SK next ST) around. Join with a SL ST to 1st ST of round. (128)

    Round 34: CH1. SC2TOG, SC in each of the next 2 STS. (SC2TOG in next ST, SC in each of the next 2 STS) around. Join with a SL ST to the top of the first ST. (96)

    Round 35-36: CH1. SC in each ST around. Join with a SL ST to the top of the first ST. (96)

    Next we’re going to make the band of the hat, and we will be working in vertical rows, attaching it to the final round of the hat (Round 36) with SL STS as we go. If you need a little extra help, click here for a video tutorial on how to add ribbing at the end of a project.

    CH9.

    Row 1: SC in 2nd chain from hook and in each of the remaining 7 chains. SL ST into the first SC from Round 36, the stitch on which your CH9 was built. SL ST into the next SC from Round 36. (8, plus the two slip stitches along Round 36)

    The section we just created, built on the CH9, will hereafter be referred to as the “ribbing.”

    Row 2: CH1, turn. Skipping over the 2 SL STS you put in Round 36, SC in BLO of each of the first 7 STS of the ribbing. SC in both loops of the last ST. (8)

    Row 3: CH1, turn. SC in 1st ST. SC in BLO of each of the remaining 7 STS of the ribbing. SL ST in each of the next 2 STS of Round 36. (8, plus the 2 SL STS along Round 36)

    Row 4: CH1, turn. Skipping over the 2 SL STS you put in Round 36, SC in BLO of each of the first 7 STS of the ribbing. SC in both loops of the last ST. (8)

    Rows 5-96: Repeat Rows 3-4 all the way along Round 36.

    Fasten off and use your tail to sew together the first and last rows of the ribbing, then weave in your ends.

  • Annabelle Slouch Hat

    Annabelle Slouch Hat

    Thank you to Chandi at Expression Fiber Arts for providing the yarn for this sample!

    This season has been all about stepping out of my comfort zone with my yarn choices. One thing I’ve never done, until now, is get my hands on hand-dyed yarn. But when Expression Fiber Arts showed up on my Facebook feed one day, I was captivated by the gorgeousness of the yarn. I knew I had to try it! Chandi was gracious enough to send me some Superwash Merino Silk Pearlescent Worsted to play with, and there are a few things I noticed right away when I held it in my hands:

    1. “Pearlescent” is a perfect description for this yarn. I wondered, when I saw the photos on the web site, if it really would look as shiny in real life. It does! And while cheaper yarns tend to sacrifice stitch definition for sheen, this yarn doesn’t at all.

    2. It’s soft! Like, super soft. But sturdy.

    3. The colors are incredible. I chose a colorway that isn’t available anymore (I think I grabbed the last one, sorry!) that is a mixture of the palest pink and icy blue, but if you look on the web site, you’ll see that there are plenty of totally gorgeous colorways to choose from!

    Now, you know me; I love my big box store yarns, and they’re what I typically use; because not only am I on a budget, but I know many of you are, too. But, I also know that there is a whole world of absolutely stunning yarns out there that are worth exploring, especially for those super special projects. Don’t be afraid to branch out; you might just discover something beautiful!

    After I finished the pattern for this hat, I felt like it needed a little contrast. So, I added a pom pom with some white unlabeled yarn from my stash. The pom pom is totally optional and is not included in the yardage count.

    Prefer a PDF?

    This pattern can be completed using the 100% free version right here on this page. However, many people prefer the convenience of a printable, ad-free PDF.

    All-Access Passholders get the ad-free version of this and all of my other blog patterns. It’s a pretty sweet deal, if I do say so myself! Learn more about it here or continuing scrolling for the free version.

    ANNABELLE SLOUCH HAT

    add-to-ravelry-favorites

    Difficulty: Easy

    Finished Size: 9″ tall x 9.5″ wide (when laid flat)

    Hook: I (5.50mm) and G (4.25mm)

    Yarn: Approximately 185 yards (not including optional pom pom) of Superwash Merino Silk Pearlescent Worsted, a #4 weight medium yarn by Expression Fiber Arts.

    Gauge: With larger hook, 16 rows of 8 (skip 1 ST, SC+HDC in next ST) combos = 4″ square

    You’ll also need: Yarn needle, stitch marker

    Abbreviations Used:
       MC (magic circle – view tutorial here)
    ST
     (stitch)
    SL ST (slip stitch)
    SK (skip)
    CH (chain)
    SC (single crochet)
    HDC (half double crochet)
    SC+HDC (this just means to put 1 SC and 1 HDC in the same ST)
    BLO (back loop only)

    Notes:
    (1) This pattern is written in American Standard Terms.
    (2) Pattern is worked in a continuous, seamless round until the band. Use a stitch marker to mark the beginning of rounds and do not join or turn unless instructed to do so.

    – – – – – – – – – – – – – – – – – – – – – – – –

    THE PATTERN

    To begin: With larger hook, make a magic circle; CH1 (does not count as a stitch).

    Round 1: 10 HDC in MC. (10)

    Round 2: 2 HDC in each ST around. (20)

    Round 3: 2 HDC in each ST around. (40)

    Round 4: 2 HDC in each ST around. (80)

    Round 5: (SC+HDC in next ST, SK next ST) around. (80)

    Rounds 6-26: Repeat Round 5.

    Round 27: (SC+HDC in next ST, SK next ST) 39 times; 2 STS remain. SC in next ST; SL ST next (final) ST. (80)

    Round 28: CH1. SC in each ST around. Join with a SL ST to the top of the first SC. (80)

    Next we’re going to make the band of the hat, and we will be working in vertical rows, attaching it to the final round of the hat with SL STS as we go.

    Switch to G Hook.

    Row 1: CH7. SC in 2nd CH from hook. SC in remaining 5 CHS. SL ST in next 2 SCs of Round 28. (6, plus the 2 SL STS at the base of the hat)

    Row 2: CH1, turn. Skipping over the 2 SL STS, SC in BLO of each of the next 5 STS. SC in both loops of the last ST. (6)

    Row 3: CH1, turn. SC in first ST. SC in BLO of each of the next 5 STS. SL ST in next 2 SCs of Round 28. (6, plus the 2 SL STS at the base of the hat)

    Repeat Rows 2-3 all the way around the hat (80 rows). Fasten off and use your tail to whip stitch the first and last rows together. Weave in all ends.

    Attach pom pom (optional).

  • Elena Slouch

    Elena Slouch

    November is coming to a close, and yesterday during our family Thanksgiving at my parent’s house, I was able to snatch my nieces up for one last photo shoot for the remaining patterns in the Little Monkeys Crochet Fall 2016 collection. (Speaking of thankfulness – I am so thankful for those girls! They are beautiful inside and out, and they’re always willing to play along when I need something photographed.)

    This slouch hat pattern might just have stolen the top spot as my favorite pattern of the season. The combination of the lightweight yarn in the perfect neutral color, the rustic buttons, and the faux fur pom made it all come together so well. This hat is a bit more unique than all of my previous slouchy releases in the way it’s built, so it was a fun challenge to figure out the best way to write it all out for you.

    Elena Slouch Hat Crochet Pattern | Free button slouchy hat crochet pattern by Little Monkeys Crochet

    As you may have guessed if you’ve been following me for a while, I used Cascade Yarns’ Longwood Sport for this pattern. It’s probably safe to say I’m addicted to this yarn, because whenever I finish a pattern with it, if I have some left over, I immediately start dreaming up a new pattern with the remaining yarn knowing full well that I’ll have to go order more in order to finish it. It’s a vicious cycle, folks, and I can’t escape it, and I don’t really want to. (I buy mine from Jimmy Beans Wool because their shipping prices rock.)

    By now you might be asking, hey Rebecca, is that a matching scarf I see in your photos? Why yes, it is! Click here to view the Elena Scarf in its entirety and make one for yourself to go with your brand new slouch.

    Elena Slouch Hat Crochet Pattern | Free button slouchy hat crochet pattern by Little Monkeys Crochet

    Prefer a PDF?

    This pattern can be completed using the 100% free version right here on this page. However, many people prefer the convenience of a printable, ad-free PDF.

    All-Access Passholders get the ad-free version of this and all of my other blog patterns. It’s a pretty sweet deal, if I do say so myself! Learn more about it here or continuing scrolling for the free version.

    ELENA SLOUCH

    add-to-ravelry-favorites

    Difficulty: Easyish

    Finished Size: 9.5″ tall x 9.5″ wide (when laid flat)

    Hooks: H (5.00mm) and G (4.25mm)

    Yarn: Approximately 265 yards of Cascade Yarns’ Longwood Sport (that’s just about a full skein). Longwood Sport is a #3 light yarn, and the color shown on the sample is “Oatmeal.”

    Gauge: With larger hook, 9 rows of 5 (SK 1, SC+HDC in next) combos = 2″ square

    You’ll also need: Yarn needle, 3/4″ buttons (4), faux fur pom pom (optional; mine is from Premier Yarns in “Otter”), needle and thread

    Abbreviations Used:
    MC
    (magic circle – view my tutorial here)
    ST/STS 
    (stitch/stitches)
    SL ST
     (slip stitch)
    SK
     (skip)
    CH
     (chain)
    SC 
    (single crochet)
    HDC 
    (half double crochet)
    SC+HDC 
    (this just means to put 1 SC and 1 HDC in the same ST)
    BLO
     (back loop only)

    Notes:
    (1) This pattern is written in American Standard Terms.
    (2) I do not currently have an adaptation for a worsted weight version of this pattern.

    – – – – – – – – – – – – – – – – – – – – – – – –

    THE PATTERN

    To begin: Using larger hook, create a Magic Circle; CH1.

    Round 1: 10HDC in MC. Join with a SL ST to first HDC. (10)

    Round 2: CH1. 2HDC in each ST around. Join with a SL ST to first HDC. (20)

    Round 3: CH1. 2HDC in each ST around. Join with a SL ST to first HDC. (40)

    Round 4: CH1. 2HDC in each ST around. Join with a SL ST to first HDC. (80)

    Round 5: CH1. 2HDC in first ST, HDC in each of the next 3 STS. (2HDC in next ST, HDC in each of the next 3 STS) around. Join with a SL ST to first HDC. (100)

    We are now switching to turned rows.

    Row 6: CH5, turn. SC+HDC in 3rd CH from hook. SK next CH. SC+HDC in 5th (final) CH. We are now going to begin working around the hat. SK 1st ST, SC+HDC in next ST. (SK next ST, SC+HDC in next ST) around. (104)

    row6

    row6complete

    Row 7: CH1, turn. SK 1st ST, SC+HDC in next ST. (SK next ST, SC+HDC in next ST) around. (104)

    row7

    row7complete

    Rows 8-30: Repeat Row 7. (104)

    Note: At the end of Row 30, your hook should be on the end of the hat that does not have the extra stitches created by the CH5 from Row 6.

    Row 31: CH1, turn. SK 1st ST, SC+HDC in next ST. SK next ST, SC+HDC in next ST. Place a stitch marker in the stitch you just made (the 4th stitch of the row); we’ll reference it in the next row. Continue to (SK next ST, SC+HDC in next ST) around. (104)

    Round 32: CH1, turn. Lay the inner edges of the hat so that they overlap, with your hook lined up with the stitch marker from Row 31, placing the edge that has the additional stitches (created by the CH5 from Row 6) underneath the opposite edge. Insert your hook into the first ST and the stitch that we marked with a stitch marker in the previous row (see photo below); make an SC in all 4 loops. Continuing to line up the overlapping stitches, SC in both layers of each of the next 3 STS. You have now sealed the bottom edge of the overlapping pieces together. Continue to SC in each ST around the rest of the hat. Join with a SL ST to first SC. (100)

    round32

    round32scing

    Creating the Band

    Next we’re going to make the band of the hat, and we will be working in vertical rows, attaching it to Round 32 of the hat with SL STS as we go.

    Switch to G (4.25mm) hook.

    Row 1: CH7. SC in 2nd CH from hook. SC in remaining 5 CHS. SL ST along the next 2 STS of Round 32 of the hat. (6, plus the 2 SL STS at the base of the hat)

    Row 2: CH1, turn. Skipping over the 2 SL STS, SC in BLO of each of the next 5 STS. SC in both loops of the last ST. (6)

    Row 3: CH1, turn. SC in first ST. SC in BLO of each of the next 5 STS. SL ST along the next 2 STS of Round 32 of the hat. (6, plus the 2 SL STS at the base of the hat)

    Repeat Rows 2-3 all the way around the hat (100 rows). Fasten off and use your tail to carefully sew the first and last rows of the band together. Weave in all ends.

    Buttons
    Where the two edges of the hat meet and overlap, use a few ball point pins to secure them in place. Then, place and sew your buttons along the edge, being sure to position them so that your needle goes through both layers, sewing them together; when you remove the ball point pins, you want the buttons to hold the hat together on their own.

    Elena Slouch Hat Crochet Pattern | Free button slouchy hat crochet pattern by Little Monkeys Crochet

    Attach your pom pom if desired. Done!

  • Oakley Slouch Hat

    Oakley Slouch Hat

    Thank you to Cascade Yarns for providing the yarn for this sample!

    A loooooong time ago, I received a shipment from Cascade Yarns and they threw in a bonus ball of a yarn that I’d never used before: Heritage Paints. It sat on my shelf for quite a while, because I honestly didn’t know what to do with it. It was a #1 super fine sock yarn, and the only other experience I’d had with that weight of yarn was when, as a newer crocheter, I’d purchased some of another brand and worked with it for about 2 minutes before I gave up on it because it was so thin and tangly.

    Eventually, about a month ago, I started wondering what it would be like to make a hat out of sock yarn. I got so curious that I finally grabbed the Heritage Paints off my shelf and gave it a try. And it was actually really fun!

    I honestly don’t know how to compare Heritage yarn to other #1 yarns, because I think the issue I had with that other yarn years ago was probably more due to my inexperience than it was about the yarn. But what I can tell you is that Heritage yarn is really, really easy to use. It actually reminds me a lot of Cascade Longwood yarn (and you all know how much I loooooove that yarn). It’s just a lot thinner. Sure, it takes longer to make a hat, but the gorgeousness of the finished fabric makes up for the time spent!

    I stuck with a simple formula of a faux-cinched crown and single crocheted body, because I’m a firm believer in keeping the stitches simple when I’m working with a busy yarn. And I found that working this pattern in single crochet allowed the design of the yarn to show up in nice, neat stripes.

    My other philosophy of using busy yarn is that it helps to balance it out with a not-so-busy yarn, so I did the ribbing in Heritage Solids in the color Snow, and I also made a pom pom with my Clover Pom Pom Maker using the same yarn. The resulting hat has such a nice feel and drape. Like wearing a cozy sock on your head! 🙂

    Prefer a PDF?

    This pattern can be completed using the 100% free version right here on this page. However, many people prefer the convenience of a printable, ad-free PDF.

    All-Access Passholders get the ad-free version of this and all of my other blog patterns. It’s a pretty sweet deal, if I do say so myself! Learn more about it here or continuing scrolling for the free version.

    OAKLEY SLOUCH HAT

    add-to-ravelry-favorites

    Difficulty: Easy

    Finished Size: 10″ tall x 9.5″ wide (when laid flat)

    Hook: E (3.5mm)

    Yarn: About 330 yards (not including optional pom pom) of Heritage Yarn by Cascade Yarns. Heritage is a #1 super fine weight yarn that is very easy to work with. (I think it feels more like a thin sport weight yarn.) Heritage comes in solids, prints, and paints; for the body of the hat in my photos, I used Heritage Prints in “Beach Cliff”, and for the band and the pom pom, I used Heritage Solids in “Snow”.

    Gauge: 29 rows of 23 SC = 4″ square.

    You’ll also need: Yarn needle, stitch marker

    Abbreviations Used:
       MC (magic circle – view tutorial here)
    ST/STS
     (stitch/stitches)
    SL ST (slip stitch)
    SK (skip)
    CH (chain)
    SC (single crochet)
    HDC (half double crochet)
    BLO (back loops only)

    Notes:
    (1) This pattern is written in American Standard Terms.
    (2) Pattern is worked in a continuous, seamless round until the band. Do not join or turn unless instructed to do so. Use a stitch marker to mark the beginning of rounds.

    – – – – – – – – – – – – – – – – – – – – – – – –

    THE PATTERN

    To begin: Make a MC; CH1.

    Round 1: 10HDC in MC. (10)

    Round 2: 2HDC in each ST around. (20)

    Round 3: 2HDC in each ST around. (40)

    Round 4: 2HDC in each ST around. (80)

    Tip: Your base should be looking very wavy at this point.

    Round 5: (2HDC in next ST, HDC in next ST) around. (120)

    Rounds 6-50 (or until hat is about 8″ tall when laid flat): SC in each ST around. (120)

    Round 51: SC in each of the first 118 STS (2 STS remain unworked). SL ST in each of the remaining 2 STS to smooth down the round.

    If using a different color for the band, you can switch to that new color now.

    Ribbed Band

    Next we’re going to make the band of the hat, and we will be working in vertical rows, attaching it to the final round of the hat with SL STS as we go.

    Row 1: CH15. SC in 2nd CH from hook. SC in remaining 13 CHS. SL ST in next 2 STS of the final round of the hat. (14, plus the 2 SL STS at the base of the hat)

    Row 2: CH1, turn. Skipping over the 2 SL STS, SC in BLO of each of the next 13 STS. SC in both loops of the last ST. (14)

    Row 3: CH1, turn. SC in first ST. SC in BLO of each of the next 13 STS. SL ST in next 2 STS of the final round of the hat. (14, plus the 2 SL STS at the base of the hat)

    Repeat Rows 2-3 all the way around the hat (120 rows). Fasten off and use your tail to whip stitch the first and last rows together. Weave in all ends.

    Optional: Create and attach pom pom in a coordinating color. (I used a large Clover Pom Pom Maker.)

  • Shiplap Slouch

    Shiplap Slouch

    A couple of months ago, we took our annual family trip to my favorite Michigan spot, South Haven! It was an amazing week full of great food, gorgeous sunsets, and lots and lots of beach time.

    Of course I had to stop in at Needle In A Haystack (edit: sadly, this cute little yarn store is now closed for good) for some Cascade Longwood yarn so that I would have something to work on down at the beach!

    NeedleInAHaystack

    This is probably my favorite yarn out of anything I’ve used. It’s so soft and has such a stunning, defined finish, and gorgeous drape. I first experienced it (the #3 weight version) during last year’s trip, which resulted in the South Haven Slouch. It’s not the easiest yarn to find, but you can always order it online from stores like Jimmy Beans Wool. It’s pricier than what you find in the big craft stores, so I save it for my most special projects, like the Herringbone Baby Hat I recently made for my son (Due in December).

    This year’s “vacation pattern” is also a slouchy hat, because frankly, it’s really hard to crochet anything bigger without it getting dragged across the sand every time the wind blows. And if you’ve spent any time around my blog, you probably noticed that I loooooove slouchy hats. I never get bored with them! Like the South Haven Slouch, this one also uses the #3 weight version of Longwood, called Longwood Sport.

    I usually use temporary names for my patterns until it’s time to publish them, and then I come up with something permanent. I called this one the Shiplap Slouch as I was making it, and the name just stuck. Something about the color and the lines reminds me of shiplap. (Yes, I do watch a lot of Fixer Upper, why do you ask?)

    Shiplap Slouch Hat Crochet Pattern | Free slouchy hat crochet pattern by Little Monkeys Crochet

    OH, and before I forget… yes, there’s a matching cowl pattern!

    Shiplap Slouch Hat and Cowl Crochet Pattern Set | Free slouchy hat and fringe cowl scarf crochet patterns by Little Monkeys Crochet

    Prefer a PDF?

    This pattern can be completed using the 100% free version right here on this page. However, many people prefer the convenience of a printable, ad-free PDF.

    All-Access Passholders get the ad-free version of this and all of my other blog patterns. It’s a pretty sweet deal, if I do say so myself! Learn more about it here or continuing scrolling for the free version.

    SHIPLAP SLOUCH HAT

    add-to-ravelry-favorites

    Difficulty: Easy

    Finished Size: 9.5″ tall x 9.5″ wide (when laid flat)

    Hook: H (5.00mm) and G (4.25mm)

    Yarn: Approximately 230 yards of Cascade Longwood Sport, a #3 light yarn.

    Gauge: Your first 5 rounds should measure 3″ across.

    You’ll also need: Yarn needle, stitch marker

    Abbreviations Used:
       MC (magic circle – view tutorial here)
    ST
     (stitch)
    SL ST (slip stitch)
    SK (skip)
    CH (chain)
    HDC (half double crochet)
    HHDC (herringbone half double crochet; see “special stitch” below)

    Special Stitch:
    HHDC – Herringbone Half Double Crochet. Here’s how you do it:

    HHDC: Yarn over, insert hook into stitch. Yarn over, pull loop through stitch AND through first loop on hook (this is similar to a slip stitch motion). Two loops remain on hook. Yarn over and pull through both loops.

    (If you need additional help, Moogly has an excellent video tutorial here. Please note that while her video considers the CH2 at the beginning of rows as a stitch, the pattern below does not.)

    Notes:
    (1) This pattern is written in American Standard Terms.
    (2) Pattern is worked in a continuous, seamless round until the band. Use a stitch marker to mark the beginning of rounds and do not join unless instructed to do so.
    (3) Since we are working in a seamless round, your ribbing rows will not meet up perfectly in the back. This is unavoidable, and the alternative (joining each round) is much, much more obvious. (Trust me, I tried it.)
    (4) Pattern uses regular HDC to set up each ribbing row. The abbreviation is very similar to HHDC, so pay attention!
    (5) To find the “3rd loop” (as mentioned in Round 13 and every 4 rows after that), reach over your top loops and insert your hook into the loop just past (below) the top loop that is furthest from you. (Also called the Camel Stitch or RibHDC.)

    – – – – – – – – – – – – – – – – – – – – – – – –

    THE PATTERN

    To begin: With H hook, make a magic circle; CH1.

    Round 1: 9 HHDC in MC. (9)

    Round 2: 2 HHDC in each ST around. (18)

    Round 3: (2 HHDC in next ST, HHDC in next ST) around. (27)

    Round 4: (2 HHDC in next ST, HHDC in each of the next 2 STS) around. (36)

    Round 5: (2 HHDC in next ST, HHDC in each of the next 3 STS) around. (45)

    Round 6: (2 HHDC in next ST, HHDC in each of the next 4 STS) around. (54)

    Round 7: (2 HHDC in next ST, HHDC in each of the next 5 STS) around. (63)

    Round 8: (2 HHDC in next ST, HHDC in each of the next 6 STS) around. (72)

    Round 9: (2 HHDC in next ST, HHDC in each of the next 7 STS) around. (81)

    Round 10: (2 HHDC in next ST, HHDC in each of the next 8 STS) around. (90)

    Round 11: HHDC in each ST around. (90)

    Round 12: HDC in each ST around. (90)

    Round 13: HHDC in 3rd loop of each ST around. (90)

    Shiplap Slouch Hat Crochet Pattern  |  Free teen / adult slouchy hat crochet pattern by Little Monkeys Crochet

    Round 14: HHDC in each ST around. (90)

    Round 15: HHDC in each ST around. (90)

    Round 16: HDC in each ST around. (90)

    Rounds 17-32: Repeat Rounds 13-16. (90)

    Round 33: HHDC in 3rd loop of each ST around. You should now have 6 rows of ribbing. (90)

    Switch to G Hook.

    Rounds 34-39: HHDC in each ST around. (90)

    Round 40: HHDC in each of the first 86 STS (4 STS remain). SC in each of the next 2 STS, SL ST in each of the remaining 2 STS. (90)

    Fasten off and weave in your ends.

    Shiplap Slouch Hat Crochet Pattern  |  Free slouchy hat crochet pattern by Little Monkeys Crochet

    Shiplap Slouch Hat Crochet Pattern | Free slouchy hat crochet pattern by Little Monkeys Crochet

  • Sophia Slouch Hat

    Sophia Slouch Hat

    Sometimes, you find a yarn that is just asking to do all the work for you.

    That’s how I felt when I found Landscapes (by Lion Brand). The color changes were so gradual and pretty that I knew it was begging to become a simple hat with an eye-catching finish. I’m all about writing patterns that confident beginners can do, and this is one of those patterns!

    Sophia Slouch Crochet Pattern | Free slouchy hat crochet pattern by Little Monkeys Crochet

    To pull the colors of the hat into an organized look, I used two skeins of Landscapes: one in Metropolis (a gorgeous mix of silvery purple and black) for the body and one in coordinating Black for the ribbed band. That’s the great thing about Landscapes; it comes in an array of multi-colored (self-striping) hues, as well as coordinating solids.

    I also picked up a black Lion Brand Pom, because I’d never used one before. I love how it all came together!

    Sophia Slouch Crochet Pattern | Free slouchy hat crochet pattern by Little Monkeys Crochet

    Prefer a PDF?

    This pattern can be completed using the 100% free version right here on this page. However, many people prefer the convenience of a printable, ad-free PDF.

    All-Access Passholders get the ad-free version of this and all of my other blog patterns. It’s a pretty sweet deal, if I do say so myself! Learn more about it here or continuing scrolling for the free version.

    SOPHIA SLOUCH CROCHET PATTERN

    add-to-ravelry-favorites

    Level: Easy

    Size:
    One Size Fist Most (Preteen – Adult Woman).
    Hat measures 9” across the bottom of the band, and is 10” tall (not including pom pom).

    Materials:

    • I Hook (5.50mm) and G hook (4.25mm)
    • Yarn needle
    • 180 yards of Yarn A: Lion Brand Landscapes in a self-striping hue (sample shown in Metropolis) and about 40 yards of Yarn B: Lion Brand Landscapes in a coordinating solid hue (sample shown in Black). (Note: If using the recommended yarn, you’ll need to purchase 3 total skeins – two self-striping and one solid. If you instead choose to do the band of the hat in the same self-striping yarn, you can combine the total yardage and purchase just two skeins of that.)
    • Stitch marker (a bobby pin works great)
    • 1 Lion Brand Pom in coordinating color (optional)

    Gauge:
    With larger hook, 9 rows of 7 SC = 2″ square.

    Abbreviations Used:
    MC (magic circle) – view my tutorial here
    ST/STS (stitch/stitches)
    CH (chain)
    SL ST (slip stitch)
    SC (single crochet)
    HDC (half double crochet)
    BLO (back loop only)

    Notes:

    (1) This pattern is written in American Standard terms.
    (2) This hat is worked in a continuous spiral until the band. Do not join, chain or turn until instructed. Use a stitch marker to mark the first stitch of each round.
    (3) The pom pom is optional.
    (4) Because of the self-striping nature of the yarn, and the fact that we need to use more than 1 skein of it, be advised that you may have to pull some yarn out of the second skein in order to find the same color point that your current skein is at in the self-striping pattern. This is just the nature of multi-colored yarns.

    – – – – – – – – – – – – – – – –

    To begin:
    Using larger hook, with Yarn A, make a magic circle.

    Round 1:  10 HDC in MC (10)

    Round 2: 2 HDC in each ST around (20)

    Round 3: 2 HDC in each ST around (40)

    Note: At this point, it’s going to start looking wavy. You’re doing it right! The back of the hat has a faux-cinched look to it, and this is how we achieve it. Once you get to the body of the hat, it will start to straighten itself out naturally.

    Round 4: (2 HDC in next, 1 HDC in next) around (60)

    Round 5: (2 HDC in next, 1 HDC in each of the next 2 STS) around (80)

    Rounds 6-31: SC around (80)

    Round 32: SC in each of the first 79 STS (all but the last ST), SL ST into final ST of the round (80)

    Join Yarn B. Fasten off Yarn A. 

    Round 33: CH1. (SC2TOG, SC in each of the next 6 STS) around. Join to the top of the first SC2TOG with a SL ST. Do not fasten off; continue to instructions for Ribbed Band. (70)

    Ribbed Band

    Switch to smaller hook.

    Next we’re going to make the band of the hat, and we will be working in vertical rows, attaching it to the final round of the hat with SL STS as we go.

    Row 1: CH9. SC in 2nd CH from hook. SC in remaining 7 CHS. SL ST in next 2 STS of the hat. (8, plus the 2 SL STS at the base of the hat)

    Row 2: CH1, turn. Skipping over the 2 SL STS, SC in BLO of each of the next 7 STS. SC in both loops of the last ST. (8)

    Row 3: CH1, turn. SC in first ST. SC in BLO of each of the next 7 STS. SL ST in next 2 STS of the hat.

    Repeat Rows 2-3 all the way around the hat (70 rows). Fasten off and use your tail to whip stitch the first and last rows together. Weave in all ends. Attach Lion Brand Pom (optional).

  • Herringbone Slouch

    Herringbone Slouch

    Thank you to Lion Brand Yarn for providing the yarn for this sample!

    Last month I published the pattern for the Herringbone Buttoned Cowl, which seems to have gotten a great response!

    Herringbone Buttoned Cowl Crochet Pattern | Free button cowl crochet pattern by Little Monkeys Crochet

    Lots of you loved it, and I promised that I would make a slouch hat to match. Well, it’s a little later than I had planned on releasing it, but here it is!

    Herringbone Slouch Crochet Pattern | Free slouchy hat crochet pattern by Little Monkeys Crochet

    The Yarn

    For both patterns, I used the gorgeous, relatively-new Vanna’s Style (from Lion Brand), which is a DK (that’s a #3 weight) yarn. (Don’t confuse this with Vanna’s Choice, which is a #4 worsted yarn!) This yarn is stunning. It has the most beautiful stitch definition, which shows off the rows of the Herringbone stitch really nicely. It isn’t too shiny, but has just enough sheen to give it an elegant look. I haven’t found Vanna’s Style in any of my local stores yet, but you can always purchase it direct from Lion Brand.

    Prefer a PDF?

    This pattern can be completed using the 100% free version right here on this page. However, many people prefer the convenience of a printable, ad-free PDF.

    All-Access Passholders get the ad-free version of this and all of my other blog patterns. It’s a pretty sweet deal, if I do say so myself! Learn more about it here or continuing scrolling for the free version.

    HERRINGBONE SLOUCH

    add-to-ravelry-favorites

    Difficulty: Easy

    Finished Size: 9.5″ wide x 9.5″ tall (when laid flat)

    Hook: G (4.25mm) & H (5.00mm)

    Yarn: About 200-210 yards of Vanna’s Style DK Yarn by Lion Brand (not including optional pom pom). Vanna’s Style is a #3 light yarn.  The sample is shown in “Silver”.

    Gauge: 16 rows of 17 HHDC = 4″ (see “Special Stitch” below for explanation of HHDC)

    You’ll also need: Yarn needle

    Abbreviations Used:
    ST/STS
     (stitches)
    SL ST (slip stitch)
    SK (skip)
    CH (chain)
    SC (single crochet)
    HHDC (herringbone half double crochet; see “special stitch” below)
    BLO (back loops only)

    Special Stitch:
    HHDC – Herringbone Half Double Crochet. Here’s how you do it:

    HHDC: Yarn over, insert hook into stitch. Yarn over, pull loop through stitch AND through first loop on hook (this is similar to a slip stitch motion). Two loops remain on hook. Yarn over and pull through both loops.

    (If you need additional help, Moogly has an excellent video tutorial here. Please note that while her video considers the CH2 at the beginning of rows as a stitch, the pattern below does not.)

    Notes:
    (1) This pattern is written in American Standard Terms.
    (2) CH1 at the beginning of rows does not count as a stitch.

    – – – – – – – – – – – – – – – – – – – – – – – –

    THE PATTERN


    To begin: Leaving at least a 12″ starting tail, CH33. (We’ll use the starting tail to cinch the hat at the end.)

    Row 1: HHDC in 2nd CH from hook and in each remaining CH. (32)

    Rows 2-88, or until piece measures 22″ long (just make sure you do an even number of rows): CH1, turn. HHDC in each ST across. (32)

    Switch to H Hook.

    Row 89: CH1, do not turn. SC evenly down the long edge, putting 1SC in each row. (88)

    Ribbed Band

    Next we’re going to make the band of the hat, and we will be working in vertical rows, attaching it to Row 89 of the hat with SL STS as we go.

    Ribbing Row 1: CH9. SC in 2nd CH from hook. SC in remaining 7 CHS. SL ST to the first SC of Row 89. SL ST to the next ST of that row. (8, plus the 2 SL STS at the base of the hat)

    Ribbing Row 2: CH1, turn. Skipping over the 2 SL STS, SC in BLO of each of the first 7 STS of the previous ribbing row. SC in both loops of the last ST. (8)

    Ribbing Row 3: CH1, turn. SC in first ST. SC in BLO of each of the next 7 STS. SL ST in each of the next 2 STS of Row 89. (8, plus 2 SL STS)

    Ribbing Row 4: CH1, turn. Skipping over the 2 SL STS, SC in BLO of each of the first 7 STS of the previous ribbing row. SC in both loops of the last ST. (8)

    Repeat Rows 3-4 all the way down the edge.

    Because Row 89 consisted of an even number of stitches, you should be ending with a repeat of Row 4, with your hook now at the bottom corner of the flat piece (see Figure 1, below).

    Seaming & Cinching the Hat Closed

    Fasten off your yarn, leaving a 24″ tail. Bring the short ends of the hat together and sew them up using your tail and a yarn needle (see Figure 2). When you reach the top, tie a knot, fasten off and weave in the end.

    Thread your starting tail through the yarn needle and weave it in and out along the very top edge of the hat (see figure 3). I wove mine through every two rows. When you pull on the starting tail, you’ll start to notice the hat beginning to cinch itself up.

    When you’ve gone all the way around the circle, pull the tail as tight as you can (without breaking the yarn!) and tie a couple of knots. You may want to sew across the cinch a few times to really secure it. Then, fasten off and weave in the tail. Turn your hat right-side out.

    Done! Add a pom pom if you want, or leave as is.

    Herringbone Slouch Hat Crochet Pattern  |  Free slouchy hat crochet pattern by Little Monkeys Crochet

  • Savannah Slouch Hat

    Savannah Slouch Hat

    This season, I’ve gotten very excited about the Herringbone Stitch. There are so many different ways to change up the look of this stitch! Today, I’m introducing a set of patterns that utilize the Herringbone Double Crochet stitch (HbDC), worked in a continuous round.

    The interesting thing about this stitch for me was that as I started experimenting with it, I quickly discovered that while the right side of my work kind of bored me, I was intrigued by the texture showing up on the wrong side. So, I designed the Savannah Slouch Hat to showcase the wrong side!

    Savannah Slouch & Infinity Scarf Crochet Pattern Set | Free infinity scarf and slouchy hat crochet patterns by Little Monkeys Crochet

    This pattern is great for a confident beginner to wants to branch out beyond those most basic stitches we all learn at first.

    And, it has a matching scarf which is even more beginner friendly! Showcasing a different texture on each side, the matching scarf is so simple; you’ll definitely want to bring it along to your next Netflix binge.

    Savannah Slouch & Infinity Scarf Crochet Pattern Set | Free infinity scarf and slouchy hat crochet patterns by Little Monkeys Crochet

    Prefer a PDF?

    This pattern can be completed using the 100% free version right here on this page. However, many people prefer the convenience of a printable, ad-free PDF.

    All-Access Passholders get the ad-free version of this and all of my other blog patterns. It’s a pretty sweet deal, if I do say so myself! Learn more about it here or continuing scrolling for the free version.

    SAVANNAH SLOUCH HAT

    add-to-ravelry-favorites

    Difficulty: Easy

    Finished Size: 9″ tall x 9.5″ wide (when laid flat)

    Hooks: K (6.5mm) and H (5.00mm)

    Yarn: About 150 yards of Vanna’s Choice by Lion Brand (that’s a little less than 1 skein). Vanna’s Choice is a #4 aran yarn. The sample is shown in “Linen”.

    Gauge: With larger hook, 10 rows of 11 HbDC = 4″ square

    You’ll also need: Yarn needle, stitch marker, 3 small buttons, sewing needle, and thread to match yarn color.

    Abbreviations Used:
       MC (magic circle – view tutorial here)
    ST
     (stitch)
    SL ST (slip stitch)
    SK (skip)
    CH (chain)
    SC (single crochet)
    HDC (half double crochet)
    HbDC (herringbone double crochet; see “special stitch” below)

    Special Stitch:
    HbDC – Herringbone Double Crochet. When worked in the round without turning, this stitch creates two beautiful and very different textures on either side of the piece. Here’s how you do it:

    HbDC: Yarn over, insert hook into stitch. Yarn over, pull loop through stitch AND through first loop on hook (this is similar to a slip stitch motion). Two loops remain on hook. Yarn over and pull through first loop on hook. Two loops remain on hook. Yarn over again and pull the loop through both loops on the hook.

    (If you need additional help, Moogly has an excellent video tutorial here.)

    Notes:
    (1) This pattern is written in American Standard Terms.
    (2) Pattern is worked in a continuous, seamless round until the band. Use a stitch marker to mark the beginning of rounds.

    – – – – – – – – – – – – – – – – – – – – – – – –

    THE PATTERN

    To begin: Make a MC; CH1.

    Round 1: 12 HbDC in MC. (12)

    Round 2: 2 HbDC in each ST around. (24)

    Round 3: 2 HbDC in each ST around. (48)

    Round 4: (2 HbDC in next ST, 1 HbDC in each of the next 2 STS) around. (64)

    Rounds 5-15: HbDC in each ST around. (64)

    If you want a slouchier hat, add more rounds here before moving on to Round 16.

    Round 16: HbDC in each of the first 56 STS (6 STS remain). HDC in each of the next 2 STS. SC in each of the next 2 STS. SL ST in each of the 2 remaining STS. (64)

    Switch to H Hook.

    Round 17: CH1, turn. SC in each ST around. (Do not join.) CH9. This is the base for our button flap. (64 + CH9)

    Round 18: Turn. SC in 2nd CH from hook and in remaining 7 CHs. Continue to SC in each ST around (you’re going in the opposite direction from Round 17). (72)

    Rounds 19-23: CH1, turn. SC in each ST around (including the button flap). (72)

    Round 24 (edging): CH1, do not turn. SC in each ST around flap and around the entire base, putting 3SC in each corner. Join with a SL ST to the top of the first SC.

    Fasten off. Turn hat inside out to display the “wrong side” (the one with more texture). Now considering this the outside of the hat, weave your ends securely into the inside of the hat.

    Button Flap
    Line up the flap with the section of the band that it will overlap, and use a needle and appropriately-colored thread to sew it in place. Position buttons as desired and sew them in place as well.