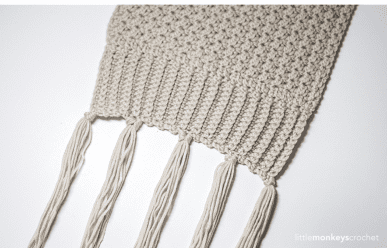
Category: Scarves

  • Maisy’s Holiday Dog Scarf

    Maisy’s Holiday Dog Scarf

    Oh boy, have I got something cute for you.

    I was on Amazon the other day when I came across some adorable knit scarves for dogs. I thought to myself, I could totally crochet something like that. So I did!

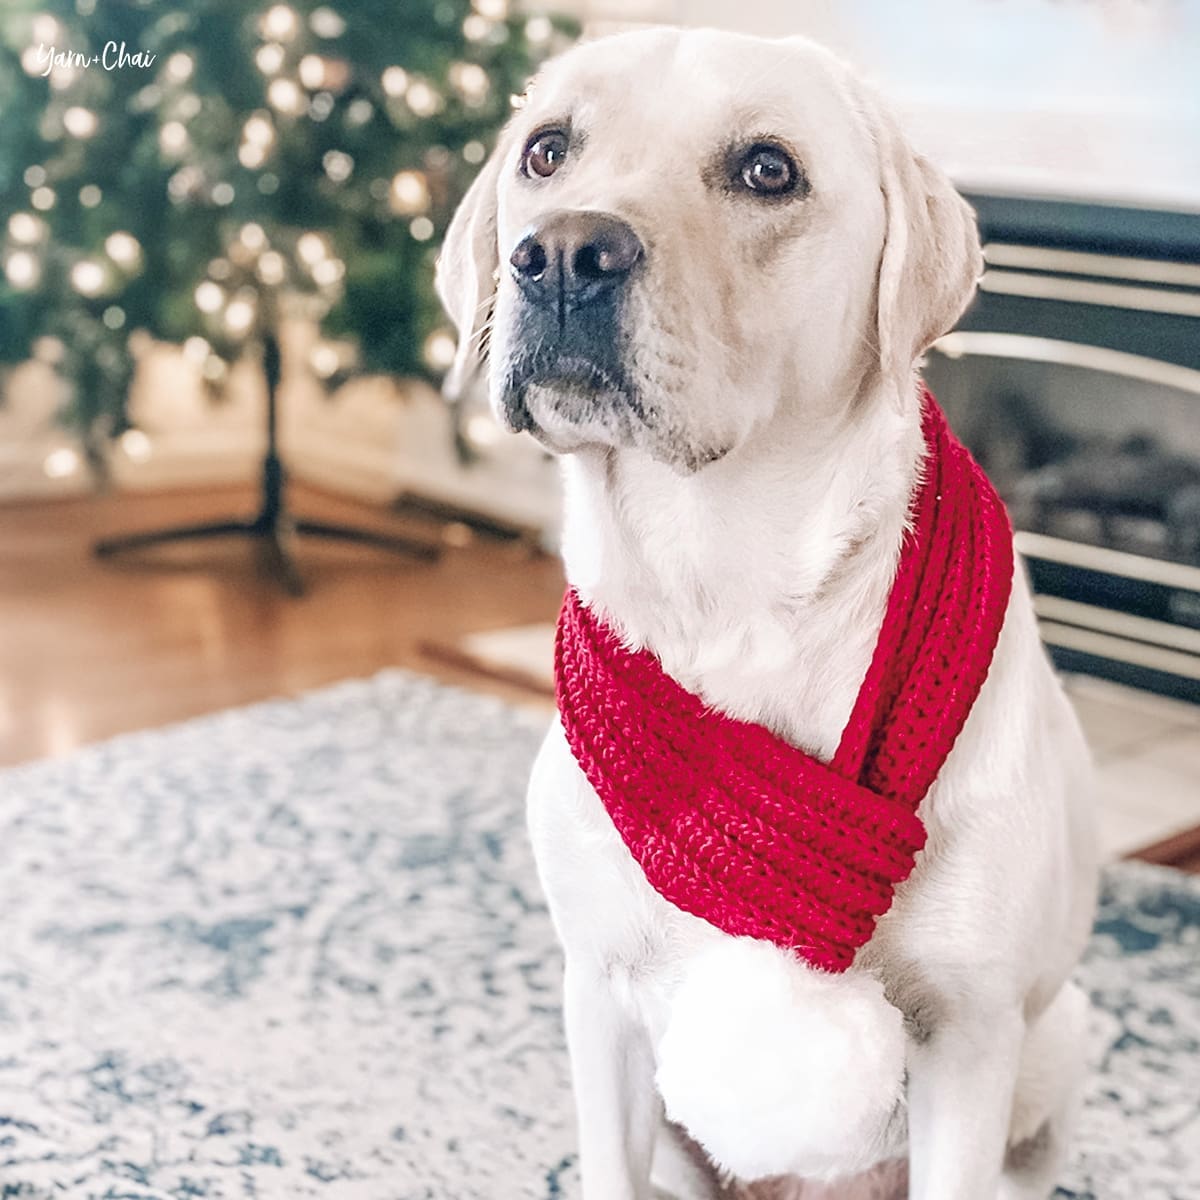
    So for Day #12 of my 12 Days of Christmas, we’re concluding the fun with a cute pattern for our furry friends. Modeled by my Maisy girl, of course!

    White Labrador sits in front of a Christmas tree and wears a red and white scarf.

    (Disclaimer: It should go without saying, but your pup should only wear this when supervised. It’s great for a winter walk, holiday photos, or Christmas Day with the family, but don’t leave it on if they’re heading outside or will be home alone. Safety before cuteness!)

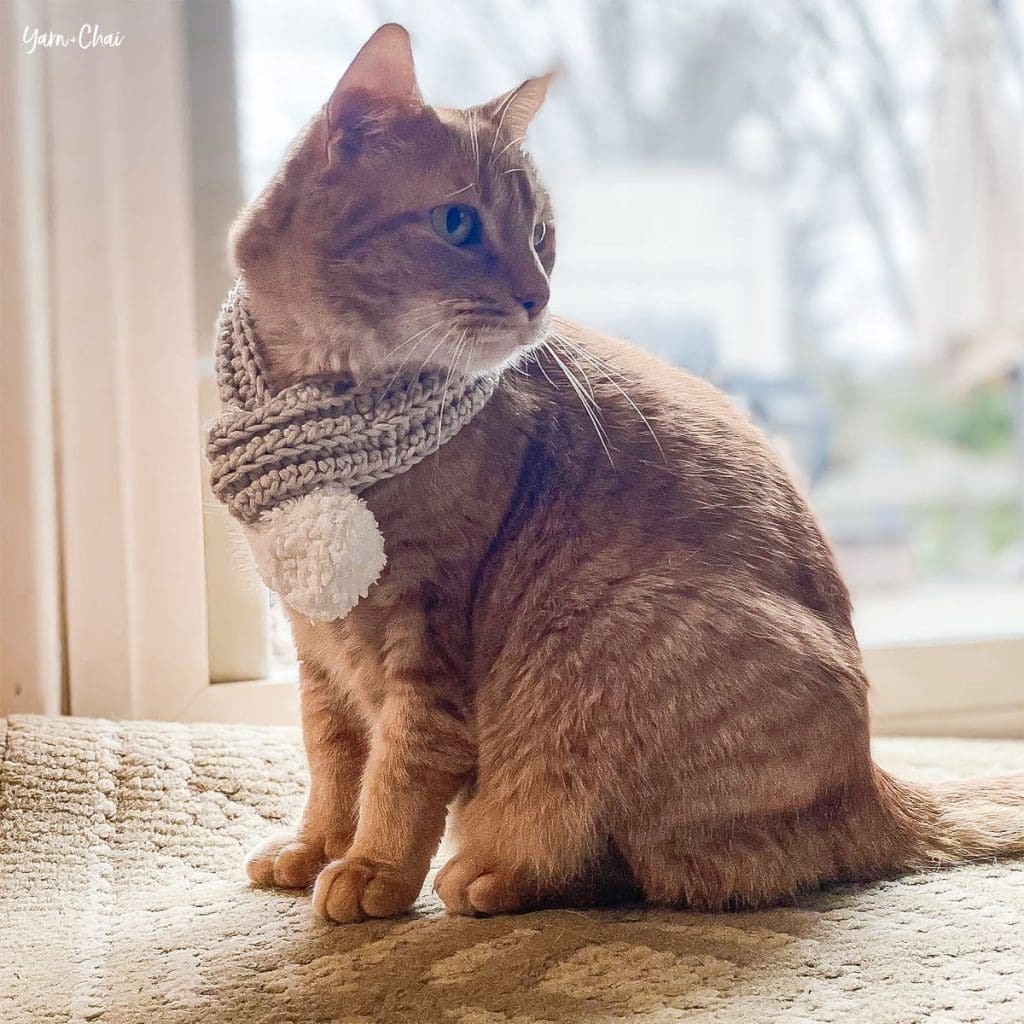
    Maisy is modeling the large breed size… I made a small breed size for Simba, but he was not thrilled about it. I know it looks like he’s posing here, but in reality my snuggly tabby was just flat out refusing to look at me. But he looks so cute!

    Prefer a PDF?

    This pattern can be completed using the 100% free version right here on this page. However, many people prefer the convenience of a printable, ad-free PDF.

    All-Access Passholders get the ad-free version of this and all of my other blog patterns. It’s a pretty sweet deal, if I do say so myself! Learn more about it here or continuing scrolling for the free version.

    Maisy’s Holiday Dog Scarf

    View on Ravelry

    Language: American Standard

    Difficulty: Beginner / Easy

    Finished Sizes: 

    Length before seamingLength after seamingWidth
    SMALL Breed18″15″2″
    MEDIUM Breed24″20″3″
    LARGE Breed28″24″4″

    Hook: J (6.0mm) or whichever hook is needed to obtain correct gauge

    Yarn: I used Yarn Bee Comfy Classic in “Red”. I chose this viscose/polyester/nylon #4 weight yarn because it’s stretchy, so it’s easy to slip over my dog’s head. But really, you can use any yarn you want! Even if you choose thicker or thinner yarn and an appropriate hook size, you can simply follow the measurements of the pattern as a guide.

    You’ll Also Need: A faux fur or yarn pom, appropriately sized for the animal that will be wearing it. I recommend 2-3″ for a small breed, and 4″ for a medium or large breed.

    Gauge: 13 HDC x 12 rows = 4″ square

    Terms and Abbreviations:
    ST/STS
     (stitch/stitches)
    CH (chain)
    HDC (half double crochet)
    BLO (back loop only)

    Notes:
    (1) CH1s at the beginning of rows do not count as a stitch in the final stitch count.
    (2) To change the length of the scarf, add to or subtract any number from your starting chain. To change the width, add to or subtract from the total number of rows. There is no stitch multiple.
    (3) Instructions are written for a small breed dog, with counts for medium breed and large breed in parentheses.

    INSTRUCTIONS

    To begin: CH59 (79, 91).

    Row 1: HDC in 2nd CH from hook and in each remaining CH.
    Stitch count: 58 (78, 90)

    Rows 2-6 (2-9, 2-12): CH1, turn. HDC in first ST, HDC in BLO across until 1 ST remains, HDC in final ST.
    Stitch count: 58 (78, 90)

    Fasten off, leaving a tail for attaching pom.

    Attaching Pom

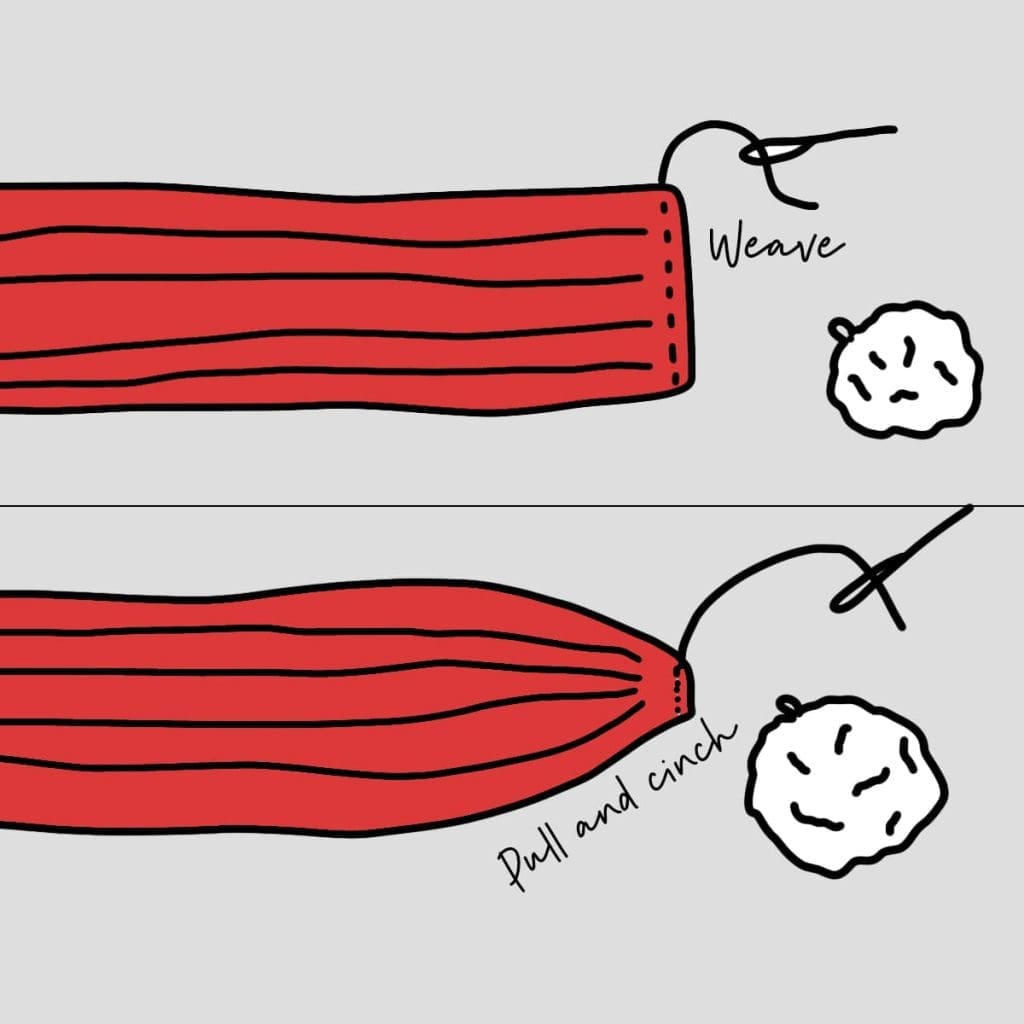
    Using finishing tail and a yarn needle, weave yarn needle down the short edge of the scarf and pull tight to cinch it together.

    Run needle through pom (use the elastic loop if using a store-bought pom) and then back through the cinched edge of the scarf, through the pom again, and through the cinched edge one more time. When pom feels secure, tie a knot and weave in the tail.

    Seaming the Other End

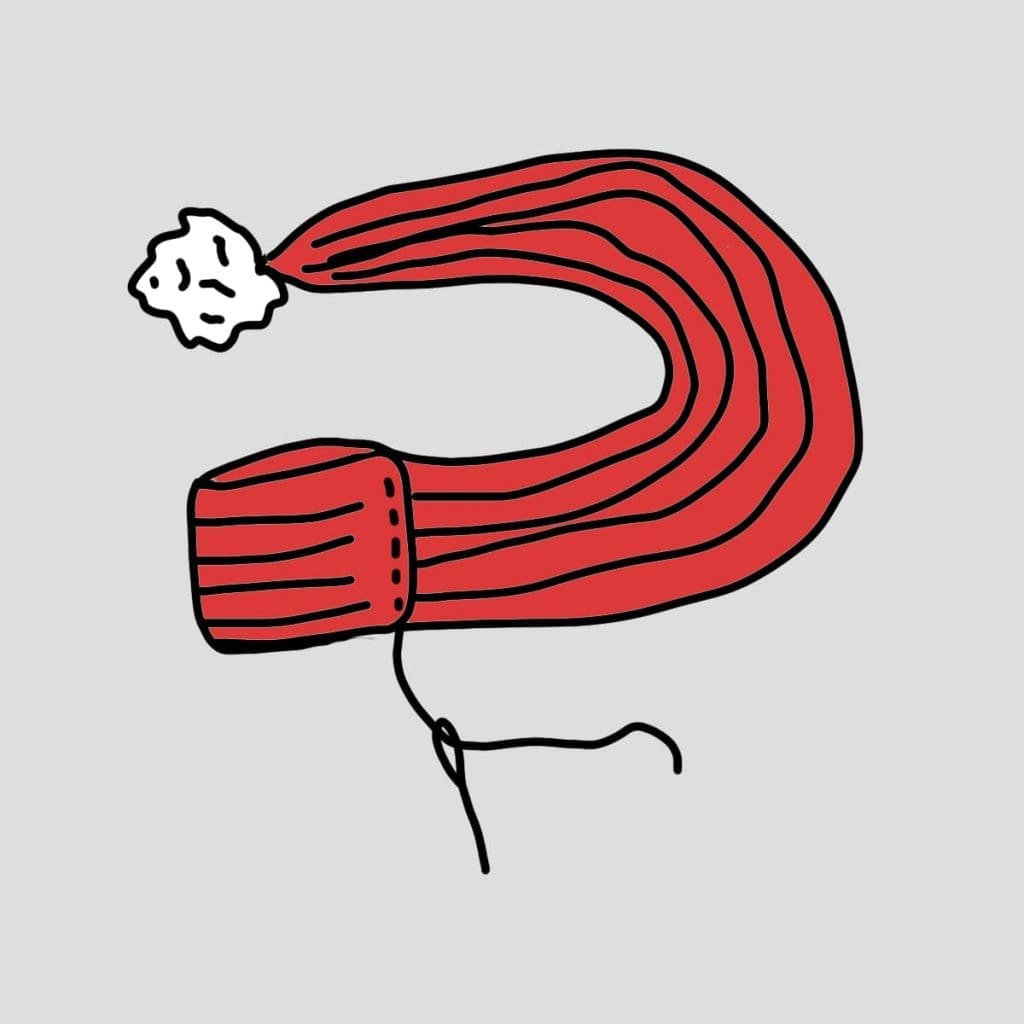
    Fold the other end onto itself, forming a loop at the end of the scarf that is just a bit smaller than the pom you chose. With yarn needle, sew the edge down to attach it to the bottom layer of the scarf.

    Weave in any remaining yarn tails.

    Done! If you’re sharing on social media, be sure to tag me @yarnandchai.design so I can see your beautiful work (and your adorable pups)!

    White Labrador sits in front of a Christmas tree and wears a red and white scarf.
  • 12 Days of Christmas: The Rhylee Scarf

    12 Days of Christmas: The Rhylee Scarf

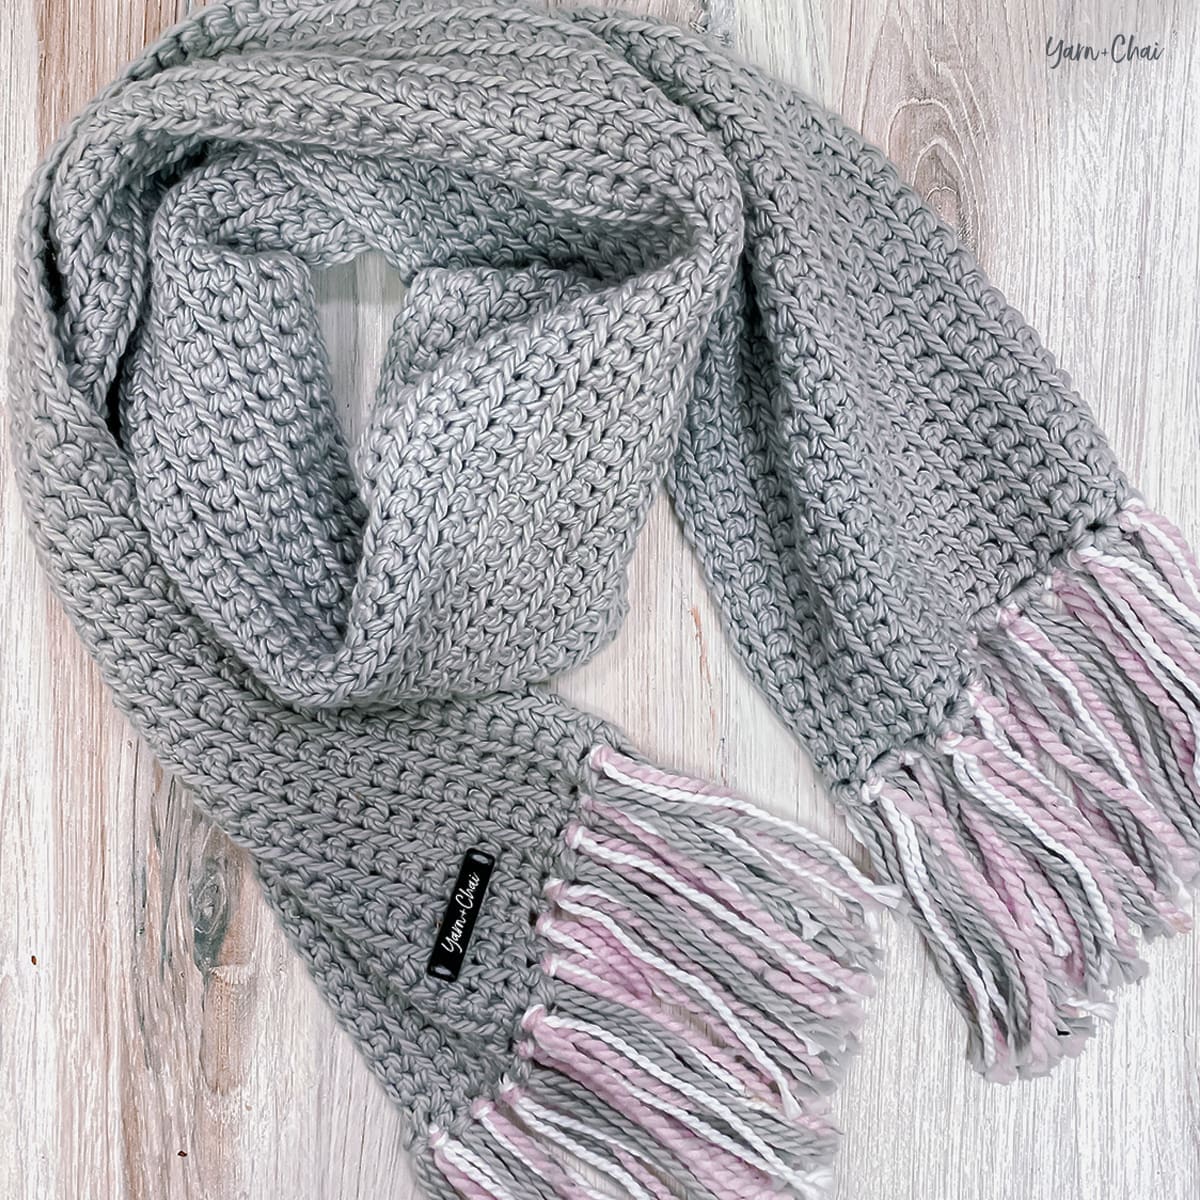
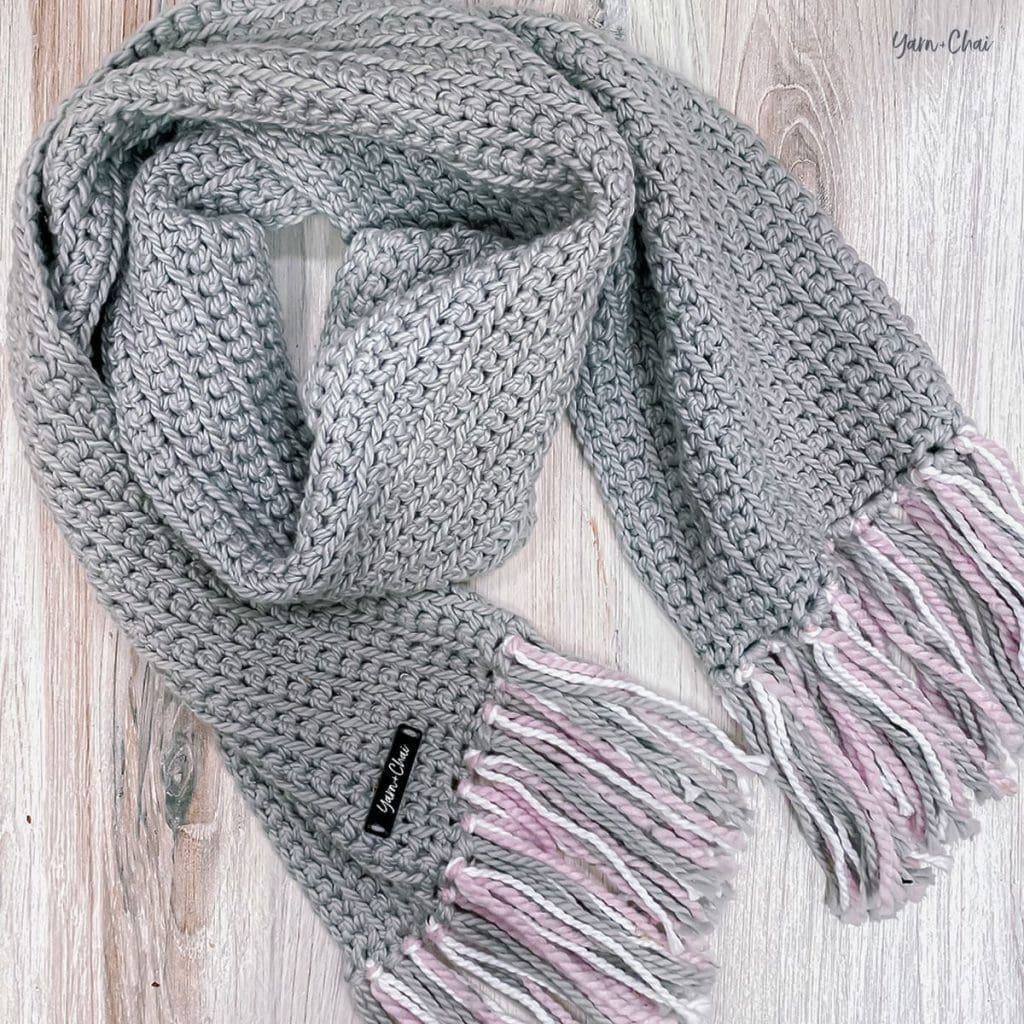
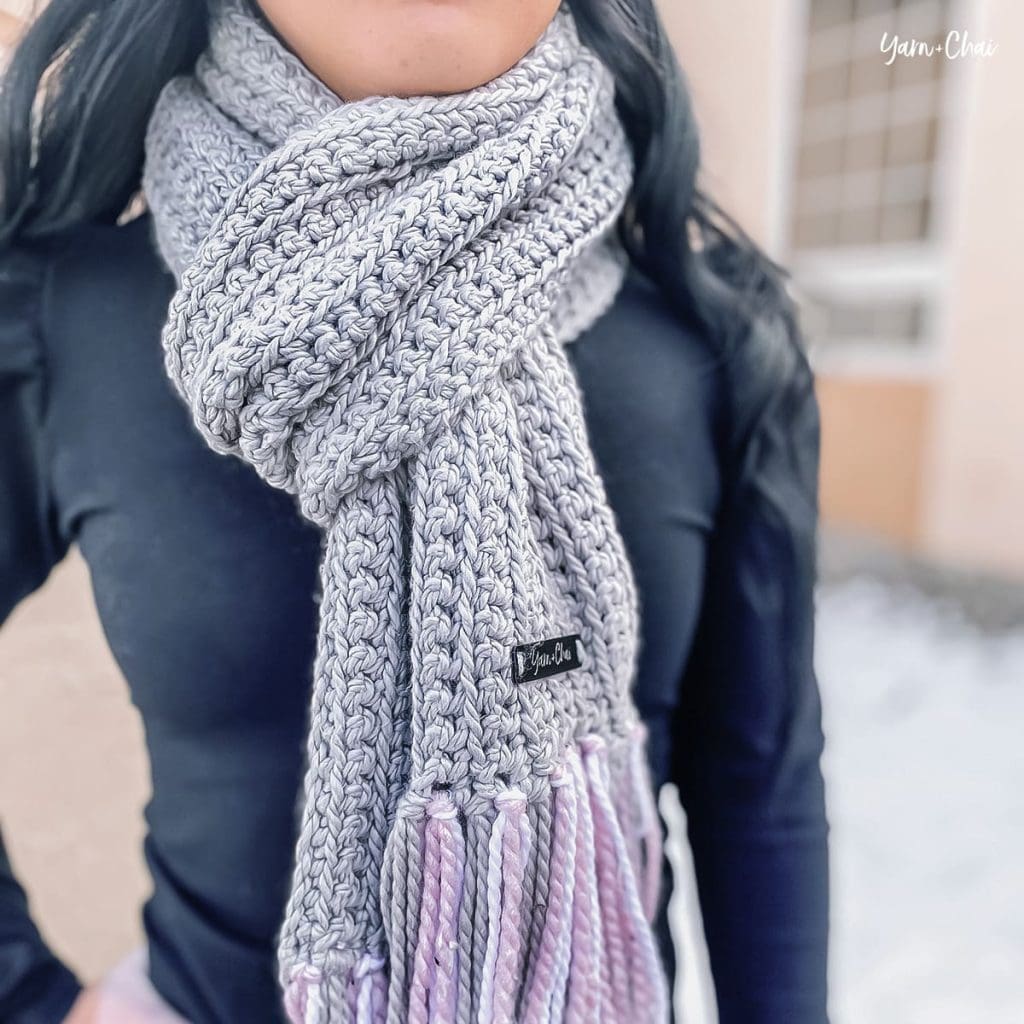
    A classic scarf is always on-trend, so for Day #7 of my 12 Days of Christmas I’m giving you a new pattern for one!

    I chose Yarn Bee’s Feelin’ Chunky for my sample scarf (which I’m totally keeping for myself). Feelin’ Chunky is a #5 weight cotton yarn… and I know cotton doesn’t seem like the ideal winter choice, but I’m one of those people that is always too warm so I love the soft, cool feel of this yarn. But you can, of course, choose whatever chunky yarn you love most!

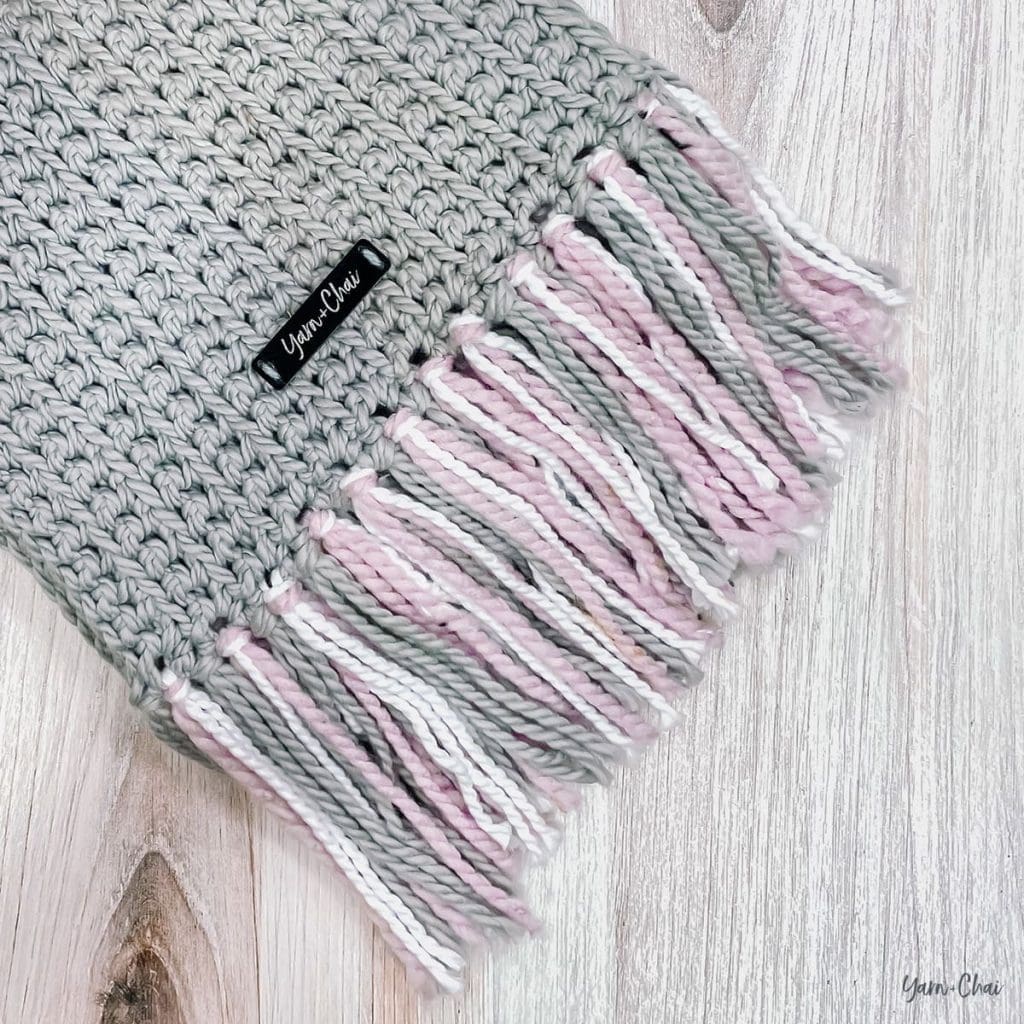
    This scarf would also make a great men’s pattern, don’t you think? The texture really isn’t feminine at all. I love the three different colors of tassels because it’s a great opportunity to incorporate color into the scarf without it becoming too busy.

    Prefer a PDF?

    This pattern can be completed using the 100% free version right here on this page. However, many people prefer the convenience of a printable, ad-free PDF.

    All-Access Passholders get the ad-free version of this and all of my other blog patterns. It’s a pretty sweet deal, if I do say so myself! Learn more about it here or continuing scrolling for the free version.

    THE RHYLEE SCARF

    View on Ravelry

    Language: American Standard

    Difficulty: Beginner / Easy

    Finished Size: 64″ long x 9″ wide

    Hook: L (8mm) or whichever hook is needed to obtain correct gauge

    Yarn: Approx. 320 yards of Yarn Bee Feelin’ Chunky, or other similar #5 weight yarn (COLOR A). I used colorway “Dove”. You’ll also need 10 yards each of two additional colors (COLOR B and COLOR C) for the fringe. (These don’t necessarily need to be the same yarn.) I used Yarn Bee Feelin’ Chunky in “White” and Loops & Threads Charisma in “Blush Tweed.”

    Gauge: 10 SC x 11 rows = 4″ square

    Terms and Abbreviations:
    ST/STS
     (stitch/stitches)
    CH (chain)
    SC (single crochet)
    FLO (front loop only)

    Notes:
    (1) CH1s at the beginning of rows do not count as a stitch in the final stitch count.
    (2) To change the length of your scarf, add to or subtract any number from your starting chain. To change the width, add to or subtract from the total number of rows. (Remember, increasing the size will increase the amount of yarn required.)

    INSTRUCTIONS

    To begin: With COLOR A, CH151.

    Row 1: SC in 2nd CH from hook and in each remaining CH. (150)

    Rows 2-24: CH1, turn. SC in first ST. SC in FLO across until 1 ST remains. SC in final ST. (150)

    Fasten off and weave in all ends.

    Adding the Fringe

    For the fringe, I cut several 10″ strands of each of my three chosen colors. I attached them in groups of 4 at the end of each row, alternating between using 4 of color A (the main scarf color) and 2 each of colors B and C.

    Done! If you’re sharing on social media, be sure to tag me @yarnandchai.design so I can see your beautiful work!

  • Anya Infinity Scarf

    Anya Infinity Scarf

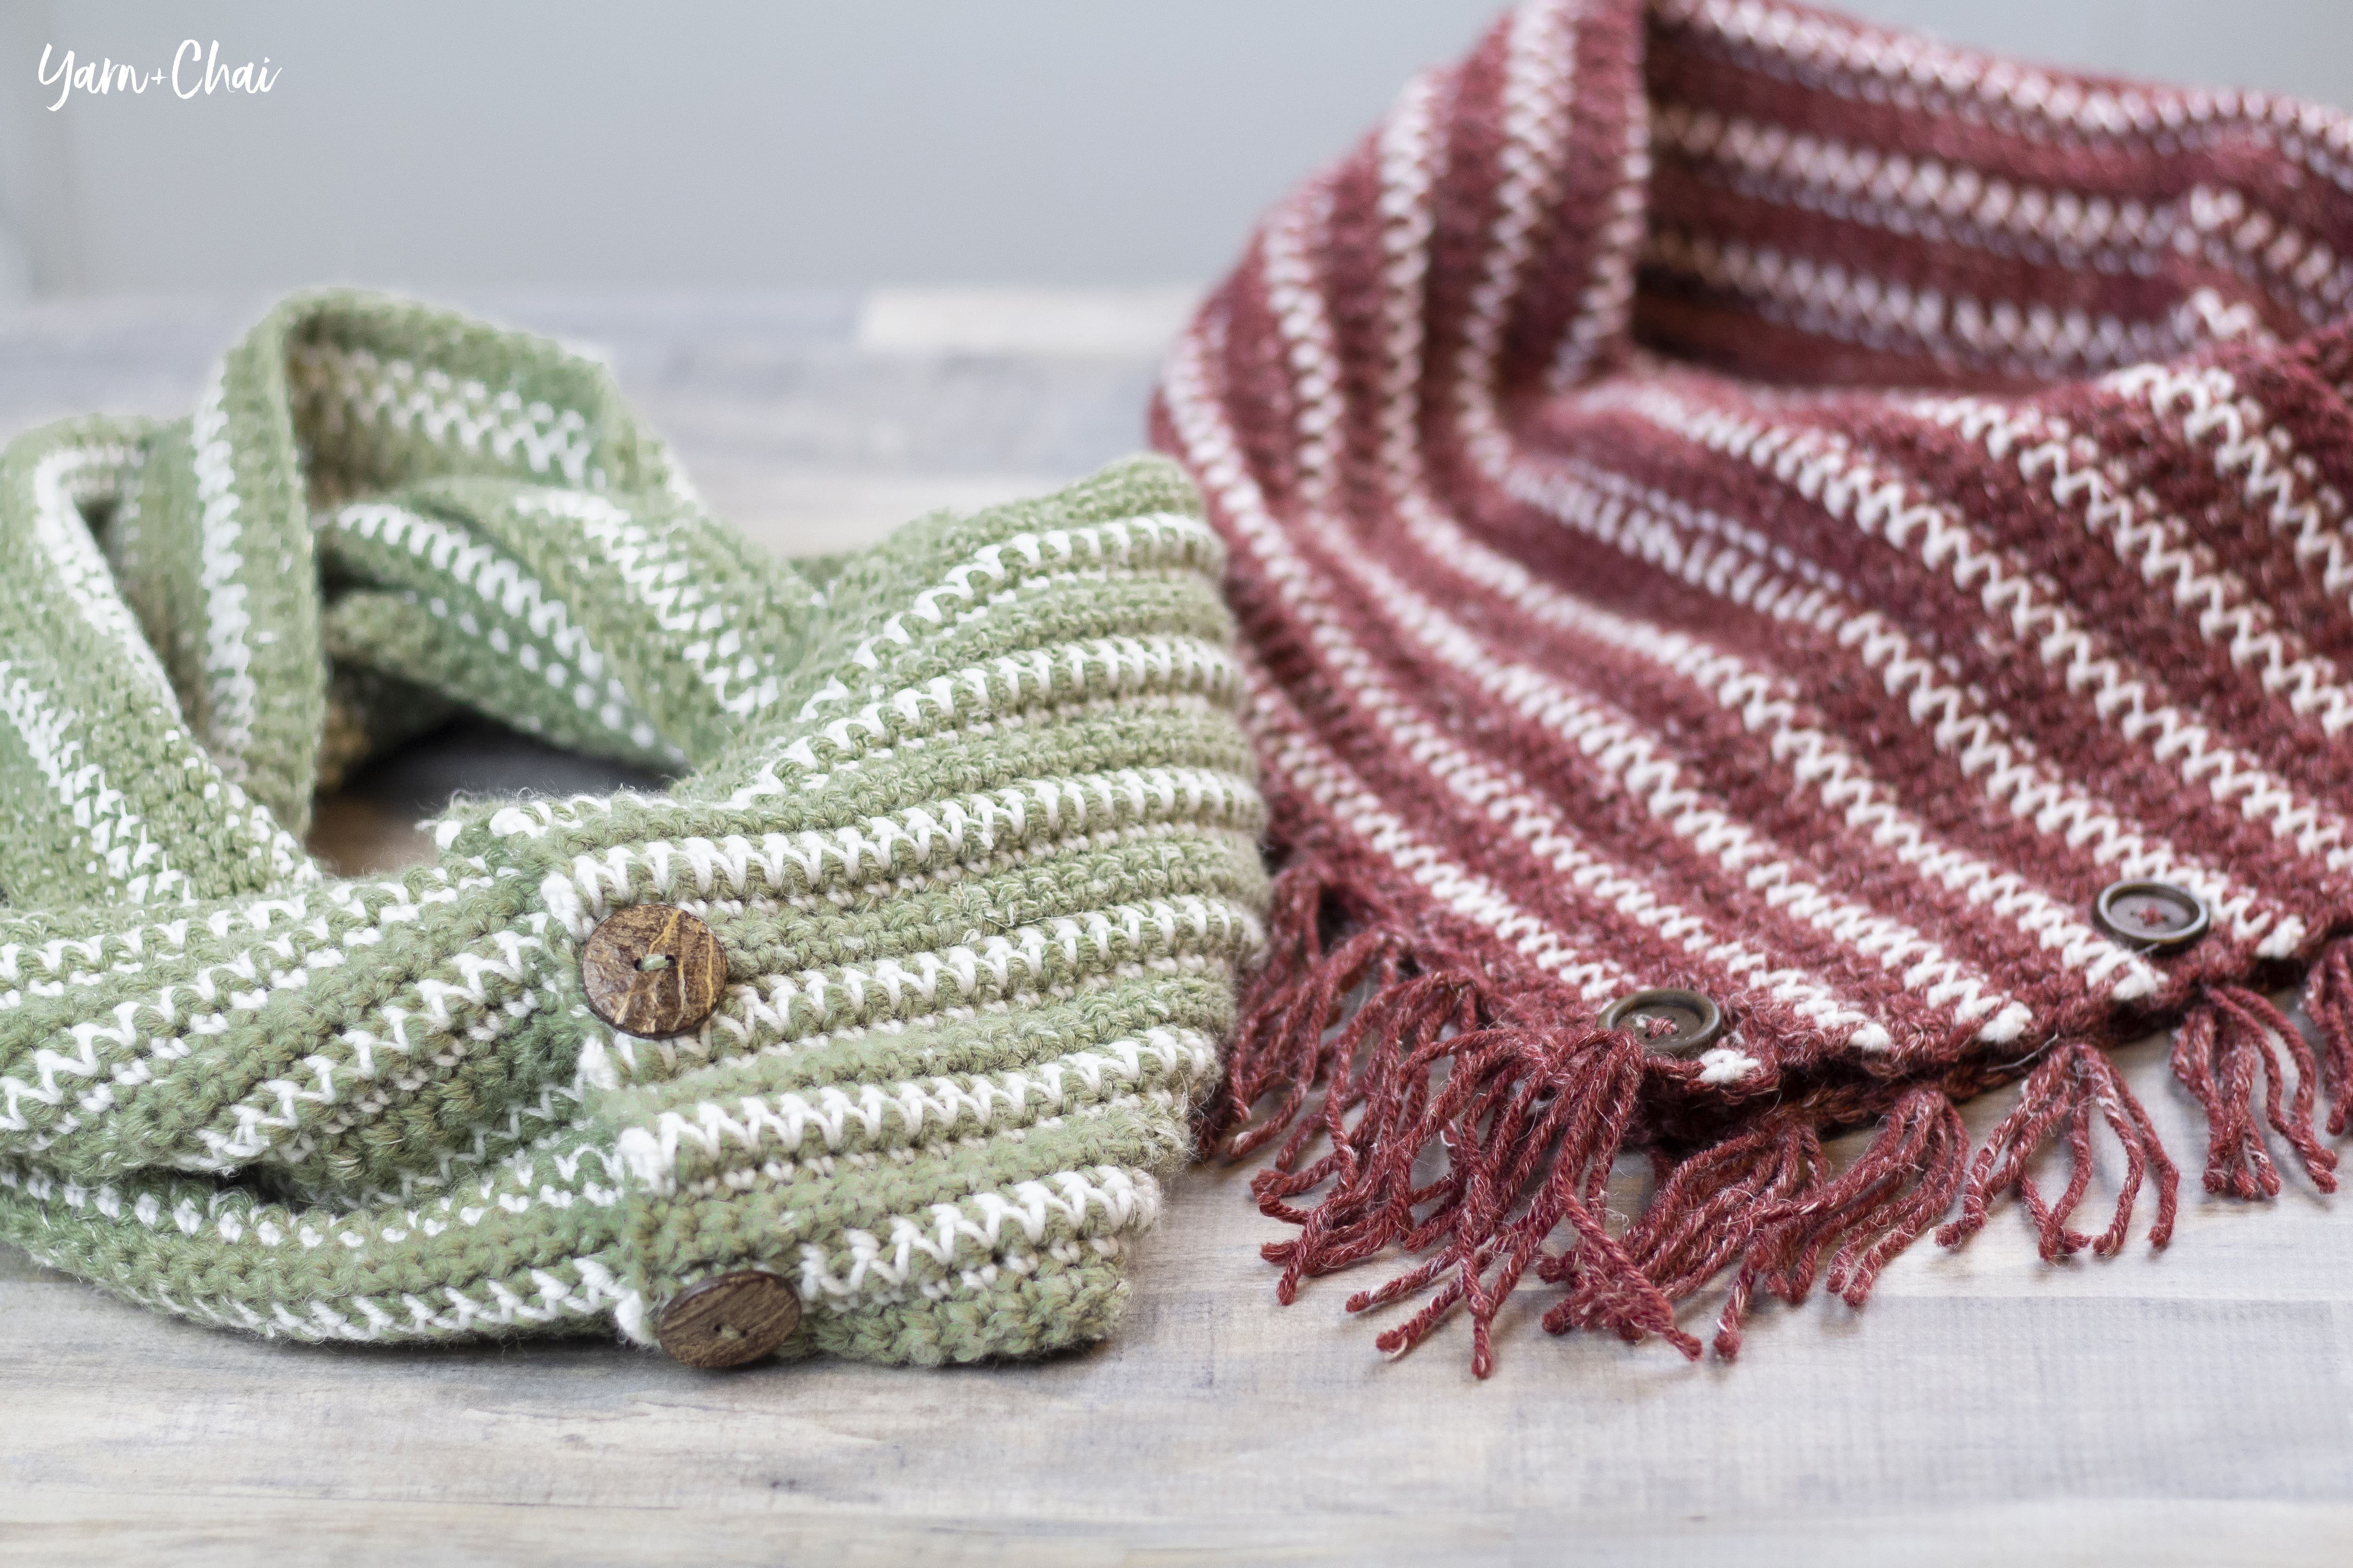
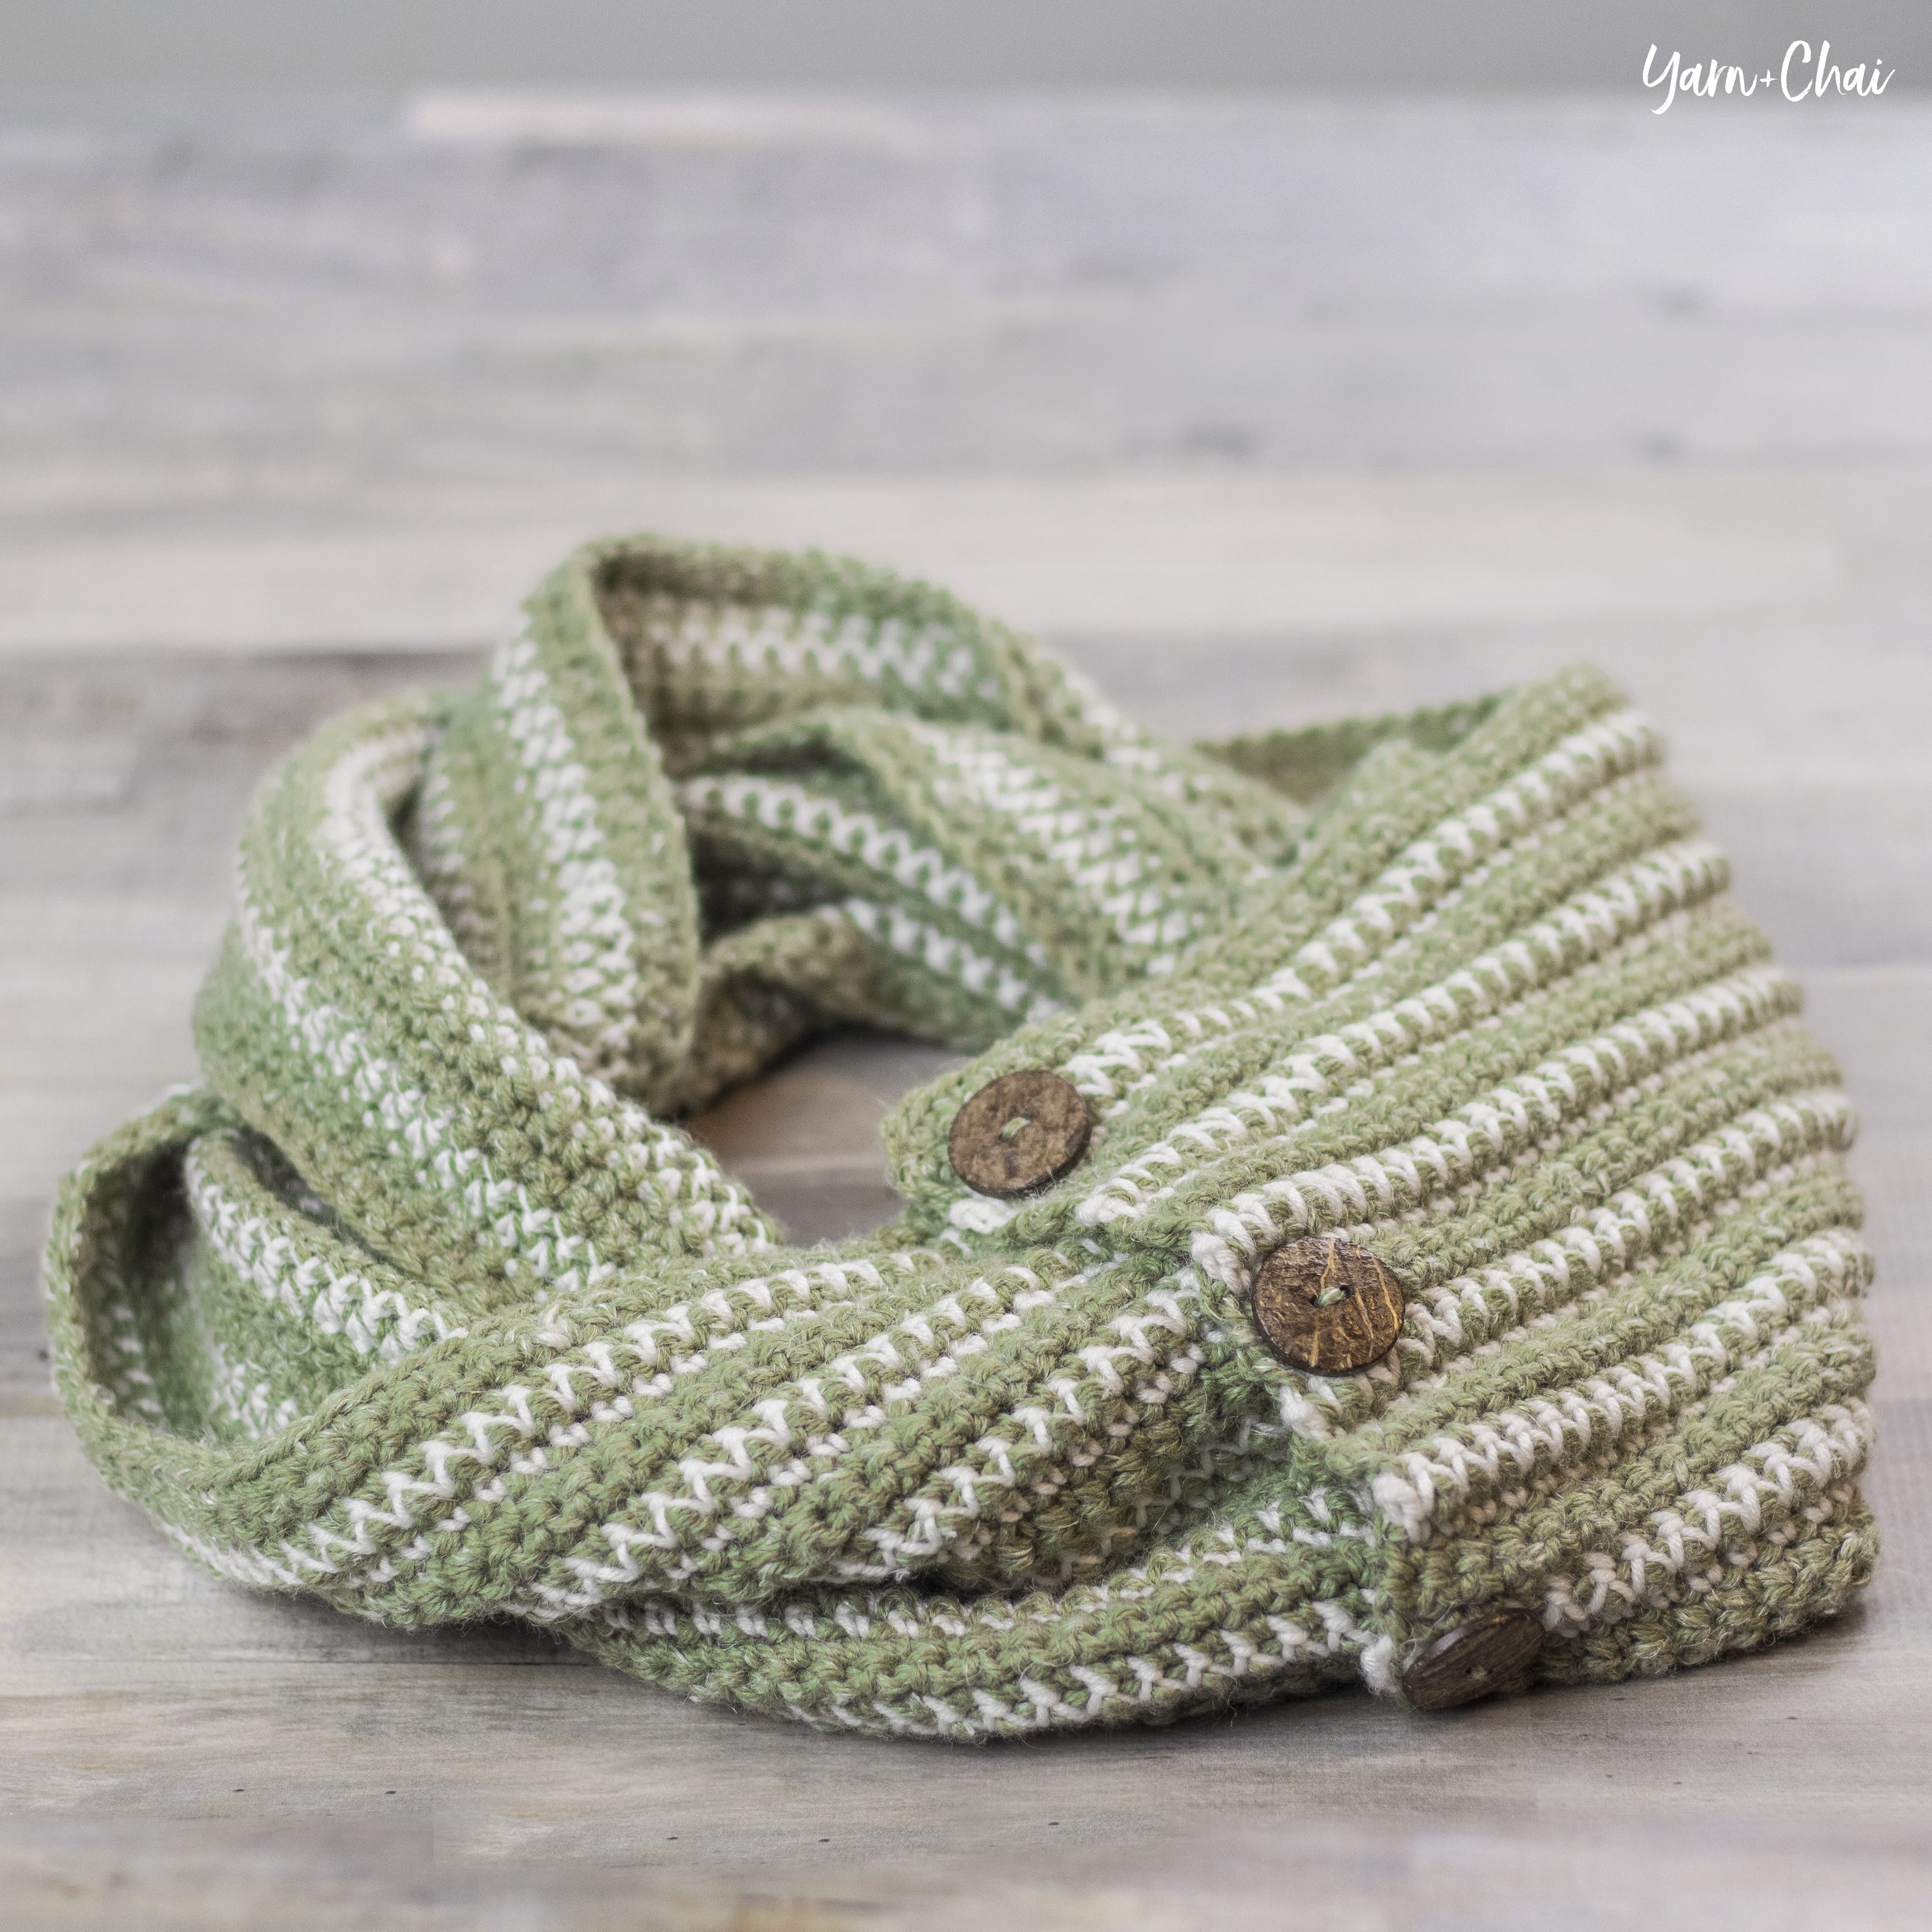
    Last Fall I created a pillow pattern for Hobby Lobby, and the whole time I was working on the pattern, I knew it needed to be made into a wearable pattern as well. I’ve been having a lot of fun lately with using the most basic stitches in new and interesting ways, and I love the stitch pattern on the Autumn Boho Pillow.

    So, I’ve used it to make a scarf and cowl! The Anya Infinity Scarf pattern is below, and you can find the Anya Cowl right here.

    These patterns definitely fall into the “looks-more-complicated-than-it-really-is” category. The reality is, the design on them is achieved purely through creative use of a single crochet stitch. So if you can single crochet, and you’re good at following directions, you can tackle this pattern with no hesitation.

    VIDEO TUTORIAL

    If you need a little extra help with the pattern, here is a video tutorial, and the free pattern is below!

    Prefer a PDF?

    This pattern can be completed using the 100% free version right here on this page. However, many people prefer the convenience of a printable, ad-free PDF.

    All-Access Passholders get the ad-free version of this and all of my other blog patterns. It’s a pretty sweet deal, if I do say so myself! Learn more about it here or continuing scrolling for the free version.

    ANYA INFINITY SCARF

    View on Ravelry

    Difficulty: Easy

    Finished Size: 62″ long x 7.5″ wide

    Hook: K (6.50 mm) or whichever hook is needed to obtain correct gauge

    Yarn: You’ll need two yarns for this project.

    COLOR A: about 375 yards of a #4 aran weight. Yarn used in sample photos is Yarn Bee’s Rustic Romantic in “Window Ivy.” A medium to dark color is best.

    COLOR B: about 150 yards of a #3 DK or #4 worsted weight. Yarn used in sample photos is Yarn Bee’s Must Be Merino in “White”. A light, smooth yarn is best.

    Gauge: With COLOR A, 16 rows of 13SC = 4″ square

    You’ll also need: Yarn needle, 3 buttons (1″ – 1-1/8″)

    Terms and Abbreviations:

    ST/STS (stitch/stitches)
    SL ST (slip stitch)
    CH (chain)
    SC (single crochet)
    SC SPIKE STITCH (single crochet spike stitch; see “Special Stitch”, below)

    Special Stitch:

    SC SPIKE STITCH – Instead of inserting your hook into the top loops of a stitch, insert it into the bottom of the stitch where the “V” meets. See photo (click to enlarge):

    Notes:
    (1) This pattern is written in American Standard Terms.
    (2) CHs at the beginning of rows do not count as a stitch in the final stitch count.
    (3) There is no stitch multiple for this pattern. If you want to make it longer, add more chains at the beginning. If you want to make it wider, complete the repeated section more times than instructed.
    (4) Buttons are decorative, but not functional (they are sewn through both layers of the scarf, joining it together permanently).

    INSTRUCTIONS

    To Begin: With COLOR A, CH205.

    Row 1: SC in 2nd CH from hook and in each remaining CH. (204)

    Row 2: CH1, turn. SC in each ST across. Pull up a large loop so yarn doesn’t unravel, then remove hook. (204)

    Row 3: Without turning your work, insert hook into the first stitch of Row 2, and attach COLOR B. CH1. SC in each ST across. Pull up a loop and remove hook.  (204)

    Row 4A: Reinsert hook into loop from COLOR A, making sure to insert from behind previous color’s loop and working yarn. CH1, turn. SC in each ST across. Pull up a loop and remove hook. (204)

    Row 4B: Turn work and reinsert hook into loop from COLOR B. CH1, turn. SC SPIKE STITCH in each ST across. Pull up a loop and remove hook. (204)

    Row 5: Reinsert hook into loop from COLOR A, making sure to insert from behind previous color’s loop and working yarn. CH1, turn. SC in each ST across. (204)

    Row 6: CH1, turn. SC in each ST across. (204)

    Row 7: CH1, turn. SC in each ST across. Pull up a loop and remove hook. (204)

    Row 8: Turn work and reinsert hook into loop from COLOR B. CH3, turn. SC in each ST across. Pull up a loop and remove hook. (204)

    Row 9A: Reinsert hook into loop from COLOR A, making sure to insert from behind previous color’s loop and working yarn. CH1, turn. SC in each ST across. Pull up a loop and remove hook. (204)

    Row 9B: Turn work and reinsert hook into loop from COLOR B. CH1, turn. SC SPIKE STITCH in each ST across. Pull up a loop and remove hook. (204)

    Row 10: Reinsert hook into loop from COLOR A, making sure to insert from behind previous color’s loop and working yarn. CH1, turn. SC in each ST across. (204)

    Row 11: CH1, turn. SC in each ST across. (204)

    Rows 12-31: Repeat Rows 7-11, in order, 4 more times. (204)

    Row 32: CH1, turn. SC in each ST across. (204)

    Fasten off and weave in all ends.

    Buttons
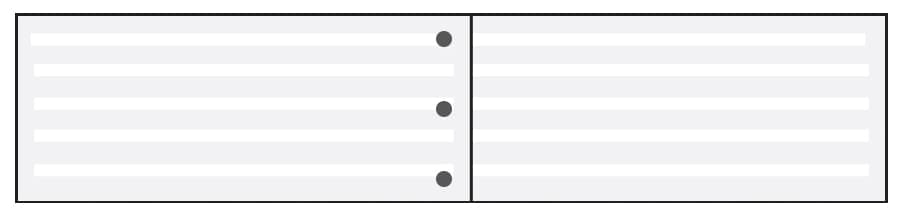
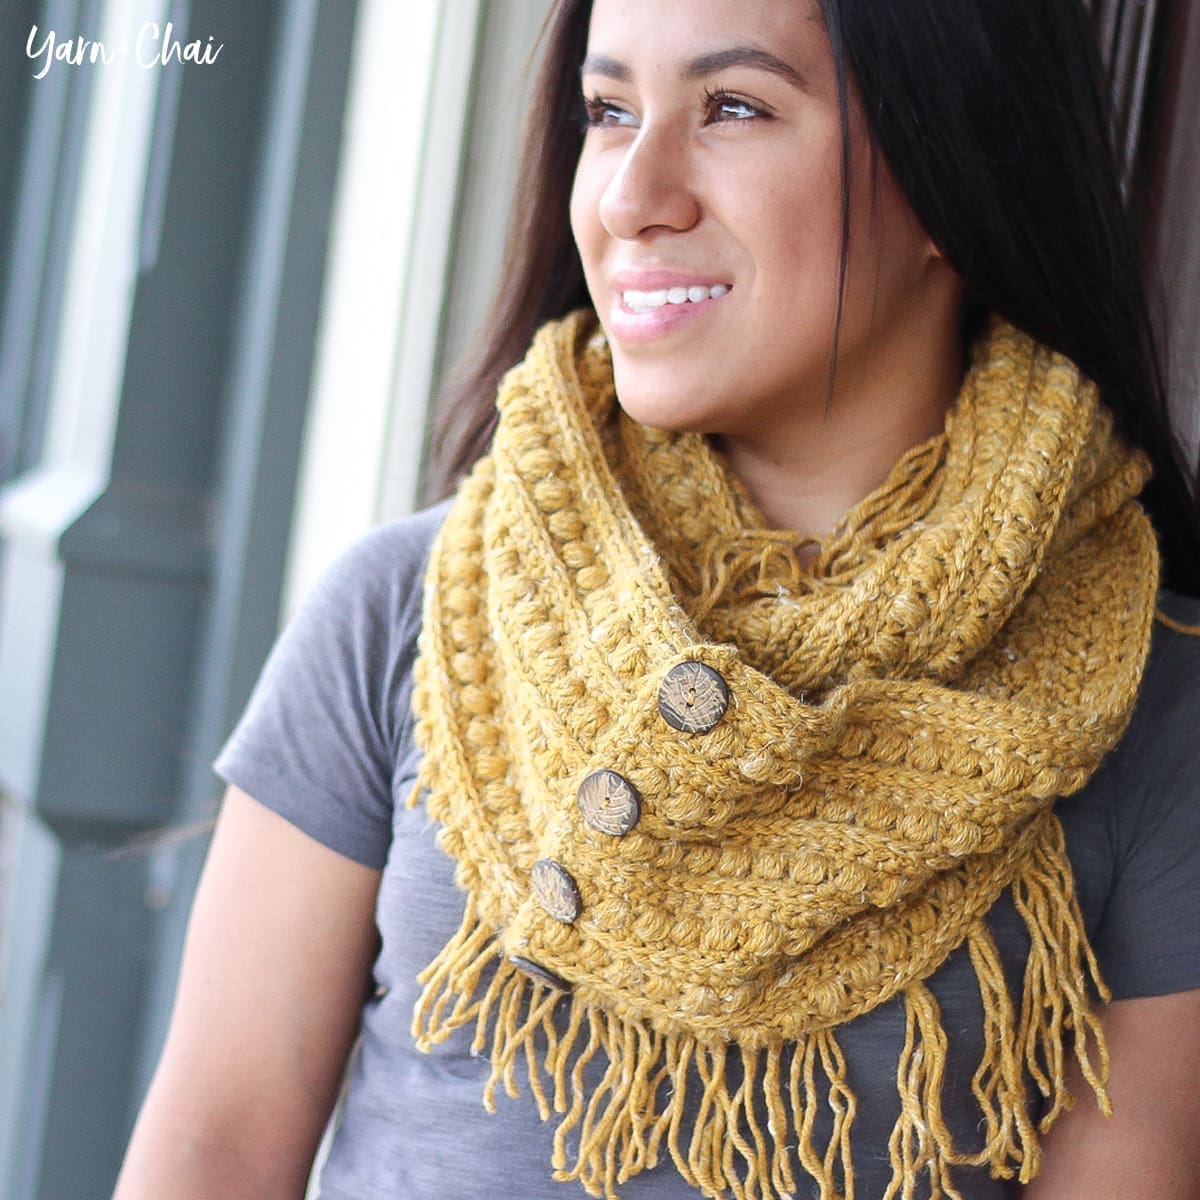
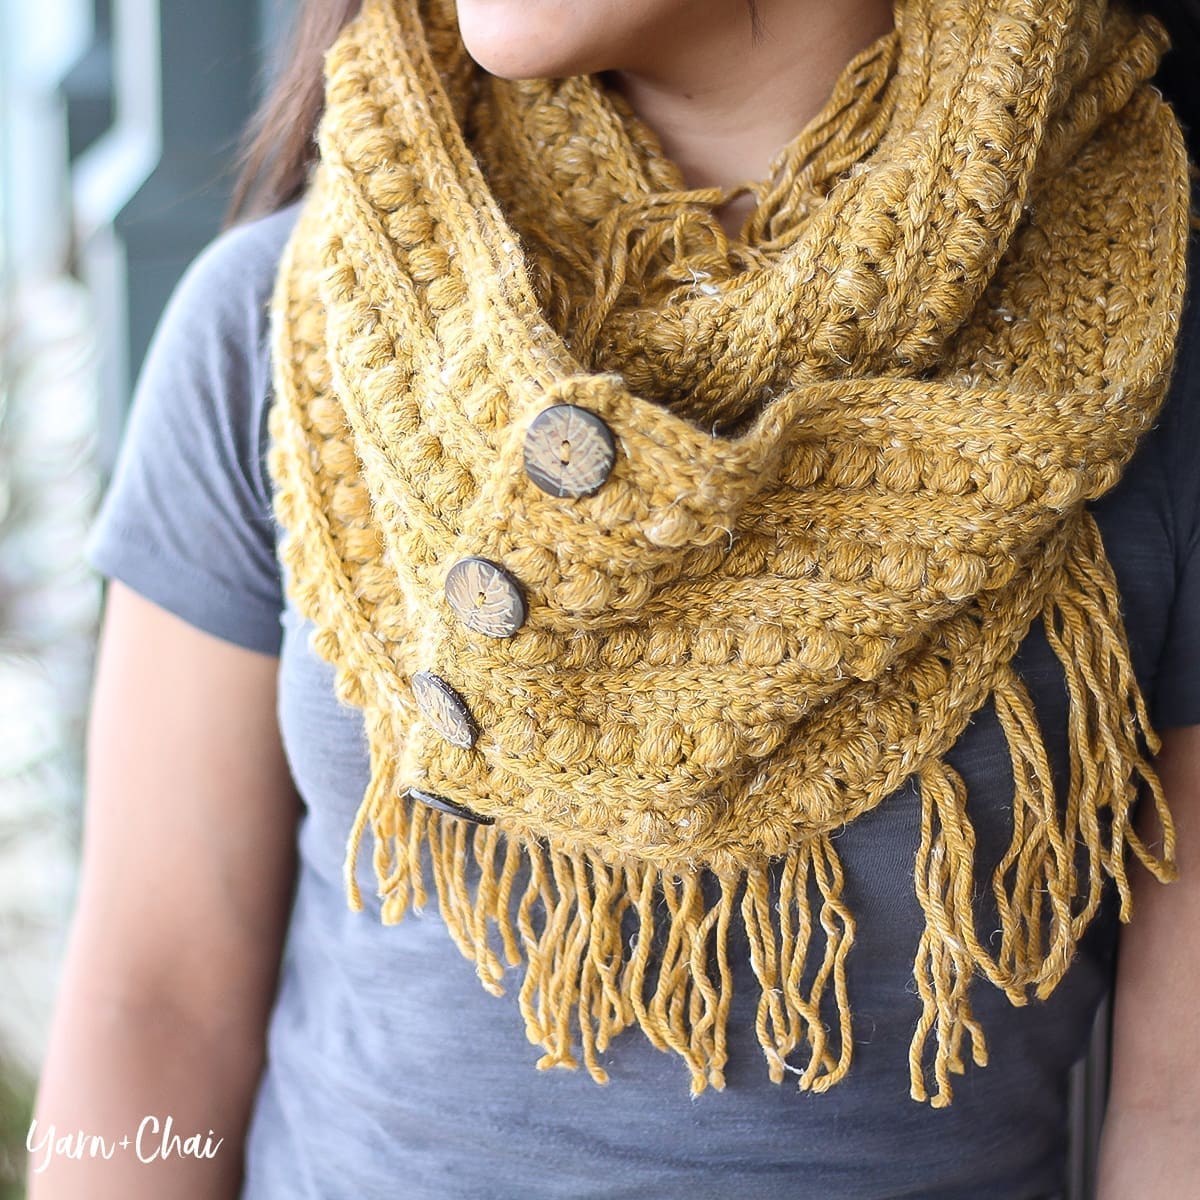
    Lay scarf wrong side up and bring ends together, overlapping by about an inch. Place your buttons evenly along the edge and sew them through both layers to hold the scarf together.

    Done! If you’re sharing on social media, be sure to hashtag #anyainfinityscarf and tag me @yarnandchai.design. Hope you enjoyed it!

  • Malia Infinity Scarf

    Malia Infinity Scarf

    This pattern is part of the Fall 2017 Malia CAL (Crochet-Along). To view the other patterns in this collection (including a beanie, slouch, and buttoned cowl), please visit the Malia CAL Homepage.

    The third pattern in the Malia CAL is a gorgeous infinity scarf! The texture in this scarf is just to die for, and the addition of the fringe gives it a casual, relaxed vibe.

    VIDEO TUTORIAL

    If you need a little extra help with the pattern, here is a video tutorial, and the free pattern is at the bottom of the page!

    Free Printable Tags

    I made some cute printable tags for this pattern that you are welcome to use! If you’re selling or gifting this cowl, a tag just ups the professionalism, in my opinion. Print on cardstock for best results!

    Prefer a PDF?

    This pattern can be completed using the 100% free version right here on this page. However, many people prefer the convenience of a printable, ad-free PDF.

    All-Access Passholders get the ad-free version of this and all of my other blog patterns. It’s a pretty sweet deal, if I do say so myself! Learn more about it here or continuing scrolling for the free version.

    MALIA INFINITY SCARF

    Difficulty: Easy

    Finished Size: 56″ around x 6.5″ wide

    Hook: I (5.50 mm) or whichever hook is needed to obtain correct gauge

    Yarn: 580 yards of #4 aran weight. Yarn used in sample photos is Yarn Bee’s Rustic Romantic in “Okie Wheat.”

    Gauge:  To ensure the best results, the gauge check is a swatch taken straight from the pattern. Upon completion, you should have a 4” square. If yours is larger, consider using a smaller hook or a thinner #4 yarn. If yours is smaller, consider using a larger hook.

    Pattern for Gauge:
    CH17.
    Row 1: SC in 2nd CH from hook and in each remaining CH. (16)
    Row 2: CH1, turn. SC in first ST. (SK next ST, LBS in next ST) 7 times. SC in final ST. (16)
    Row 3: CH1, turn. HDC in each ST across. (16)
    Row 4: CH1, turn. SC in first ST. SC in 3rd loop of each of the next 14 STS. SC in final ST. (16)
    Row 5: CH1, turn. SC in each ST across. (16)
    Row 6: CH1, turn. SC in first ST. (LBS in next ST, SK next ST) 7 times. SC in final ST. (16)
    Row 7: CH1, turn. HDC in each ST across. (16)
    Row 8: CH1, turn. SC in first ST. SC in 3rd loop of each of the next 14 STS. SC in final ST. (16)
    Row 9: CH1, turn. SC in each ST across. (16)
    Rows 10-16: Repeat Rows 2-8. (16)

    You’ll also need: Yarn needle, 4 buttons (1″ – 1-1/8″)

    Terms and Abbreviations:
    FHDC 
    (foundation half double crochet – see “Special Stitches”)
    ST/STS
     (stitch/stitches)
    SL ST (slip stitch)
    SK (skip)
    CH (chain)
    SC (single crochet)
    HDC (half double crochet)
    LBS (large bean stitch – see “Special Stitches”)
    BLO (back loop only)
    3rd LOOP (work stitch into 3rd loop only – see “Special Stitches”)

    Special Stitches:

    Foundation Half Double Crochet (FHDC)
    This is the recommended way of beginning the pattern and is better shown than explained, so please watch the included tutorial video as a guide. There is also an optional classic chain start noted in the pattern, if you would like to do that instead.

    Large Bean Stitch (LBS)
    Insert hook into stitch, yarn over and pull through (2 loops on hook). Yarn over, insert hook into same stitch, yarn over and pull through (4 loops on hook). Yarn over, insert hook into same stitch, yarn over and pull through (6 loops on hook). Yarn over, insert hook into same stitch, yarn over and pull through (8 loops on hook). Yarn over and pull through all 8 loops. Chain 1 to close the stitch. (Because this stitch creates two sets of loops – one when creating the bean, and one when closing the stitch – each completed Large Bean Stitch will count for two stitches in the row or round’s final stitch count.)

    3rd Loop Only
    Half double crochet stitches have a 3rd loop that we utilize in this pattern. When working in turned rows, as in this pattern, the 3rd loop can be found just below the front loop on the side of the work that is facing you. When instructed to work in “3rd loop only”, insert your hook into this special loop. This creates a delicate braided look on the opposite side of the pattern.

    Notes:
    (1) This pattern is written in American Standard Terms.
    (2) CH1s at the beginning of rows do not count as a stitch in the final stitch count.
    (3) Pattern is worked as a flat piece and then secured into an infinity style with buttons.
    (4) A video tutorial is available up in the post, or by clicking here.

    INSTRUCTIONS

    Row 1: FHDC* 204. (*Alternate start: CH205, HDC in 2nd CH from hook and in each remaining CH.) (204)

    Row 2: CH1, turn. SC in first ST. SC in 3rd loop of each of the next 202 STS. SC in final ST. (204)

    Row 3: CH1, turn. SC in each ST across. (204)

    Row 4: CH1, turn. SC in first ST. (SK next ST, LBS in next ST) 101 times. SC in final ST. (204)

    Row 5: CH1, turn. HDC in each ST across.

    Row 6: CH1, turn. SC in first ST. SC in 3rd loop of each of the next 202 STS. SC in final ST. (204)

    Row 7: CH1, turn. SC in each ST across. (204)

    Row 8: CH1, turn. SC in first ST. (LBS in next ST, SK next ST) 101 times. SC in final ST. (204)

    Row 9: CH1, turn. HDC in each ST across.

    Rows 10-25: Repeat Rows 2-9, in order, 2 more times. (204)

    Row 26: CH1, turn. SC in first ST. SC in 3rd loop of each of the next 202 STS. SC in final ST. (204)

    Edging (1 side only, optional): CH1, SC in same ST to round corner. Working down the short edge of the scarf, SC in each row (26). SL ST to the 2nd corner, fasten off and weave in all ends.

    Fringe: Cut about 160 9″ long strands of yarn. (I wrap mine around a 9″ cutting board.) Start at one corner and attach them in groups of 3, every 4 stitches along the entire bottom edge of the scarf.

    Buttons: Lay the scarf out in front of you wrong side up and bring the short ends together, overlapping the end with the edging (if applicable) over the edge without the edging by about 1″. (Ends should now be right side facing up.) Pin it in place if desired. Use yarn and yarn needle or a sewing needle and thread to sew each button onto the edge, evenly spaced, sewing through both layers to hold the scarf together. To help with spacing, start with the top and bottom buttons and then move on to the middle two.

    Done! If you’re sharing on social media, be sure to hashtag #maliacaland #maliascarf, and tag me @littlemonkeyscrochet. Hope you enjoyed it!

  • Landon Slouch and Scarf (Adult and Child Sizes)

    Landon Slouch and Scarf (Adult and Child Sizes)

    Thank you to Lion Brand Yarn for providing the yarn for this sample.

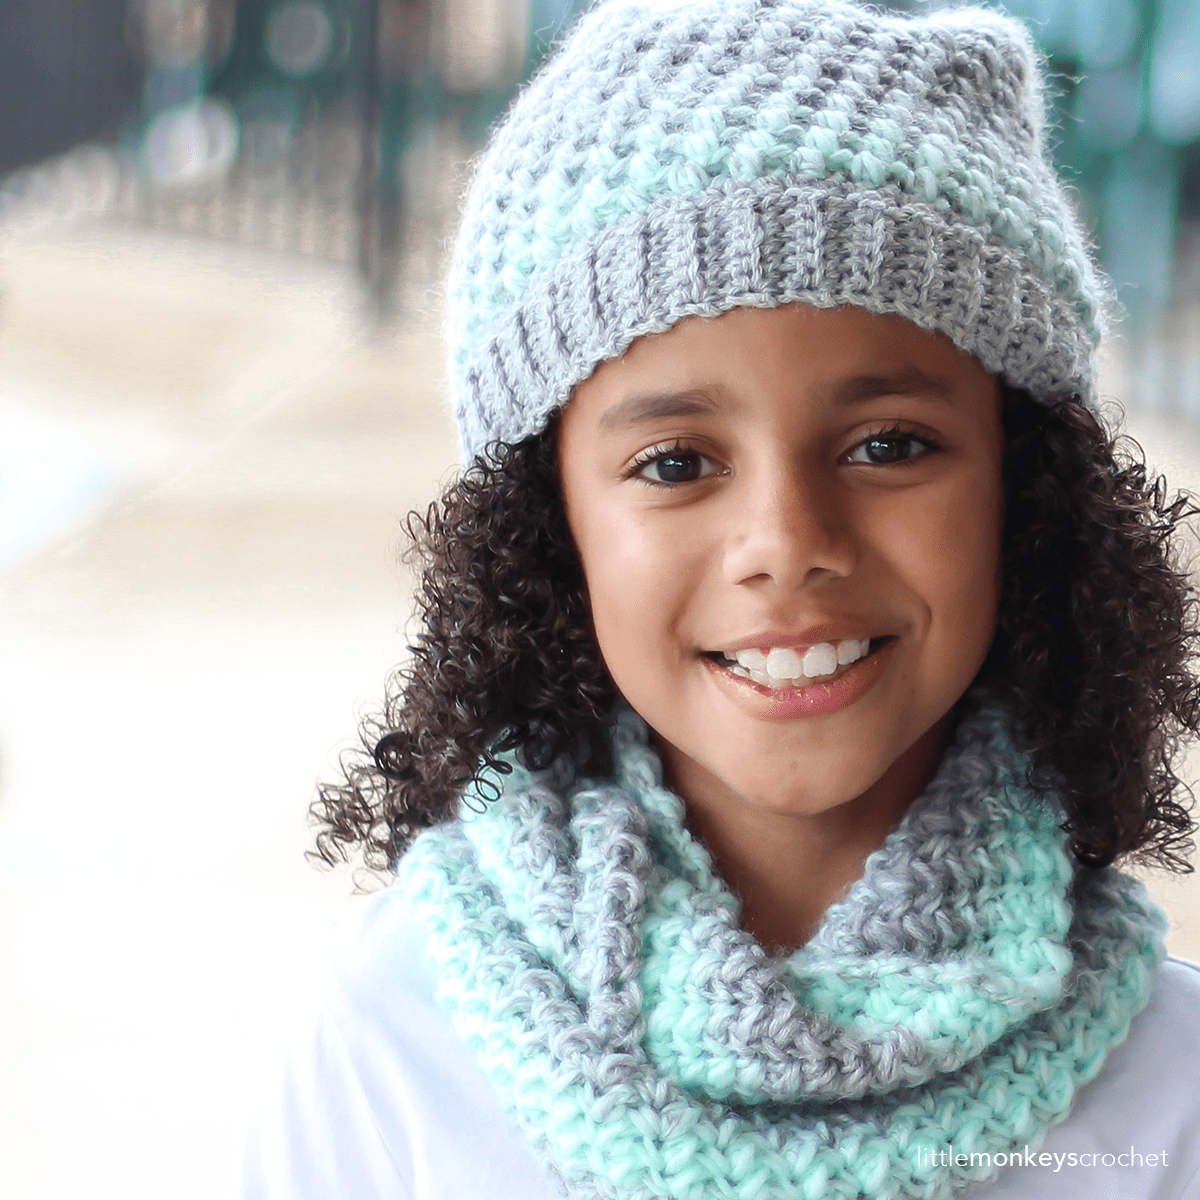
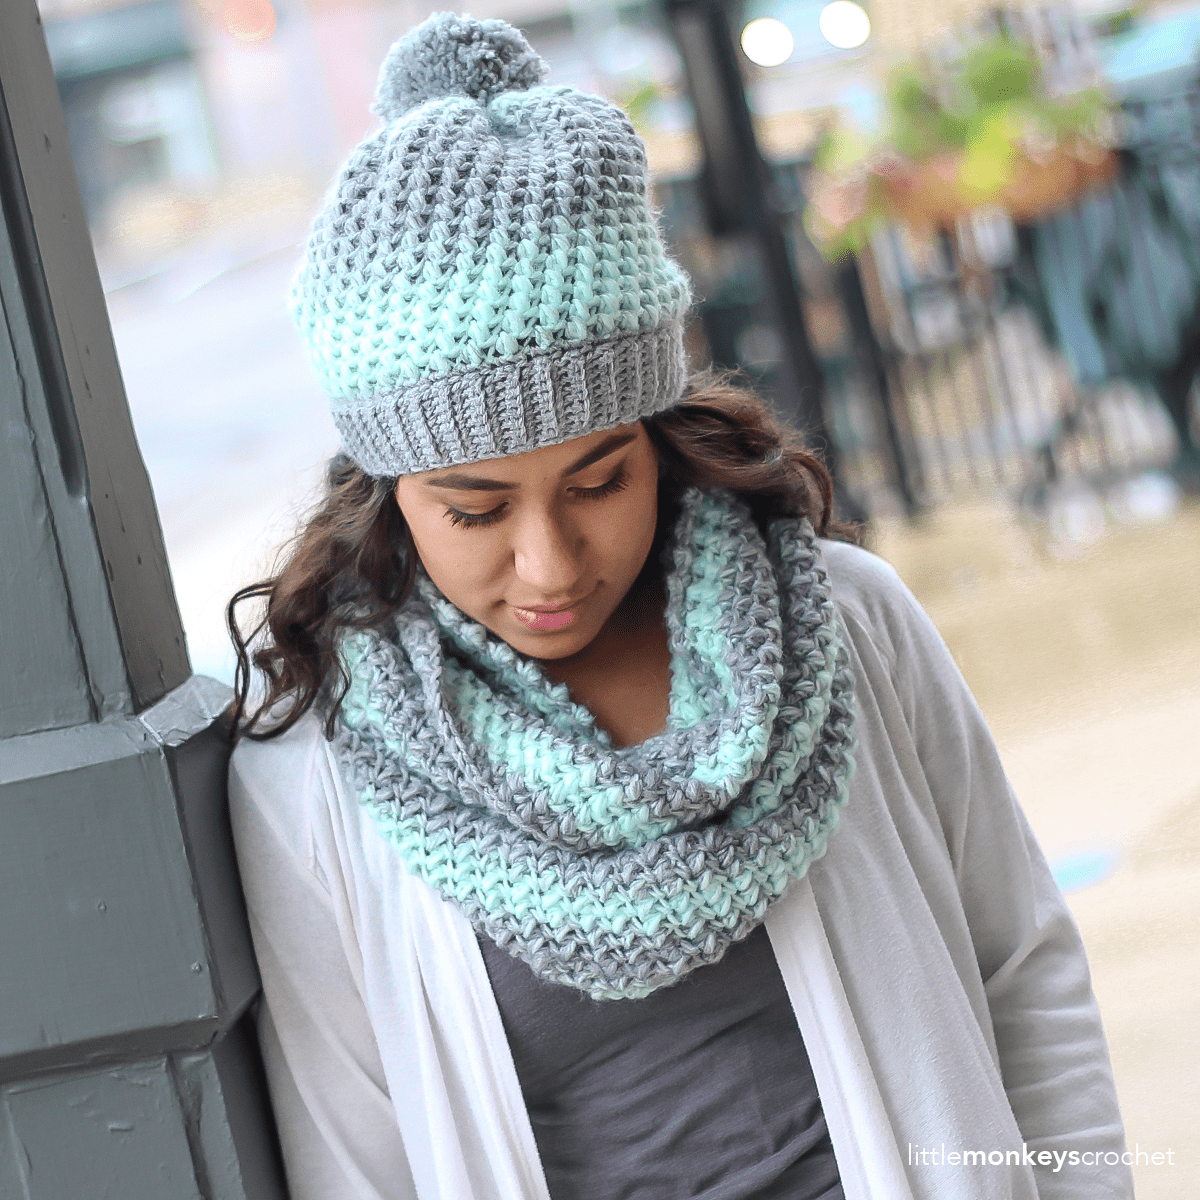
    Have you used Lion Brand’s Scarfie yarn yet? It is sooo soft and fluffy. My first experience with it was when I designed the Macchiato Slouch and I always knew I’d come back to it again someday. Now there are even more combos to choose from then there were back then, and I am just obsessed with this Mint & Silver! I paired it with Wool-Ease Gray Heather (for the band of the hat, because I wanted to make sure the entire band was one solid color) and it was a perfect match.
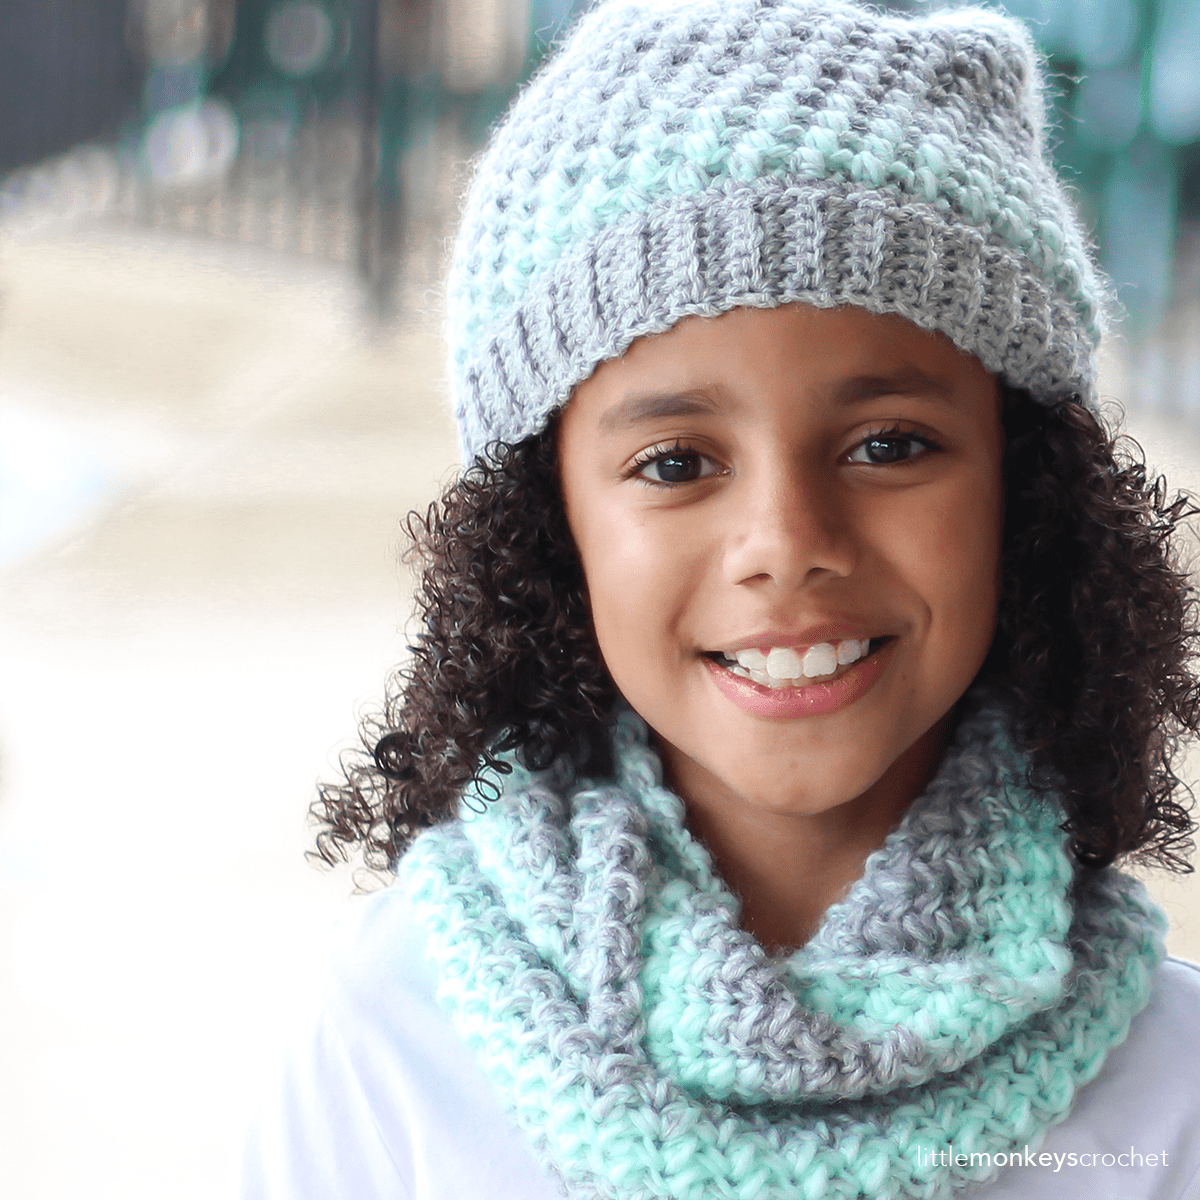
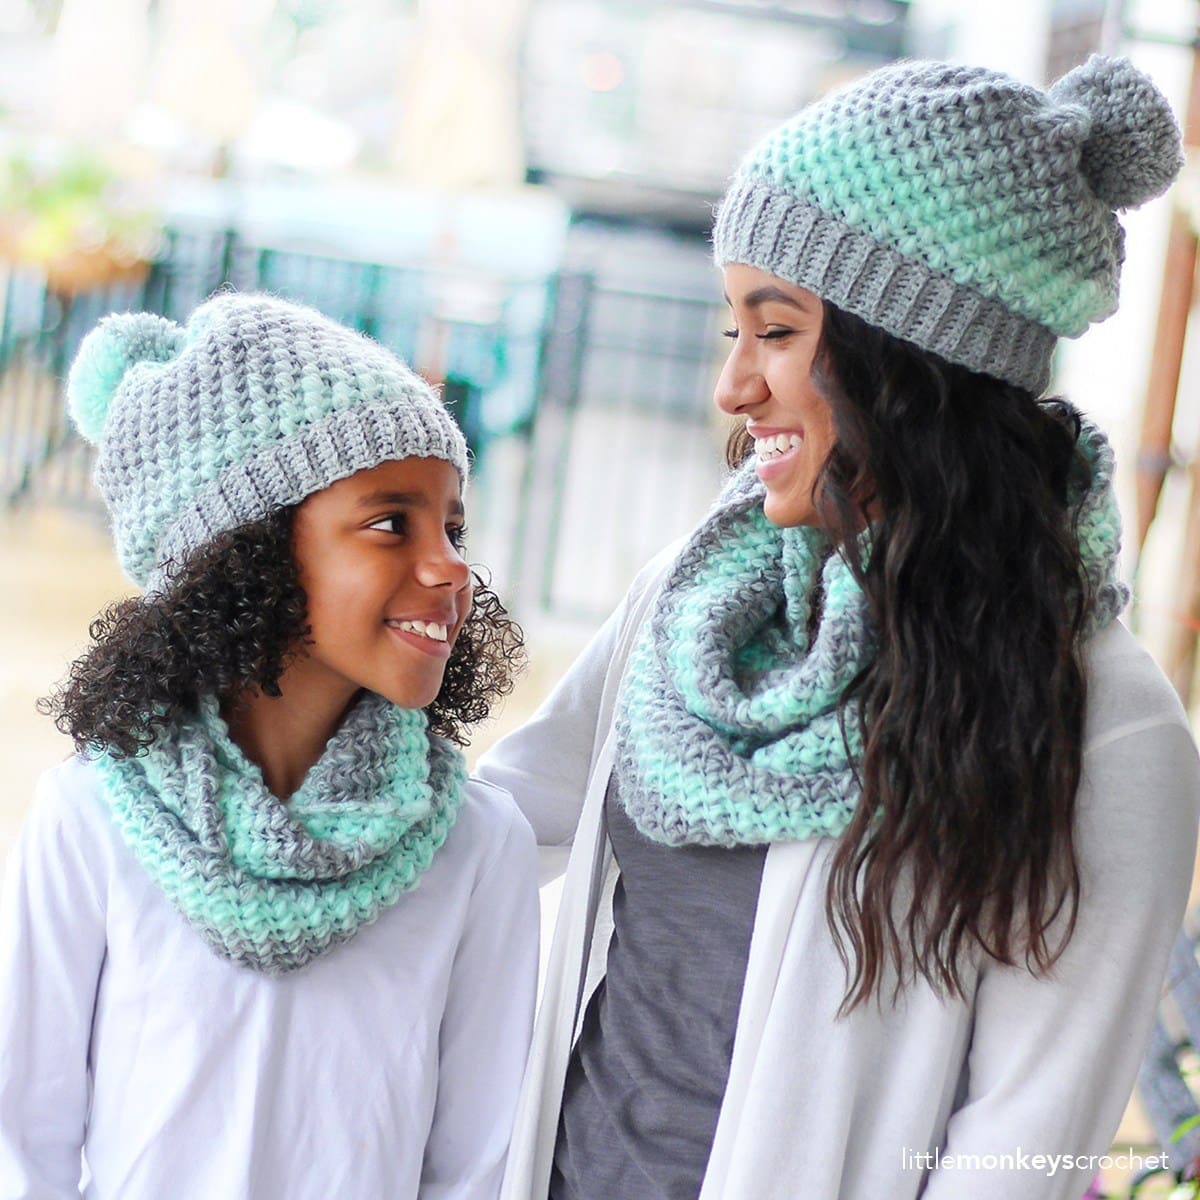
    I designed this set as a part of Lion Brand’s “12 Days of Christmas” promotion, and knew you guys would be excited to have it available in both adult and child sizes. You can even grab the kit on lionbrand.com, which comes with the pattern and enough yarn to make two sets – one for you and one for your mini-me!
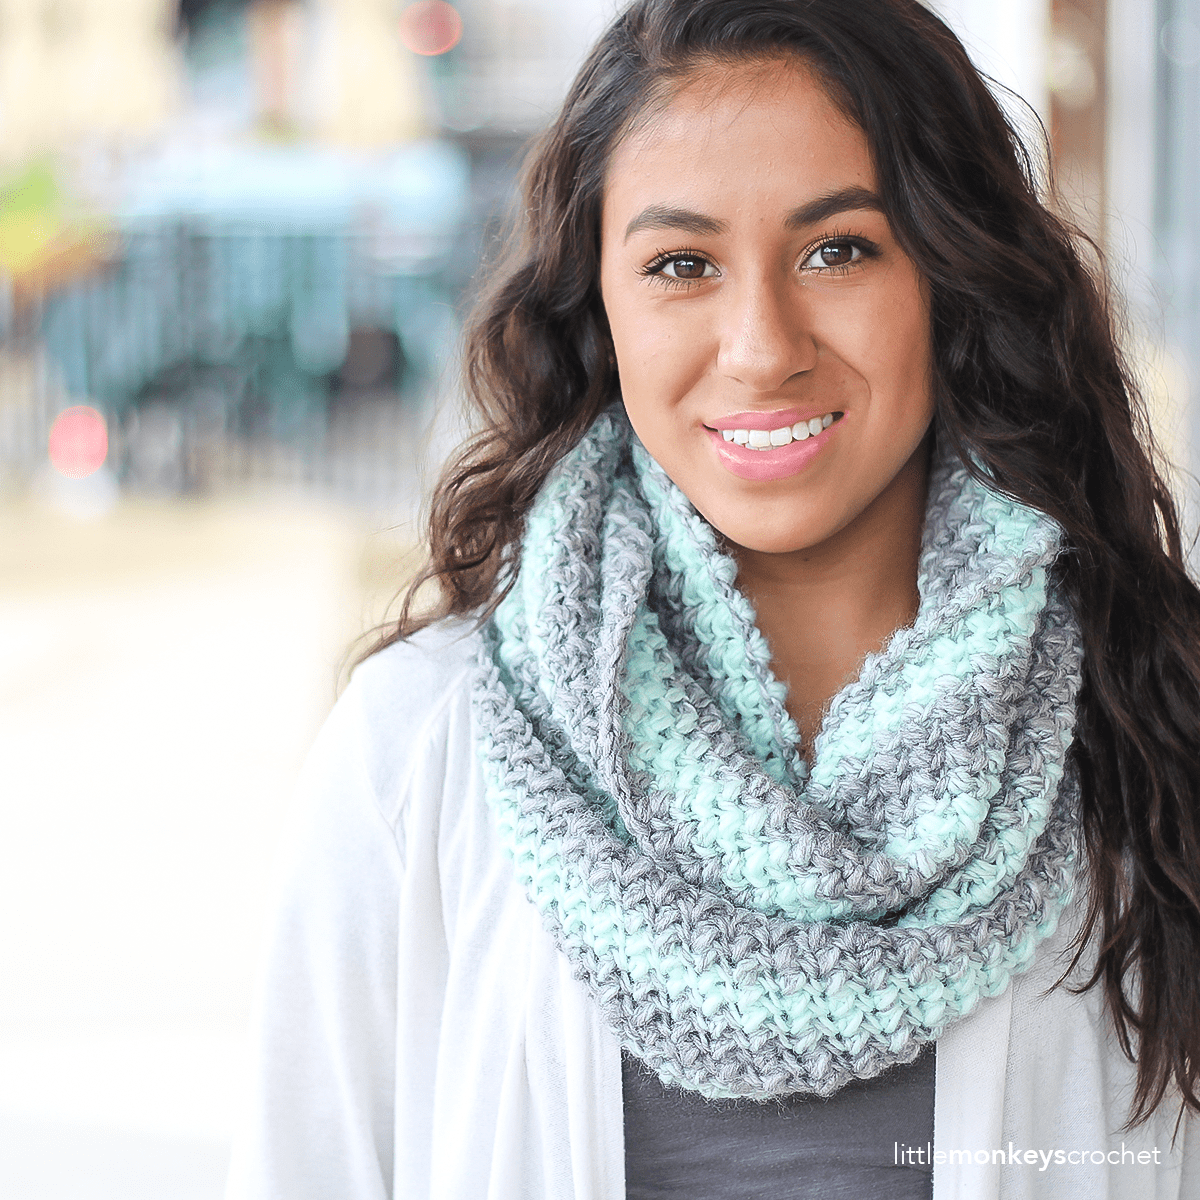
    The hat is made up mostly of mini bean stitches, which I love because they give basically the same look as a regular bean stitch but use less yarn.
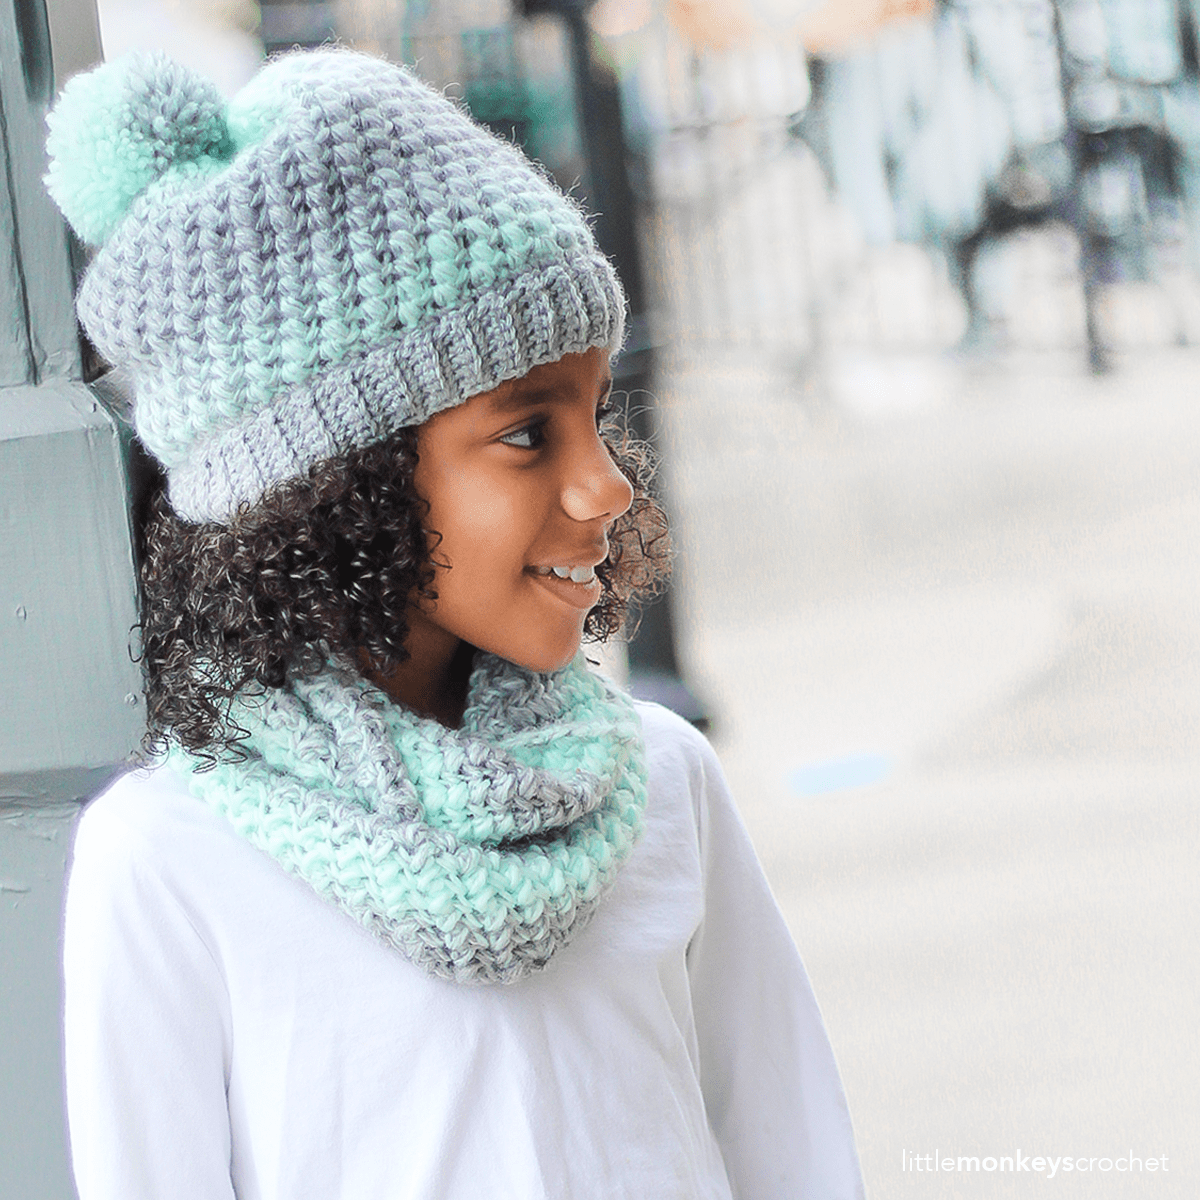
    The finished products are so fluffy and soft! I love fluffy accessories. Besides the obvious fact that they are soft on your skin, they also tend to lay really nicely. This infinity scarf was so easy to style on my model because of its light, airy feel.
    Can I also give a shoutout to my models? Because seriously, they rocked this shoot. You’d never know they had just met, like, two and a half minutes before this photo. 🙂
    Prefer a PDF?

    This pattern can be completed using the 100% free version right here on this page. However, many people prefer the convenience of a printable, ad-free PDF.

    All-Access Passholders get the ad-free version of this and all of my other blog patterns. It’s a pretty sweet deal, if I do say so myself! Learn more about it here or continuing scrolling for the free version.

    LANDON SLOUCH AND SCARF (ADULT AND CHILD SIZES)

    Difficulty: Easy

    Hooks: K (6.5mm) and H (5.0mm)

    Yarn:
    3 skeins of Lion Brand Scarfie in “Mint/Silver” (#826-217)
    1 skein of Lion Brand Wool-Ease in “Grey Heather” (#620-151)

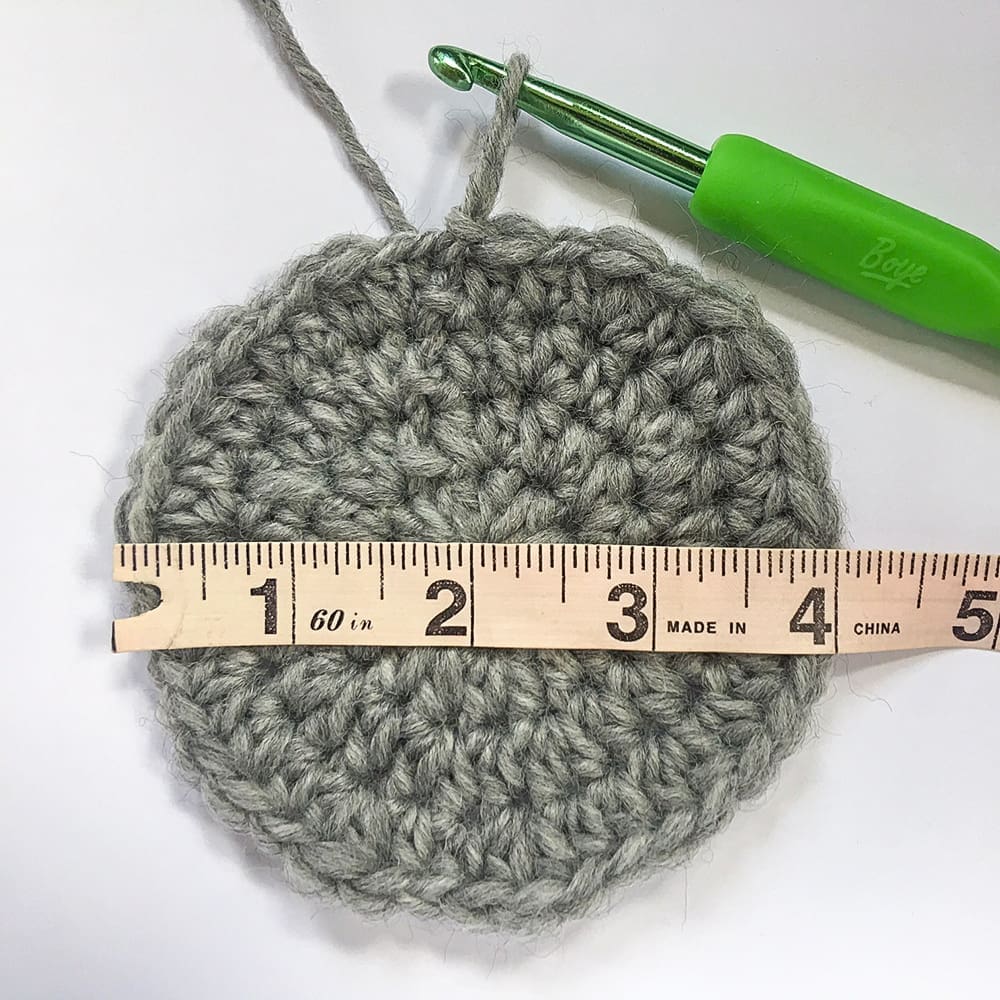
    Gauge: With larger hook and Scarfie yarn, 4 increase rounds of HDC = 4” diameter. (Begin first round with 10 HDC in a magic circle, then increase each round for a total of 4 rounds.) Use whatever hook size you need to obtain the correct gauge. This guage can be used for all 4 patterns.
    You’ll Also Need: Yarn needle, scissors, pom maker (optional)

    Abbreviations Used:
    MC
    (magic circle – tutorial here)
       ST/STS (stitch/stitches)
       SL ST (slip stitch)
       SK (skip)
       CH (chain)
       SC (single crochet)
       BLO (back loop only)
       MBS (mini bean stitch – see “Special Stitch”)

    Special Stitch – Mini Bean Stitch (MBS):
    Insert hook into stitch, yarn over, pull through (2 loops on hook), yarn over, insert hook into same stitch, yarn over, pull through (4 loops on hook), yarn over, pull through all 4 loops, chain 1 to close stitch. (Because this stitch creates two sets of top loops, it counts as 2 stitches in final round counts.)

    Notes:
    (1) Patterns are written in American Standard terms.
    (2) Any CH1s at the beginning of rounds do not count as stitches.
    (3) All patterns are designed in a continuous spiral for a seamless finished look. Do not join, chain up or turn unless instructed.
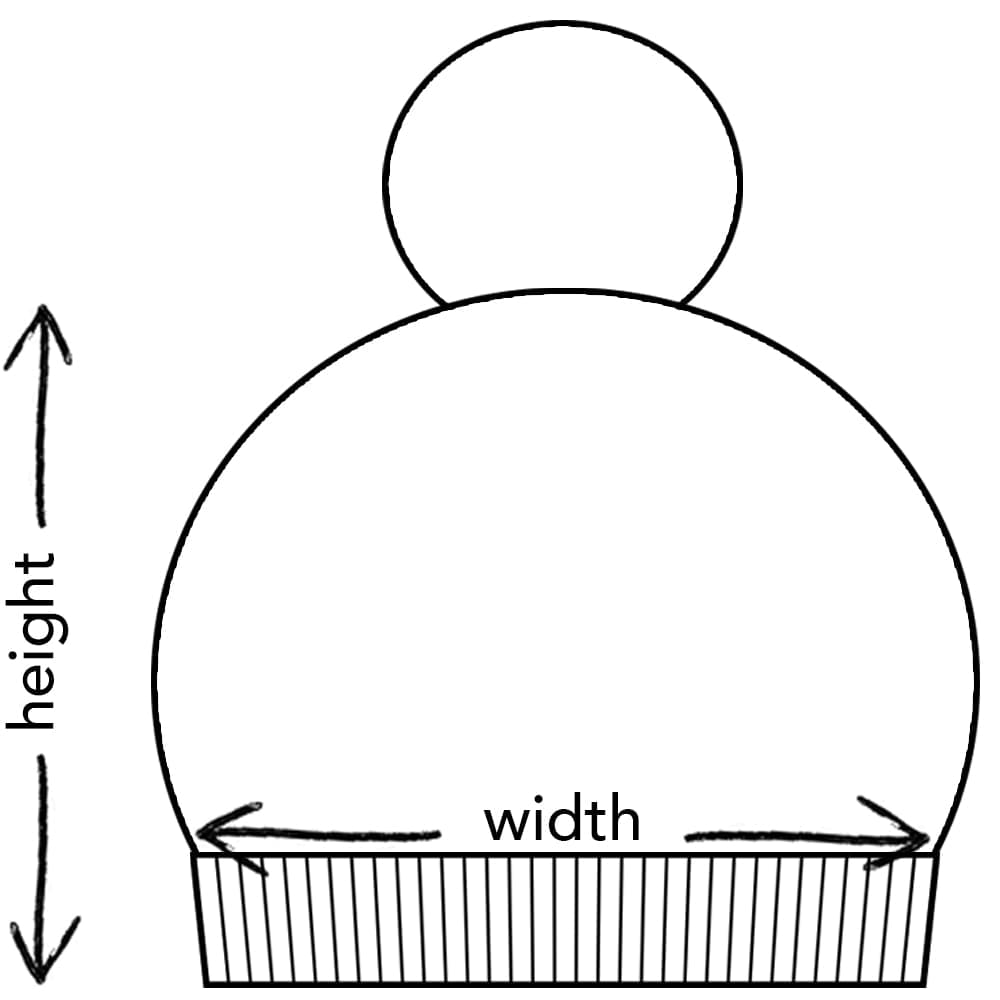
    (4) For the finished measurements of the hats, height is measured from the bottom of the band to the top of the body, pom not included. Width is measured across the bottom of the body of the hat, at the point where the body and the band meet. (Band of hat is smaller but will stretch to fit.)
    (5) The poms on the hats are optional. You will have more than enough yarn left over to make two poms in either Scarfie (shown on the child-size sample) or Wool-Ease (shown on the adult-size sample).
    (6) Due to the nature of the ombre yarn used, no two hats or scarves will look the same.

    – – – – – – – – – –

    LANDON SLOUCH HAT (TEEN / ADULT SMALL)

    Finished Size: 9” tall x 10” wide
    Yarn:
    Lion Brand Scarfie (130 yards) and Wool-Ease (45 yards)

    With larger hook and Scarfie yarn,
    Round 1: 10 HDC in MC. (10)

    Round 2: 2 HDC in each ST around. (20)

    Round 3: 2 HDC in each ST around. (40)

    Round 4: (2 HDC in each of the next 7 STS, HDC in next ST, 2 HDC in each of the next 7 STS, HDC in next ST, 2 HDC in each of the next 3 STS, HDC in next ST) 2 times. (74)

    Rounds 5-20: (MBS in next ST, SK next ST) around. (74)

    Round 21: (MBS in next ST, SK next ST) around. Join with a SL ST to the top of the first ST of the round. (74)

    Switch to smaller hook and Wool-Ease yarn. Fasten off Scarfie yarn.

    Round 22: CH1. SC in each ST around. Join with a SL ST to the top of the first ST of the round. (74)

    – – – – – –

    Next we’re going to make the band of the hat, and we will be working in vertical rows, attaching it to Round 22 (the final round of the hat) with SL STS as we go. If you need a little extra help, click here for a video tutorial on how to add ribbing at the end of a project.

    – – – – – –

    CH9.
    Row 1:
    SC in 2nd chain from hook and in each of the remaining 7 chains. SL ST into the first SC from Round 22, the stitch on which your CH9 was built. SL ST into the next SC from Round 22. (8, plus the two slip stitches along Round 22)

    The section we just created, built on the CH9, will hereafter be referred to as the “ribbing.”

    Row 2: CH1, turn. Skipping over the 2 SL STS you put in Round 22, SC in BLO of each of the first 7 STS of the ribbing. SC in both loops of the last ST. (8)

    Row 3: CH1, turn. SC in 1st ST. SC in BLO of each of the remaining 7 STS of the ribbing. SL ST in each of the next 2 STS of Round 22. (8, plus the 2 SL STS along Round 22)

    Row 4: CH1, turn. Skipping over the 2 SL STS you put in Round 22, SC in BLO of each of the first 7 STS of the ribbing. SC in both loops of the last ST. (8)

    Rows 5-74: Repeat Rows 3-4 all the way along Round 22.

    Fasten off and use your tail to sew together the gap between the first and last rows of the ribbing, then weave in your ends.

    Optional: Use a large Clover Pom Maker to make a pom pom (or make one by hand) and attach it to the top of the hat.

    LANDON SLOUCH HAT (CHILD)

    Finished Size: 8.5” tall x 9” wide
    Yarn:
    Lion Brand Scarfie (105 yards) and Wool-Ease (30 yards)

    With larger hook and Scarfie yarn,
    Round 1:
    10 HDC in MC. (10)

    Round 2: 2 HDC in each ST around. (20)

    Round 3: 2 HDC in each ST around. (40)

    Round 4: 2 HDC in each of the next 2 STS, HDC in each of the next 2 STS. (2 HDC in each of the next 3 STS, HDC in next ST) 4 times. 2 HDC in each of the next 2 STS, HDC in each of the next 2 STS. (2 HDC in each of the next 3 STS, HDC in next ST) 4 times. (68)

    Rounds 5-19: (MBS in next ST, SK next ST) around. (68)

    Round 20: (MBS in next ST, SK next ST) around. Join with a SL ST to the top of the first ST of the round. (68)

    Switch to smaller hook and Wool-Ease yarn. Fasten off Scarfie yarn.

    Round 21: CH1. SC in each ST around. Join with a SL ST to the top of the first ST of the round. (68)

    – – – – – –

    Next we’re going to make the band of the hat, and we will be working in vertical rows, attaching it to Round 21 (the final round of the hat) with SL STS as we go. If you need a little extra help, click here for a video tutorial on how to add ribbing at the end of a project.

    – – – – – –

    CH7.
    Row 1:
    SC in 2nd chain from hook and in each of the remaining 5 chains. SL ST into the first SC from Round 21, the stitch on which your CH7 was built. SL ST into the next SC from Round 21. (6, plus the two slip stitches along Round 21)

    The section we just created, built on the CH7, will hereafter be referred to as the “ribbing.”

    Row 2: CH1, turn. Skipping over the 2 SL STS you put in Round 21, SC in BLO of each of the first 5 STS of the ribbing. SC in both loops of the last ST. (6)

    Row 3: CH1, turn. SC in 1st ST. SC in BLO of each of the remaining 5 STS of the ribbing. SL ST in each of the next 2 STS of Round 21. (6, plus the 2 SL STS along Round 21)

    Row 4: CH1, turn. Skipping over the 2 SL STS you put in Round 21, SC in BLO of each of the first 5 STS of the ribbing. SC in both loops of the last ST. (6)

    Rows 5-68: Repeat Rows 3-4 all the way along Round 21.

    Fasten off and use your tail to sew together the gap between the first and last rows of the ribbing, then weave in your ends.

    Optional: Use a large Clover Pom Maker to make a pom pom (or make one by hand) and attach it to the top of the hat.

    LANDON SCARF (TEEN / ADULT SMALL)

    Finished Size: 6.5” wide x 60” around
    Yarn:
    Lion Brand Scarfie (310 yards)
    Notes:
    (1) For this pattern, use the larger of the two hooks (6.5mm, or whichever one you used to complete your gauge swatch).
    (2) Working into the back bump of the starting chain during Round 1 will help to keep the scarf from curling. It is a bit slower than working into one of the top loops, but worth it in the end.

    To Begin: CH192. Join with a SL ST, being careful not to twist the chain. (192)

    Round 1: CH1. Working in the back bumps of the starting chain, MBS in first ST, SK next ST. (MBS in next ST, SK next ST) around. (192)

    Rounds 2-18: (MBS in next ST, SK next ST) around. (192)

    Round 19: (MBS in next ST, SK next ST) around. SL ST into the first ST of the round. (192)

    Fasten off and weave in all ends.

    LANDON SCARF (CHILD)

    Finished Size: 5” wide x 46” around
    Yarn:
    Lion Brand Scarfie (180 yards)
    Notes:

    (1) For this pattern, use the larger of the two hooks (6.5mm, or whichever one you used to complete your gauge swatch).
    (2) Working into the back bump of the starting chain during Round 1 will help to keep the scarf from curling. It is a bit slower than working into one of the top loops, but worth it in the end.

    To Begin: CH 148. Join with a SL ST, being careful not to twist the chain. (148)

    Round 1: CH1. Working in the back bumps of the starting chain, MBS in first ST, SK next ST. (MBS in next ST, SK next ST) around. (148)

    Rounds 2-13: (MBS in next ST, SK next ST) around. (148)

    Round 14: (MBS in next ST, SK next ST) around. SL ST into the first ST of the round. (148)

    Fasten off and weave in all ends.

    Done! If you’re sharing on social media, be sure to hashtag #landonslouch and #landonscarf, and tag me @yarnandchai. Hope you enjoyed it!

  • Elena Scarf

    Elena Scarf

    So I was looking back through all of my patterns the other day and realizing that, for whatever reason, I’ve never designed a regular, classic scarf. I’ve always done infinity scarves! It’s probably because I love to wear them; they are just so easy.

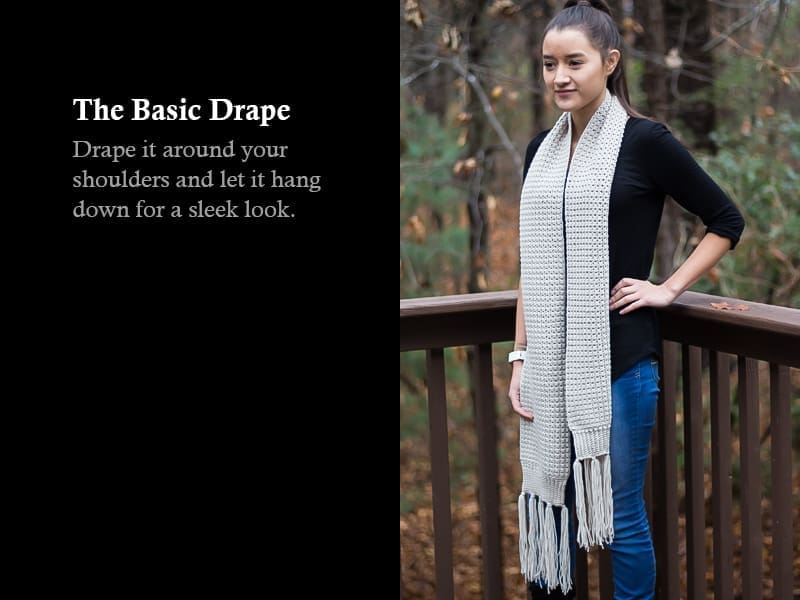
    When I got the idea for this scarf, I originally intended it to be an infinity scarf, too. I was going to seam it up at the end, add some buttons, and maybe even add some fringe all the way around. But the longer I worked on it, the more I started to think, this should be a classic scarf. It has this amazing texture, and when I would double-wrap it around my neck, all that gorgeous texture just sort of got lost in the folds. But when I draped it once around my neck and let it hang, it just looked right.

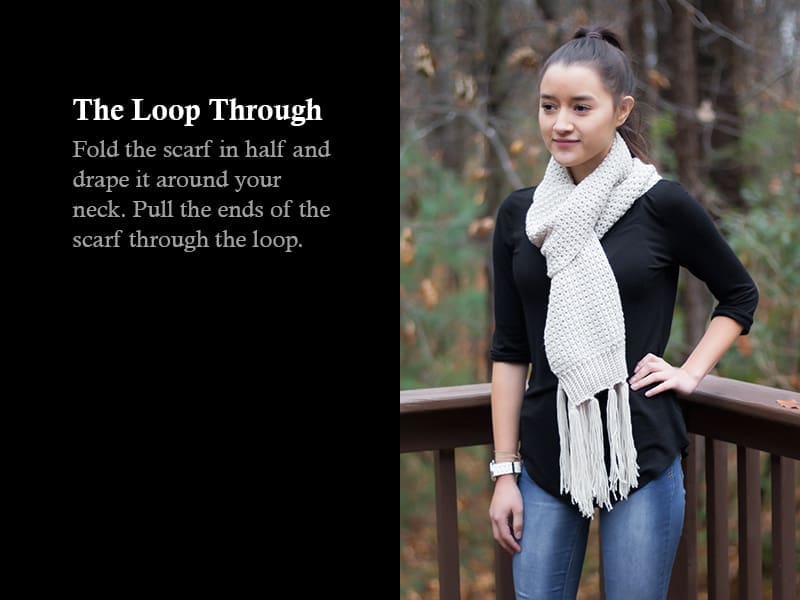
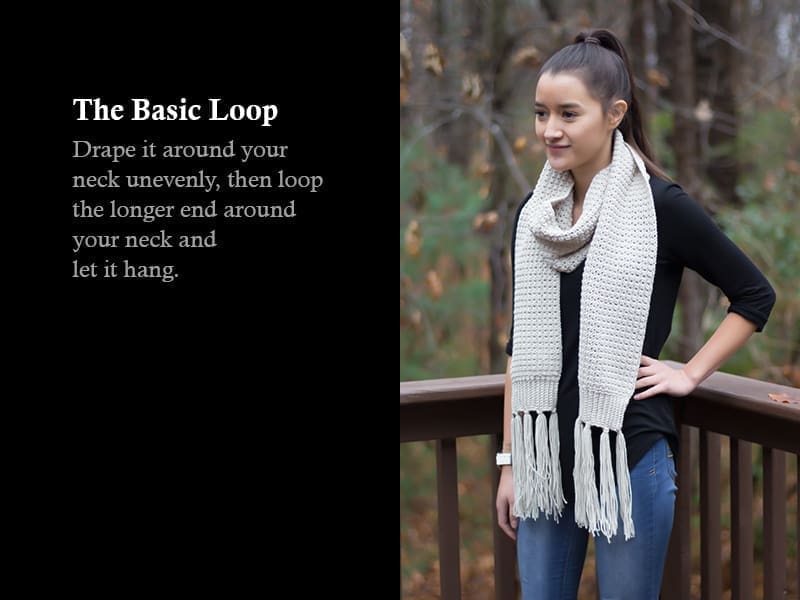
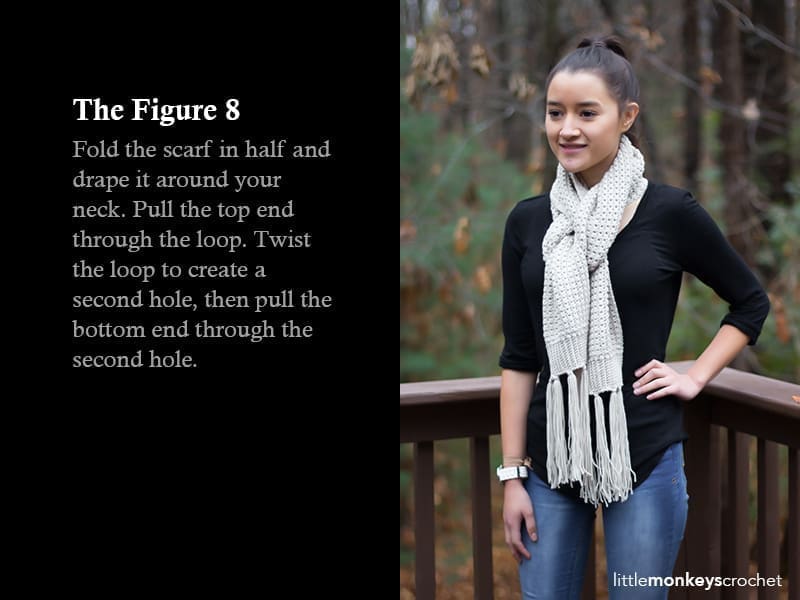
    So, here is yet another instance this season when I’m branching out of my “norm” and doing something different than what I’ve always done. I hope you love the finished product as much as I do! This scarf has so many ways it can be worn, and here are a few (my favorite is the Figure 8):


    On Using A Different Yarn Weight

    Every time I design a pattern with #3 light yarn, someone inevitably asks how to adapt the pattern for #4 worsted. I totally get it; I crocheted for at least a year or two before I ventured into anything less than #4. While I think the lighter yarn really contributes to the texture of this pattern (and, shoutout to the newbies: #3 yarn is not as scary as you think it is), it really wouldn’t be that difficult to adapt it for #4 yarn, or even bulky or super bulky yarn. You just need to make the body of the scarf about 65″ long and repeat the rows until it is 7″ wide. Then, when you add your ribbing, chain enough to add a 2.5″ ribbing section to each end. I can’t give you exact stitch / row counts, nor can I tell you how much the yardage would be, but feel free to adapt it as you see fit. (That’s my nice way of saying that if you deviate from the pattern, you’re on your own.)  🙂

    And since I loved the finished look of this scarf so much, I knew it needed to be a set. Click here to view the pattern for the matching slouch!

    Prefer a PDF?

    This pattern can be completed using the 100% free version right here on this page. However, many people prefer the convenience of a printable, ad-free PDF.

    All-Access Passholders get the ad-free version of this and all of my other blog patterns. It’s a pretty sweet deal, if I do say so myself! Learn more about it here or continuing scrolling for the free version.

    Elena Scarf

    Difficulty: Easy

    Finished Size: 70″ long (not including the fringe) x 7″ wide. It’s not “super-scarf” dimensions, but it’s big enough to give you lots of stylish, wearable options.

    Hook: H (5.00mm)

    Yarn: Approximately 725 yards (this does include the fringe) of Cascade Yarns’ Longwood Sport. Longwood Sport is a #3 light yarn, and the color shown on the sample is “Oatmeal.”

    Gauge: 9 rows of 5 (SC+HDC) combos = 2″ square

    You’ll also need: Yarn needle

    Abbreviations Used:
    ST/STS 
    (stitch/stitches)
    SL ST
     (slip stitch)
    SK
     (skip)
    CH
     (chain)
    SC 
    (single crochet)
    HDC 
    (half double crochet)
    SC+HDC 
    (this just means to put 1 SC and 1 HDC in the same ST)
    BLO
     (back loop only)

    Notes:
    (1) This pattern is written in American Standard Terms.
    (2) Pattern is worked in rows, and the ribbing sections on the ends are worked after the main part of the scarf is finished.

    – – – – – – – – – – – – – – – – – – – – – – – –

    THE PATTERN

    To begin: CH 309.

    Row 1: In 3rd CH from hook, SC+HDC. (SK next ST, SC+HDC in next ST) across. (308)

    Row 2: CH1, turn. SK 1st ST, SC+HDC in next ST. (SK next ST, SC+HDC in next ST) across. (308)

    Rows 3-32: Repeat Row 2. (308)

    Fasten off and weave in all ends.

    Ribbing
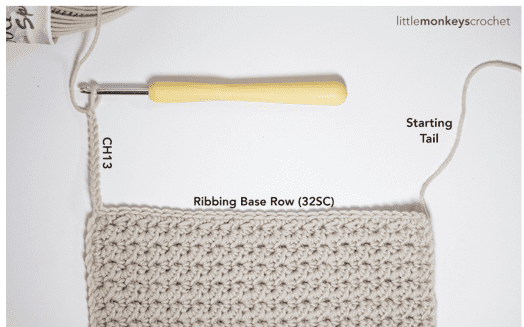
    Next we’ll crochet the small ribbing sections to each end of the scarf. We will crochet one row of SC along the short edge to provide a base for our ribbing, and then we will be working the ribbing in vertical rows, attaching it to the base row with SL STS as we go. 

    Ribbing Base Row: Attach yarn to one of the corners of the scarf. SC evenly down the short edge, putting 1SC in each row, for a total of 32SC. CH13.

    Ribbing Row 1: Turn your work and SC in 2nd CH from hook, and in each remaining CH. SL ST in the first SC of the Base Row, then SL ST in the next SC of the base row. (12, plus the 2 SL STS on the base row)

    Ribbing Row 2: CH1, turn. Skipping over the 2 SL STS, SC in BLO of each of the first 11 STS of the ribbing. SC in both loops of the last ST. (12)

    Ribbing Row 3: CH1, turn. SC in first ST. SC in BLO of each of the next 11 STS. SL ST in next 2 STS of the Base Row. (12, plus the 2 SL STS on the base row)

    Ribbing Row 4: CH1, turn. Skipping over the 2 SL STS, SC in BLO of each of the first 11 STS of the ribbing. SC in both loops of the last ST. (12)

    Repeat Rows 3-4 all the way down the Base Row (for 32 rows). Fasten off and weave in ends.

    Repeat “Ribbing” instructions for the opposite end of the scarf.

    Tassels
    Last, we’ll attach tassels to both ends of the scarf.

    Cut at least 80 (a few more to be safe) 18″ strands of yarn. In groups of 8 strands, attach yarn to first edge of scarf; 5 groups total, spaced evenly across the edge of the ribbing. Repeat on opposite end of scarf.

  • Savannah Infinity Scarf

    Savannah Infinity Scarf

    This season, I’ve gotten very excited about the Herringbone Stitch. There are so many different ways to change up the look of this stitch! Today, I’m introducing a set of patterns that utilize the Herringbone Double Crochet stitch (HbDC), worked in a continuous round.

    If you’re a beginner who already has the most basic stitches under your belt, you’re going to love this scarf pattern! You’ll learn a new stitch and have plenty of practice with it as you go round and round the scarf.

    Savannah Slouch & Infinity Scarf Crochet Pattern Set | Free infinity scarf and slouchy hat crochet patterns by Little Monkeys Crochet

    And the great news is, there’s a matching slouch hat!

    Savannah Slouch & Infinity Scarf Crochet Pattern Set | Free infinity scarf and slouchy hat crochet patterns by Little Monkeys Crochet

    Savannah Slouch & Infinity Scarf Crochet Pattern Set | Free infinity scarf and slouchy hat crochet patterns by Little Monkeys Crochet

    Prefer a PDF?

    This pattern can be completed using the 100% free version right here on this page. However, many people prefer the convenience of a printable, ad-free PDF.

    All-Access Passholders get the ad-free version of this and all of my other blog patterns. It’s a pretty sweet deal, if I do say so myself! Learn more about it here or continuing scrolling for the free version.

    SAVANNAH INFINITY SCARF

    add-to-ravelry-favorites

    Difficulty: Easy

    Finished Size: Approximately 64″ around, 7″ wide

    Hook: I (5.50mm)

    Yarn: About 360 yards of Vanna’s Choice by Lion Brand (that’s a little more than 2 skeins). Vanna’s Choice is a #4 aran yarn. The sample is shown in “Linen”.

    Gauge: 5 rows of 6 HbDC = 2″ square

    You’ll also need: Yarn needle and stitch marker

    Abbreviations Used:
       ST (stitch)
    SL ST (slip stitch)
    SK (skip)
    CH (chain)
    FSC (foundation single crochet; see tutorial here)
    SC (single crochet)
    HDC (half double crochet)
    HbDC (herringbone double crochet; see “special stitch” below)

    Special Stitch:
    HbDC – Herringbone Double Crochet. When worked in the round without turning, this stitch creates two beautiful and very different textures on either side of the piece. Here’s how you do it:

    HbDC: Yarn over, insert hook into stitch. Yarn over, pull loop through stitch AND through first loop on hook (this is similar to a slip stitch motion). Two loops remain on hook. Yarn over and pull through first loop on hook. Two loops remain on hook. Yarn over again and pull the loop through both loops on the hook.

    (If you need additional help, Moogly has an excellent video tutorial here.)

    Notes:
    (1) This pattern is written in American Standard Terms.
    (2) After joining Round 1, the pattern will be worked in a continuous, seamless round (no more joining). If you need to, you may use a stitch marker to mark the beginning of rounds.

    – – – – – – – – – – – – – – – – – – – – – – – –

    THE PATTERN

    Round 1: FSC 175. Join with a SL ST to the top of the first FSC, being careful not to twist the foundation round. (175)

    Round 2: CH1. SC in same ST and in each of the next 2 STS. HDC in each of the next 3 STS. HbDC in each remaining ST. Do not join. (175)

    Rounds 3-17: HbDC in each ST around. (175)

    Round 18: HbDC in each of the first 166 STS; 9 STS remain unworked. HDC in each of the next 3 STS. SC in each of the next 3 STS. SL ST in each of the remaining 3 STS. This will smooth down your round so that we don’t end with a jagged edge. (175)

    Fasten off and weave in all ends.

  • Cosmos Scarf

    Cosmos Scarf

    During a recent trip to Hobby Lobby, in my current quest to branch out and add more colored yarns to my patterns, I came across Yarn Bee Dazzling yarn. Most of the color options didn’t do much for me, but a skein of “Morning Haze” practically jumped off the shelf and into my cart (you’ve had that happen before too, right?). It is soooo pretty! The steely purple, blue and gray color changes are long and subtle (just how I like them), and a continuous metallic thread gives the yarn such a pretty reflective finish. It is definitely on the lighter side of the #4 worsted category, comparable to the feel of Caron Simply Soft or Bernat Satin.

    When I first started playing with it, I was afraid that my 3rd loop stitches would get completely lost in the busyness of the yarn. And while they certainly don’t jump off the scarf, one of the things I love about the finished product is the understated texture that is magnified when the light hits it in a certain way.

    Cosmos Scarf Crochet Pattern | Free infinity scarf crochet pattern by Little Monkeys Crochet

    Of course, this pattern would be beautiful in a solid-colored yarn as well, and I may try that next.

    Prefer a PDF?

    This pattern can be completed using the 100% free version right here on this page. However, many people prefer the convenience of a printable, ad-free PDF.

    All-Access Passholders get the ad-free version of this and all of my other blog patterns. It’s a pretty sweet deal, if I do say so myself! Learn more about it here or continuing scrolling for the free version.

    COSMOS SCARF

    add-to-ravelry-favorites

    Difficulty: Easy

    Finished Size: 7″ tall x 60″ around

    Hook: H (5.00mm)

    Yarn: Approximately 440 yards of Yarn Bee Dazzling Yarn (<2 skeins) in “Morning Haze”. Dazzling is a lightweight #4 yarn, with a very similar feel to Caron Simply Soft. It is sold at Hobby Lobby stores.

    Gauge: 8 rows of 8 HHDC = 2″ square

    You’ll also need: Yarn needle

    Abbreviations Used:
    ST
     (stitch)
    SL ST (slip stitch)
    CH (chain)
    HDC (half double crochet)
    HHDC (herringbone half double crochet; see “special stitch” below)

    Special Stitch:
    HHDC – Herringbone Half Double Crochet. Here’s how you do it:

    HHDC: Yarn over, insert hook into stitch. Yarn over, pull loop through stitch AND through first loop on hook (this is similar to a slip stitch motion). Two loops remain on hook. Yarn over and pull through both loops.

    (If you need additional help, Moogly has an excellent video tutorial here. Please note that while her video considers the CH2 at the beginning of rows as a stitch, the pattern below does not.)

    Notes:
    (1) This pattern is written in American Standard Terms.
    (2) Pattern is worked in rows, then seamed at the end.
    (3) To find the “3rd loop” (as mentioned in Round 4 and every four rows after that), insert your hook into the loop that sits just below the top loop that is closest to you. (Also called the Camel Stitch or RibHDC.)

    – – – – – – – – – – – – – – – – – – – – – – – –

    THE PATTERN

    To begin: CH 231.

    Row 1: HHDC in 2nd CH from hook and in each remaining CH. (230)

    Row 2: CH1, turn. HHDC in each ST across. (230)

    Row 3: CH1, turn. HDC in each ST across. (230)

    Row 4: CH1, turn. HHDC in third loops of each ST across. (230)

    Row 5: CH1, turn. HHDC in each ST across. (230)

    Row 6: CH1, turn. HHDC in each ST across. (230)

    Row 7: CH1, turn. HDC in each ST across. (230)

    Row 8: CH1, turn. HHDC in third loops of each ST across. (230)

    Rows 9-24: Repeat Rows 5-8. (230)

    Row 25: CH1, turn. HHDC in each St across. (230)

    Row 26: CH1, turn. HHDC in each ST across. (230)

    Fasten off, leaving a long tail. Use tail to sew short sides of scarf together. Weave in all ends.

  • Providence Scarf

    Providence Scarf

    Thank you to Lion Brand Yarn for providing the yarn for this sample!

    Have you seen Lion Brand’s new yarn, Shawl In A Ball?

    Boasting the potential to create an entire stunning shawl with just one skein, it might be just now starting to show up at your local craft stores. (Or, you can purchase it direct from Lion Brand, or from Joann Fabrics in limited colors.) I had a chance to try it, and can I just say, wow.

    Sonoma Scarf Crochet Pattern | Free Fringe Infinity Scarf Crochet Pattern by Little Monkeys Crochet

    I realize this is not a shawl, but I’ll get to that.

    When I first held the yarn in my hands, I was really surprised that it was a category 4 (worsted) yarn. It really feels so much lighter.

    The first thing I thought when I started working with it was, “wow, this is like a really thin version of Homespun.” Which freaked me out a little, because (honesty time) I’ve never successfully completed a pattern with Homespun. I love what people are able to make with it, but it’s just too difficult for me to see the stitches. Shawl In A Ball has that similar crinkly feel to it, so I decided to use a stitch combo that I was very familiar with to ensure I would be able to recognize the loops. Once I got past the first row, I really got the hang of it. It’s like anything new; you just have to give it a chance! And you will be soooo glad you did.

    Ok, so I know it’s called Shawl In A Ball, but I’m not a shawl-wearer. So, I decided to take it in a little bit different direction, and used it to make this gorgeous infinity scarf. Aren’t you just drooling over those gradual color changes? I had so much fun making this and was so motivated to keep going because I was enjoying the color changes so much. And the finished look of the stitches creates this beautiful fabric that is light and drapes perfectly. I honestly think Lion Brand hit it out of the park with this yarn!

    Sonoma Scarf Crochet Pattern | Free Fringe Infinity Scarf Crochet Pattern by Little Monkeys Crochet

    The scarf is wide, so it could be worn over the shoulders in more of a shawl or wrap fashion. My model here is very petite, so it was too large to hang secure on her shoulders, but I bunched it up in the back a bit to at least be able to show you what it would look like. You could simply measure the shoulder width of the intended recipient, and crochet enough rows to match that needed length. Or, you could secure it with a cute pin.

    Sonoma Scarf Crochet Pattern | Free Fringe Infinity Scarf Crochet Pattern by Little Monkeys Crochet

    Of course, there are lots of beautiful colorways to choose from, and you’re bound to find one that suits your personality. The name of the color used in my sample is “Mindful Mauve.” If you can’t find it in stores yet, you can buy it from Joann Fabrics Online in limited colors (or, as always, you can get it direct from Lion Brand).

    Prefer a PDF?

    This pattern can be completed using the 100% free version right here on this page. However, many people prefer the convenience of a printable, ad-free PDF.

    All-Access Passholders get the ad-free version of this and all of my other blog patterns. It’s a pretty sweet deal, if I do say so myself! Learn more about it here or continuing scrolling for the free version.

    PROVIDENCE SCARF
    add-to-ravelry-favorites

    Size:
 Scarf measures 40″ around and is 10″ tall (not including fringe).
    Gauge:
 Not crucial, because you can simply chain until you reach 10″. But, in my scarf, a row of 22 stitches is about 5″ in length (and 10 rows of the pattern are about 3″).
    Hook: I (5.50mm)
    Yarn: 1 skein of Lion Brand Shawl In A Ball (sample shown in “Mindful Mauve”)
    You’ll also need: Yarn needle

    Abbreviations Used:
    CH (chain)
    ST/STS (stitch/stitches)
    SL ST (slip stitch)
    SK (skip)
    SC (single crochet)
    HDC (half double crochet)
    SC+HDC (this just means to put a single crochet and a half double crochet in the same stitch)

    Notes:
    (1) This pattern is written in American Standard terms.
    (2) It is crocheted as a flat piece, then seamed at the end.
    (3) CH1 at the beginning of rounds does not count as a stitch.
    (4) Note that the yarn needed for the fringe is cut from the skein first, so that we can be sure to have enough. You’ll notice on my sample scarf that I alternated between two colors of fringe; this was accomplished because the first few yards of my skein were purple, but they were attached with a manufacturer’s knot to the rest of the skin, which started cream-colored (that was the only knot I found). So, I cut off the purple and set it aside, then cut off enough of the cream for the rest of the fringe, then proceeded to make the scarf. (In other words, I got lucky, and made lemonade out of lemons. Every skein will be different.)

    FRINGE

    Before we even pick up our hook, we first need to set aside some yarn. We’ll be using the whole skein for this pattern, so we want to make sure we have enough yarn left for fringe! Grab a cutting board or something sturdy that’s somewhere between 8-10″ wide, and follow the instructions below.

    1. Wrap the yarn all the way around the cutting board about 40 times. Wrap it snug, but don’t wrap it crazy-tight. Try to be consistent.
    2. Take a good pair of scissors and carefully cut the yarn right down the center of the pile.
    3. You now have a pile of yarn strands approximately 18″ long. Very carefully, fold it in half and cut at the halfway point again. You should now have about 80 strands of yarn, about 9″ long apiece. Set it aside for when you’ve completed the pattern.

    Providence Scarf Crochet Pattern  |  Free Fringe Infinity Scarf Crochet Pattern by Little Monkeys Crochet


    PATTERN

    To begin:
    CH45. (This should measure about 10″ when lightly stretched; add or subtract chains as necessary, just be sure to begin with an odd number of chains.)

    Row 1: SC+HDC in 3rd CH from hook. (SK next ST, SC+HDC in next ST) across. (44)

    Rows 2-132 (or until you get to the end of your skein, or until the scarf is the length you want it to be): CH1, turn. SK 1st ST, SC+HDC in next ST. (SK next ST, SC+HDC in next ST) across. (44)

    seamingFasten off, leaving a tail long enough to seam the scarf. Use your yarn needle and finishing tail to whip stitch both ends together.

    Fasten off and weave in all ends.

    Attaching the Fringe

    Attach fringe to every other row along the entire length of one side of the scarf.

  • Rustic Fringe Infinity Scarf

    Rustic Fringe Infinity Scarf

    © Photography by Kindred Photo & Design

    Thank you to Lion Brand Yarn for providing the yarn for this sample!

    I recently had a chance to sample some Lion’s Pride Woolspun (by Lion Brand Yarn), and boy, was I impressed!

    This #5 bulky weight yarn is pretty awesome. Sold exclusively at Michael’s stores, it’s a sturdy yarn that doesn’t split and shows stitch definition very clearly.

    Rustic Fringe Infinity Scarf Crochet Pattern | Free Infinity Scarf Crochet Pattern by Little Monkeys Crochet

    I’ve been experimenting with combining some of my favorite stitches and textures, and I’m absolutely thrilled with how this pattern came out!

    It’s a double-wrapping scarf, but I think it looks beautiful hanging long, too.

    Rustic Fringe Infinity Scarf Crochet Pattern | Free Infinity Scarf Crochet Pattern by Little Monkeys Crochet

    The fringe is optional, but why would you not want it?

    Rustic Fringe Infinity Scarf Crochet Pattern | Free Infinity Scarf Crochet Pattern by Little Monkeys Crochet

    And do you want to know the best thing about this pattern?

    It has a matching slouch hat!

    Rustic Fringe Infinity Scarf Crochet Pattern | Free Infinity Scarf Crochet Pattern by Little Monkeys Crochet

    Brand New Video Tutorial Available!

    If the video below doesn’t work for you, please click here.

    Video Breakdown:
    3:10 – Beginning of Pattern
    25:30 – Fringe
    31:27 – Buttons
    32:08 – Seaming
    36:10 – Stitch Appendix

    Prefer a PDF?

    This pattern can be completed using the 100% free version right here on this page. However, many people prefer the convenience of a printable, ad-free PDF.

    All-Access Passholders get the ad-free version of this and all of my other blog patterns. It’s a pretty sweet deal, if I do say so myself! Learn more about it here or continuing scrolling for the free version.

    THE RUSTIC INFINITY FRINGE SCARF

    add-to-ravelry-favorites

    Level: Easy

    Size:
    Scarf measures 64″ around, and is 7″ wide (not including fringe). These measurements are easily adjustable.

    Materials:

    • N hook (9.00mm)
    • Yarn needle
    • Lion’s Pride Woolspun (from Lion Brand), about 400 yards. The color in the photos is Taupe.
      *About Lion’s Pride Woolspun:
        Weight: #5 Bulky
                    Fiber: 80% acrylic, 20% wool
      Yardage: 100 g (3.5 oz) / 127 yd (116 m)
    • 4 button embellishments (mine are 1″), plus tools to attach buttons (needle, thread)

    Gauge: With N hook, a row of 7HDC = 3″ in length.

    Abbreviations Used:
    CH (chain)
    SK (skip)
    SS (slip stitch)
    SC (single crochet)
    HDC (half double crochet)
    DC (double crochet)
    SC+DC (this just means to put a single crochet and a double crochet in the same stitch)

    Special Terminology:
    3rd Loop – Some rows call for the stitches to be completed in the “3rd loop”. When working in turned rows, and after completing a row of HDC, these loops will be visible just below the front loop. So instead of inserting your hook into the top loops, you’ll only insert it into that 3rd loop. This will force the top loops to go to the front of your work, which is how we get the “ribbing” effect. Click here for tutorial.

    Notes:
    (1) This pattern is written in American Standard terms.
    (2) The buttons are just a decorative embellishment (non-functional).

    – – – – – – – – – – – – – – – –

    To begin:
    Using N Hook, and leaving a 12″ tail, CH151.

    Row 1:  SC+DC in 3rd CH from hook. (SK next ST, SC+DC in next ST) across. (150)

    Row 2: CH1, turn. SK 1st ST, SC+DC in next ST. (SK next ST, SC+DC in next ST) across. (150)

    Row 3: CH1, turn. SK 1st ST, SC+DC in next ST. (SK next ST, SC+DC in next ST) across. (150)

    Row 4: CH1, turn. SK 1st ST. HDC in each of the next 148 STS. 2HDC in last ST. (150)

    Row 5: CH1, turn. Working in 3rd loops, SK 1st ST, SC+DC in next ST. (SK next ST, SC+DC in next ST) across. (150)

    Rows 6-16: Repeat Rows 2-5, in order, until you have 16 total rows (you will end with a repeat of Row 4). (150)

    Edging
    We are going to put an edging on only one end of the scarf (it isn’t necessary anywhere else). So, with your hook in the same place you left off on Row 16, CH 1. SC into the same ST again to turn the corner to the short end of the scarf. SC evenly along the edge, putting 4SC in between each ribbing row. When you get to the end of the short edge, finish it off with a CH1 and a SL ST into the same ST as your last SC. Fasten off and weave in your ends.Yenni Chunky Infinity Fringe Scarf Crochet Pattern | Little Monkeys Crochet

    Fringe
    We need to cut approximately 75 pieces of yarn for the fringe. Find a sturdy, thin object in your home that measures somewhere between 8-10″. I used my 9″ cutting board and it worked perfectly! Here’s how you make fringe (the numbers correspond to the photos below):

    1. Wrap the yarn around the cutting board about 40 times (this will give us a little wiggle room). Wrap it snug, but don’t wrap it crazy-tight. Try to be consistent.
    2. Take a good pair of scissors and carefully cut the yarn right down the center of the pile.
    3. You now have a pile of yarn approximately 18″ long. Very carefully, fold it in half and cut at the halfway point again. You should now have about 80 strands of yarn.
    4. Start at one end of the scarf, on the side where you began the pattern (the CH151 side). Using a crochet hook and one strand of yarn, find the first stitch. Fold the yarn in half and use the hook to pull it halfway through the space created by that first stitch. The two ends of the strand should be poking out the front of the entry point.
    5. Remove your hook and insert the two ends of the strand through the loop.
    6. Pull tight.
    7. Continue down the scarf, adding fringe to every other stitch. This will be easy to spot, because when you did your SC+DCs, they created little spaces. Use the photo for a visual.

    Yenni Chunky Infinity Fringe Scarf Crochet Pattern | Little Monkeys Crochet

    Button Embellishments
    Use your needle and thread to attach the 4 buttons to the front of the short end of the scarf (the one that has the edging!).

    Seaming
    To make this an infinity scarf, we’re going to attach the ends together. Instead of doing a normal seam (where the first row is joined to the last row), we are going to overlap the edge with the buttons over the other end by about 1-2″. This will give the illusion that the buttons are holding it closed. You can use a needle and thread to sew along the edge. (I sewed the bottom layer to the underside of the top layer so that it didn’t disrupt the look of the top piece, because I’m not very good at sewing.) You could also use a sturdy fabric glue, but be sure it’s machine-washable!
    Yenni Chunky Infinity Fringe Scarf Crochet Pattern | Little Monkeys Crochet

    That’s it, folks! I was pleasantly surprised at how stunning these stitches looked incorporated into a chunky scarf, and I hope you love it as much as I do!