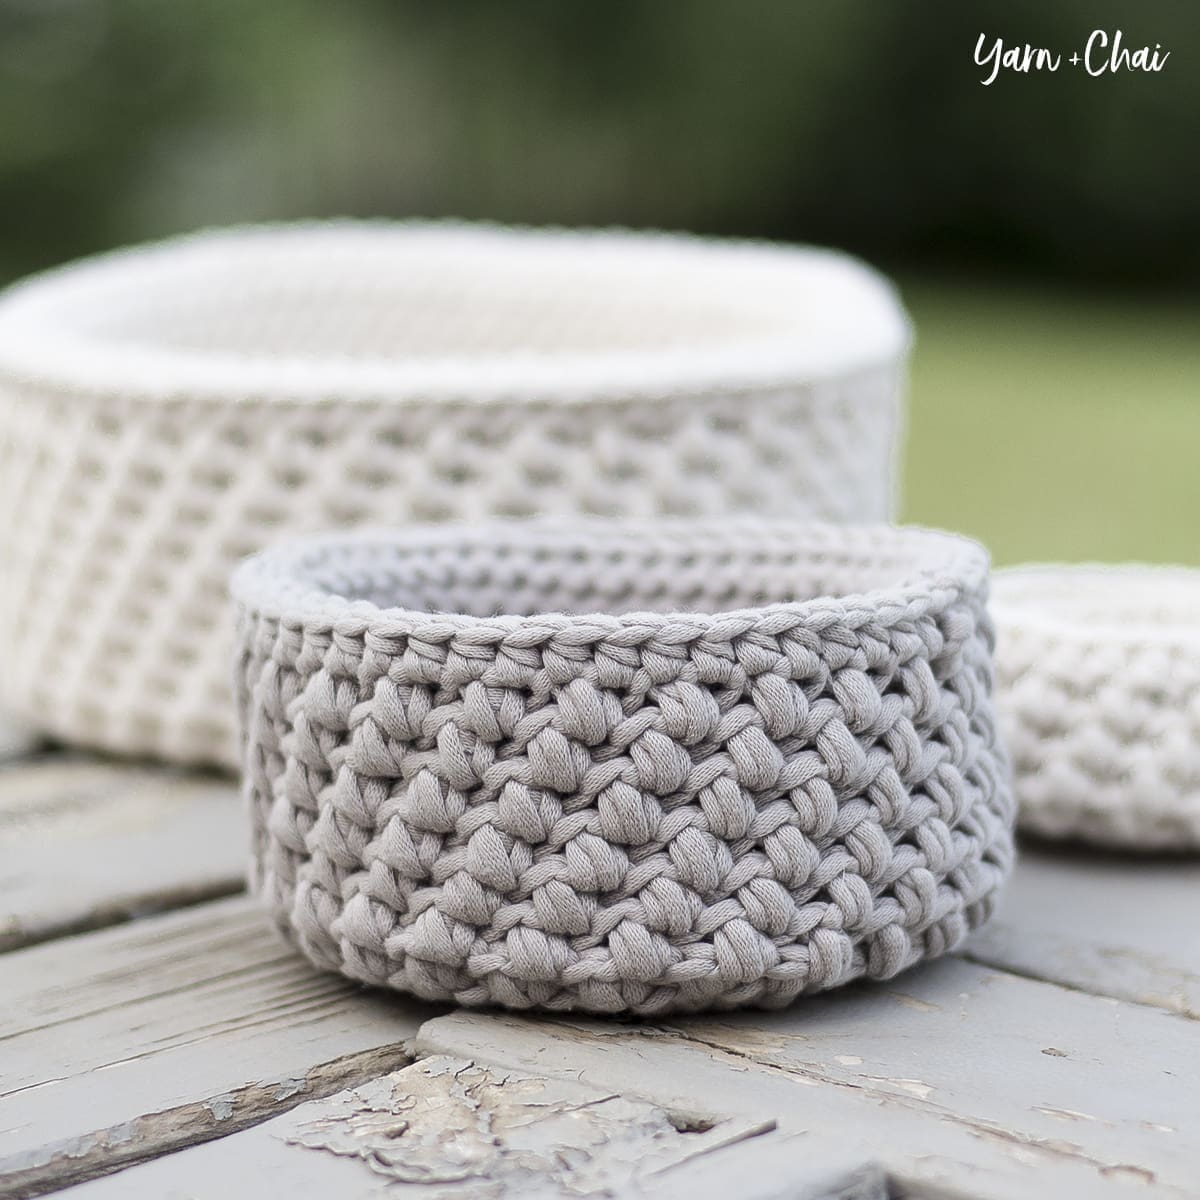
Category: Home Decor

  • Malia Baby Blanket

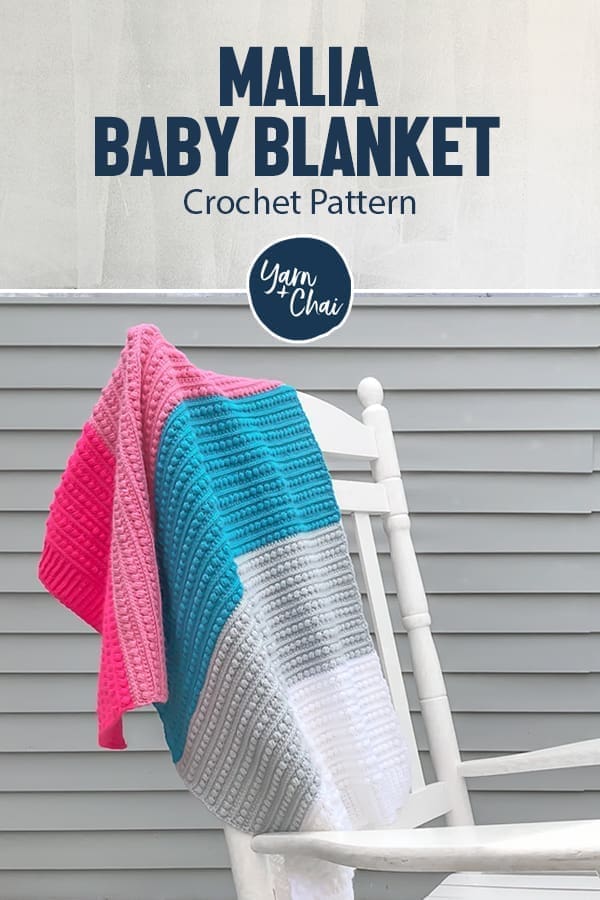
    Malia Baby Blanket

    One of the most common Malia-related requests I get is for a blanket pattern. I always said I’d publish one, but it’s taken me a long time. (Sorry!)

    Truthfully, I’ve been incredibly overwhelmed with life (business and otherwise) for a while. So about a year ago, I decided to <*gasp*> ask for some help. I commissioned a talented crocheter from our Facebook group to create a Malia Baby Blanket with the pattern I had in my head. It was a little scary for me, considering this was the first time I’d asked someone to invest time making pattern of mine that I hadn’t actually made and tested myself yet. But as you can see, it went well… and Erica did a phenomenal job with it!

    I mean look at all those beautiful LBS stitches.
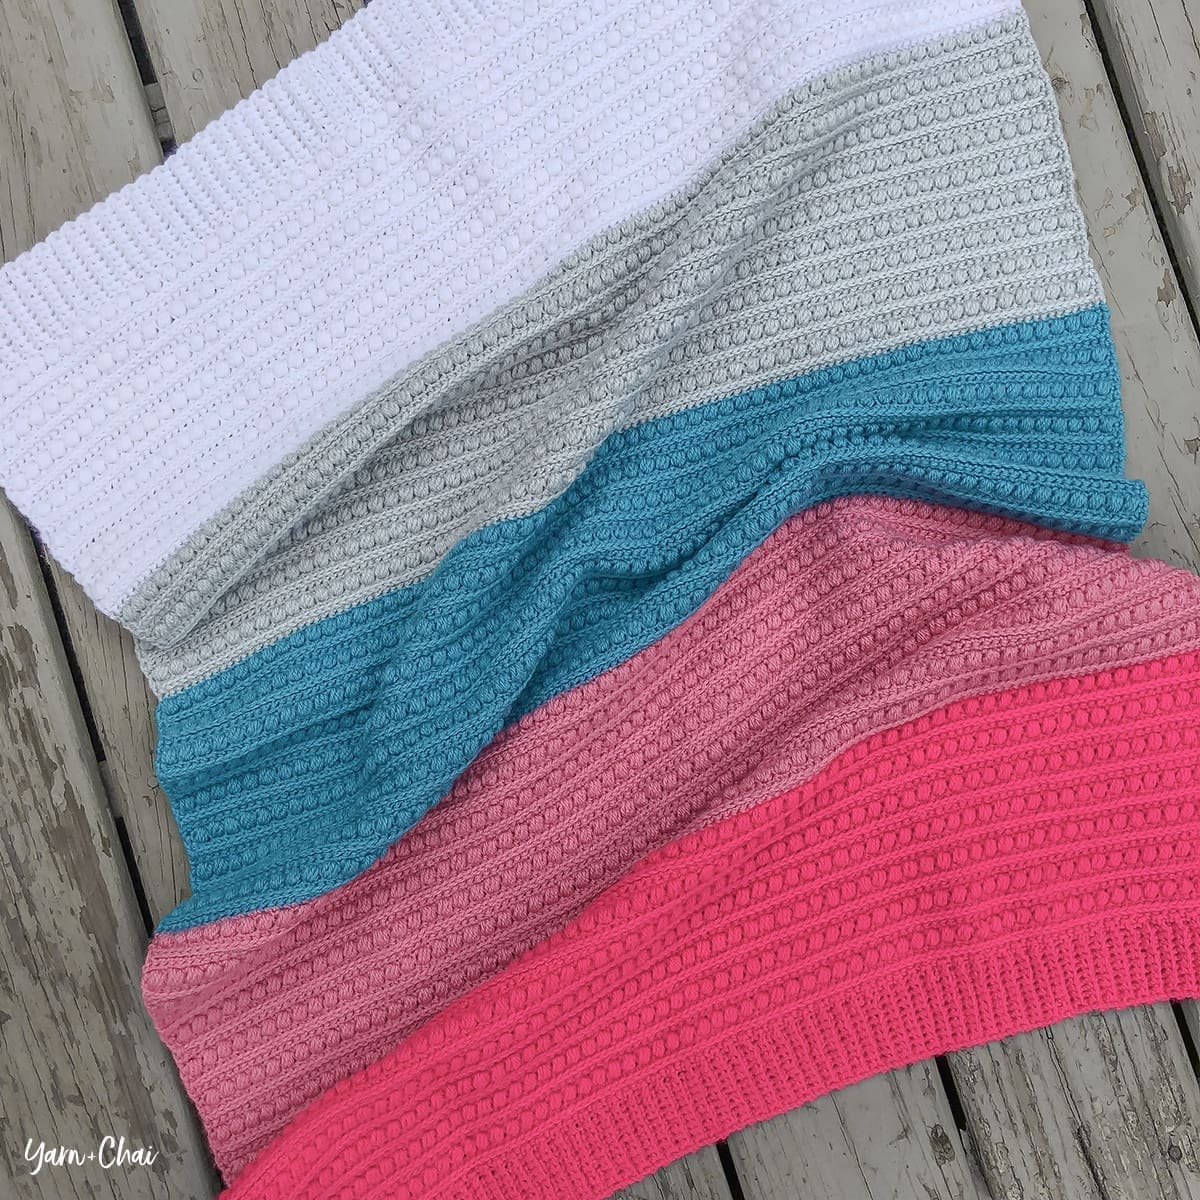
    It’s taken me entirely too long to get this pattern published (again, life = overwhelming), but here it is!

    ABOUT THE YARN

    I sent Erica some Paintbox Simply DK for this sample. I’d never used Paintbox yarn before, and I have to say, the color choices are pretty amazing. I feel like some of the larger yarn companies are trending toward putting out more new lines of yarn with fewer colors to choose from in each one, and I love Paintbox’s philosophy of keeping it simple, because that enables them to be able to offer a wide variety of color choices. This particular yarn (Simply DK) is an acrylic, and while it’s soft, I wasn’t sure if it was soft enough to be a baby blanket. But with a wash, the blanket definitely softened up.

    VIDEO TUTORIAL

    If you need a little extra help with the stitches in the Malia stitch pattern, here is a video tutorial! (Please note that this tutorial does not follow the Malia Baby Blanket pattern; I simply show you how to do the Malia stitch pattern by crocheting up a swatch of it.)

    Prefer a PDF?

    This pattern can be completed using the 100% free version right here on this page. However, many people prefer the convenience of a printable, ad-free PDF.

    All-Access Passholders get the ad-free version of this and all of my other blog patterns. It’s a pretty sweet deal, if I do say so myself! Learn more about it here or continuing scrolling for the free version.

    MALIA BABY BLANKET

    Difficulty: Easyish

    Finished Size: Approx. 30” wide x 37.5” long (stroller blanket size). Each color block is approx. 7.5” tall.  

    Hook: 4.5mm (US-7) hook

    Yarn: Approx. 1,950 yards of #3 DK weight in 5 colors. You’ll need about 390 yards per color. Yarn used in sample photos is Paintbox Simply DK in Paper White (COLOR A), Stormy Grey (B), Marine Blue (C), Bubblegum Pink (D), and Neon Pink (E).

    Gauge: 18 HDC x 14 rows = 4″ square

    You’ll also need: Yarn needle

    Terms and Abbreviations:
    ST/STS (stitch/stitches)
    SL ST (slip stitch)
    SK (skip)
    CH (chain)
    SC (single crochet)
    HDC (half double crochet)
    LBS (large bean stitch – see “Special Stitches”)
    BLO (back loop only)
    3rd LOOP (work stitch into 3rd loop only – see “Special Stitches”)

    Special Stitches:

    Large Bean Stitch (LBS)
    Insert hook into stitch, yarn over and pull through (2 loops on hook). Yarn over, insert hook into same stitch, yarn over and pull through (4 loops on hook). Yarn over, insert hook into same stitch, yarn over and pull through (6 loops on hook). Yarn over, insert hook into same stitch, yarn over and pull through (8 loops on hook). Yarn over and pull through all 8 loops. Chain 1 to close the stitch. (Because this stitch creates two sets of loops – one when creating the bean, and one when closing the stitch – each completed Large Bean Stitch will count for two stitches in the row or round’s final stitch count.)

    3rd Loop Only
    Half double crochet stitches have a 3rd loop that we utilize in this pattern. When working in turned rows, as in this pattern, the 3rd loop can be found just below the front loop on the side of the work that is facing you. When instructed to work in “3rd loop only”, insert your hook into this special loop. This creates a delicate braided look on the opposite side of the pattern.

    Notes:
    (1) This pattern is written in American Standard Terms.
    (2) CH1s at the beginning of rows do not count as a stitch in the final stitch count.
    (3) A video tutorial for the stitch pattern is available up in the post, or by clicking here.
    (4) You may prefer to use one hook size larger than your gauge hook to complete the ribbing at the beginning and end of the pattern. Some people tend to crochet ribbing a little tighter, which can result in some minor pulling inward at each end of the blanket.

    INSTRUCTIONS

    TOP RIBBING

    With COLOR A, CH11.

    Row 1: SC in 2nd CH from hook and in each remaining CH. (10)

    Rows 2-144 (or until ribbing measures about 30″ long; be sure to complete an even number of rows): CH1, turn. SC in first ST. SC in BLO of each of the next 8 STS. SC in final ST. (10)

    – – – – – – – – – –

    BODY (Row count restarts back to 1)

    Body, Row 1: CH1, do not turn. SC in each row end along the long edge of the ribbing. (144, or however many ribbing rows you completed)

    Row 2: CH1, turn. SC in first ST. (SK next ST, LBS in next ST) 71 times. SC in final ST. (144)

    Row 3: CH1, turn. HDC in each ST across. (144)

    Row 4: CH1, turn. SC in first ST. SC in 3rd loop of each of the next 142 STS. SC in final ST. (144)

    Row 5: CH1, turn. SC in each ST across. (144)

    Row 6: CH1, turn. SC in first ST. (LBS in next ST, SK next ST) 71 times. SC in final ST. (144)

    Row 7: CH1, turn. HDC in each ST across. (144)

    Row 8: CH1, turn. SC in first ST. SC in 3rd loop of each of the next 142 STS. SC in final ST. (144)

    Row 9: CH1, turn. SC in each ST across. (144)

    Row 10: CH1, turn. SC in first ST. (SK next ST, LBS in next ST) 71 times. SC in final ST. (144)

    Row 11: CH1, turn. HDC in each ST across. (144)

    Row 12: CH1, turn. SC in 3rd loop of each ST across. (144)

    Rows 13-28: Repeat Rows 5-12, in order, twice. (144)

    – – – – – – – – – –

    Switch to COLOR B; fasten off COLOR A.

    Rows 29-60: Repeat Rows 5-12, in order, 4 times. (144)

    Rows 61-64: Repeat Rows 5-8. (144)

    – – – – – – – – – –

    Switch to COLOR C; fasten off COLOR B.

    Rows 65-68: Repeat Rows 9-12. (144)

    Rows 69-100: Repeat Rows 5-12, in order, 4 times. (144)

    – – – – – – – – – –

    Switch to COLOR D; fasten off COLOR C.

    Rows 101-132: Repeat Rows 5-12, in order, 4 times. (144)

    Rows 133-136: Repeat Rows 5-8. (144)

    – – – – – – – – – –

    Switch to COLOR E; fasten off COLOR D.

    Rows 137-140: Repeat Rows 9-12. (144)

    Rows 141-164: Repeat Rows 5-12, in order, 3 times. (144)

    – – – – – – – – – – – – – –

    BOTTOM RIBBING

    In this section, we will be creating the bottom ribbing by making vertical ribs and attaching them with slip stitches to the last row of the body as we go. We’ll be referring to “Row 164” quite a bit; that’s the last row of the body of the blanket we completed, and that’s what the ribbing will be attaching to. If you need a little help with this part, here’s a tutorial video.

    CH11.
    Row 1:
    Turn. SC in 2nd chain from hook and in each of the remaining 9 chains. SL ST into the first SC from Row 164, the stitch on which your CH11 was built. SL ST into the next SC from Row 164. (10, plus the two slip stitches along Row 164)

    The section we just created, built on the CH11, will hereafter be referred to as the “ribbing.”

    Row 2: CH1, turn. Skipping over the 2 SL STS you put in Row 164, SC in BLO of each of the first 9 STS of the ribbing. SC in both loops of the last ST. (10)

    Row 3: CH1, turn. SC in 1st ST. SC in BLO of each of the remaining 9 STS of the ribbing. SL ST in each of the next 2 STS of Row 164. (10, plus the 2 SL STS along Row 164)

    Row 4: CH1, turn. Skipping over the 2 SL STS you put in Row 164, SC in BLO of each of the first 9 STS of the ribbing. SC in both loops of the last ST. (10)

    Rows 5-144: Repeat Rows 3-4 all the way across Row 164.

    Fasten off and weave in ends.

    – – – – – – – – – –

    Done! If you’re sharing on social media, be sure to hashtag #maliababyblanket and tag me @yarnandchai.design 

    Hope you enjoyed it!
  • Mosaic Potholder

    Mosaic Potholder

    The Mosaic stitch pattern (that’s what I call it, but it’s really just a combination of single crochets and spike stitches) has been so fun to design with. It started with the Mosaic Baskets and soon became a Floor Pouf and a Bucket Bag, too. It’s one of those patterns that produces a fabric that looks good in so many different forms.

    My latest addition to the Mosaic collection is the Mosaic Potholder (or trivet, or hotpad, depending on what you call it). I used all cotton (because heat melts acrylic), and stuck with my formula of light background + dark, thinner mosaic to produce this beautiful kitchen helper that, at least in my opinion, looks like it could hang out on the shelves at Target next to all the other farmhouse-chic decor.

    I’m way too time-starved to make more than one of anything these days, but I can just imagine how beautiful a set of two or three of these, in different complimentary colors, would look in my kitchen. And what a great gift idea for a new bride or a new homeowner!

    Speaking of being time-starved, this pattern probably deserves a video tutorial, but it’s just not going to happen at this point. If this is your first experience with a Mosaic pattern, you might want to consider grabbing some scrap yarn and completing a small Mosaic Basket using this video tutorial. It’s a quick project and it will teach you everything you need to know and clear up any confusion that you may have, especially if you’re a visual learner like me.

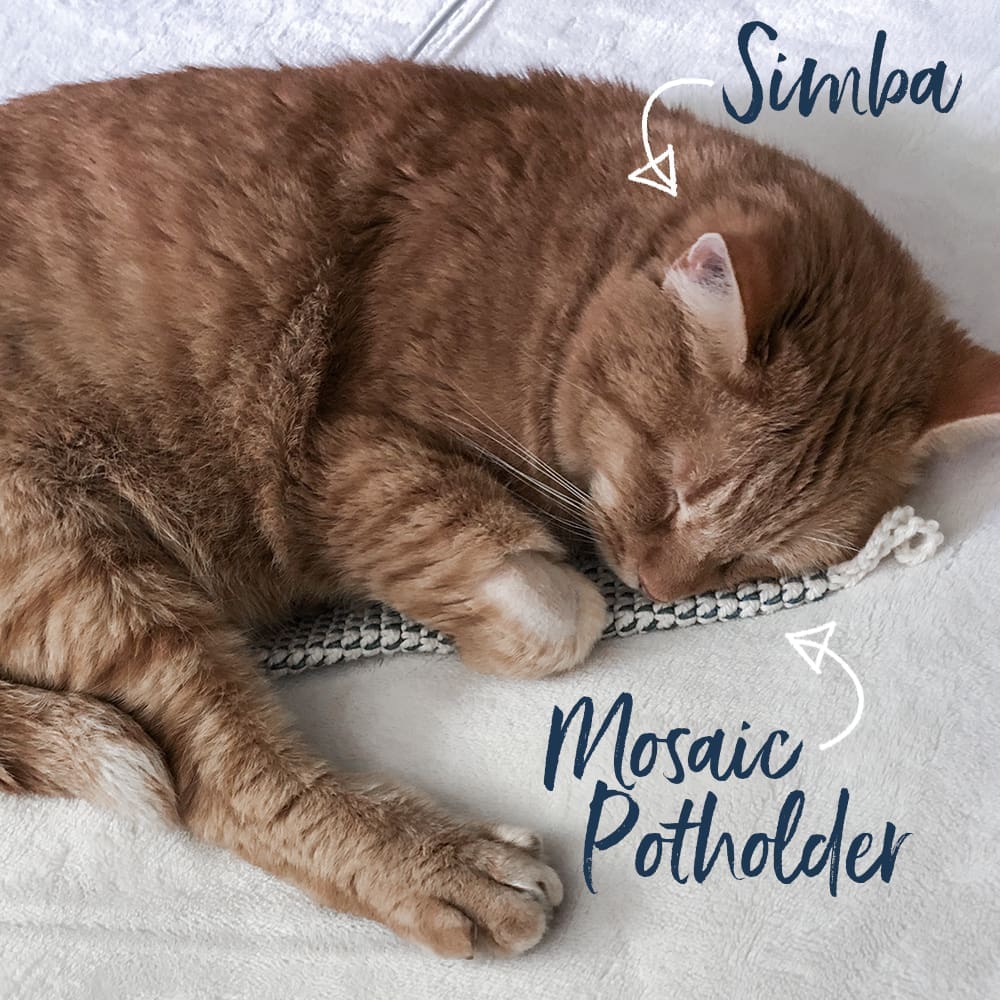
    Also, off topic, but does anyone else have a kitty who assumes everything you make is for him? If I leave anything out, there is a 120% chance I will walk back in the room and he will be snuggled up with it.

    Prefer a PDF?

    This pattern can be completed using the 100% free version right here on this page. However, many people prefer the convenience of a printable, ad-free PDF.

    All-Access Passholders get the ad-free version of this and all of my other blog patterns. It’s a pretty sweet deal, if I do say so myself! Learn more about it here or continuing scrolling for the free version.

    Mosaic Potholder

    View on Ravelry

    Difficulty: Easyish

    Finished Size: 7.75″ x 7.75″

    Hook: E (3.50 mm)

    Yarn: For COLOR A, approx. 150 yards of #4 worsted weight cotton (I used I Love This Cotton in “Ivory”). For COLOR B, approx. 150 yards of #10 cotton thread (I used Artiste in “Deep Ocean”).

    Gauge: 19SC = 4″ in length. Stitch height does not matter for this pattern.

    You’ll also need: Yarn needle

    Terms and Abbreviations:

    ST/STS (stitch/stitches)
    SL ST (slip stitch)
    SK (skip)
    CH (chain)
    SC (single crochet)
    Spike Stitch (see Special Stitches, below)

    Special Stitches:

    SC Spike Stitch: Instead of inserting your hook into the top loops of the stitch, insert them into its base, then complete an SC. This will wrap your SCs over the top of the SCs from the previous round.

    SL ST Spike Stitch: Follow instructions for SC Spike Stitch, but instead of completing an SC, complete a SL ST.

    Notes:
    (1) This pattern is written in American Standard Terms.
    (2) CHs do not count as a stitch.
    (3) There is no stitch multiple for this pattern. If you want to make it larger or smaller, add or subtract chains at the beginning and repeat rounds as many times as necessary for the height you want.
    (4) Because we utilize the SC Spike Stitch for entire rounds throughout the pattern, we will be referring to those rounds as an extension of the SC rounds they are being worked into. For example, if Round 1 is a round of SC, then the very next round which places spike stitches on top of those SCs will be referred to as Round 1B. This just makes for easier counting.

    INSTRUCTIONS

    To Begin: With COLOR A, CH35.

    Round 1: SC in 2nd CH from hook and in each remaining CH. Working down the opposite side of the chain, SC across. (You have now worked in both sides of each chain.) Do not join. Pull the loop on your hook up a couple inches so it doesn’t unravel, then remove your hook. (68)

    Round 1B: Insert hook into top loops of the first ST of Round 1; attach COLOR B and CH1, then SC SPIKE ST in same ST. SC SPIKE STITCH into next ST and each ST around. Pull the loop on your hook up a couple inches so it doesn’t unravel, then remove your hook. (68)

    Round 2: Reinsert hook into loop from COLOR A. SC in each ST around (you’re working in the top loops of the SC SPIKE STS from the previous round). Remove hook. (68)

    Round 2B: Reinsert hook into loop from COLOR B. SC SPIKE ST in each ST around. Remove hook. (68)

    Take a quick moment to weave in your starting tails, because it will be much harder to do so the further into the pattern you get. Then…

    Repeat Rounds 2 and 2B until potholder measures about 7.5″ tall.

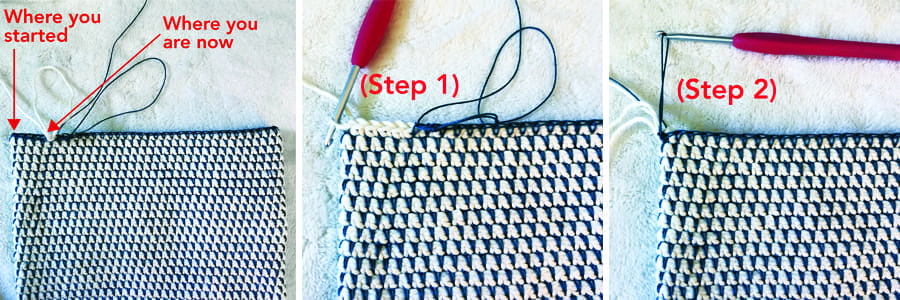
    Lay your potholder flat and notice that your starting ST for the last round has moved slightly away from the edge of the potholder (see first image below). This is normal and has to do with the anatomy of a stitch and the fact that we aren’t turning our rounds, but that’s a lesson for another day. For now, to get us back to the edge where we need to be to complete the final round of the potholder, follow these instructions:

    1. Reinsert hook into loop from COLOR A. Count how many stitches are between your hook and the folded edge of the potholder (I had 6; it’s ok if your number is slightly different). SC in all but the last 2 STS, then SL ST in each of the last 2 STS. Remove hook.
    2. Reinsert hook into loop from COLOR B. Follow the instructions from Step 1, but with SPIKE STS. Remove hook and fasten off COLOR B; weave in its end.

    Final Round: Reinsert hook into loop from COLOR A. CH1; SC into same ST. Continue to SC along top of the potholder, stopping when you get to the fold on the opposite side; CH20, then SL ST back into the same ST (at the base of the CH20) to form a loop. SC in each ST along the other side of the potholder to complete the round. Join with a SL ST to the top of the first SC. (68 + CH20)

    Finishing: Fasten off COLOR A, leaving a long tail for seaming. Use the tail and a yarn needle to seam potholder closed. Tie a knot at the end; then run your yarn needle into the nearest opening and underneath about half a dozen stitches (going between the two layers of fabric). Pull yarn through, then reinsert yarn needle back into the exit point and repeat. Do this a few times, then cut yarn and pull fabric to make the tip of the yarn disappear completely into the potholder.

    – – – – – – – – – – – –

    Done! If you’re sharing on social media, be sure to tag me @yarnandchai.design. Hope you enjoyed it!

  • Ribbed Potholder

    Ribbed Potholder

    Potholder, trivet, hotpad… whatever you call them, they are a staple in any home. Why not use your yarn skills to add some handmade flair to your kitchen?

    My favorite feature of these potholders is the double layer of thickness, achieved by working them in the round. It’s a simple way to protect your hands and furniture, and it gives the potholders a thick, professional-looking finish. And while these aren’t technically seamless (we join our rounds, chain up and turn), the seam is nicely hidden on the edge of the potholder where no one would be the wiser of it.

    The simple ribbing design gives it a sleek, modern look, and it’s sure to be a beautiful addition to your kitchen.

    Prefer a PDF?

    This pattern can be completed using the 100% free version right here on this page. However, many people prefer the convenience of a printable, ad-free PDF.

    All-Access Passholders get the ad-free version of this and all of my other blog patterns. It’s a pretty sweet deal, if I do say so myself! Learn more about it here or continuing scrolling for the free version.

    Ribbed Potholder

    View on Ravelry

    Difficulty: Easy

    Finished Size: 7.75″ x 7.75″

    Hook: E (3.50 mm)

    Yarn: Approx. 160 yards of cotton in a medium (#4) weight.  For my samples, I used I Love This Cotton in Rosy.

    Gauge: 19SC = 4″ in length. Stitch height does not matter for this pattern.

    You’ll also need: Yarn needle

    Terms and Abbreviations:

    ST/STS (stitch/stitches)
    SL ST (slip stitch)
    SK (skip)
    CH (chain)
    SC (single crochet)
    HDC (half double crochet)
    3rd LOOP (work stitch into 3rd loop only – see “Special Stitch”)

    Special Stitch:

    3rd Loop Only – Half double crochet stitches have a 3rd loop that we utilize in this pattern. When working in turned rounds, as in this pattern, the 3rd loop can be found just below the front loop on the side of the work that is facing you. When instructed to work in “3rd loop only”, insert your hook into this special loop. This creates a delicate braided look on the opposite side of the pattern.

    Notes:

    (1) This pattern is written in American Standard Terms.
    (2) CHs at the beginning of rounds do not count as a stitch.
    (3) Pattern can easily be adapted for different yarn thicknesses, hook sizes, or desired final measurements, by adding or subtracting any number of chains from the beginning.
    (4) Placing a stitch marker or bobby pin in the first stitch of each round is recommended.

    INSTRUCTIONS

    To Begin: CH37.

    Round 1: SC in 2nd CH from hook and in each remaining CH. Working down the opposite side of the chain, SC across. You have now worked in both sides of each chain. Join with a SL ST to the top of the first ST. (72)

    Round 2: CH1, turn. HDC in each ST around. Join with a SL ST to the top of the first ST. (72)

    Round 3: CH1, turn. SC in 3rd loop of each ST around. Join with a SL ST to the top of the first ST. (72)

    Round 4: CH1, turn. HDC in each ST around. Join with a SL ST to the top of the first ST. (72)

    – – – – – – – – – – – –
    Repeat Rounds 3-4, in order, until potholder reaches about 7.5″ in height; be sure to end on a repeat of Round 4 for best results.
    – – – – – – – – – – – –

    Final Round: CH1, turn. SC in 3rd loop of each ST across first side of potholder until you get to the fold. CH20; SL ST back into the base ST to form a loop. SC in 3rd loop of each remaining St around. Join with a SL ST to the top of the first ST.  (72 + CH20)

    To finish: Fasten off, leaving a long tail for seaming. Weave in starting tail. Use the finishing tail and a yarn needle to sew potholder closed. Tie a knot at the end; then run your yarn needle into the nearest opening and underneath about half a dozen stitches or rows (going between the two layers of fabric). Pull yarn through, then reinsert yarn needle back into the exit point and repeat. Do this a few times, then cut yarn and pull fabric to make the tip of the yarn disappear completely into the potholder.

    – – – – – – – – – – – –

    Done! If you’re sharing on social media, be sure to tag me @yarnandchai.design. Hope you enjoyed it!

  • Malia Potholder

    Malia Potholder

    Ah, Malia. You are so versatile. You’ve been everything from clothing accessories to holiday decor to purses. I can’t get enough of you.

    So, old friend… welcome to my kitchen!

    With a double layer of thickness and a seam that hides inconspicuously on the folded edge, this potholder design is such a beautiful addition to your home.

    If you’re like me and you’re always looking for ways to add more of your crochet obsession to your decor, potholders (or trivets or hotpads, depending on where you’re from) are a quick and easy way to do it. They also make great gifts!

    Prefer a PDF?

    This pattern can be completed using the 100% free version right here on this page. However, many people prefer the convenience of a printable, ad-free PDF.

    All-Access Passholders get the ad-free version of this and all of my other blog patterns. It’s a pretty sweet deal, if I do say so myself! Learn more about it here or continuing scrolling for the free version.

    Malia Potholder

    View on Ravelry

    Difficulty: Easyish

    Finished Size: 7.75″ x 7.75″

    Hook: E (3.50 mm)

    Yarn: Approx. 170 yards of cotton in a medium (#4) weight.  For my samples, I used I Love This Cotton in Dove.

    Gauge: 19SC = 4″ in length. Stitch height does not matter for this pattern.

    You’ll also need: Yarn needle

    Terms and Abbreviations:

    ST/STS (stitch/stitches)
    SL ST (slip stitch)
    SK (skip)
    CH (chain)
    SC (single crochet)
    HDC (half double crochet)
    BNS (bean stitch – see “Special Stitches”)
    3rd LOOP (work stitch into 3rd loop only – see “Special Stitches”)

    Special Stitches:

    Bean Stitch (BNS)
    Insert hook into stitch, yarn over and pull through (2 loops on hook). Yarn over, insert hook into same stitch, yarn over and pull through (4 loops on hook). Yarn over, insert hook into same stitch, yarn over and pull through (6 loops on hook). Yarn over and pull through all 6 loops.

    3rd Loop Only
    Half double crochet stitches have a 3rd loop that we utilize in this pattern. When working in turned rounds, as in this pattern, the 3rd loop can be found just below the front loop on the side of the work that is facing you. When instructed to work in “3rd loop only”, insert your hook into this special loop. This creates a delicate braided look on the opposite side of the pattern.

    Notes:

    (1) This pattern is written in American Standard Terms.
    (2) CHs at the beginning of rounds do not count as a stitch.
    (3) Pattern can easily be adapted for different yarn thicknesses, hook sizes, or desired final measurements, by adding or subtracting any number of chains from the beginning.
    (4) Placing a stitch marker or bobby pin in the first stitch of each round is strongly recommended.
    (5) Weaving in your ends as you go will be much easier than leaving them all for the end.

    INSTRUCTIONS

    To Begin: CH37.

    Round 1: SC in 2nd CH from hook and in each remaining CH. Working down the opposite side of the chain (away from your starting tail), SC across. You have now worked in both sides of each chain. Join with a SL ST to the top of the first ST. (72)

    Round 2: CH1, turn. SK first ST, BNS in next ST, CH1. (SK next ST, BNS in next ST, CH1) around. Join with a SL ST to the top of the first ST. (72)

    Round 3: CH1, turn. HDC in each ST around. Join with a SL ST to the top of the first ST. (72)

    Round 4: CH1, turn. SC in 3rd loops of each ST around. Join with a SL ST to the top of the first ST. (72)

    Round 5: CH1, turn. SC in each ST around. Join with a SL ST to the top of the first ST. (72)

    Round 6: CH1, turn. BNS in first ST, CH1, SK next ST. (BNS in next ST, CH1, SK next ST) around. Join with a SL ST to the top of the first ST. (72)

    Round 7: CH1, turn. HDC in each ST around. Join with a SL ST to the top of the first ST. (72)

    Round 8: CH1, turn. SC in 3rd loops of each ST around. Join with a SL ST to the top of the first ST. (72)

    Round 9: CH1, turn. SC in each ST around. Join with a SL ST to the top of the first ST. (72)

    – – – – – – – – – – – –
    Repeat Rounds 2-9, in order, until potholder reaches about 7.5″ in height. It does not matter which repeat round you end on.
    – – – – – – – – – – – –

    Final Round: CH1, turn. SC across first side of potholder until you get to the fold. CH20; SL ST back into the same ST to form a loop. SC in each remaining St around.  (72 + CH20)

    To finish: Fasten off, leaving a long tail for seaming. Use the tail and a yarn needle to seam potholder closed. Tie a knot at the end; then run your yarn needle into the nearest opening and underneath about half a dozen stitches (going between the two layers of fabric). Pull yarn through, then reinsert yarn needle back into the exit point and repeat. Do this a few times, then cut yarn and pull fabric to make the tip of the yarn disappear completely into the potholder.

    – – – – – – – – – – – –

    Done! If you’re sharing on social media, be sure to tag me @yarnandchai.design. Hope you enjoyed it!

  • Farmhouse Potholder

    Farmhouse Potholder

    Herringbone Half Double Crochet worked in the round provides one of my favorite crocheted textures. I used it in the Carlyle Slouch + Cowl set and the Herringbone Baby Hat, and it’s making an appearance again in this doubly-thick, modern potholder.

    The color-blocking gives you endless possibilities for a more colorful potholder, but this pattern would look just as chic in a solid color, especially if presented in a set of two or three potholders of complimentary shades.

    Prefer a PDF?

    This pattern can be completed using the 100% free version right here on this page. However, many people prefer the convenience of a printable, ad-free PDF.

    All-Access Passholders get the ad-free version of this and all of my other blog patterns. It’s a pretty sweet deal, if I do say so myself! Learn more about it here or continuing scrolling for the free version.

    Farmhouse Potholder

    View on Ravelry

    Difficulty: Easy

    Finished Size: 7.75″ x 7.75″

    Hook: E (3.50 mm) or whichever hook is needed to obtain correct gauge

    Yarn: Approx. 160 yards (80 yards per color) of cotton in a medium (#4) weight.  For my sample, I used I Love This Cotton in Dark Denim + Pale Denim.

    Gauge: 15 rows of 18 HHDC = 4″ square

    You’ll also need: Yarn needle

    Terms and Abbreviations:

    ST/STS (stitch/stitches)
    SL ST (slip stitch)
    CH (chain)
    SC (single crochet)
    HHDC (herringbone half double crochet; see “Special Stitch”, below)

    Special Stitch:

    Herringbone Half Double Crochet (HHDC): Yarn over, insert hook into stitch. Yarn over, pull loop through stitch AND through first loop on hook (this is similar to a slip stitch motion). Two loops remain on hook. Yarn over and pull through both loops.

    (If you need additional help, Moogly has an excellent video tutorial here.)

    Notes:
    (1) This pattern is written in American Standard Terms.
    (2) CHs do not count as a stitch.
    (3) There is no stitch multiple for this pattern. If you want to make it larger or smaller, add or subtract chains at the beginning and repeat rounds as many times as necessary for the height you want. (If doing two colors, switch when potholder is half the height you want it to be.)

    INSTRUCTIONS

    To Begin: With COLOR A, CH37.

    Round 1: SC in 2nd CH from hook. HHDC in each remaining CH. Working down the opposite side of the chain, HHDC across. (You have now worked in both sides of each chain.) Do not join. (72)

    Rounds 2-15: HHDC in each ST around. Do not join. (72)

    Round 16: You may notice that your starting point has shifted over a bit and is no longer right on the fold. This is normal and has to do with the anatomy of a stitch and the fact that we aren’t turning our rounds, but that’s a lesson for another day. For now, since we want to put our color change on the fold (where the jagged change won’t be as noticeable), HHDC in next few stitches (until you are back on the folded edge), then switch to COLOR B. HHDC in each remaining ST around. Do not join. (72)

    Rounds 17-29: HHDC in each ST around. Do not join. (72)

    Round 30: HHDC in each ST until you get to the first folded edge. Then, continue to HHDC around until you get to the next fold. CH20; SL ST back into the same ST to form a loop. HHDC in each remaining ST around. (72 + CH20)

    To finish: Determine how many stitches are left between where your hook is now, and the folded edge. (There should be about 6 or 7, but don’t worry if yours is more or less.) SC in all but one of those STS, then SL ST in the final ST. (So your SL ST should be right on the folded part.)

    Fasten off, leaving a long tail for seaming. Weave in your other tails, then use the finishing tail and a yarn needle to sew potholder closed. Tie a knot at the end; then run your yarn needle into the nearest opening and underneath about half a dozen stitches (going between the two layers of fabric). Pull yarn through, then reinsert yarn needle back into the exit point and repeat. Do this a few times, then cut yarn and pull fabric to make the tip of the yarn disappear completely into the potholder.

    – – – – – – – – – – – –

    Done! If you’re sharing on social media, be sure to tag me @yarnandchai.design. Hope you enjoyed it!

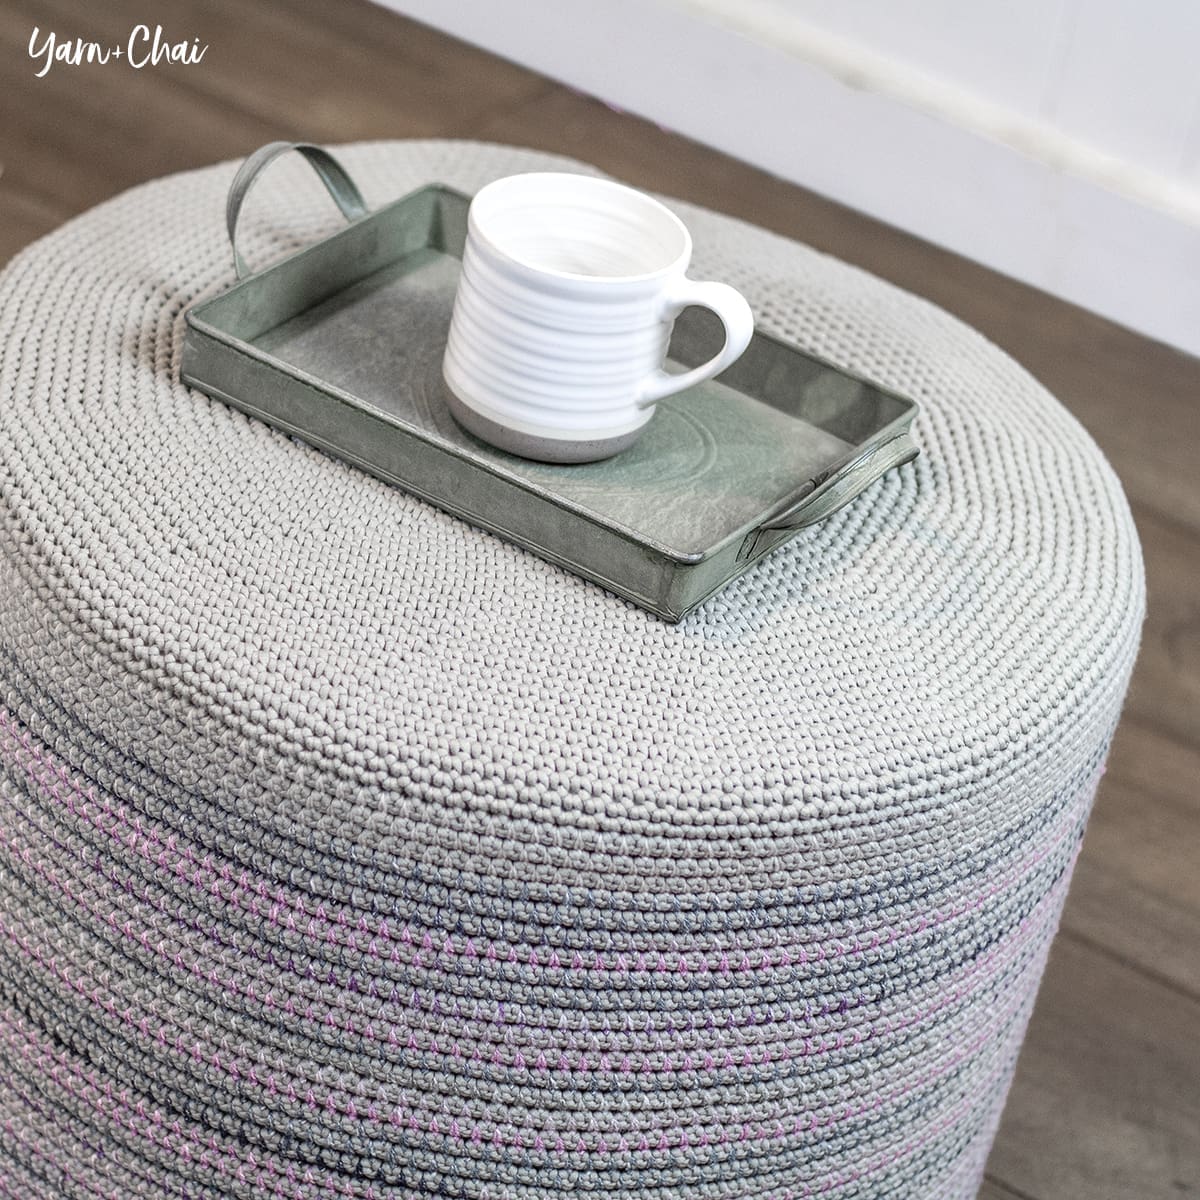
  • Mosaic Floor Pouf

    Mosaic Floor Pouf

    A few years ago, my sister saw a photo of another designer’s floor pouf and exclaimed “I want one!” She probably doesn’t even remember this, but I do. At the time, I was a much slower crocheter and the size of that project seemed daunting. But lucky for her, I’m much faster (and, more importantly, more confident) than I was then. And, I drew her name in the family Christmas exchange this year! 🙂

    Ready to make your own?

    The Supplies

    Yarn

    You’ll need two different yarns to achieve the mosaic effect of this pattern. First, you’ll need a chunky #5 yarn that will be the base color of your pouf. Just like with my Mosaic Baskets, I used Bernat Maker Home Dec (but with a bigger hook — yay!). I think it’s the perfect yarn for this project, but really any #5 yarn will work.

    Second, you’ll need a different colored yarn for the mosaic pattern on the sides of the pouf. You can get so creative here! Whether you choose a solid, variegated, or self-striping yarn, the effect will be awesome. The only rule is that it needs to be thinner than your base yarn so that you can still see the base yarn through the mosaic stitching. I recommend a #3 weight yarn.

    Stuffing

    We also have to stuff this thing, which is quite large. There are several things you can do — if you like to sew, you can sew an insert and fill it with polyester stuffing (you’ll need a lot to help it hold its shape). You can also use old pillows or an old blanket, but you’ll probably have to work a little harder to get it nice and round.

    Or, do what I did, and use a couple rolls of foam! I found this at my craft store by the pillow inserts and knew it would be perfect. I bought two rolls of the 1″ thick foam and had my handyman dad help me slice them in half so that I would have twice as much to work with. I then carefully combined it all into one big roll.

    Perfect!

    Large wood circle

    This part is optional, but I think it’s a great addition. If you want your pouf cover to be removable (for washing), you can purchase a large wooden circle from a craft or hardware store. I found a 15″ circle in the woodworking section of Joann Fabrics, but yours doesn’t have to be 15″ — just make sure it covers a good amount of the bottom of the pouf. (If it’s too small, you’ll have to crochet further toward the middle and the cover will get harder to remove.) I’ll explain in the directions how to adjust the pattern for whatever size you get.

    Of course, if you don’t want to add the wooden piece and don’t need it to be washable, just follow the pattern to the end to completely close up the stuffing in crocheted fabric.

    For the Visual Learners

    This pattern does not have a video tutorial. However, it is basically just a very large version of my Mosaic Basket! If you want to quickly practice the techniques in this pattern before committing to it on such a large scale, I highly recommend that you watch the video tutorial below and maybe even follow along to make the small sized basket. Any confusing parts are bound to become more clear when seen in action!

    Prefer a PDF?

    This pattern can be completed using the 100% free version right here on this page. However, many people prefer the convenience of a printable, ad-free PDF.

    All-Access Passholders get the ad-free version of this and all of my other blog patterns. It’s a pretty sweet deal, if I do say so myself! Learn more about it here or continuing scrolling for the free version.

    MOSAIC FLOOR POUF

    View on Ravelry

    Difficulty: Easy

    Finished Size: 20″ wide x 15″ tall

    Yarn: I used about 930 yards of Bernat Maker Home Dec (a #5 bulky weight cotton/nylon blend) in “Clay”, and about 400 yards of Yarn Bee Urban Chic (a #3 light acrylic/alpaca blend) in “Juneberry Breeze”.

    Hook: K (6.5mm)

    Gauge: First 7 rounds of pattern = 4.25″ across

    You’ll also need: Yarn needle, stitch marker, stuffing

    Terms and Abbreviations:
    MC (magic circle – view tutorial here)
    ST/STS
     (stitch/stitches)
    SL ST (slip stitch)
    SK (skip)
    CH (chain)
    SC (single crochet)
    Spike Stitch (see Special Stitches, below)
    SC2TOG (single crochet two together)

    Special Stitches:

    SC Spike Stitch: Instead of inserting your hook into the top loops of the stitch, insert them into its base, then complete an SC. This will wrap your SCs over the top of the SCs from the previous round.

    SL ST Spike Stitch: Follow instructions for SC Spike Stitch, but instead of completing an SC, complete a SL ST.

    Notes:
    (1) This pattern is written in American Standard Terms.
    (2) This pattern is worked in a seamless round. Use a stitch marker or bobby pin to mark the first stitch of each round.
    (3) When working increase rounds in single crochet (as we do for this pattern), the small bumps created by the increases tend to make the circle look more like a hexagon the more rounds you complete. That’s why for this large base of 32 rounds, I chose to use the Smooth Circle Base method, which is a way of staggering the placement of your increase stitches to keep it all circular. If you need help with this method beyond the written instructions, you can use my video tutorial for the Mosaic Basket in which I go into great detail about how it is done. If you prefer to not use the method, a standard 32-round increase will work fine and the hexagon will work back into a smooth circle eventually after you get past the increasing part of the pattern.
    (4) Because we utilize the SC Spike Stitch for entire rounds throughout the pattern, we will be referring to those rounds as an extension of the SC rounds they are being worked into. For example, if Round 32 is a round of SC, then the very next round which places spike stitches on top of those SCs will be referred to as Round 32B. This just makes for easier counting.

    – – – – – – – – – – – – – – –

    Part 1: Increasing

    Note: What follows is the Smooth Circle Base method of increasing. Please refer to Note #3 for an explanation.

    To Begin: Make a magic circle; CH1 (does not count as a stitch).

    Round 1: 6SC in MC. (6)

    Round 2: 2SC in each ST around. (12)

    Round 3: (2SC in next ST, SC in next ST) around. (18)

    Round 4: (SC in next ST, 2SC in next ST, SC in next ST) around. (24)

    Round 5: (2SC in next ST, SC in each of the next 3 STS) around. (30)

    Round 6: (SC in each of the next 2 STS, 2SC in next ST, SC in each of the next 2 STS) around. (36)

    Round 7: (2SC in next ST, SC in each of the next 5 STS) around. (42)

    Round 8: (SC in each of the next 3 STS, 2SC in next ST, SC in each of the next 3 STS) around. (48)

    Round 9: (2SC in next ST, SC in each of the next 7 STS) around. (54)

    Round 10: (SC in each of the next 4 STS, 2SC in next ST, SC in each of the next 4 STS) around. (60)

    Round 11: (2SC in next ST, SC in each of the next 9 STS) around. (66)

    Round 12: (SC in each of the next 5 STS, 2SC in next ST, SC in each of the next 5 STS) around. (72)

    Round 13: (2SC in next ST, SC in each of the next 11 STS) around. (78)

    Round 14: (SC in each of the next 6 STS, 2SC in next ST, SC in each of the next 6 STS) around. (84)

    Round 15: (2SC in next ST, SC in each of the next 13 STS) around. (90)

    Round 16: (SC in each of the next 7 STS, 2SC in next ST, SC in each of the next 7 STS) around. (96)

    Round 17: (2SC in next ST, SC in each of the next 15 STS) around. (102)

    Round 18: (SC in each of the next 8 STS, 2SC in next ST, SC in each of the next 8 STS) around. (108)

    Round 19: (2SC in next ST, SC in each of the next 17 STS) around. (114)

    Round 20: (SC in each of the next 9 STS, 2SC in next ST, SC in each of the next 9 STS) around. (120)

    Round 21: (2SC in next ST, SC in each of the next 19 STS) around. (126)

    Round 22: (SC in each of the next 10 STS, 2SC in next ST, SC in each of the next 10 STS) around. (132)

    Round 23: (2SC in next ST, SC in each of the next 21 STS) around. (138)

    Round 24: (SC in each of the next 11 STS, 2SC in next ST, SC in each of the next 11 STS) around. (144)

    Round 25: (2SC in next ST, SC in each of the next 23 STS) around. (150)

    Round 26: (SC in each of the next 12 STS, 2SC in next ST, SC in each of the next 12 STS) around. (156)

    Round 27: (2SC in next ST, SC in each of the next 25 STS) around. (162)

    Round 28: (SC in each of the next 13 STS, 2SC in next ST, SC in each of the next 13 STS) around. (168)

    Round 29: (2SC in next ST, SC in each of the next 27 STS) around. (174)

    Round 30: (SC in each of the next 14 STS, 2SC in next ST, SC in each of the next 14 STS) around. (180)

    Round 31: (2SC in next ST, SC in each of the next 29 STS) around. (186)

    Round 32: (SC in each of the next 15 STS, 2SC in next ST, SC in each of the next 15 STS) around. (192)

    – – – – – – – – – – – – – – –

    Part 2: Body of Pouf

    Rounds 33-36: SC in each ST around. (192)

    Round 37: SC in each ST around. Pull up a loop on your hook a couple inches tall so it doesn’t unravel, then remove your hook. (192)

    Round 37B: Insert hook into top loops of next ST; attach thinner yarn and CH1; SC in same ST. SC Spike Stitch into next ST and each remaining ST. Pull the loop on your hook up a couple inches so it doesn’t unravel, then remove your hook. (192)

    Round 38: Reinsert hook into loop from bulky yarn. SC in each ST around (you’re working in the top loops of the SC Spike Stitches from the previous round). Remove hook. (192)

    Round 38B: Reinsert hook into loop from thinner yarn. SC Spike Stitch in each ST around. Remove hook. (192)

    Rounds 39-67B: Repeat Rounds 38-38B. (192)

    If you’re using rolled foam as your stuffing, you should insert it now to see how high the fabric will reach up the side. Be sure to work the fabric a bit and stretch it up — you don’t want to pull it crazy tight, but the more snug the fabric fits over the stuffing, the better the whole thing will look in the end. If you’re confident that the fabric will stretch up to the top of the insert, that’s great. If not, you can add more rounds before moving on. If you think you need to take some rounds away to make sure it all stays tight and snug, do that.

    Round 68: Reinsert hook into loop from bulky yarn. SC in each of the next 189 STS (3 STS remain). SL ST in each of the remaining 3 STS. Remove hook. (192)

    Round 68B: Reinsert hook into loop from thinner yarn. SC Spike Stitch in each of the next 189 STS (3 STS remain). SL ST Spike Stitch in each of the remaining 3 STS. Remove hook. (192)

    Round 69: Reinsert hook into loop from bulky yarn; fasten off thinner yarn. SC in each ST around. (192)

    Take a moment to weave in all ends before proceeding to “Decreasing”.

    – – – – – – – – – – – – – – –

    Part 3: Decreasing

    Important note: Below you will find the complete pattern for decreasing back down to the handful of stitches you started with. If you don’t plan to use a wooden insert at the bottom, follow these instructions to the end. If you do plan to use an insert, simply follow the instructions until your crocheted fabric will cover the wooden insert by about 2-3 inches, then proceed to “Finishing with a wooden insert”, below.

    Round 70: (SC in each of the next 15 STS, SC2TOG, SC in each of the next 15 STS) around. (186)

    Round 71: (SC2TOG, SC in each of the next 29 STS) around. (180)

    Round 72: (SC in each of the next 14 STS, SC2TOG, SC in each of the next 14 STS) around. (174)

    Round 73: (SC2TOG, SC in each of the next 27 STS) around. (168)

    Round 74: (SC in each of the next 13 STS, SC2TOG, SC in each of the next 13 STS) around. (162)

    Round 75: (SC2TOaG, SC in each of the next 25 STS) around. (156)

    Round 76: (SC in each of the next 12 STS, SC2TOG, SC in each of the next 12 STS) around. (150)

    Round 77: (SC2TOG, SC in each of the next 23 STS) around. (144)

    Round 78: (SC in each of the next 11 STS, SC2TOG, SC in each of the next 11 STS) around. (138)

    Round 79: (SC2TOG, SC in each of the next 21 STS) around. (132)

    Round 80: (SC in each of the next 10 STS, SC2TOG, SC in each of the next 10 STS) around. (126)

    Round 81: (SC2TOG, SC in each of the next 19 STS) around. (120)

    Round 82: (SC in each of the next 9 STS, SC2TOG, SC in each of the next 9 STS) around. (114)

    Round 83: (SC2TOG, SC in each of the next 17 STS) around. (108)

    Round 84: (SC in each of the next 8 STS, SC2TOG, SC in each of the next 8 STS) around. (102)

    Round 85: (SC2TOG, SC in each of the next 15 STS) around. (96)

    Round 86: (SC in each of the next 7 STS, SC2TOG, SC in each of the next 7 STS) around. (90)

    Round 87: (SC2TOG, SC in each of the next 13 STS) around. (84)

    Round 88: (SC in each of the next 6 STS, SC2TOG, SC in each of the next 6 STS) around. (78)

    Round 89: (SC2TOG, SC in each of the next 11 STS) around. (72)

    Round 90: (SC in each of the next 5 STS, SC2TOG, SC in each of the next 5 STS) around. (66)

    Round 91: (SC2TOG, SC in each of the next 9 STS) around. (60)

    Round 92: (SC in each of the next 4 STS, SC2TOG, SC in each of the next 4 STS) around. (54)

    Round 93: (SC2TOG, SC in each of the next 7 STS) around. (48)

    Round 94: (SC in each of the next 3 STS, SC2TOG, SC in each of the next 3 STS) around. (42)

    Round 95: (SC2TOG, SC in each of the next 5 STS) around. (36)

    Round 96: (SC in each of the next 2 STS, SC2TOG, SC in each of the next 2 STS) around. (30)

    Round 97: (SC2TOG, SC in each of the next 3 STS) around. (24)

    Round 98: (SC in next ST, SC2TOG, SC in next ST) around. (18)

    Round 99: (SC2TOG, SC in next ST) around. (12)

    To Finish: Fasten off, leaving a long tail. Thread it through your yarn needle and weave it in and out of the 12 stitches from the previous round, then pull it tight and weave in.

    – – – – – – – – – – – – – – –

    Finishing with a Wooden Insert

    After you’ve completed a sufficient number of decrease rounds, fasten off and weave in the end. Cut a long length of Bernat Maker Home Dec (or your chosen chunky yarn) and thread it through a yarn needle. Weave it in and out of each stitch of the last completed round. Insert your wooden circle, then take each end of the threaded yarn and pull tight (but don’t break it!) and tie a small bow.

    You’re done!

    I hope you enjoyed this tutorial. If you’re sharing your pouf on social media, be sure to use hashtag #mosaicfloorpouf and tag me @yarnandchai.design!

  • Autumn Boho Pillow

    Autumn Boho Pillow

    This post is sponsored by Hobby Lobby.

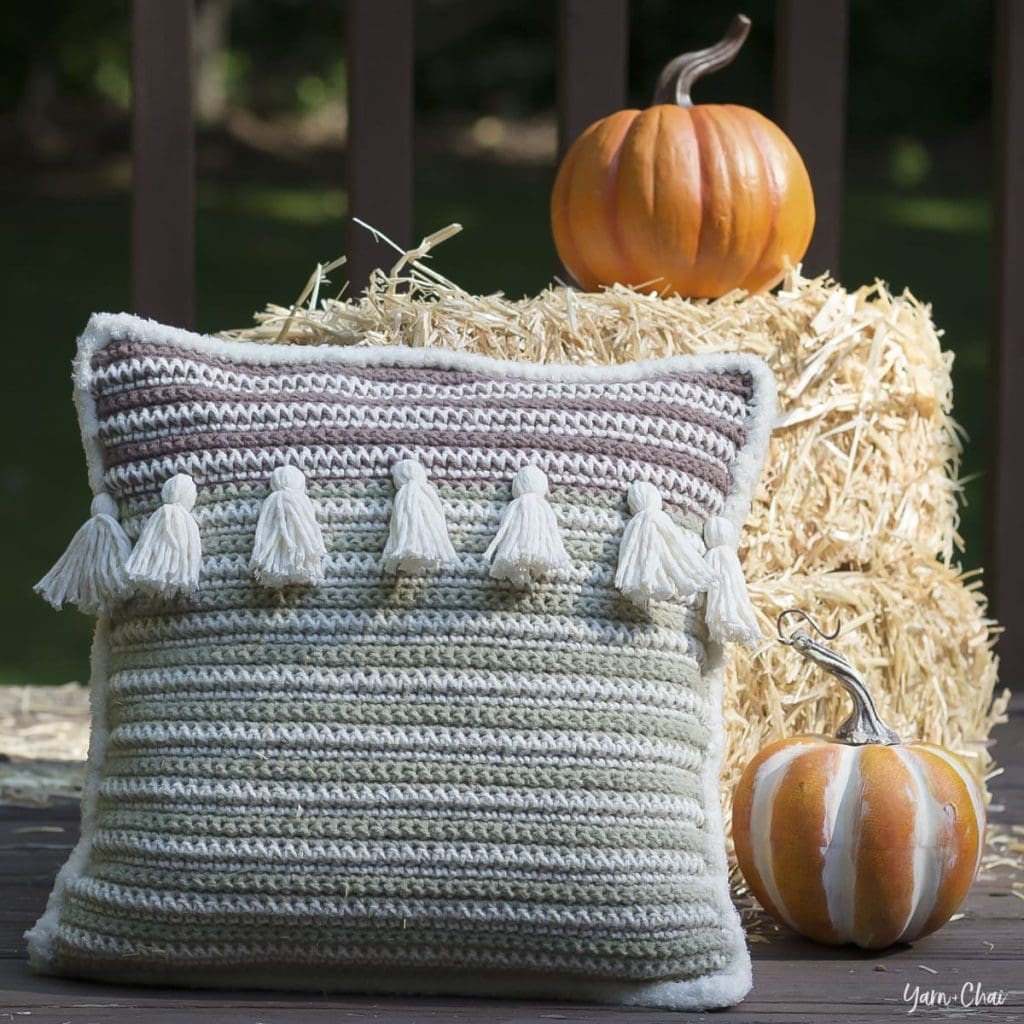
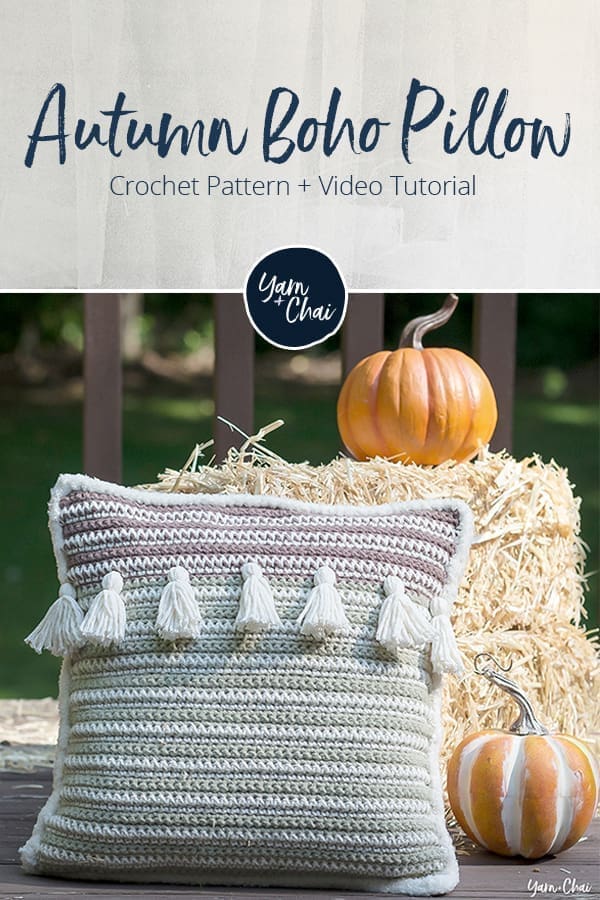
    I am so excited to team up with Hobby Lobby to bring you my newest pattern – the Autumn Boho Pillow!

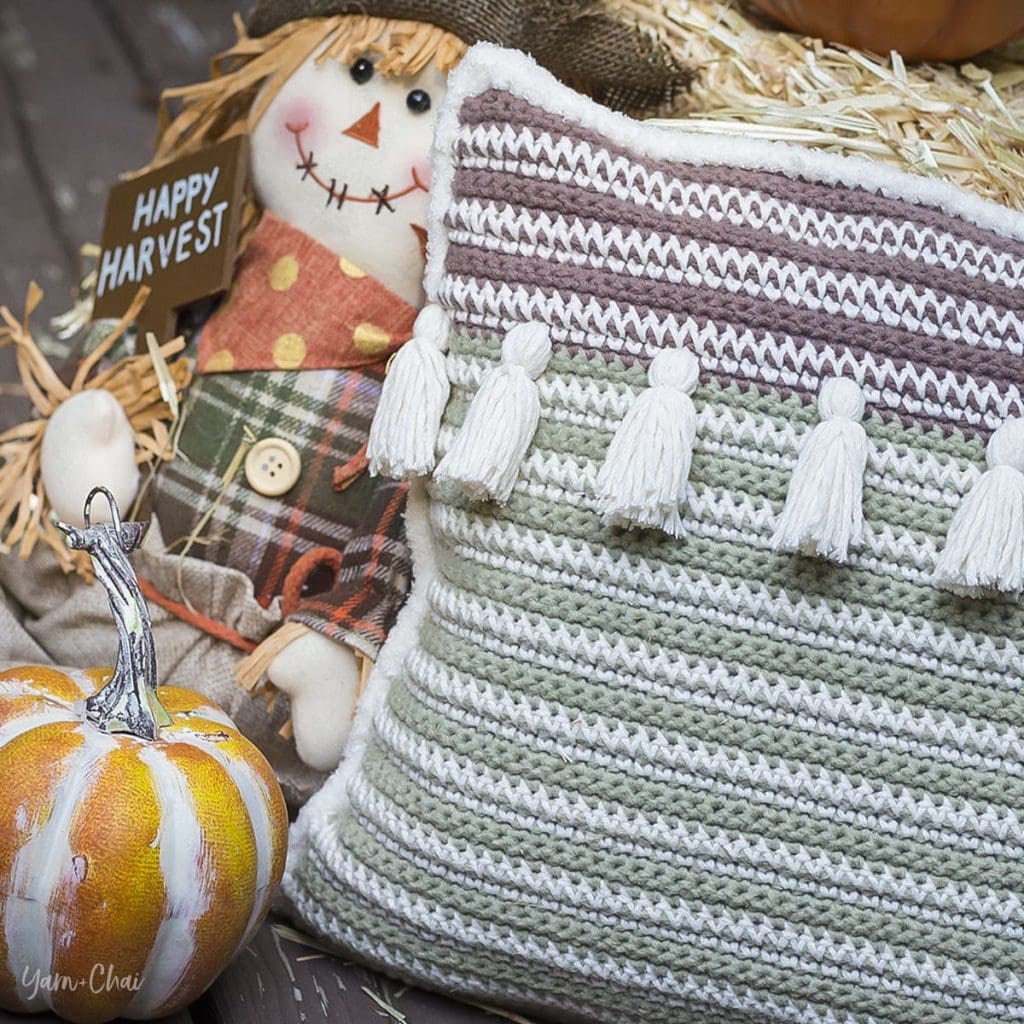
    I’ve been playing around with different ways to do single crochet stitches to make unique designs, so when Hobby Lobby asked me to make a fun fall pattern with some of their new Yarn Bee yarn, I knew right away that I wanted to incorporate the stitches into a cozy fall pillow! I’m really loving the boho style right now – I’ve always loved tassels and fur – and this pillow incorporates all of that to produce a piece of fresh, modern fall decor.

    Let’s Talk About This Yarn!

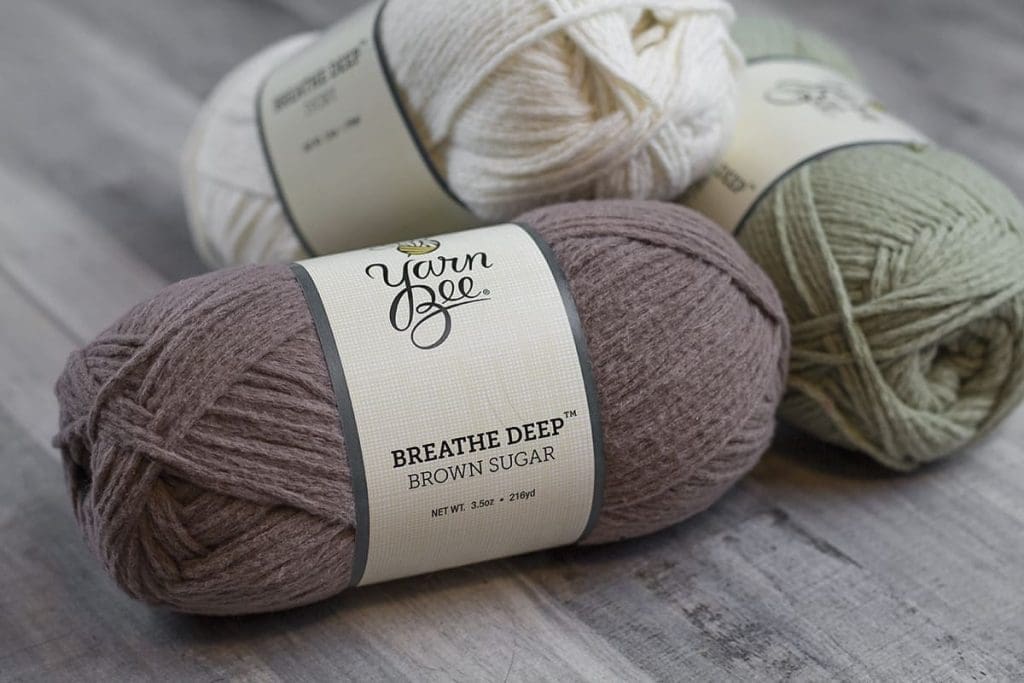
    I don’t know if you’ve noticed, but over the last few months, Hobby Lobby has been adding a ton of new yarns to their Yarn Bee line. One of those yarns is called Breathe Deep, and I’m not sure what I’m more drawn to — that name, or the crazy soft yarn it represents. Breathe Deep is an airy worsted weight yarn that’s available in a range of soft, modern shades. The strands have a rustic look to them, perfect for fall, and the polyester fibers are squishy and soft. It was a dream to work with — there was very little splitting, the stitches were easy to see, and the fibers didn’t irritate my sensitive skin.

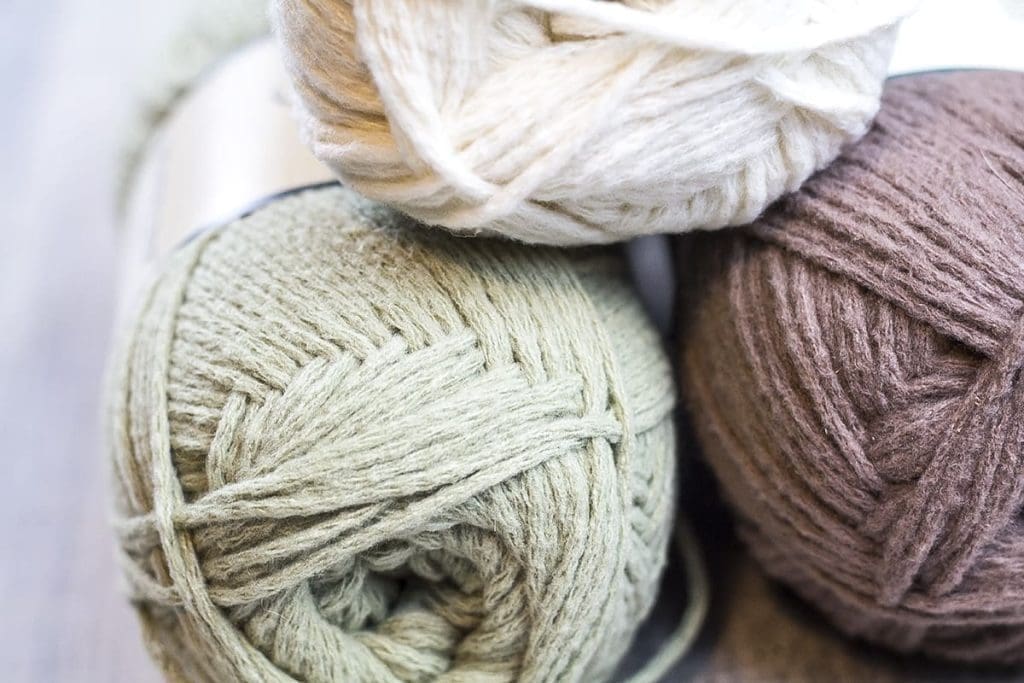
    In the pattern, I used the colors “Sage”, “Ivory”, and “Brown Sugar.” Sounds like autumn to me!

    The pillow is edged in Fur-Ever Style, another Yarn Bee Yarn. Even if you’re intimidated by fur yarns, give it a try! This is an easy project to practice on because we only use a little, but it adds such a cozy finishing touch.

    My Second Sample

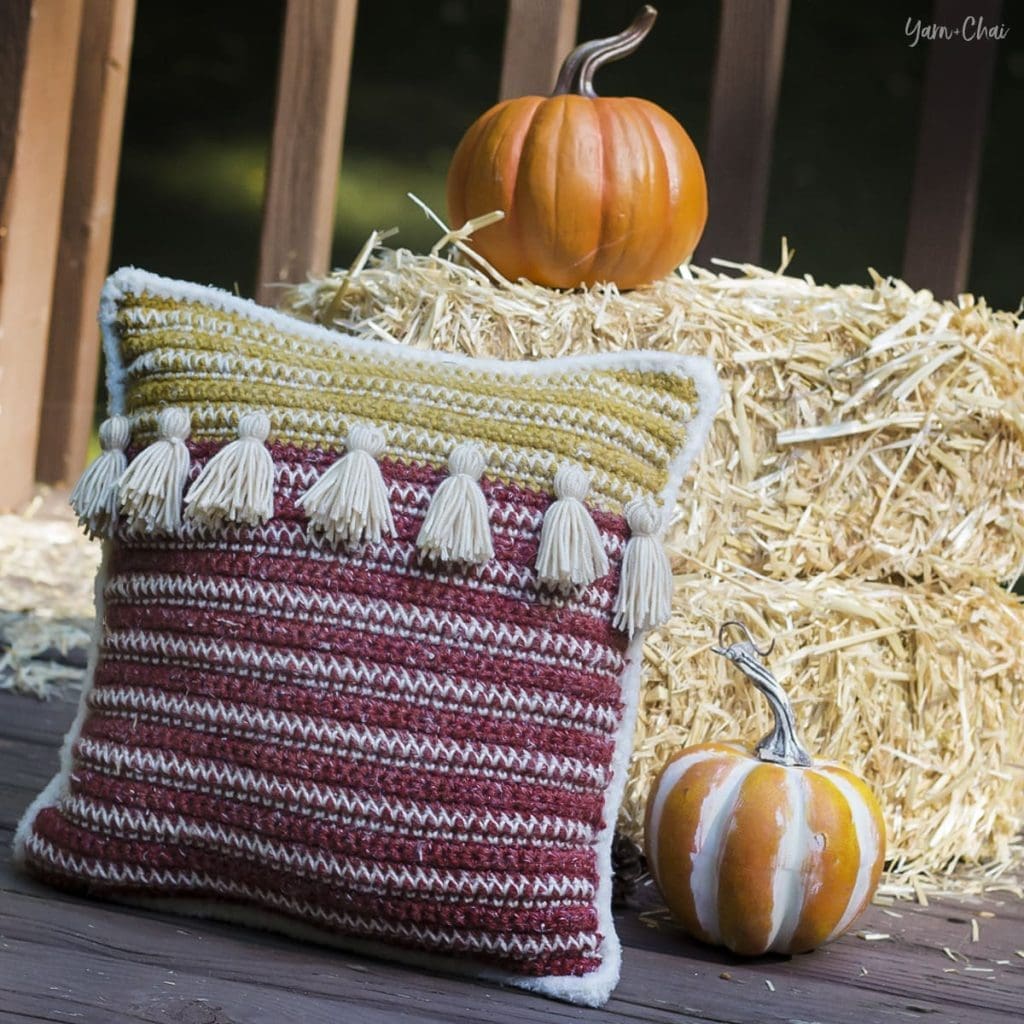
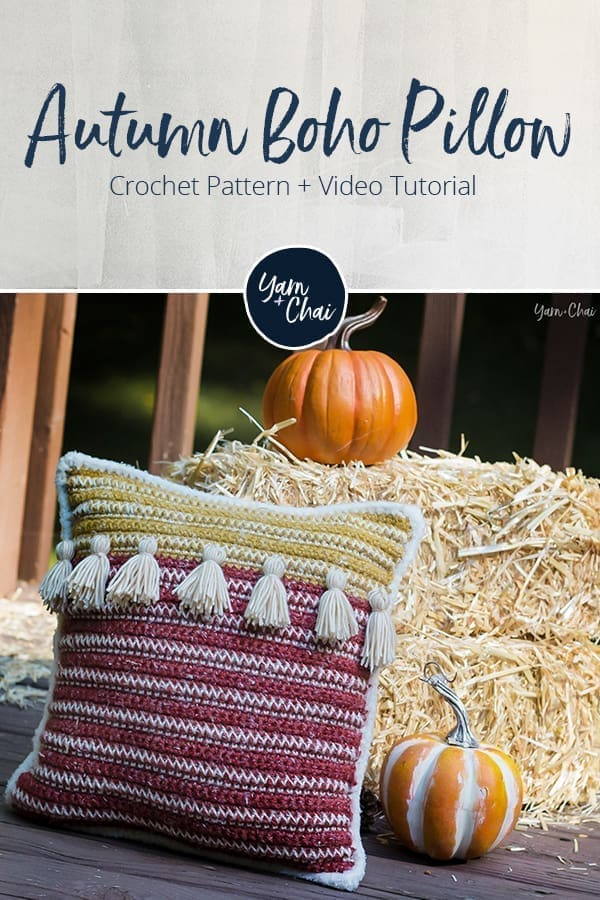
    I also worked up a second sample in one of my all-time favorite yarns, Yarn Bee’s Rustic Romantic. This was totally a personal project and I had no intention of showing it here, but it turned out so pretty that I had to photograph it. For this pillow, I used “Red Roads” and “Okie Wheat” for the deep red and mustard colors, as well as Yarn Bee’s Must Be Merino in “Ivory” for the detailing and tassels. (Must Be Merino is actually a #3 weight yarn, but in this specific case, it doesn’t matter all that much. I grabbed it because I wanted a super smooth yarn to contrast against the heathered look of the Rustic Romantic.) I did chain 4 less in the beginning because the Rustic Romantic is a little thicker than the Breathe Deep yarn, but this pattern doesn’t have a stitch multiple, so it’s easy to adapt!

    Full Video Tutorial

    If you’re the type who prefers to learn by watching (I know I am!), I have a complete, start-to-finish video tutorial for you right here! Or, scroll down to view the written pattern.

    Prefer a PDF?

    This pattern can be completed using the 100% free version right here on this page. However, many people prefer the convenience of a printable, ad-free PDF.

    All-Access Passholders get the ad-free version of this and all of my other blog patterns. It’s a pretty sweet deal, if I do say so myself! Learn more about it here or continuing scrolling for the free version.

    AUTUMN BOHO PILLOW

    Difficulty: Easy

    Finished Size: Fits a standard 12″x12″ pillow insert (easily adapted to other sizes)

    Hook: 4.5mm (US-7 / G) hook

    Yarn: This pattern was written for Breathe Deep, a super-soft #4 worsted weight polyester yarn by Yarn Bee (a Hobby Lobby brand), and edged in Fur-Ever Style, a #4 worsted weight nylon yarn (also by Yarn Bee). Amounts used are as follows: 

    Breathe Deep Yarn:
    COLOR A (“Sage”): 185 yds
    COLOR B (“Ivory”): 160 yds
    COLOR C (“Brown Sugar”): 65 yds

    Fur-Ever Style Yarn:
    FUR EDGING  (“Ivory”): 65 yds

    Gauge: 9SC x 11 rows = 2″ square

    You’ll also need: Yarn needle, 12″ square pillow insert

    Terms and Abbreviations:
    ST/STS (stitch/stitches)
    SL ST (slip stitch)
    CH (chain)
    SC (single crochet)
    SC SPIKE STITCH (single crochet spike stitch; see “Special Stitch”, below)

    Special Stitch:

    SC SPIKE STITCH – Instead of inserting your hook into the top loops of a stitch, insert it into the bottom of the stitch where the “V” meets. See photo (click to enlarge):

    Notes:
    (1) This pattern is written in American Standard Terms.
    (2) CH1s and CH2s at the beginning of rows do not count as a stitch in the final stitch count.
    (3) There is no stitch multiple for this pattern. If you want to make it wider, add more chains at the beginning. If you want to make it taller, complete the repeated section more times than instructed, switching from COLOR A to COLOR C about 2/3 – 3/4 way up the pillow cover. (Be sure to chain an even number in the beginning in order to have an odd numbered stitch count, so that you can use the stitch in the very center of the pillow to place your first tassel.)

    INSTRUCTIONS (make 2)

    To begin: With COLOR A, CH50.

    Row 1: SC in 2nd CH from hook and in each remaining CH. (49)

    Row 2: CH1, turn. SC in each ST across. (49)

    Row 3: CH1, turn. SC in each ST across. Pull up a loop and remove hook. (49)

    Row 4: Without turning your work, insert hook into the first stitch of Row 3, and attach COLOR B (Ivory). CH1. SC in each ST across. Pull up a loop and remove hook.  (49)

    Row 5A: Reinsert hook into loop from COLOR A, making sure to insert from behind previous color’s loop and working yarn. CH1, turn. SC in each ST across. Pull up a loop and remove hook. (49)

    Row 5B: Turn work and reinsert hook into loop from COLOR B. CH1, turn. SC SPIKE STITCH in each ST across. Pull up a loop and remove hook. (49)

    Row 6: Reinsert hook into loop from COLOR A, making sure to insert from behind previous color’s loop and working yarn. CH1, turn. SC in each ST across. (49)

    Row 7: CH1, turn. SC in each ST across. (49)

    Row 8: CH1, turn. SC in each ST across. Pull up a loop and remove hook. (49)

    Row 9: Turn work and reinsert hook into loop from COLOR B. CH2, turn. SC in each ST across. Pull up a loop and remove hook. (49)

    Row 10A: Reinsert hook into loop from COLOR A, making sure to insert from behind previous color’s loop and working yarn. CH1, turn. SC in each ST across. Pull up a loop and remove hook. (49)

    Row 10B: Turn work and reinsert hook into loop from COLOR B. CH1, turn. SC SPIKE STITCH in each ST across. Pull up a loop and remove hook. (49)

    Row 11: Reinsert hook into loop from COLOR A, making sure to insert from behind previous color’s loop and working yarn. CH1, turn. SC in each ST across. (49)

    Row 12: CH1, turn. SC in each ST across. (49)

    Rows 13-47: Repeat Rows 8-12, 7 times. (49)

    Switch to COLOR C; fasten off COLOR A.

    Rows 48-62: Repeat Rows 8-12, 3 times, using COLOR C in place of COLOR A. (49)

    At this point, measure the height of your pillow cover. We want to get it to right about 11.5″, so if you need to do a row or two more, simply continue on with the repeat. If you need to remove a row or two, that’s ok, too. The measurement is more important than the number of rows completed.

    Fasten off and weave all ends into the wrong side of the pillow cover.


    Edging

    With right side facing you, attach COLOR B in top right stitch and CH1. SC around perimeter of square, putting 3SC in each corner. Join with a SL ST to the top of the first SC. Fasten off and weave in ends.


    Tassels

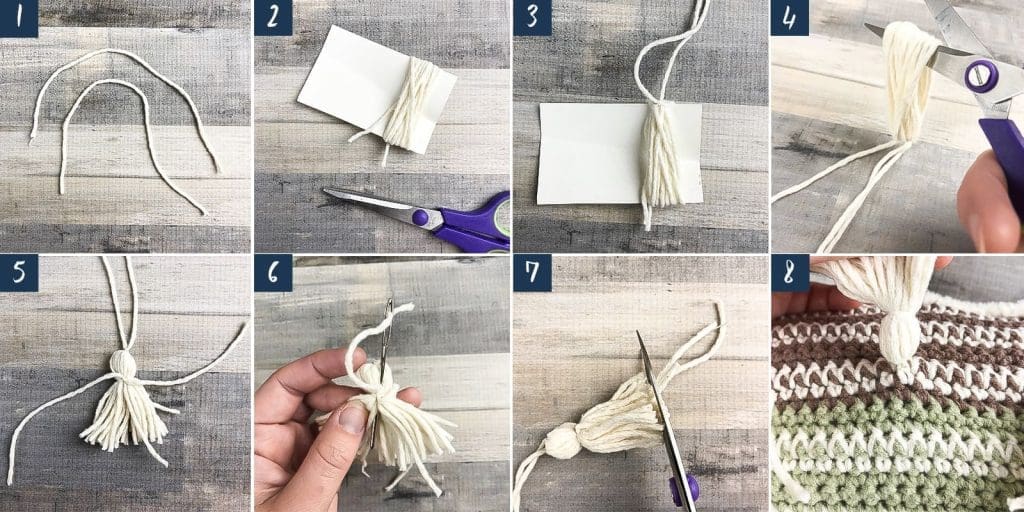
    With COLOR B, use the following steps to make 7 2″ tassels:

    1. With COLOR B, cut 2 8″ lengths of yarn; set aside.
    2. Wrap COLOR B around a 2″ tall piece of cardstock (you can use a credit card) 20 times; fasten off.
    3. Slip one 8″ length of yarn under the strands and pull it up to the top of the card; tie a tight double knot.
    4. Carefully remove yarn from card and cut at the opposite end from the tied-off part.
    5. Take the other 8″ length of yarn and wrap it around the yarn, about 1/2″ below the top knot, and tie a tight double knot.
    6. Thread into a yarn needle each end of the 2nd tie-off yarn (one at a time) and insert the needle just above the knot and down into the middle of the yarn to hide the knot.
    7. Trim yarn at the bottom.
    8. Attach tassel to pillow by using a yarn needle to insert each top strand around a single stitch; double knot on the opposite side and trim the ends. (This will be hidden inside the pillow cover.)

    Space all 7 tassels across the pillow evenly and attach them all. Additionally, you can use a small dot of fabric glue under the ball section of the tassel to hold it in place on the pillow; use a pin to hold it where you want it while it dries overnight.


    Seaming

    Hold both squares together with wrong sides facing each other and right sides facing out. Attach Fur-Ever Style yarn in one corner; CH1 and SC SPIKE STITCH around 3 sides of the pillow, being sure to put 3SC SPIKE STITCHES in the same places you put the 3 SC stitches when you edged each piece individually. Stuff your pillow insert into the cover, then continue the rest of the way around the pillow until it is completely enclosed. Join with a SL ST to the top of the first SC, then CH1, turn, and repeat in the opposite direction (still working the spike stitches for a nice, thick ending). Join, fasten off, and weave in ends.

    Done! If you’re sharing on social media, be sure to hashtag #autumnbohopillow and tag me @yarnandchai.design!

    Hope you enjoyed it!


  • Baskets!

    Baskets!

    You want to know what a fun, easy, quick project is in the dead heat of summer?

    Baskets!

    I’ve never published basket patterns before now, and I’ll tell you why. It’s because I did not like making them. I’d made one back in the day (which still graces my dining room), but I didn’t enjoy the process because my hands just ached all the way through. Using crazy thick yarn with an unnaturally tiny hook is a recipe for wrist issues, and so the idea of ever making a basket again was not really an option for me.

    Until I decided there had to be a better way!

    And once I figured out how to make beautiful baskets without killing my hands, I went a little crazy and ended up designing 4 patterns. I think you’ll love this method — not only does it save you the pain, but it produces professional-grade baskets that are significantly sturdier than any crocheted baskets I’ve seen, and it all comes down to the addition of one thing – plastic canvas! (Seems obvious now, right?)

    As usual, my patterns are 100% free on the blog; but if you prefer the ad-free PDF versions, you can grab the All Access Pass, which includes all four of these patterns and every single other pattern in my library!

    So, scroll down, click the basket that strikes your fancy, and get ready to make a piece of beautiful decor that will last for years to come.

    Nautical Basket

    Mosaic Basket (with full video tutorial!)

    Mini Nesting Baskets

    Hook & Needle Basket

  • Mini Nesting Baskets

    Mini Nesting Baskets

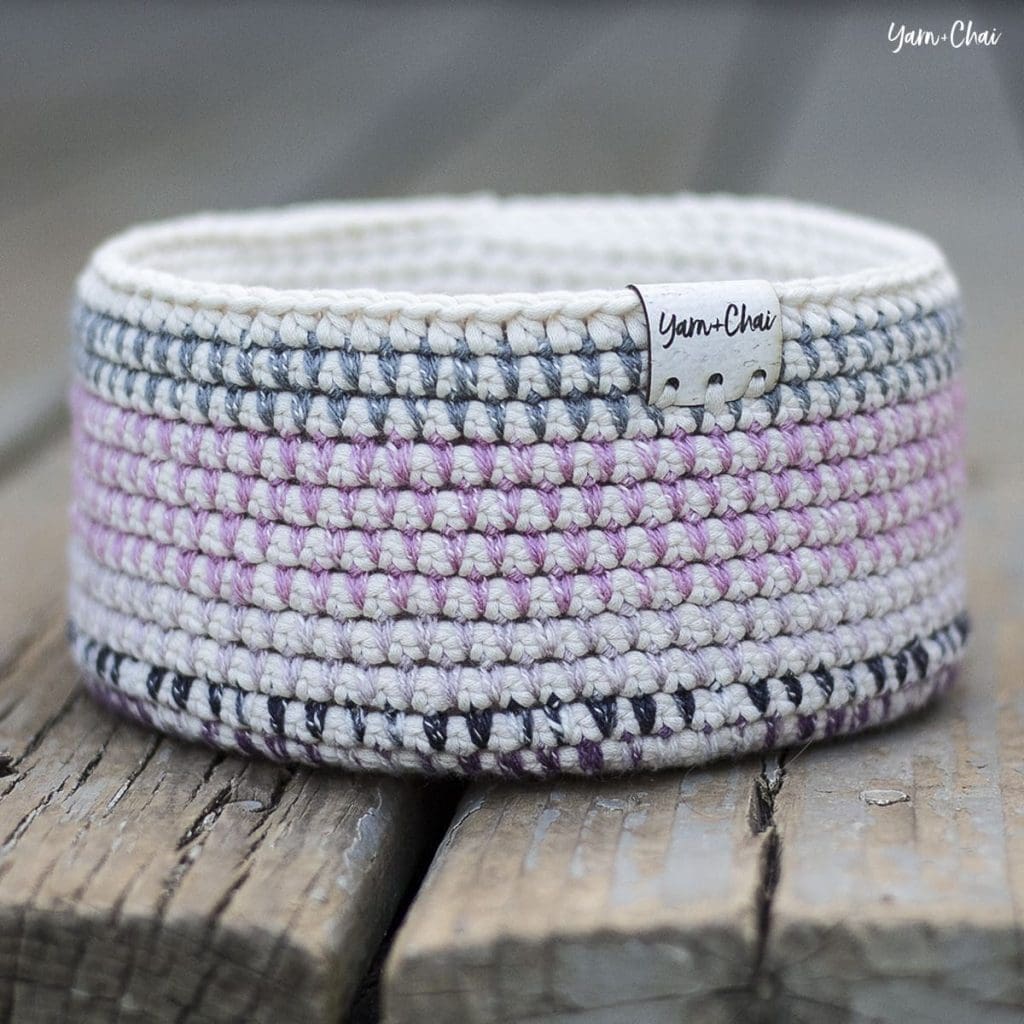
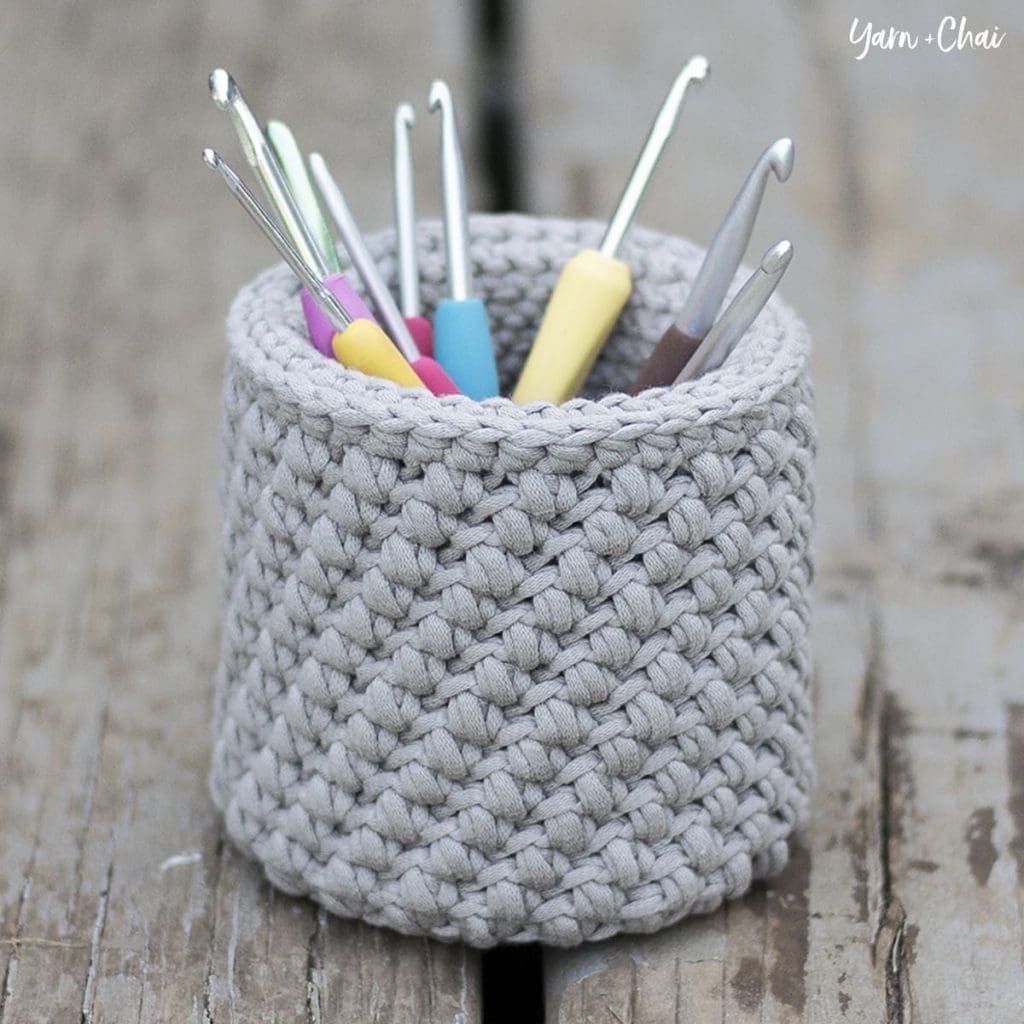
    I had a good amount of Bernat Maker Home Dec yarn leftover after finishing up the Market Tote Bag pattern, so I started brainstorming what to use it for — and came up with these adorable mini baskets!

    There’s no doubt that the mini bean stitch is the perfect stitch for a basket, and those colors are to die for. But do you want to know what really sets these baskets apart?

    The reinforced sides!

    That’s right. As I was working up my first flimsy basket, I kept thinking, there has to be a better way to do this. I was already using a much smaller hook than is recommended for the yarn, and even though it was producing a nice tight fabric, it just wasn’t stiff. The walls of the basket would lose their shape at the slightest touch. Once I got to the top, I thought to myself… maybe I should double layer the sides. So I did, and it helped a little, but it was still missing something. Finally it dawned on me that I had a stack of plastic canvas in my stash. I cut out some strips of it and lined them overlapping inside the basket, then folded the second layer down over it. Perfect!

    They still aren’t totally indestructible, but the plastic canvas helps them hold their circular shape, and even the large basket can be picked up with one hand without drooping. It takes a little extra time to crochet up a double layer, but I think you will be so impressed with the finished product that it will be totally worth it.

    These nesting baskets come in 3″, 4.5″, and 7″ widths, but once you’ve made one, resizing the pattern to fit your needs should be pretty easy to figure out.

    Prefer a PDF?

    This pattern can be completed using the 100% free version right here on this page. However, many people prefer the convenience of a printable, ad-free PDF.

    All-Access Passholders get the ad-free version of this and all of my other blog patterns. It’s a pretty sweet deal, if I do say so myself! Learn more about it here or continuing scrolling for the free version.
    MINI NESTING BASKETS

    View on Ravelry

    Difficulty: Easy

    Yarn: I used Bernat Maker Home Dec, a #5 bulky weight cotton/nylon blend, in colors “Cream” and “Clay.” Amounts for each basket size are listed within their individual patterns.

    Hooks: H (5.0mm) and G (4.25mm)

    Gauge: Your first 5 rounds should measure 2.5″ across.

    You’ll also need: Yarn needle, stitch marker, plastic canvas

    Terms and Abbreviations:
    MC (magic circle – view tutorial here)
    ST/STS
     (stitch/stitches)
    SL ST (slip stitch)
    SK (skip)
    CH (chain)
    SC (single crochet)
    HDC (half double crochet)
    MBS (mini bean stitch – see Special Stitches, below)
    3rd Loop (see Special Stitches, below)

    Special Stitches:

    Mini Bean Stitch (MBS): Insert hook into stitch, yarn over, pull through (2 loops on hook), yarn over, insert hook into same stitch, yarn over, pull through (4 loops on hook), yarn over, pull through all 4 loops, chain 1 to close stitch. (Please note that this CH1 does count as a stitch in the final stitch counts of each round; so each MBS you complete will count for 2 stitches.)

    3rd Loop: Half double crochet stitches have a 3rd loop that we utilize in this pattern. For this pattern the 3rd loop can be found just below the front loop on the side of the work that is facing you. When instructed to work in “3rd loop only”, insert your hook into this special loop. This creates a delicate braided look on the opposite side of the pattern. Also called Camel Stitch or RibHDC.

    Notes:
    (1) This pattern is written in American Standard Terms.
    (2) IMPORTANT: Part of this pattern is worked in joined rounds, and part of it is worked seamlessly. Pay attention, and only join, chain and/or turn when specifically instructed. Use a stitch marker to mark the beginning of your rounds when working seamlessly.
    (3) The finished size of each basket is listed on its individual pattern.

    – – – – – – – – – – – – – – –

    SMALL BASKET

    Yardage: 30 yards
    Finished Size: 3″ wide x 1.5″ tall

    To Begin: With larger hook, make a magic circle; CH1 (does not count as a stitch).

    Round 1: 6SC in MC; join with a SL ST to the top of the first SC. (6)

    Round 2: CH1. 2SC in each ST around; join with a SL ST to the top of the first SC. (12)

    Round 3: CH1. (2SC in next ST, SC in next ST) around; join with a SL ST to the top of the first SC. (18)

    Round 4: CH1. (2SC in next ST, SC in each of the next 2 STS) around; join with a SL ST to the top of the first SC. (24)

    Round 5: CH1. (2SC in next ST, SC in each of the next 3 STS) around. DO NOT JOIN. (30)

    Rounds 6-8: (MBS in next ST, SK next ST) around. (30, or 15 beans)

    Round 9: (MBS in next ST, SK next ST) around. SL ST to the top of the first ST of the round to join. (30, or 15 beans)

    Round 10: CH1. HDC in each ST around. Join with a SL ST to the top of the first ST of the round. (30)

    Switch to smaller hook.

    Round 11: CH1, TURN. SC in 3rd loops of each ST around. DO NOT JOIN. (30)

    Rounds 12-15: SC in each ST around. DO NOT JOIN. (30)

    QUICK CHECK: Remove your hook and fold the top half of the basket down into the center to create a double-layered side. The round of 3rd loops we did earlier (which looks like a braid around the edge) should be at the top of the basket, and down inside, the last round of single crochets should be touching the floor of the basket but not crowding it. You may need to add or remove a round or two of single crochets to achieve this.

    To finish: Unfold your basket, reinsert your hook into the last stitch, and SL ST to the first ST of the final round. Fasten off and weave in ends. Proceed to “Adding Plastic Canvas” (included at the end of the pattern).

    – – – – – – – – – – – – – – –

    MEDIUM BASKET

    Yardage: 80 yards
    Finished Size: 4.5″ wide x 2.25″ tall

    To Begin: With larger hook, make a magic circle; CH1 (does not count as a stitch).

    Round 1: 6SC in MC; join with a SL ST to the top of the first SC. (6)

    Round 2: CH1. 2SC in each ST around; join with a SL ST to the top of the first SC. (12)

    Round 3: CH1. (2SC in next ST, SC in next ST) around; join with a SL ST to the top of the first SC. (18)

    Round 4: CH1. (2SC in next ST, SC in each of the next 2 STS) around; join with a SL ST to the top of the first SC. (24)

    Round 5: CH1. (2SC in next ST, SC in each of the next 3 STS) around; join with a SL ST to the top of the first SC. (30)

    Round 6: CH1. (2SC in next ST, SC in each of the next 4 STS) around; join with a SL ST to the top of the first SC. (36)

    Round 7: CH1. (2SC in next ST, SC in each of the next 5 STS) around; join with a SL ST to the top of the first SC. (42)

    Round 8: CH1. (2SC in next ST, SC in each of the next 6 STS) around. DO NOT JOIN. (48)

    Rounds 9-14: (MBS in next ST, SK next ST) around. (48, or 24 beans)

    Round 15: (MBS in next ST, SK next ST) around. SL ST to the top of the first ST of the round to join. (48, or 24 beans)

    Round 16: CH1. HDC in each ST around. Join with a SL ST to the top of the first ST of the round. (48)

    Switch to smaller hook.

    Round 17: CH1, TURN. SC in 3rd loops of each ST around. DO NOT JOIN. (48)

    Rounds 18-26: SC in each ST around. DO NOT JOIN. (48)

    QUICK CHECK: Remove your hook and fold the top half of the basket down into the center to create a double-layered side. The round of 3rd loops we did earlier (which looks like a braid around the edge) should be at the top of the basket, and down inside, the last round of single crochets should be touching the floor of the basket but not crowding it. You may need to add or remove a round or two of single crochets to achieve this.

    To finish: Unfold your basket, reinsert your hook into the last stitch, and SL ST to the first ST of the final round. Fasten off and weave in ends. Proceed to “Adding Plastic Canvas” (included at the end of the pattern).

    – – – – – – – – – – – – – – –

    LARGE BASKET

    Yardage: 160 yards
    Finished Size: 7″ wide x 3″ tall

    To Begin: With larger hook, make a magic circle; CH1 (does not count as a stitch).

    Round 1: 6SC in MC; join with a SL ST to the top of the first SC. (6)

    Round 2: CH1. 2SC in each ST around; join with a SL ST to the top of the first SC. (12)

    Round 3: CH1. (2SC in next ST, SC in next ST) around; join with a SL ST to the top of the first SC. (18)

    Round 4: CH1. (2SC in next ST, SC in each of the next 2 STS) around; join with a SL ST to the top of the first SC. (24)

    Round 5: CH1. (2SC in next ST, SC in each of the next 3 STS) around; join with a SL ST to the top of the first SC. (30)

    Round 6: CH1. (2SC in next ST, SC in each of the next 4 STS) around; join with a SL ST to the top of the first SC. (36)

    Round 7: CH1. (2SC in next ST, SC in each of the next 5 STS) around; join with a SL ST to the top of the first SC. (42)

    Round 8: CH1. (2SC in next ST, SC in each of the next 6 STS) around; join with a SL ST to the top of the first SC. (48)

    Round 9: CH1. (2SC in next ST, SC in each of the next 7 STS) around; join with a SL ST to the top of the first SC. (54)

    Round 10: CH1. (2SC in next ST, SC in each of the next 8 STS) around; join with a SL ST to the top of the first SC. (60)

    Round 11: CH1. (2SC in next ST, SC in each of the next 9 STS) around; join with a SL ST to the top of the first SC. (66)

    Round 12: CH1. (2SC in next ST, SC in each of the next 10 STS) around. DO NOT JOIN. (72)

    Rounds 13-21: (MBS in next ST, SK next ST) around. (72, or 36 beans)

    Round 22: (MBS in next ST, SK next ST) around. SL ST to the top of the first ST of the round to join. (72, or 36 beans)

    Round 23: CH1. HDC in each ST around. Join with a SL ST to the top of the first ST of the round. (72)

    Switch to smaller hook.

    Round 24: CH1, TURN. SC in 3rd loops of each ST around. DO NOT JOIN. (72)

    Rounds 25-35: SC in each ST around. DO NOT JOIN. (72)

    QUICK CHECK: Remove your hook and fold the top half of the basket down into the center to create a double-layered side. The round of 3rd loops we did earlier (which looks like a braid around the edge) should be at the top of the basket, and down inside, the last round of single crochets should be touching the floor of the basket but not crowding it. You may need to add or remove a round or two of single crochets to achieve this.

    To finish: Unfold your basket, reinsert your hook into the last stitch, and SL ST to the first ST of the final round. Fasten off and weave in ends. Proceed to “Adding Plastic Canvas.”

    – – – – – – – – – – – – – – –

    Adding Plastic Canvas

    Cut two pieces of plastic canvas that are just slightly shorter than the single crocheted portion of your basket (the part we are folding over). The length of the plastic canvas isn’t important; just cut across the entire sheet. Roll the pieces of canvas up together into a small tube and place it down inside the basket. Work with it so that it is up against the walls of the basket, and touching the floor of the basket. Then, fold the single crocheted portion of the basket into the middle, over the canvas, so that the canvas is hidden inside. Use your fingers to smooth down any wavy areas until the middle of the basket is smooth and round.

  • Hook & Needle Basket

    Hook & Needle Basket

    I’ve been on a basket kick lately, and while I was working on the pattern for the Mini Nesting Baskets, I decided that a new place for my favorite crochet hooks would be a great way to utilize the techniques I was exploring – mainly, the use of plastic canvas to make a strong, sturdy basket! So I whipped up this cute little basket for my desk and now I’m wondering why I didn’t make my own hook holder a long time ago.

    Of course, there could be many applications for this little guy. Pens and pencils, candy, buttons… it could hold just about any little objects you can think of.

    Prefer a PDF?

    This pattern can be completed using the 100% free version right here on this page. However, many people prefer the convenience of a printable, ad-free PDF.

    All-Access Passholders get the ad-free version of this and all of my other blog patterns. It’s a pretty sweet deal, if I do say so myself! Learn more about it here or continuing scrolling for the free version.

    HOOK & NEEDLE BASKET

    View on Ravelry

    Difficulty: Easy

    Finished Size: 3.75″ tall x 3.75″ wide

    Yarn: I used about 110 yards of Bernat Maker Home Dec, a #5 bulky weight cotton/nylon blend, in “Clay.”

    Hooks: H (5.0mm) and G (4.25mm)

    Gauge: Your first 5 rounds should measure 2.5″ across.

    You’ll also need: Yarn needle, stitch marker, plastic canvas

    Terms and Abbreviations:
    MC (magic circle – view tutorial here)
    ST/STS
     (stitch/stitches)
    SL ST (slip stitch)
    SK (skip)
    CH (chain)
    SC (single crochet)
    HDC (half double crochet)
    MBS (mini bean stitch – see Special Stitches, below)
    3rd Loop (see Special Stitches, below)

    Special Stitches:

    Mini Bean Stitch (MBS): Insert hook into stitch, yarn over, pull through (2 loops on hook), yarn over, insert hook into same stitch, yarn over, pull through (4 loops on hook), yarn over, pull through all 4 loops, chain 1 to close stitch. (Please note that this CH1 does count as a stitch in the final stitch counts of each round; so each MBS you complete will count for 2 stitches.)

    3rd Loop: Half double crochet stitches have a 3rd loop that we utilize in this pattern. For this pattern the 3rd loop can be found just below the front loop on the side of the work that is facing you. When instructed to work in “3rd loop only”, insert your hook into this special loop. This creates a delicate braided look on the opposite side of the pattern. Also called Camel Stitch or RibHDC.

    Notes:
    (1) This pattern is written in American Standard Terms.
    (2) IMPORTANT: Part of this pattern is worked in joined rounds, and part of it is worked seamlessly. Pay attention, and only join, chain and/or turn when specifically instructed. Use a stitch marker to mark the beginning of your rounds when working seamlessly.

    – – – – – – – – – – – – – – –

    INSTRUCTIONS

    To Begin: With larger hook, make a magic circle; CH1 (does not count as a stitch).

    Round 1: 6SC in MC; join with a SL ST to the top of the first SC. (6)

    Round 2: CH1. 2SC in each ST around; join with a SL ST to the top of the first SC. (12)

    Round 3: CH1. (2SC in next ST, SC in next ST) around; join with a SL ST to the top of the first SC. (18)

    Round 4: CH1. (2SC in next ST, SC in each of the next 2 STS) around; join with a SL ST to the top of the first SC. (24)

    Round 5: CH1. (2SC in next ST, SC in each of the next 3 STS) around; join with a SL ST to the top of the first SC. (30)

    Round 6: CH1. (2SC in next ST, SC in each of the next 4 STS) around; join with a SL ST to the top of the first SC. (36)

    Round 7: CH1. (2SC in next ST, SC in each of the next 5 STS) around. DO NOT JOIN. (42)

    Rounds 8-19: (MBS in next ST, SK next ST) around. (42, or 21 beans)

    Round 20: (MBS in next ST, SK next ST) around. SL ST to the top of the first ST of the round to join. (42, or 21 beans)

    Round 21: CH1. HDC in each ST around. Join with a SL ST to the top of the first ST of the round. (42)

    Round 22: CH1, TURN. SC in 3rd loops of each ST around. DO NOT JOIN. (42)

    Switch to smaller hook.

    Rounds 23-39: SC in each ST around. DO NOT JOIN. (42)

    QUICK CHECK: Remove your hook and fold the top half of the basket down into the center to create a double-layered side. The round of 3rd loops we did earlier (which looks like a braid around the edge) should be at the top of the basket, and down inside, the last round of single crochets should be touching the floor of the basket but not crowding it. You may need to add or remove a round or two of single crochets to achieve this.

    To finish: Unfold your basket, reinsert your hook into the last stitch, and SL ST to the first ST of the final round. Fasten off and weave in ends.

    – – – – – – – – – – – – – – –

    Adding Plastic Canvas

    Cut across your plastic canvas to make strips that are the same height as the inner layer of the basket. Set your basket so that it is completely unfolded. Roll up a strip of canvas and insert it into the bottom of the basket, allowing it to expand up against the walls of the basket. Continue adding as many layers as you want to make it as stiff as you want. Fold the inside layer down over the canvas. Work the fabric until it all lays neat and flat.

    Here’s a quick tutorial video that explains what plastic canvas is, where to buy it, and how to use it in Yarn + Chai basket patterns: